


Building A Smooth Portable Video Dolly From Scraps
Jan 7, 2013
Udi Tirosh
Udi Tirosh is an entrepreneur, photography inventor, journalist, educator, and writer based in Israel. With over 25 years of experience in the photo-video industry, Udi has built and sold several photography-related brands. Udi has a double degree in mass media communications and computer science.
Share:
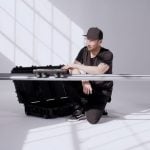
Photographer Patrick Luke built quite a clever video Dolly. While we have had our share of dollies and sliders before, I don’t think I’ve seen something this cost effective yet.

Here is a break down, curtsey of Patrick. We did not put any sizes down as those may vary depending on how wide or long you would like your dolly to be, but the guidelines should provide enough direction if you would like to build your own.
Introduction
The video dolly, allows the camera to be moved laterally in a smooth motion. Currently the options are between cheap dollies that do not deliver and high end dollies that cost an arm and a leg. This is the gap that this tutorial fills.
The video dolly consists of two parts: a track and a carriage. My design came from seeing a photo of the underside of a similar carriage that was built for a totally different use. The rest of it resulted after building and rebuilding it in my head and on paper until the kinks were worked out.
The Cart

The carriage consists of small wooden platform that is attached to two lengths of inverted aluminum angle iron, to which are affixed eight soft rollerblade wheels with bearings. A small tripod ball head is mounted to the carriage using a standard ¼”-20 knob from underneath. The camera attaches to the ball head.

The Track
The carriage rides on the track, which consists of two three ft. long lengths of the same aluminum angle iron which are mounted to cross braces of square aluminum tubing and a plywood base.

Triangle-shaped oak wood blocks were epoxied to the underside of the aluminum angle iron. These help dampen any vibrations and also allow a method of attaching the pieces together. There is a threaded ¼”-20 insert in the wooden base that allows it to be mounted to a standard tripod (as shown), or it can be set on a flat surface and used in that manner.
The aluminum pieces were hand sanded with fine sandpaper to give them a brushed metal finish, and the plywood was finished with hand-rubbed tung oil. This obviously is optional and has no bearing on the functionality of the dolly, but gives it a nice appearance.
Integration
The camera and carriage have to be manually moved along the length of the track, so the fluidity of the resulting video is totally dependent on the fluidity of the operator. Too fast, and the viewer might feel like they’re looking out the side window of a car; too slow and it’s difficult to maintain a smooth pace. I’ve experimented and found that the pace I prefer is a 30-second trip from end-to-end of the 3 foot track.

The aluminum pieces ($28) and roller blade wheels ($10) had to be purchased, along with some hardware, but I already had the ball head and plywood, so for less than $40 and a few hours of time, I was able to build a dolly that works as well as its $500 cousins from the rich side of town. The aluminum and plywood make it very lightweight, but I didn’t want to make it too lightweight, because a little bit of heft helps with the fluidity of the motion effects.
Obviously, the track can be as long as the aluminum angles you can find, as long as you rest it on two tripods.
Until Steven Spielberg calls and wants me as the cinematographer on his next project, this hand-built model will satisfy my needs until I feel the need to get something bigger and….gasp…more expensive.
UPDATE: Reader Jim Filipuzzi suggests upgrading the track with stops, which should be pretty easy to do with wooden studs or bolts.
About The Author
Patrick Luke is a photographer based in Fairport in upstate NY and specialize in portraiture of high school seniors, athletes, children, and families. You can visit his site here.

Udi Tirosh
Udi Tirosh is an entrepreneur, photography inventor, journalist, educator, and writer based in Israel. With over 25 years of experience in the photo-video industry, Udi has built and sold several photography-related brands. Udi has a double degree in mass media communications and computer science.


Join the Discussion
DIYP Comment Policy
Be nice, be on-topic, no personal information or flames.