


Bring boring skies to life with Lightroom’s Tone Curve
Nov 27, 2024
Dunja Đuđić
Dunja Djudjic is a multi-talented artist based in Novi Sad, Serbia. With 15 years of experience as a photographer, she specializes in capturing the beauty of nature, travel, concerts, and fine art. In addition to her photography, Dunja also expresses her creativity through writing, embroidery, and jewelry making.
Share:
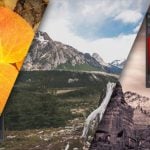
In his latest video, Christian Möhrle shares an excellent Lightroom workflow to make the colors in your skies more vivid and dramatic using the Tone Curve. Whether you’re a seasoned Lightroom user or just getting started, this step-by-step guide will help you get stunning results from seemingly flat photos.
Christian demonstrates the technique on a snowy landscape image, and he shares the raw file with you so you can follow along. Of course, you can practice on your images as well, and I strongly suggest you use raw files, as you can get way more out of them. We’ve talked about it many times. :)
Basic adjustments
Christian begins by tackling the basic adjustments. He decides to keep the default profile as it already looks great. He lowers the overall exposure and then brings up the whites to deepen the shadows while keeping the bright areas vibrant.
To maintain a natural look, he raises the blacks just a touch, ensuring that the shadows aren’t overly harsh. Fine-tuning the contrast further, Christian carefully adjusts the shadow slider to add a bit more depth without losing too much detail in the darkest areas.
Since the snow in the image has a noticeable blue tint, Christian warms things up by increasing the temperature slider until the snow appears more natural. This adjustment also gives the sky a pleasant, warm hue. Although he briefly considers tweaking the tint, he decides to stick with the temperature adjustments for now.
Adding texture sharpens the details, while dropping the clarity introduces a subtle glow that softens the image just slightly. He also boosts vibrance to make the colors pop, resulting in a beautifully balanced base image with improved contrast and a natural color tone.
Of course, all of this applies to his image, but it may not apply to yours if you decide to use a different photo for practicing. You may also edit his example image differently, based on your preferences. As long as you set a strong foundation for further adjustments, feel free to play with the edits here as much as you want.
Tone curve mask
Here’s where the magic begins. Christian focuses on the sky, using Lightroom’s sky mask to isolate it for adjustments. While the auto-selection leaves out a small area, he decides it’s not a big issue and proceeds.
The tone curve adjustments start with the red channel. By shifting the red highlights slightly to the left, he infuses the sky with a warmer, more intense red tone. Next, he uses the blue channel to balance the color by adding a touch of yellow, toning down any overpowering red hues. This combination creates a vibrant, warm, and harmonious effect in the sky.
Christian explains that while you could experiment with the green channel to introduce magenta, it’s easy to overdo it and make the image look unnatural. Instead, he crafts a gentle S-curve in the tone curve panel to add contrast. The result? A sky that’s rich in color and dimension.
To ensure the colors look just right, Christian temporarily increases saturation to better assess the balance, adjusting the white balance sliders as needed. Once satisfied, he reduces the saturation to a more natural level.
More masking
Christian refines the image with additional masks to enhance its mood and depth. He uses a linear gradient to darken the top of the sky, drawing focus to the center while maintaining a natural look by tweaking exposure and blacks. Another gradient introduces cooler tones to the top of the sky, blending beautifully with the warmer hues near the horizon for a smooth transition.
To emphasize sunlight near the horizon, he applies a radial gradient, warming and brightening this area subtly. For the foreground, an inverted sky mask lightens shadows, complementing the vibrant sky. A final linear gradient adds soft shadowing to the immediate foreground, creating a cohesive and dimensional scene.
Color grading
With the masks done, Christian moves to color grading. Starting in the color mixer, he boosts the saturation of reds, oranges, and yellows to intensify the warm tones in the sky. A quick pass through the color grading panel adds subtle warm tones to the highlights and cooler tones to the midtones and shadows. This creates a balanced yet dramatic look.
He also makes adjustments in the calibration tab, lowering the blue primary slider and increasing saturation for a polished finish.
Sharpening and cleanup
To wrap up the edits, Christian applies sharpening in the details panel. He reduces the radius, increases detail, and adds masking to target only the necessary areas. Finally, he cleans up sensor spots using Lightroom’s heal tool, using the visualized spots feature to ensure a spotless result.
By the end of the video, the transformation is obvious. What seemed as flat, dull sky really showed its true colors. Christian encourages you to try this tone curve trick for yourself and make sure to watch the video so you can follow along and get a better idea of how it all flows. Feel free to share your results, too!
[Make the SKY POP with LIGHTROOMS TONE CURVE! | Christian Möhrle]

Dunja Đuđić
Dunja Djudjic is a multi-talented artist based in Novi Sad, Serbia. With 15 years of experience as a photographer, she specializes in capturing the beauty of nature, travel, concerts, and fine art. In addition to her photography, Dunja also expresses her creativity through writing, embroidery, and jewelry making.
Related Posts
 Adobe brings a major features to Lightroom CC including tone curve and split toning
 Latest Lightroom updates include new camera profiles, larger tone curve and Sony A7 III support
 Is your life boring? No problem, fake it with AI like this guy did
 Mastering the Tone Panel, Lightroom’s most important settings
Join the Discussion
DIYP Comment Policy
Be nice, be on-topic, no personal information or flames.