


A Dream Come True: Build a REAL, LIVE-View EVF for Less Than $120
Mar 9, 2026
David Prochnow
Our resident “how-to” project editor, David Prochnow, lives on the Gulf Coast of the United States in Ocean Springs, Mississippi. He brings his expertise at making our photography projects accessible to everyone, from a lengthy stint acting as the Contributing How-To Editor with Popular Science magazine. While you don’t have to actually build each of his projects, reading about these adventures will contribute to your continued overall appreciation of do-it-yourself photography. A collection of David’s best Popular Science projects can be found in the book, “The Big Book of Hacks,” Edited by Doug Cantor.
Share:
At first glance, to sharp-eyed DIYP readers, this project might look like a similar article that built an electronic viewfinder (EVF) which mimicked an optical viewfinder. Well, hold onto your hat, because this project is head-and-shoulders above an optical viewfinder copycat.
Why? The product of this DIY project is a real, genuine, honest-to-goodness, tethered, LIVE-stream from the camera sensor EVF. You can let go of your hat, now.
Yes, with just a handful of parts, you can convert a gaming handheld device into a shoe-mounted EVF. Oh, and if you absolutely must have an eyepiece for this EVF, consider attaching the incredibly low priced DigiViewer to the handheld device.
Let’s begin.
Purposeful Parts
- Anbernic RG35XXSP $54.99 [Model used in this article Black Transparent 64G.]
- Lithium Ion Polymer Battery 3.7V 1000mAh $9.95 [The battery used in this article is 750mAh. This recommended battery is a more powerful replacement that is also slightly bigger in size. It is untested for this project, however.]
- Camvate Hex 1/4″-20 Threaded Stud w/Lock Nuts $5.96
- 2X – Kondor Replacement 1/4″ & 3/8″ Screws Rubber Washer $0.99 each; $1.98
- Nanlite Hot/Cold Shoe to 1/4″-20 Adapter $4.00
- 2X – SanDisk 32GB Ultra UHS-1 microSDHC Memory Card $13.59
- Silkland 20Gbps USB C Data Cable Right Angle, Short 1.6FT 90 Degree USB C 3.2 Gen 2×2 High Speed Data Transfer Cable, 5K/4K 60Hz Monitor Display, 240W PD, Type C Compatible for SSD, Hub, Dock,eGPU $12.99 [Depending on your camera, the 1 foot length for $12.59 might work.]
Total cost: $119.03
While there are only a small handful of hardware parts used in this project, the bulk of the work is performed via a clever software installation. Furthermore, the Anbernic RG35XXSP handheld acts kinda like a complete EVF surrogate with virtually no hardware modification needed to make it work.
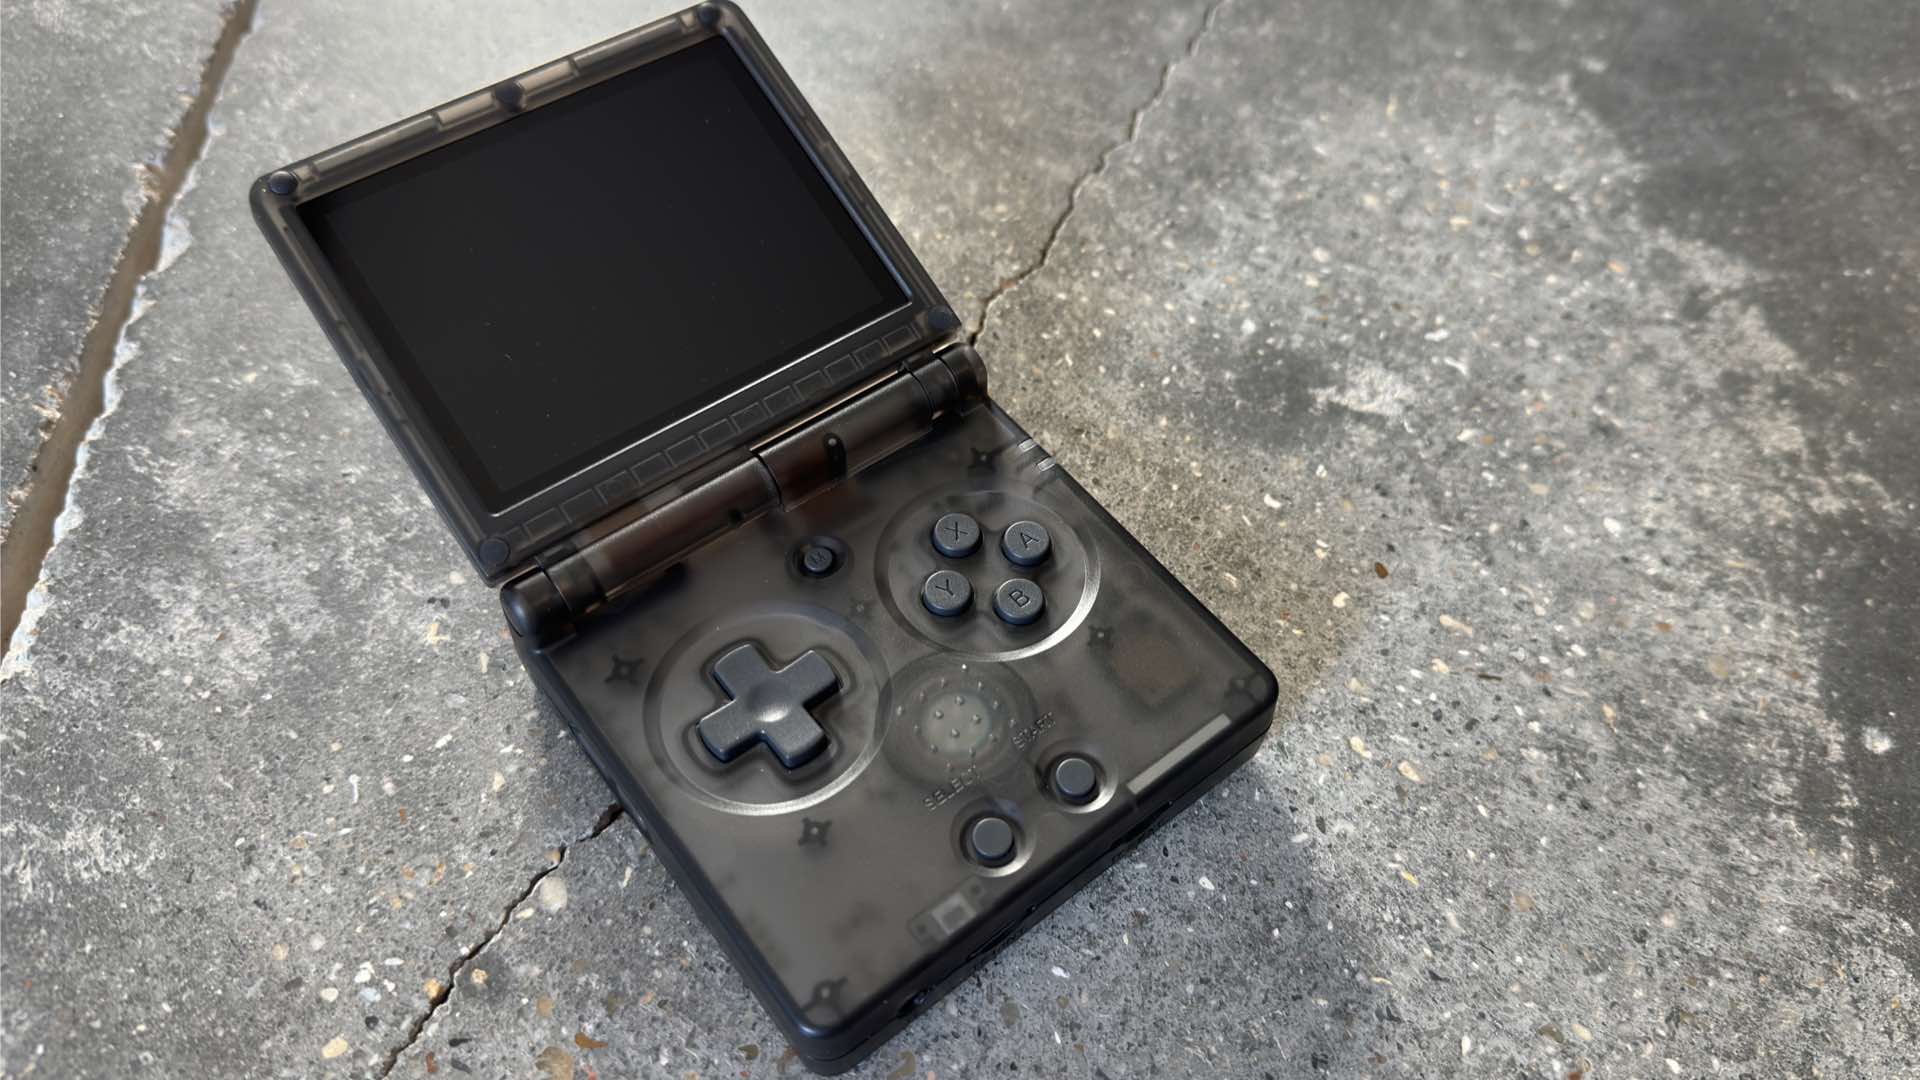
In fact, there are only two ridiculously simple steps that are needed for adapting the handheld to a camera. First, remove the battery compartment lid from the bottom of the device and carefully unplug the battery.
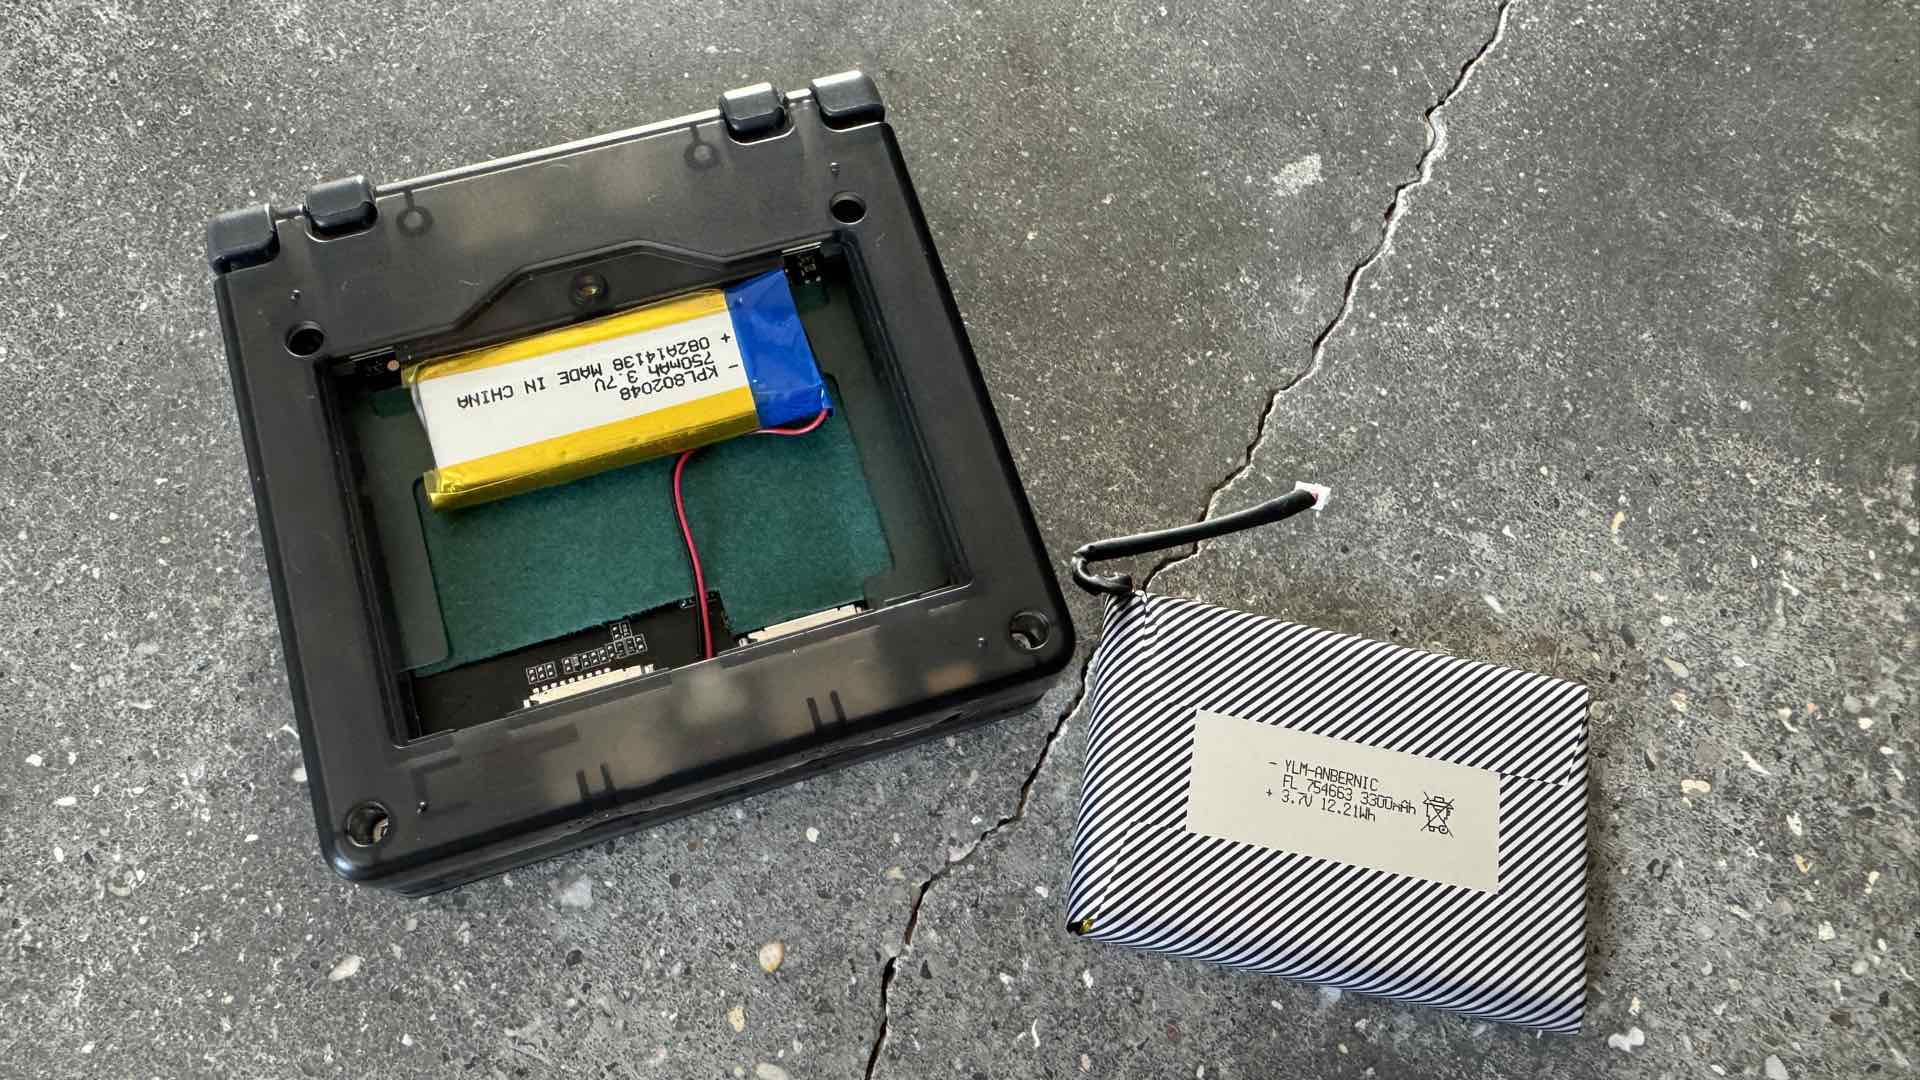
Set this original battery aside and install the smaller project battery. Slide this battery up snug with the upper edge of the compartment and tape it into place. This keeps the battery from sliding around during operation.
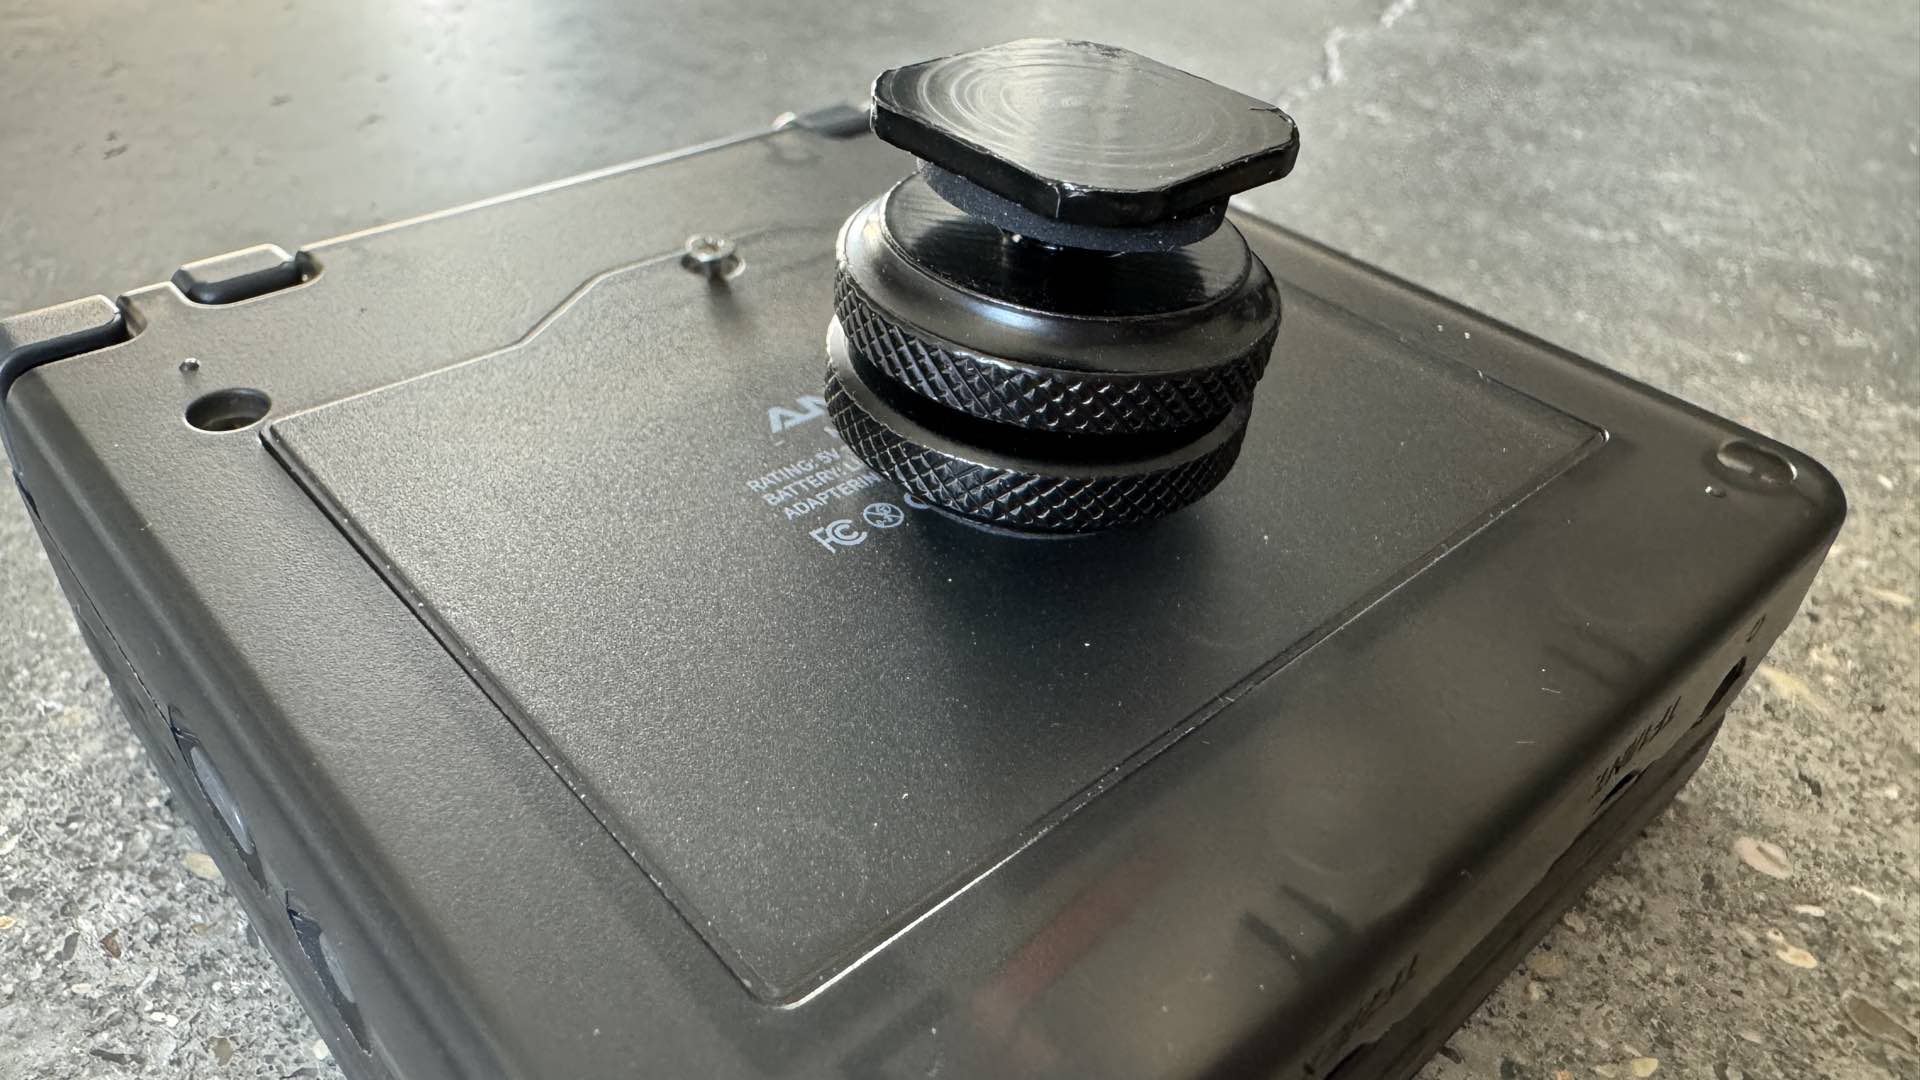
All that remains for the hardware assembly is to drill a hole in the battery compartment lid and install the cold shoe adapter using one of the Camvate nuts and the two Kondor washers. Replace the lid and you are done!
Meet MrJackSpade
This is where things really get exciting. The software work is what makes this entire project tick like a clock. Here we go…
Step 1. Remove the stock microSD card (TF1) from the Anbernic RG35XXSP handheld and set it aside.
Step 2. Download the required firmware V1.1.4 from the Anbernic Support site. It is named: https://drive.google.com/drive/folders/1zaUG_KwEsDox55BKNfdkPxKnvoS48Qyv?usp=sharing
Step 3. Goto the Balena Etcher disk utility Web site and download the version for your computer OS. Install this utility on your computer.
Step 4. Insert one of your 32GB SanDisk Memory Cards into your computer and use the Balena Etcher utility to install the Anbernic firmware file on this card.
Step 5. Insert the firmware card into the TF1 slot on the Anbernic RG35XXSP handheld.
Step 6. Download the “AppStore” binary file from MrJackSpade GitHub site.
Step 7. Format the second 32GB SanDisk Memory Card with your computer as a Fat32 device and insert this second, formatted memory card into the TF2/Ext slot on the handheld.
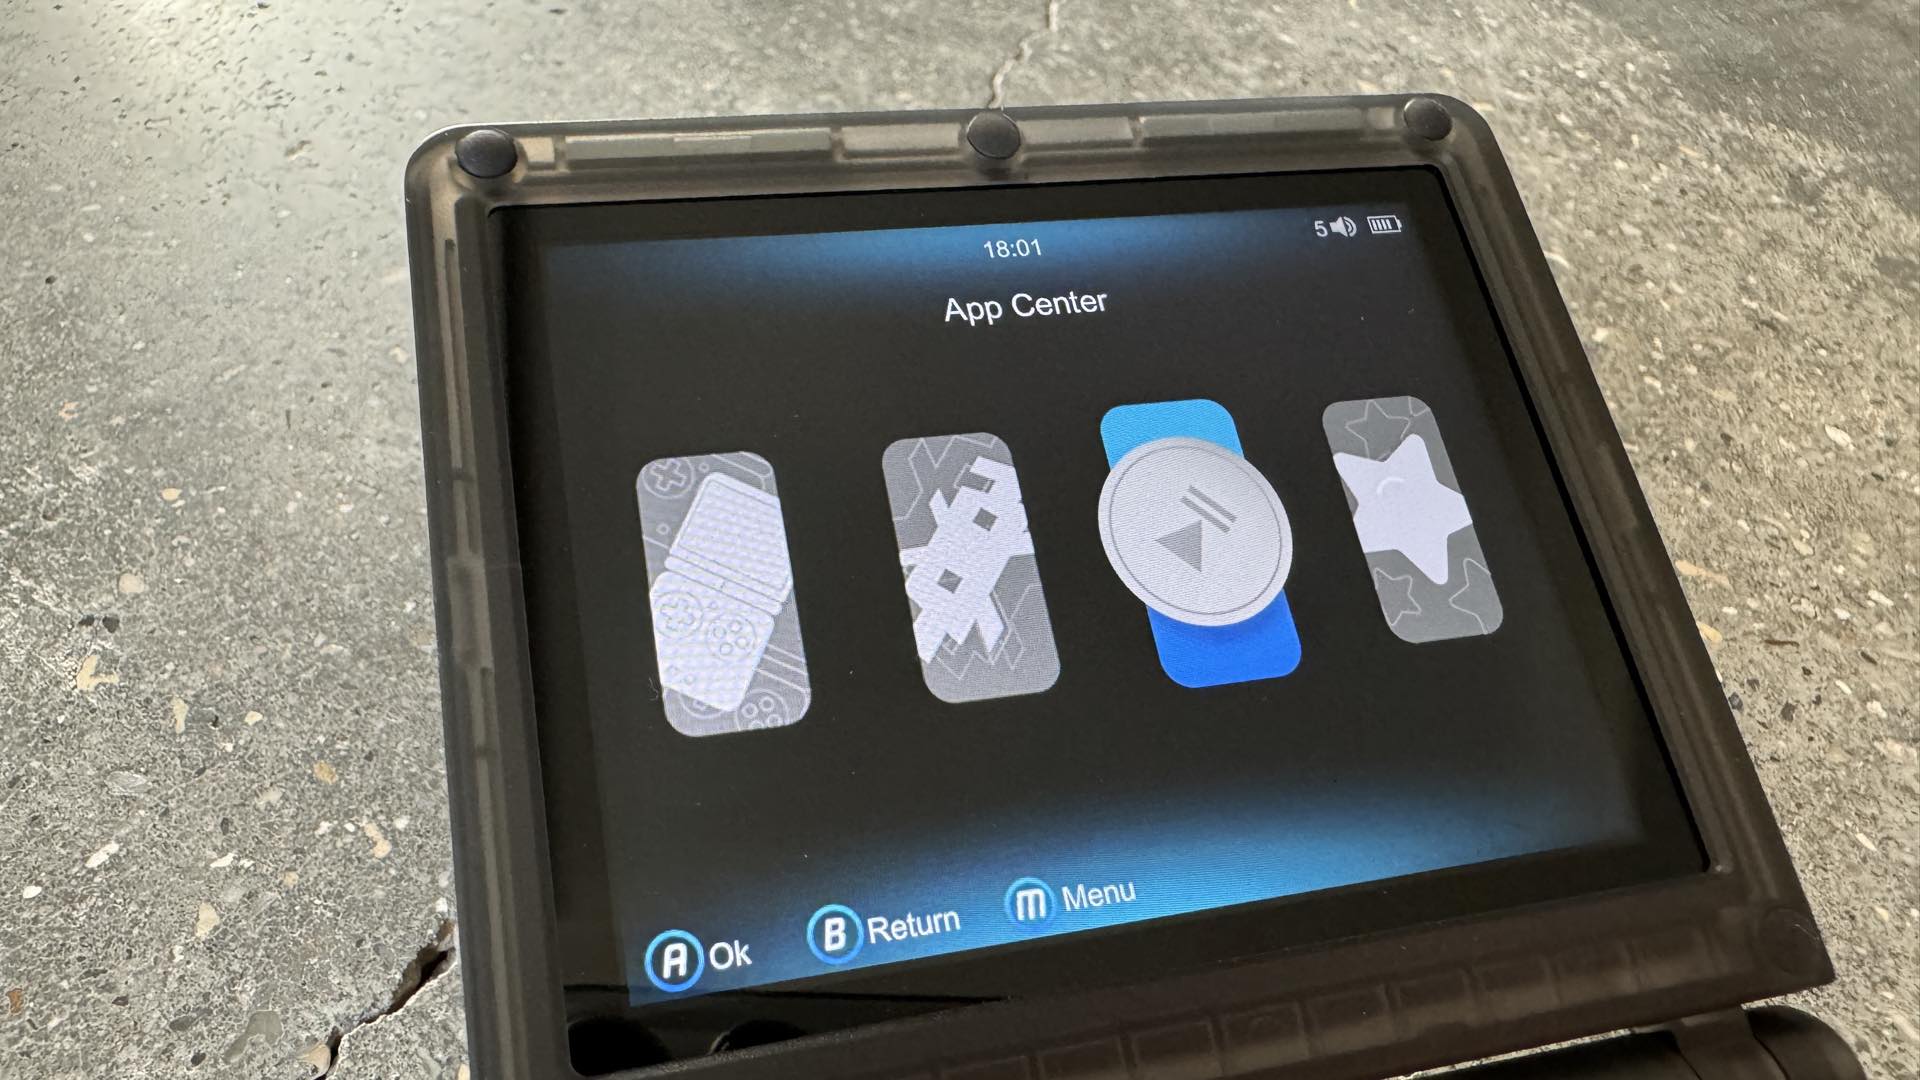
Step 8. Start the Anbernic RG35XXSP handheld and navigate to the File Manager inside the App Center category.
[Easter Egg Alert: there is a FREE, playable contemporary music file inside the Music app. Play it!]
Step 9. Select the File Manager app. Inside the two columns, the left side shows the contents of TF1. Configure the right to show the contents of TF2. Use the arrow keys and the A button to navigate to the sdcard directory. The path displayed at the top of the right column should read: /mnt/sdcard/Roms/APPS. Exit the File Manager and shutdown the handheld.
Step 10. Remove the microSD card from TF2, insert it into your computer, and copy the AppStore binary file into the Roms/APPS folder.
Step 11. Reinsert the second microSD card into TF2, restart the handheld, and return to File Manager.
Step 12. You should see the AppStore binary in the righthand column. Navigate to this path in the lefthand column: /mnt/mmc/Roms/APPS.
Step 13. Highlight the AppStore binary in the righthand column, press the X button, and select <-Move. The AppStore binary will be moved into the APPS folder on TF1.
Step 14. Press the M button and select Quit to return to the App Center. Press the M button and use Network Settings to connect the handheld to your WiFi network.
Step 15. Return to the App Center, select Apps, select TF-1 storage card, select the AppStore binary, select the XFCE option, and let the installation complete. The handheld will now reboot.
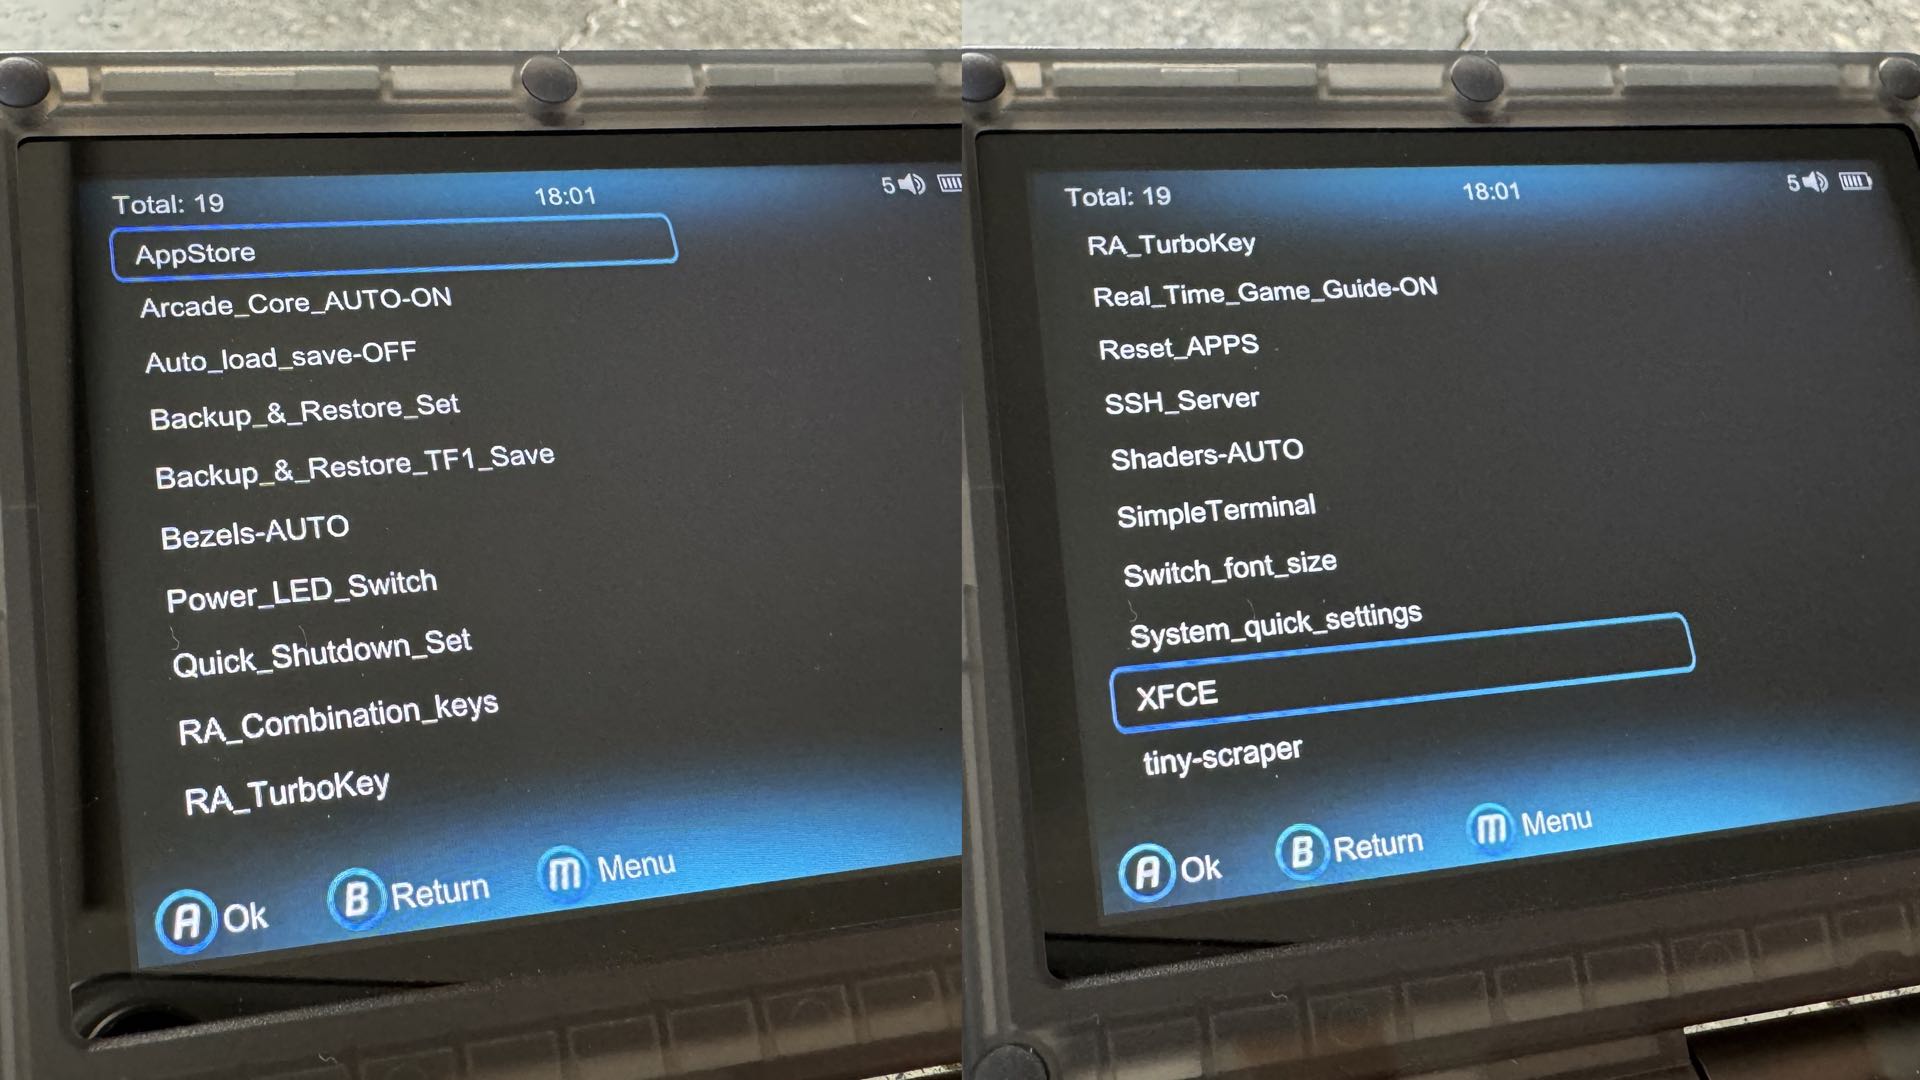
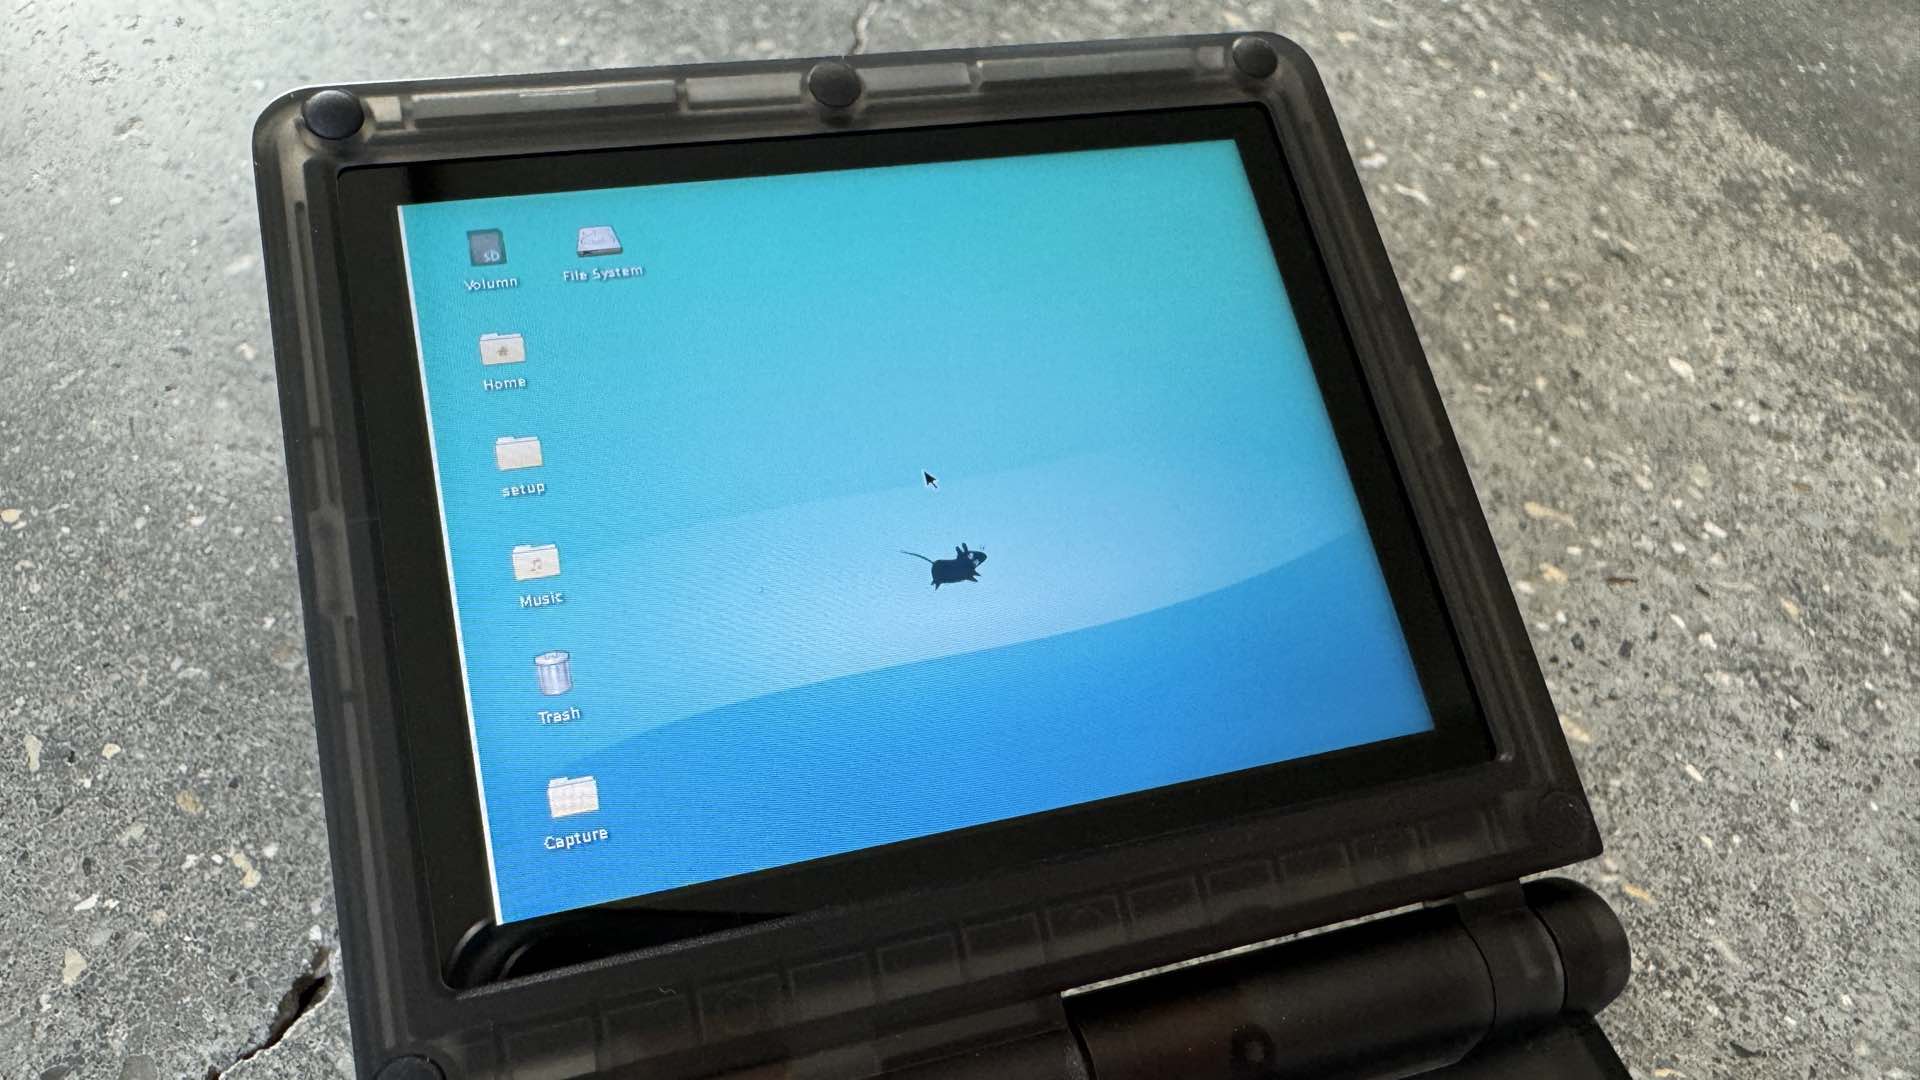
Step 16. Inside the list of Apps in the App Center, scroll down and select XFCE. In a few moments, you’ll be greeted by a Debian Linux XFCE desktop…on a GAMING HANDHELD DEVICE! This is dope!
Step 17. The arrow keys and L1 and R1 triggers act as a mouse/mouse buttons, respectively. There is also a built-in, pop-up keyboard. Use the mouse to launch the Terminal Emulator application. This application is inside the Applications button along the left edge of the desktop.
[The main camera tethering interface software is the same application used for building a Chromebook camera monitor.]
Step 18. Type this command to load the Entangle camera tethering application: apt install entangle
Step 19. You will be prompted with a verification question for installing Entangle. Type “Y” and press enter.
Step 20. After several seconds, the command prompt will return. Type “exit” and press enter to quit the Terminal application.
Whew; you’ve now successfully completed the hardware and software installation, it’s time to connect your camera to the EVF. Take a breather, you’ve earned it.
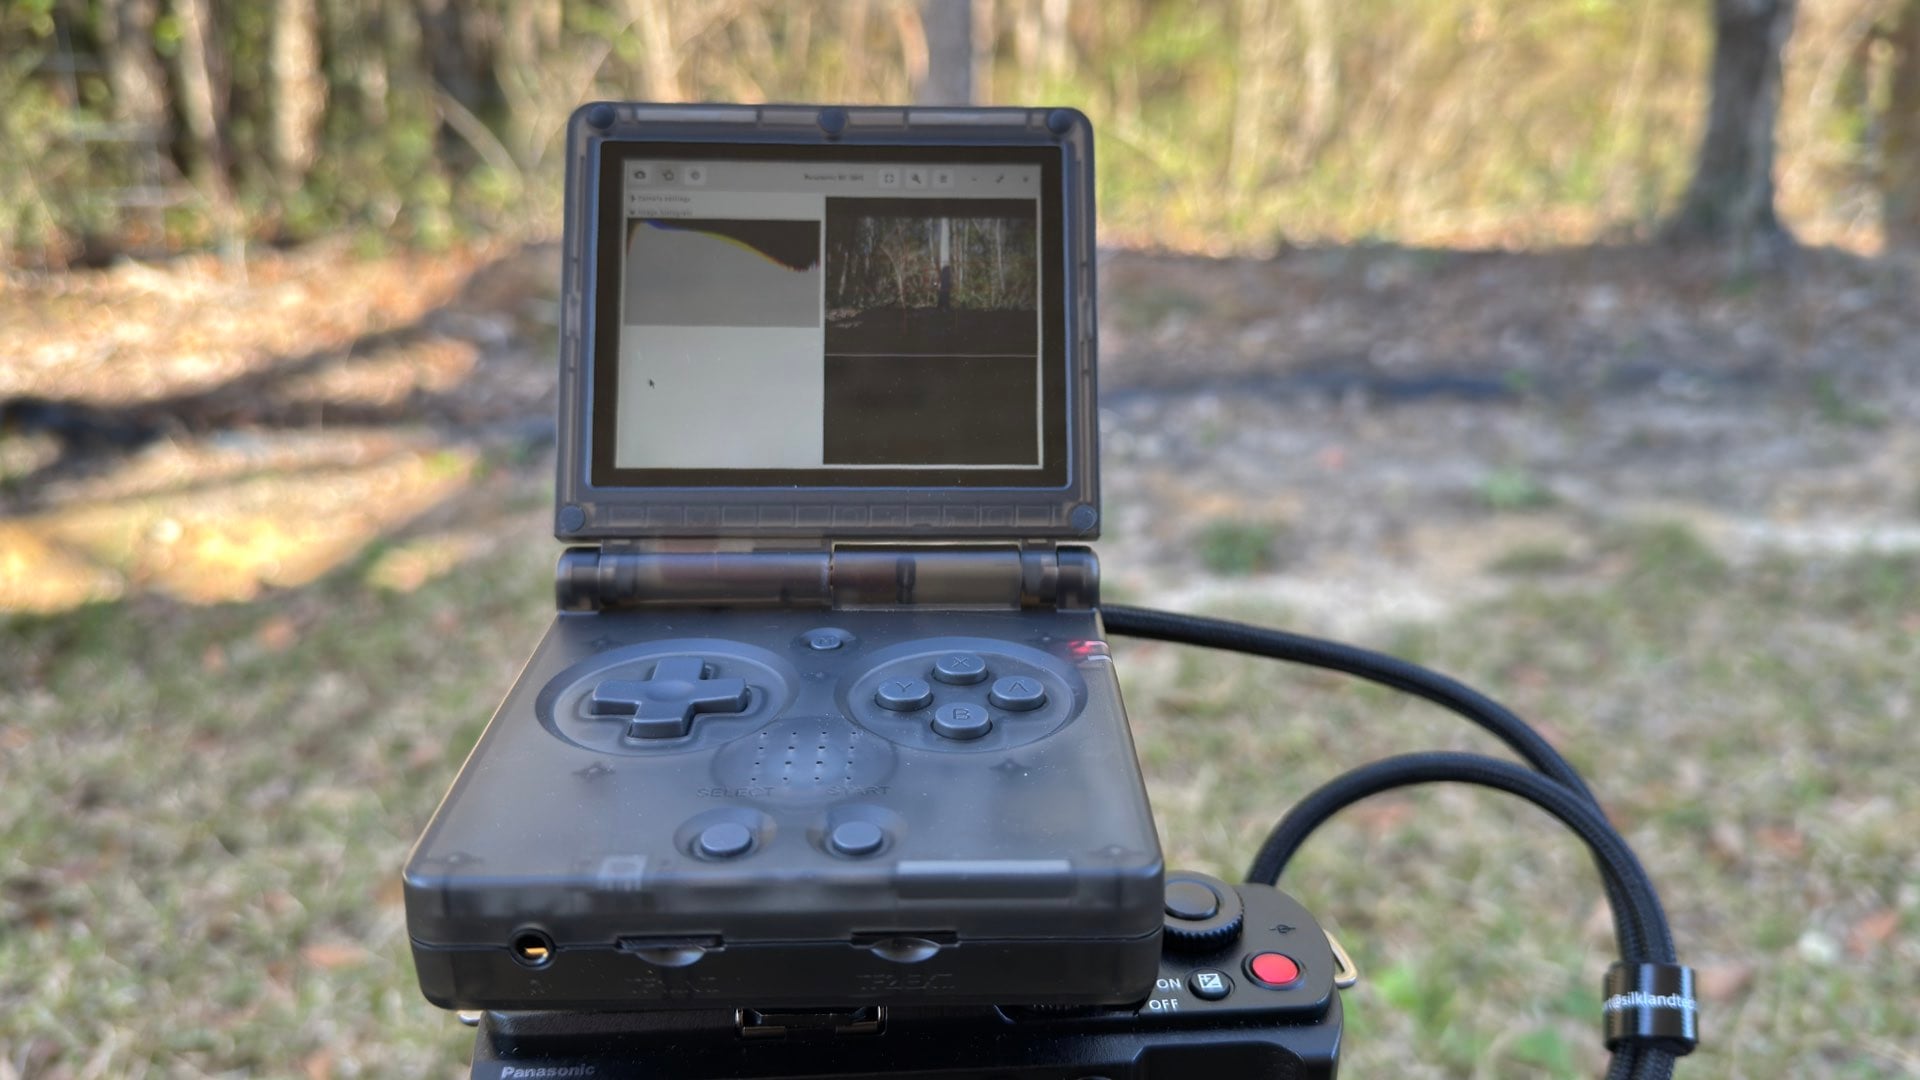
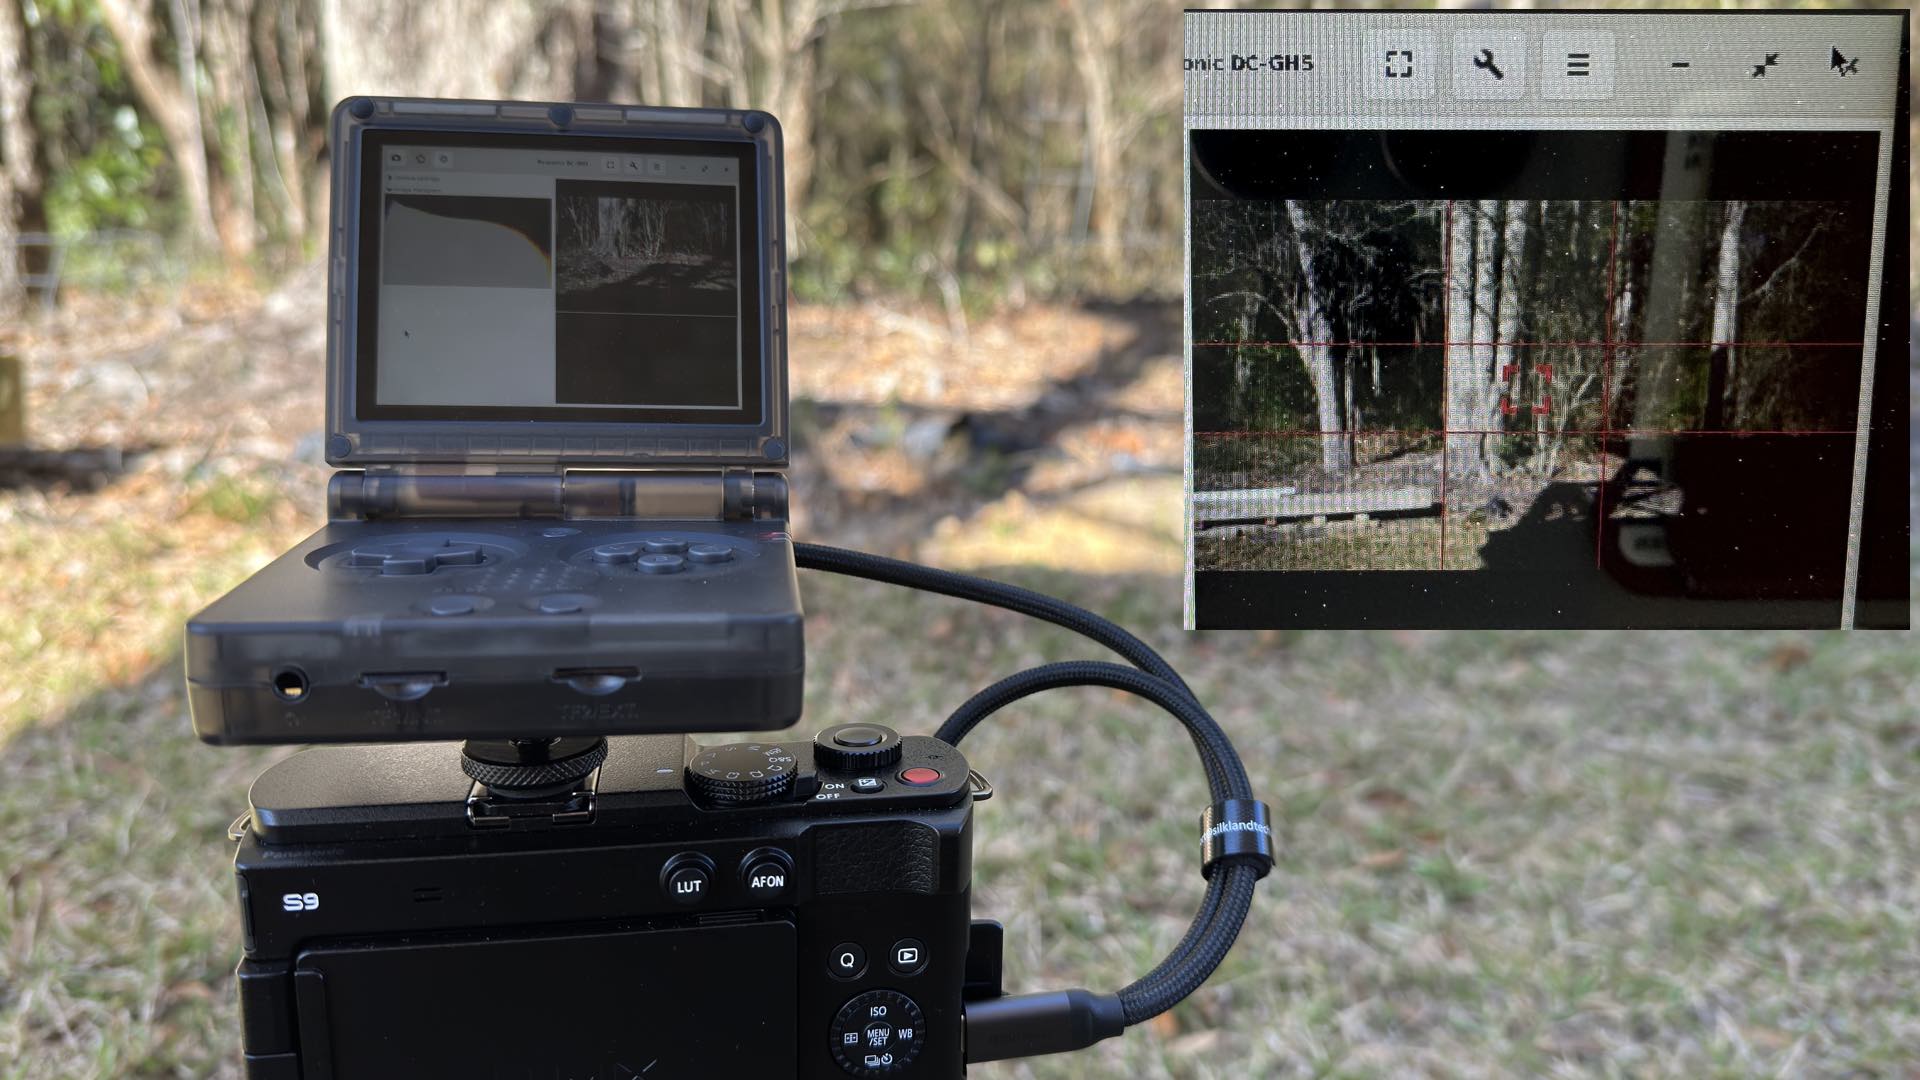
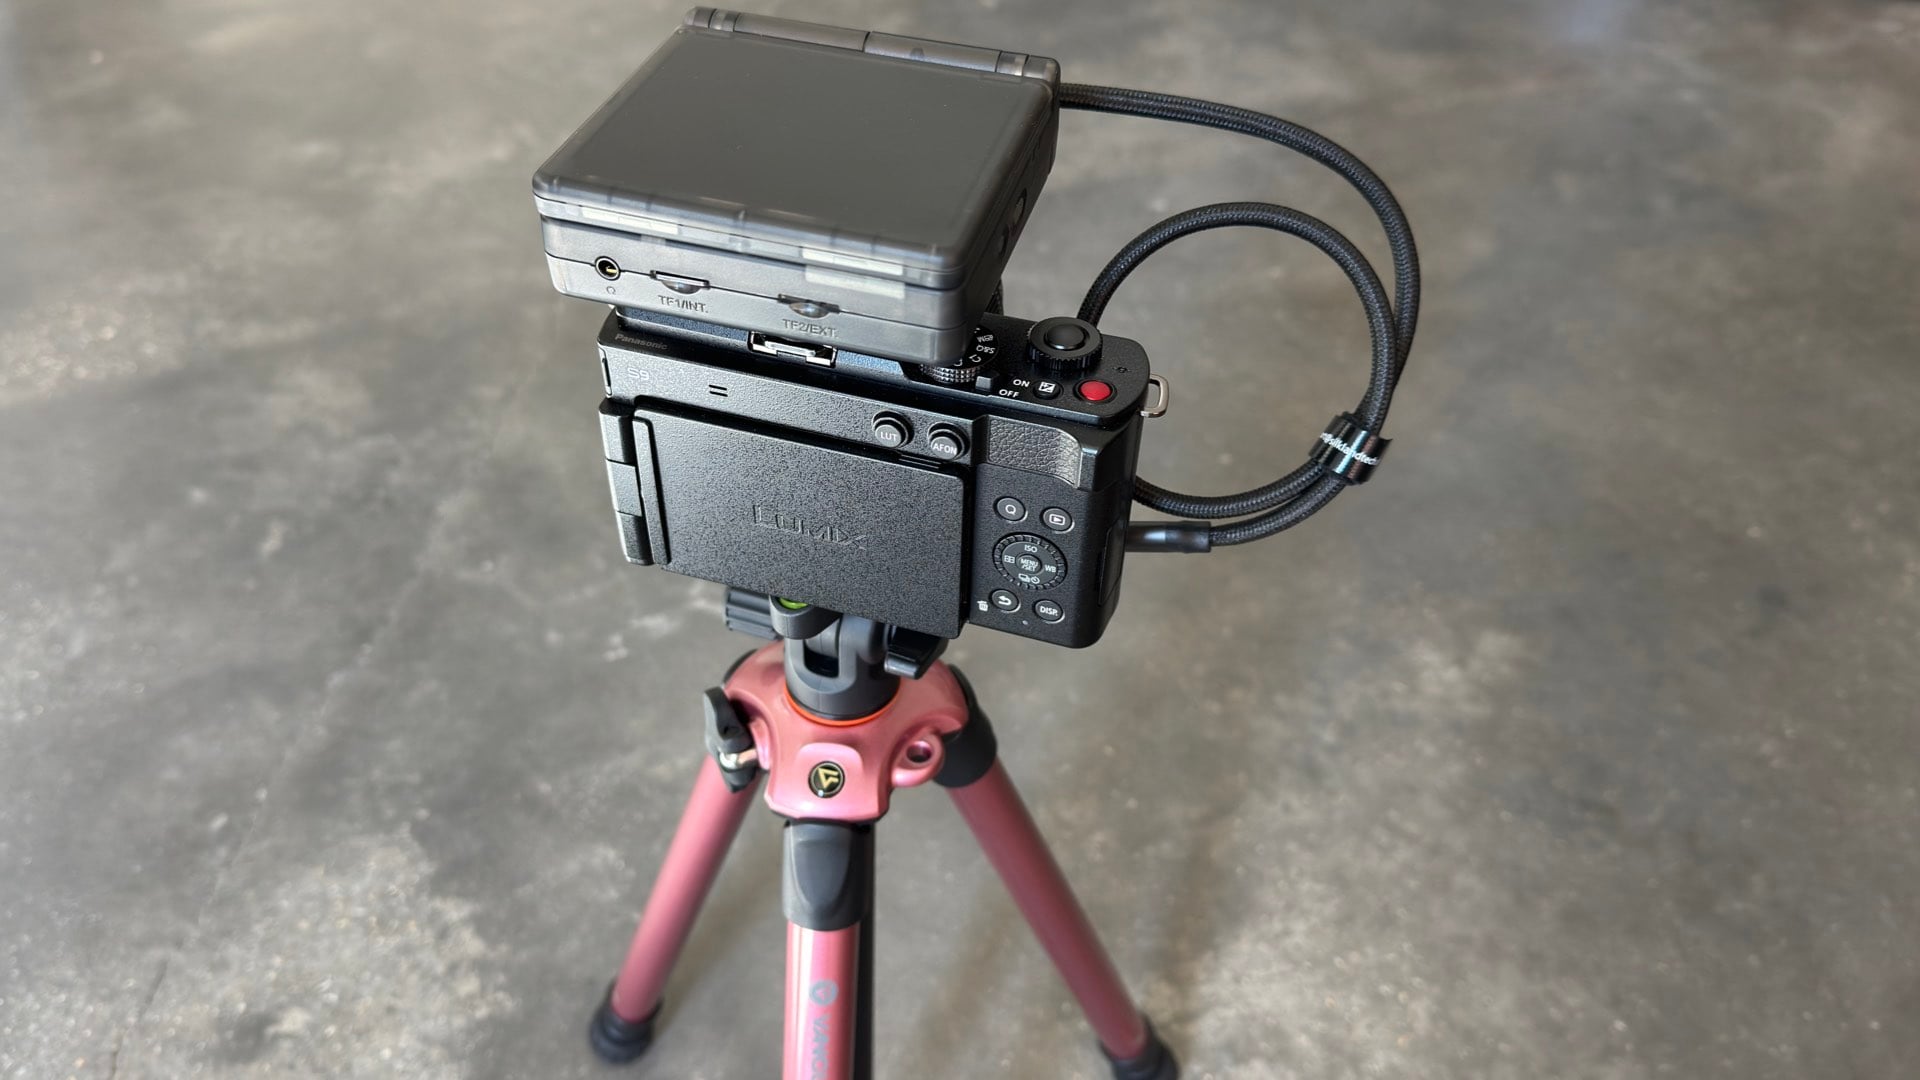
Now that you’re refreshed, connect one plug of the USB-C data cable into the USB/OTG port of the handheld and the other plug into the camera’s USB-C live data port. If your camera prompts you for identifying the USB connection, select data connection or its equivalent.
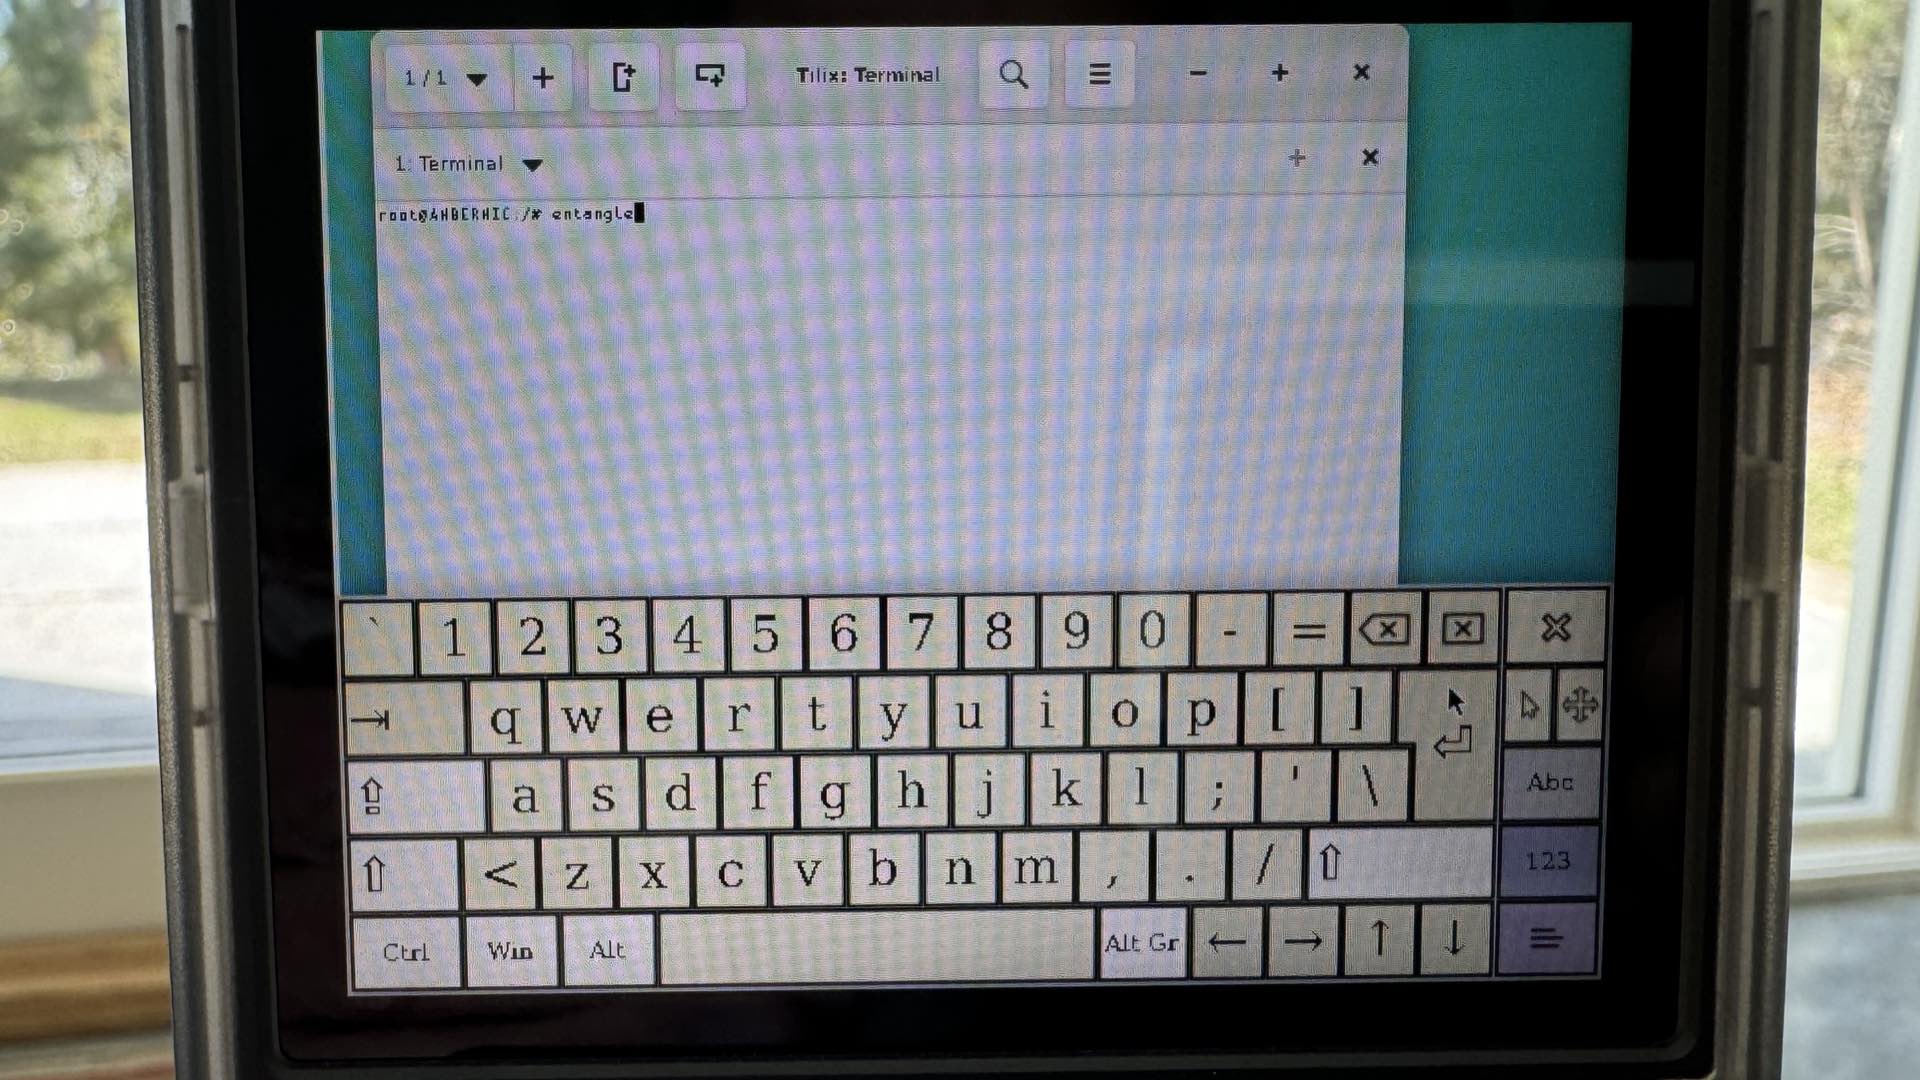
Again, launch the Terminal application and then type: entangle and press enter.
This will start the camera tether application with a blank screen. Use the arrow keys to move the pointer to the menu icon in the top righthand corner. You might have to use the “move” (L1 trigger + mouse keys) action to slide the window over.
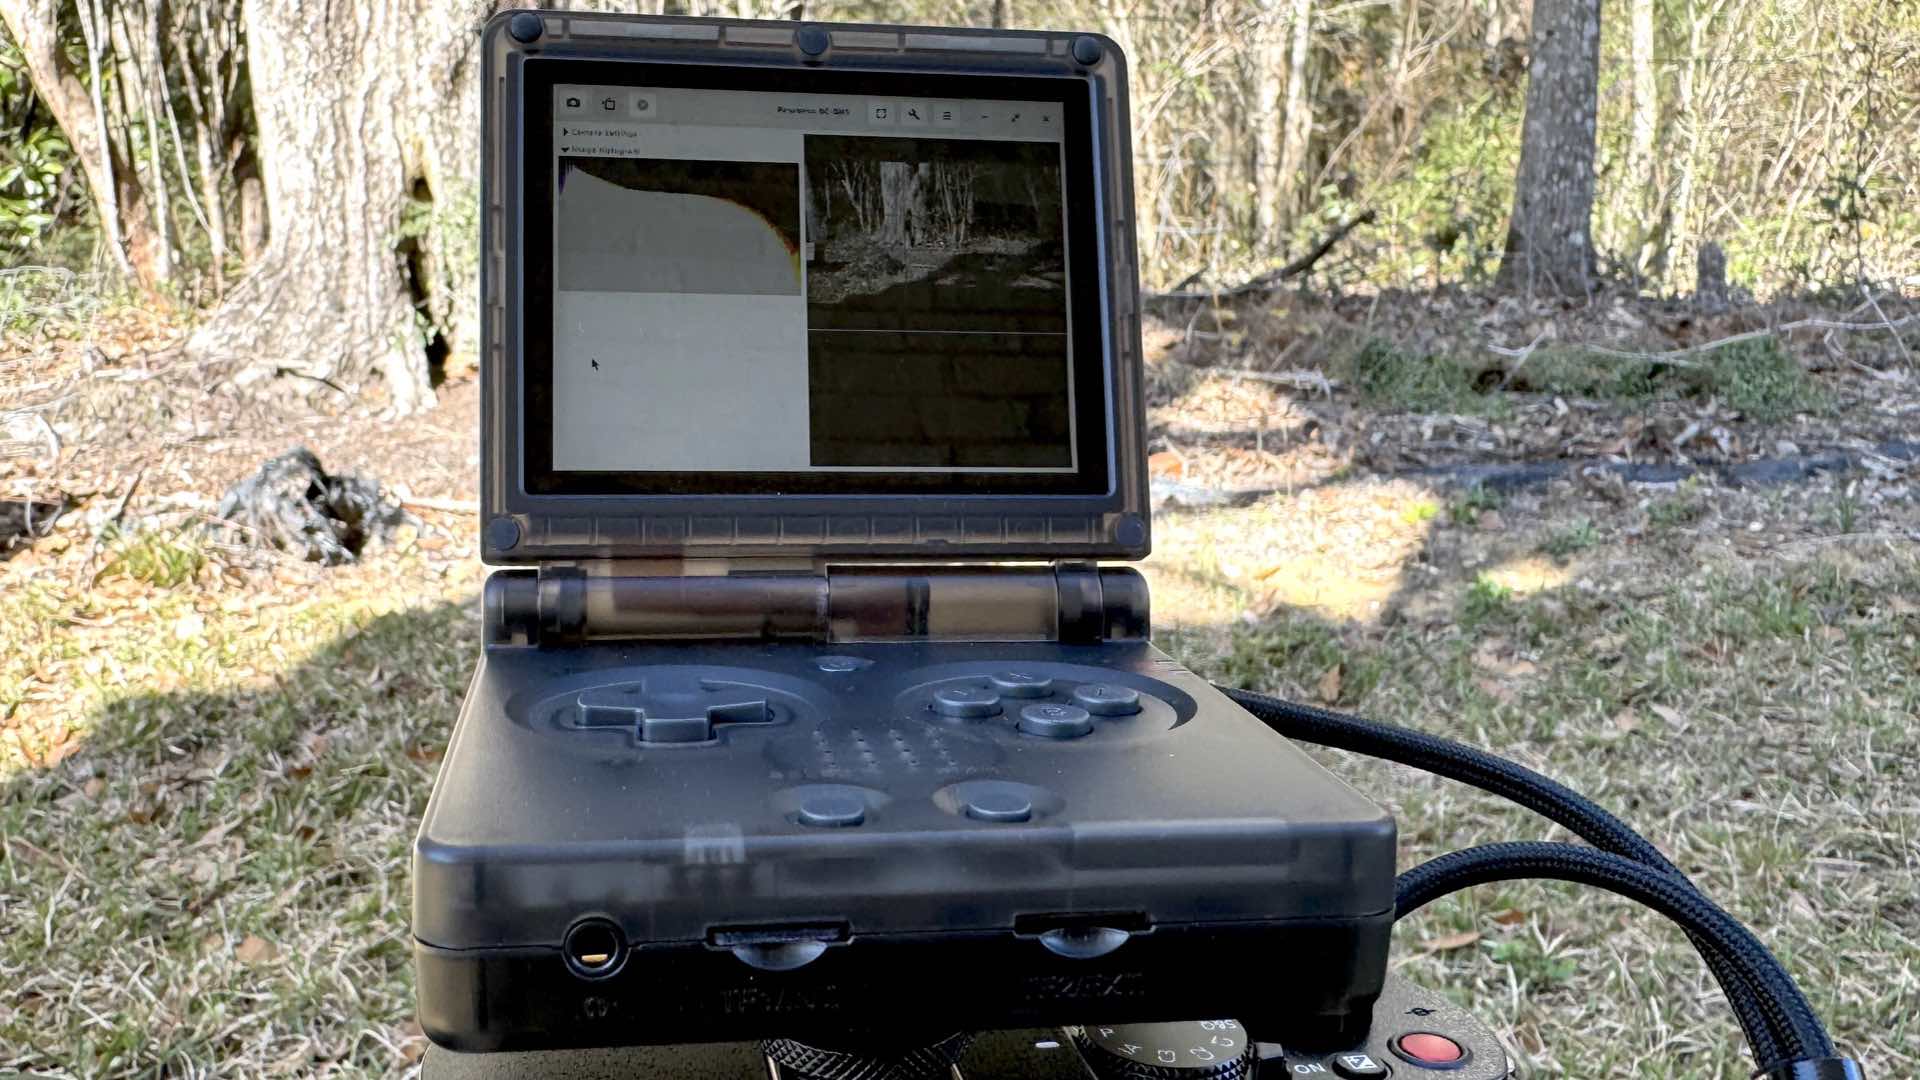
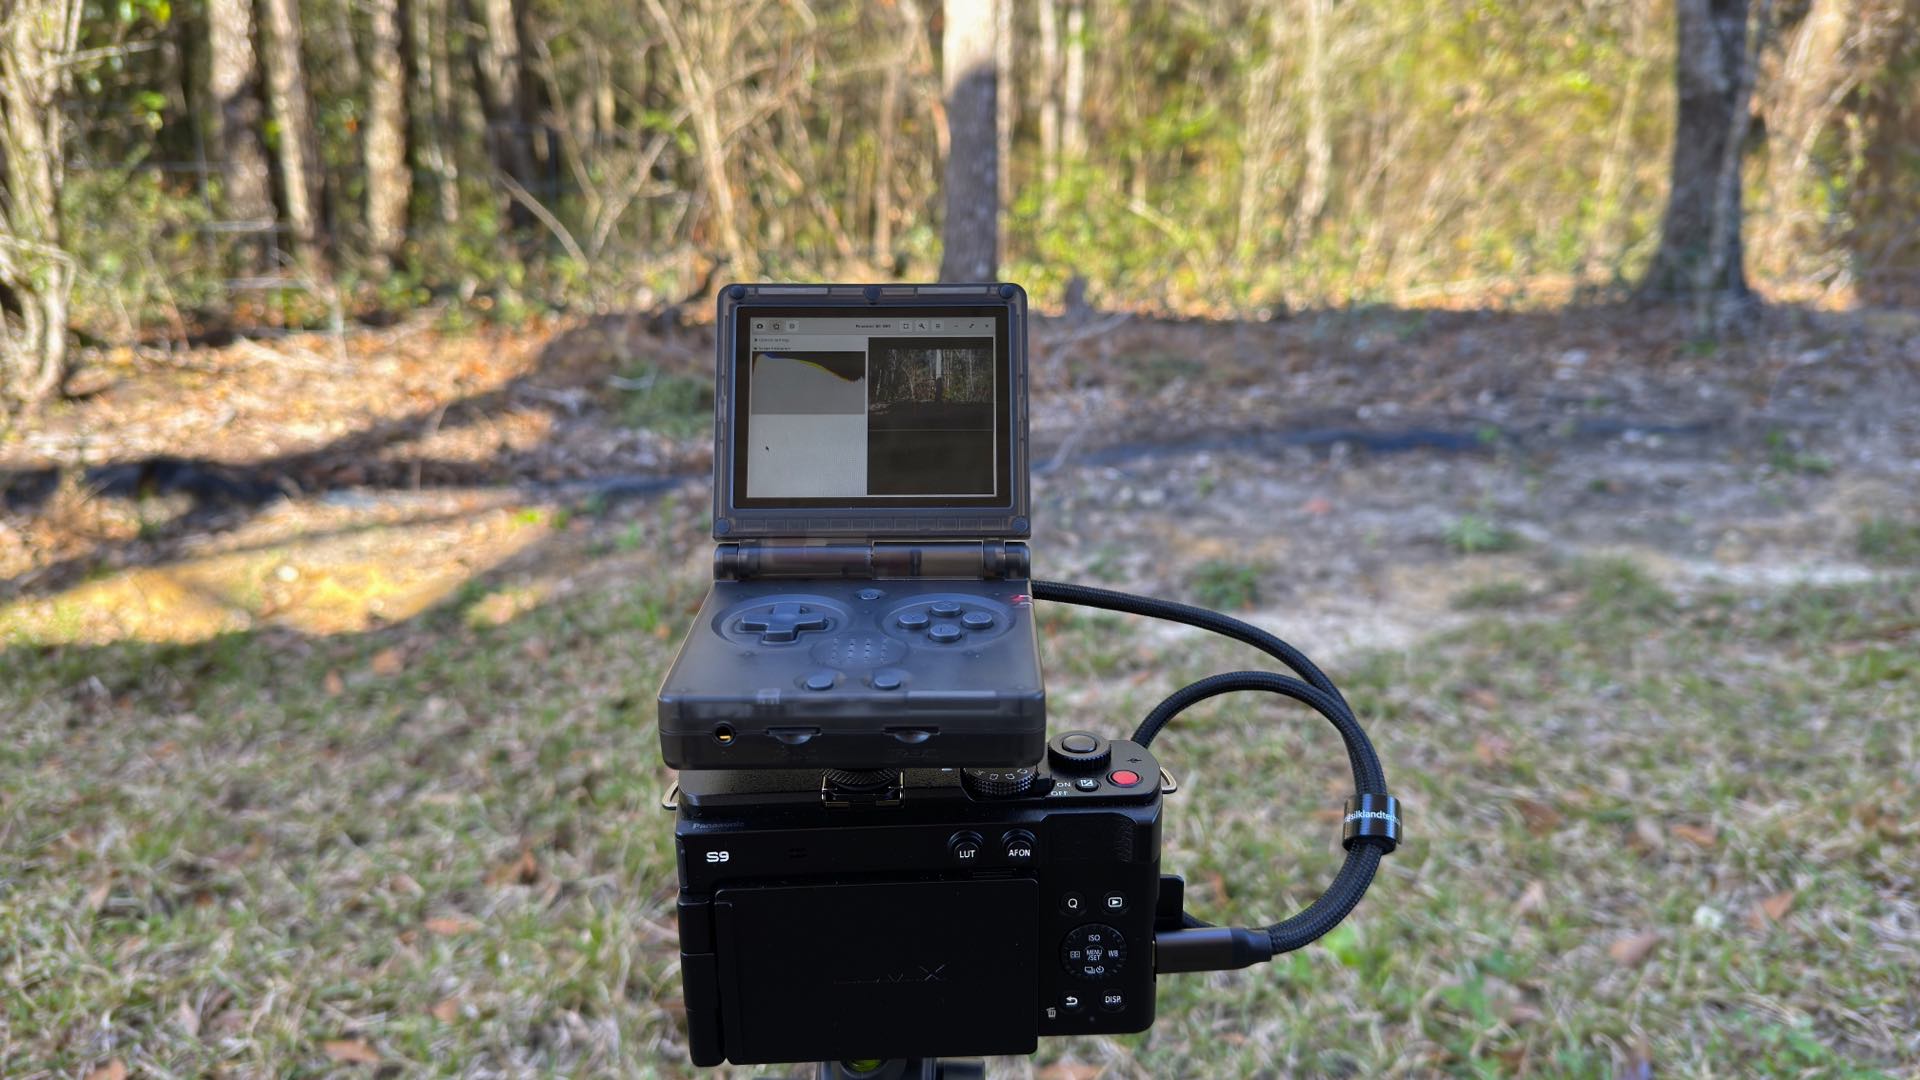
Inside the menu, select “Connect…” You should see your camera model (or, a closely related model) in the window. Highlight the camera’s name and press the Connect button. Now scoot your mouse over to the upper left corner and L1 click on the icon called “continuous capture preview.”
YAY! You should see the camera’s “Live” stream displayed inside the Entangle interface. Welcome to a fully-fledged EVF. Congratulations.
Feel free to return to the menu (upper right) and make settings adjustments to the live stream display. Beware, this is a “roll-up” window. Just click the arrow symbol to retract/unfurl the settings screen.
This project is priceless! Think about it; you are now free to purchase ANY mirrorless camera regardless of whether or not it features a builtin viewfinder. All it needs is the ability to support a live stream USB tether. The Panasonic Lumix S9…yes, please.
Just one final word of caution, however. The camera will typically draw power from the handheld device. This will reduce the battery life of the gaming machine. In testing, a 750mAh battery was able to operate the EVF for approximately 35-40 minutes.
Enjoy.
Filed Under:
Tagged With:

David Prochnow
Our resident “how-to” project editor, David Prochnow, lives on the Gulf Coast of the United States in Ocean Springs, Mississippi. He brings his expertise at making our photography projects accessible to everyone, from a lengthy stint acting as the Contributing How-To Editor with Popular Science magazine. While you don’t have to actually build each of his projects, reading about these adventures will contribute to your continued overall appreciation of do-it-yourself photography. A collection of David’s best Popular Science projects can be found in the book, “The Big Book of Hacks,” Edited by Doug Cantor.


Join the Discussion
DIYP Comment Policy
Be nice, be on-topic, no personal information or flames.
One response to “A Dream Come True: Build a REAL, LIVE-View EVF for Less Than $120”
I’ll stick with an optical viewfinder, thank you.