


Long Exposure Photography: Creative Techniques Beyond Silky Water
Nov 25, 2025
Darlene Lleno
Darlene Lleno brings a unique perspective to DIY Photography as someone who grew up surrounded by camera gear but chose words over lenses. With five years of writing experience, she specializes in photography content that’s both technically informed and genuinely passionate. Growing up with a photographer twin brother meant camera talk was everyday conversation in her household. While he mastered capturing moments, Darlene discovered she preferred being the subject and the storyteller behind the scenes. As a travel enthusiast and mother of two, she understands the importance of preserving life’s precious moments. When not exploring new destinations or writing for DIY Photography, you’ll find her reading or tending to her garden. Her approach to photography writing is refreshingly authentic, she may not be behind the camera, but she knows exactly what it takes to help others capture the shots that matter most.
Share:
Long exposure photography goes way beyond smooth water shots. Most photographers stick to the same waterfall and ocean wave photos. But this technique can do so much more. You can create abstract art, capture ghost-like figures, or paint with actual light.
Everyone knows the basics by now. Set up a tripod, slap on an ND filter, and shoot water. The result looks like every other photo online. Long exposure photography gets interesting when you try something different. Break the rules. Move your camera on purpose. Play with light sources.
These techniques need very little gear. Your creativity matters more than expensive equipment. Some methods work great in daylight. Others need darkness to shine. Every approach will give you plenty of failed shots. That’s part of the fun.
Intentional Camera Movement Creates Abstract Art
Intentional Camera Movement flips photography rules upside down. You move your camera during a long exposure on purpose. The result looks like a painting. Forests turn into colorful streaks. Cities become impressionist art.
Most photographers spend years learning to hold their camera still. ICM throws that out the window. Your camera becomes the moving part. The scene stays put while you create motion.
How ICM Works Compared to Normal Long Exposure Photography
Normal long exposure photography keeps everything locked down tight. Your tripod holds the camera steady. Moving subjects create the blur.
ICM does the opposite. The scene stays still. You move the camera. A forest doesn’t move but your upward sweep creates vertical streaks. Buildings stand firm but your sideways pan turns them into bands.
You need shutter speeds between 1/4 and 2 seconds for most scenes. Keep your ISO at 100 for clean images. Lower ISO also helps you get those longer shutter speeds.
Basic ICM Movements to Try
Different movements create completely different looks. Start simple before you try complex patterns.
Here are the main movements you should practice:
- Move vertically for forests and tall buildings
- Pan horizontally for city streets and landscapes
- Rotate in circles for kaleidoscope effects
- Zoom your lens during exposure for tunnel effects
- Try diagonal movements for dynamic energy
Start with simple up and down or side to side movements. Your success rate will be terrible at first. Shoot 50 frames to get one good shot. The random results keep it exciting though.
Light Painting Brings Surreal Effects
Light painting mixes long exposure photography with handheld lights. You literally paint light onto your camera sensor. The shutter stays open while you wave lights around. This works indoors or outdoors.
You need darkness, a tripod, and any light source. Flashlights work great. So do sparklers or LED strips. Your shutter opens for 30 seconds or more. You paint patterns with light during that time. The camera records every movement as glowing trails.
Three Main Light Painting Methods
On-camera light painting puts you in front of the lens. You create designs with glowing tools like fiber optics or LEDs. Your body might look ghostly or vanish completely.
Off-camera lighting hits subjects from outside the frame. You shine light on rocks or trees. This balances dark foregrounds with bright skies. Perfect for astrophotography where the ground stays too dark.
Kinetic light painting captures moving light sources. Car headlights create streaks. Sparklers leave glowing trails. These flowing patterns add energy to night shots.
Long Exposure Photography Works Great for Portraits
Long exposure photography changes everything about portrait work. Add some movement and you get cool effects. Subjects can look ghostly. They can stay sharp against blurred backgrounds. Or they can blur completely into motion streaks.
Dancers work really well for this technique. A ballerina’s movements become smooth flowing ribbons. You see grace in a way fast shutter speeds never capture. One exposure shows the whole movement between poses.
Keeping Your Subject Sharp While Everything Moves
This technique keeps one person totally still while chaos happens around them. Picture someone standing calm on a busy street. People walking by turn into blurred streaks. Your subject stays crisp and clear. The contrast looks almost magical.
Your camera stays locked on a tripod. The subject holds perfectly still for 5 to 30 seconds. Cars pass. Clouds move. Crowds flow around them. One person exists frozen while time rushes past.
Use apertures between f/8 and f/16 for this method. Start with 10-second exposures. Adjust based on how bright it is and how fast things move. Your subject needs to understand the vision. Explain it clearly so they stay totally still.
Panning Captures Speed and Motion
Panning follows moving subjects with your camera. The subject stays pretty sharp. Backgrounds blur into streaks. This shows speed better than freezing action ever could.
You track the subject smoothly left to right or right to left. Shutter speed controls how much blur you get. Try 1/15 second for joggers or cyclists. Cars and motorcycles need 1/30 or 1/60 second.
Smooth tracking makes or breaks this technique. Practice following subjects without taking photos first. Match their speed perfectly. When you press the shutter, keep panning smoothly through the whole exposure. Stop too soon and you ruin the shot.
Pick backgrounds with color and interesting patterns. Boring walls create boring blurs. Colorful storefronts work great. So do trees and architectural details.
Zoom Burst Adds Drama
Zoom burst creates radial blur by changing focal length during exposure. Lines streak out from your center like an explosion. Any zoom lens works for this. The effect grabs attention immediately.
Mount your camera on a tripod and frame your shot. Pick a shutter speed between 1/4 and 1 second. How fast you twist the zoom ring matters. Faster zooming makes more dramatic streaks.
Focus on your subject at your starting focal length. Hit the shutter button. Twist the zoom ring smoothly right away. Go from wide to telephoto or the other way. Your center stays fairly sharp. Everything else streaks toward the edges.
Flowers look amazing with this technique. So do portraits and architectural details. The explosive effect pulls eyes straight to your focal point. Try different zoom speeds and exposure times. See what works best.
Multiple Exposures Mix Things Up
Multiple exposures combine different shots into one image. You can do this right in your camera. Mix a sharp photo with intentional camera movement. The results look surreal and creative.
Take your first shot normally. Everything stays sharp. This becomes your base layer. Then take a second shot using ICM or motion blur. Your camera merges both into one file.
Practical Ways to Combine Long Exposure Photography
The classic mix pairs a sharp landscape with an ICM layer. Your scene stays recognizable but gets a painterly quality. You see enough detail but it feels dreamlike.
Another cool approach combines sharp portraits with abstract textures. Here’s how:
- Shoot your subject cleanly as your first exposure
- Photograph tree branches or clouds with movement
- Use architectural patterns with intentional blur
- Let the camera blend both layers together
- Adjust the blending ratio to control the effect
Most modern cameras have multiple exposure modes built in. Start with two frames. Use equal blending between them.
Star Trails Show Earth’s Rotation
Long exposure photography gets astronomical when you point up at night. Star trails show how Earth rotates. You get circular light paths across your frame. These exposures run from 30 minutes to several hours.
You need dark skies away from cities for this. Find spots with interesting foreground elements. Trees, buildings, or rocks work great.
Single exposures work fine up to 30 minutes. After that your sensor gets too hot. The solution is shooting multiple shorter exposures. Take 30-second to 4-minute shots. Then stack them in editing software later.
Point north to capture circular trails. Aim east or west for diagonal streaks. South-facing shots show the most dramatic arcs.
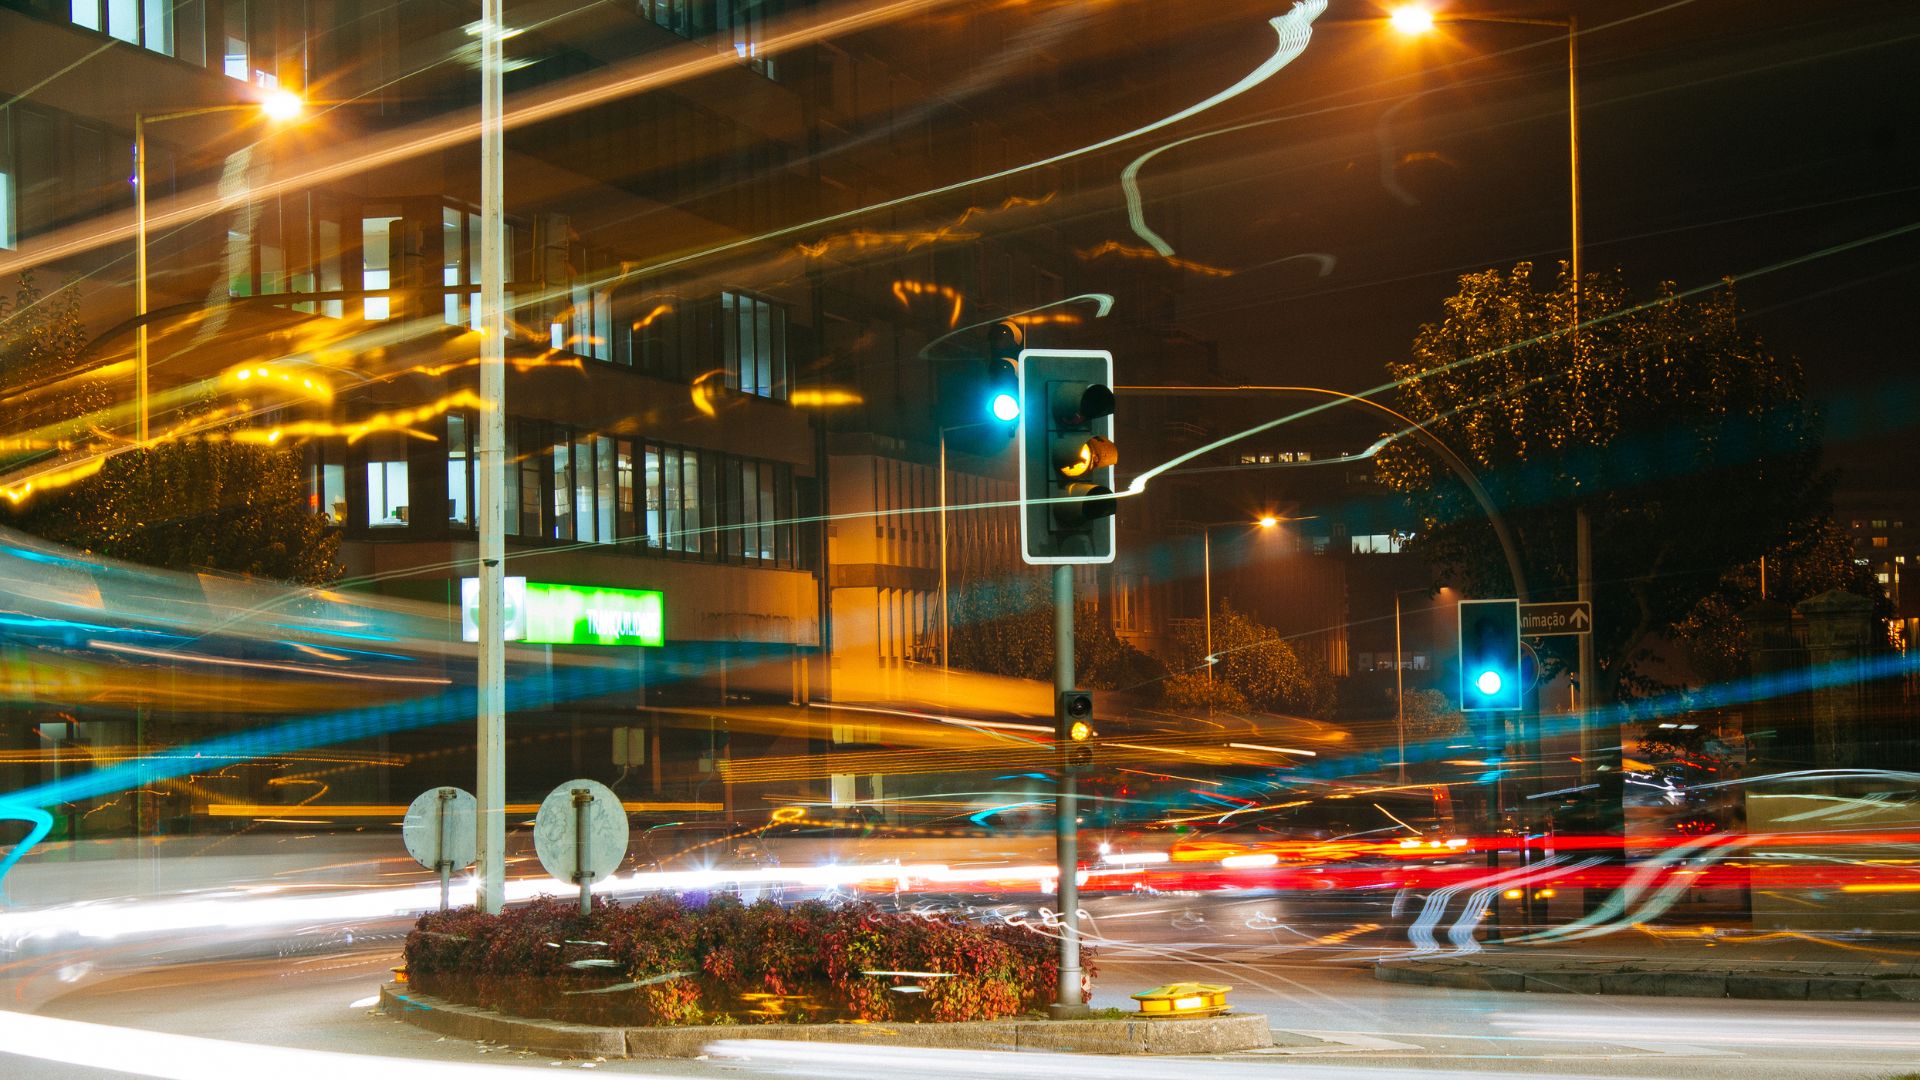
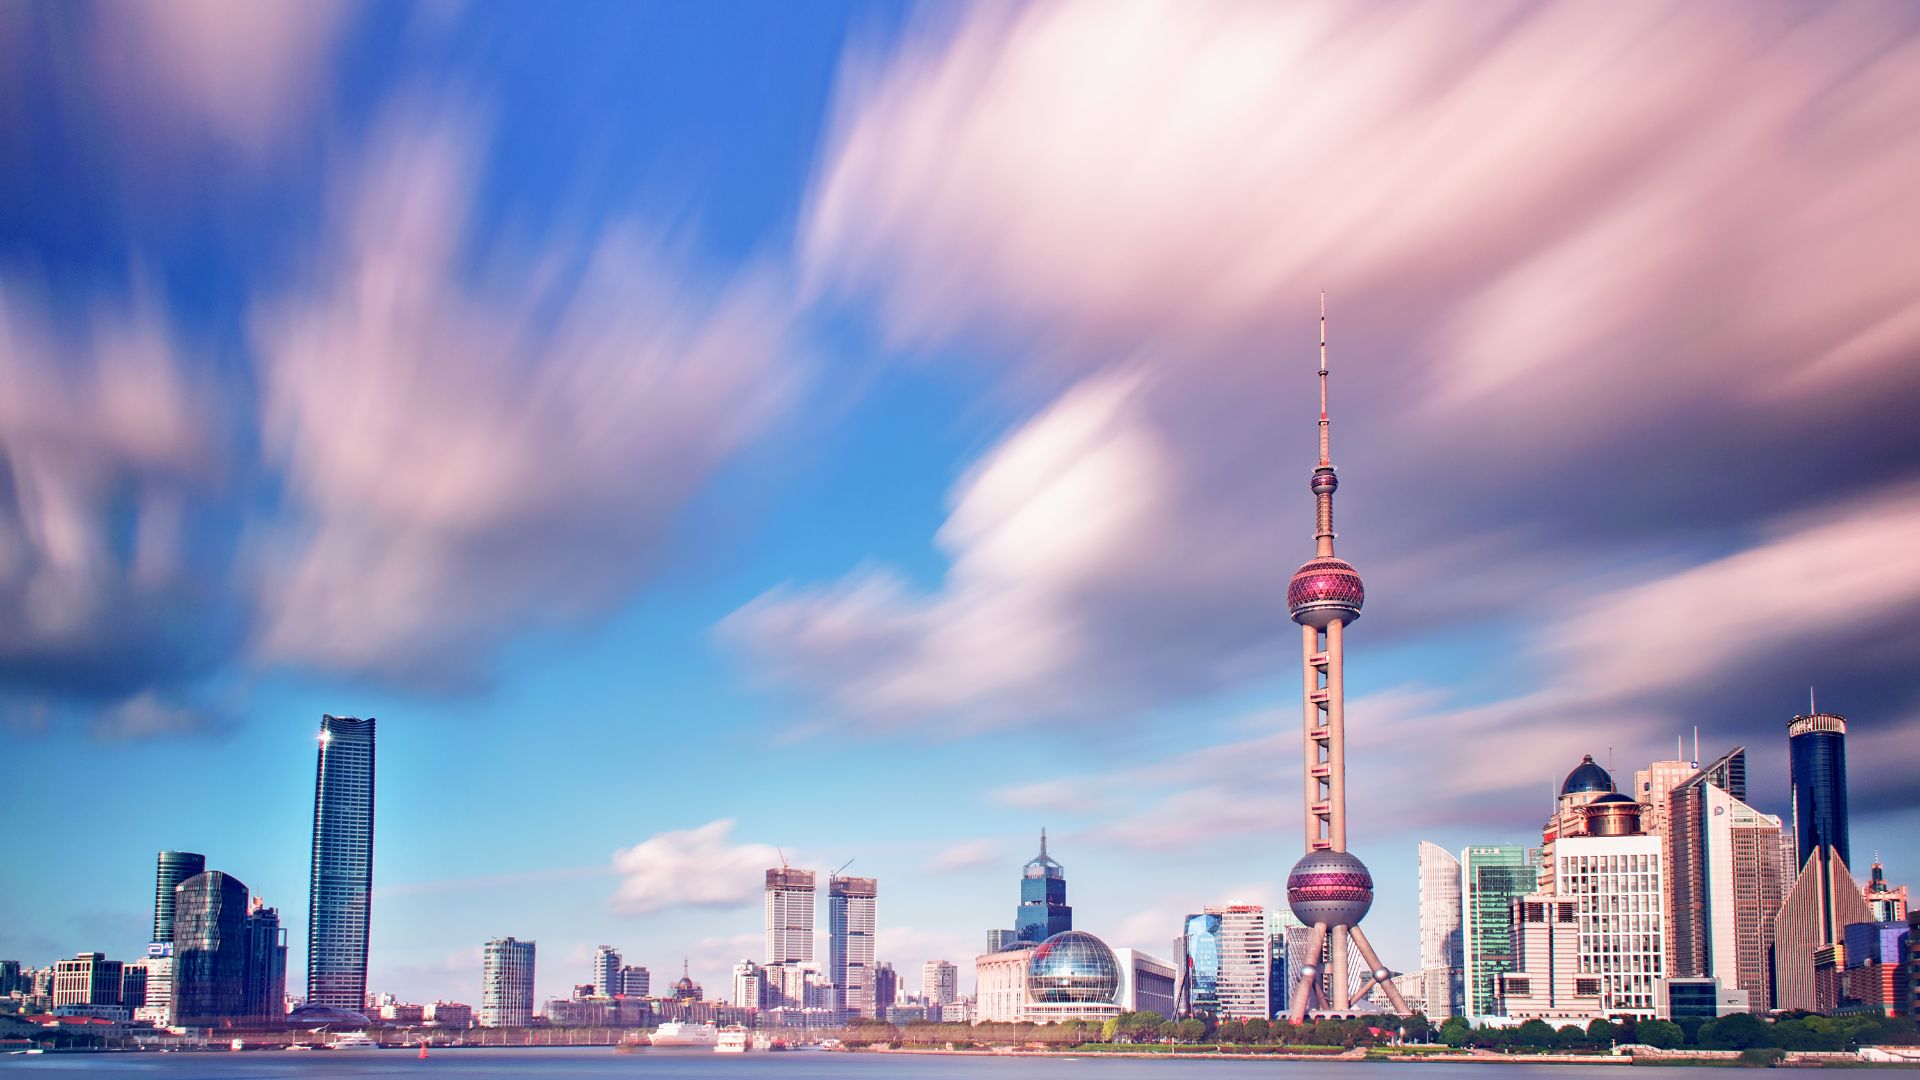
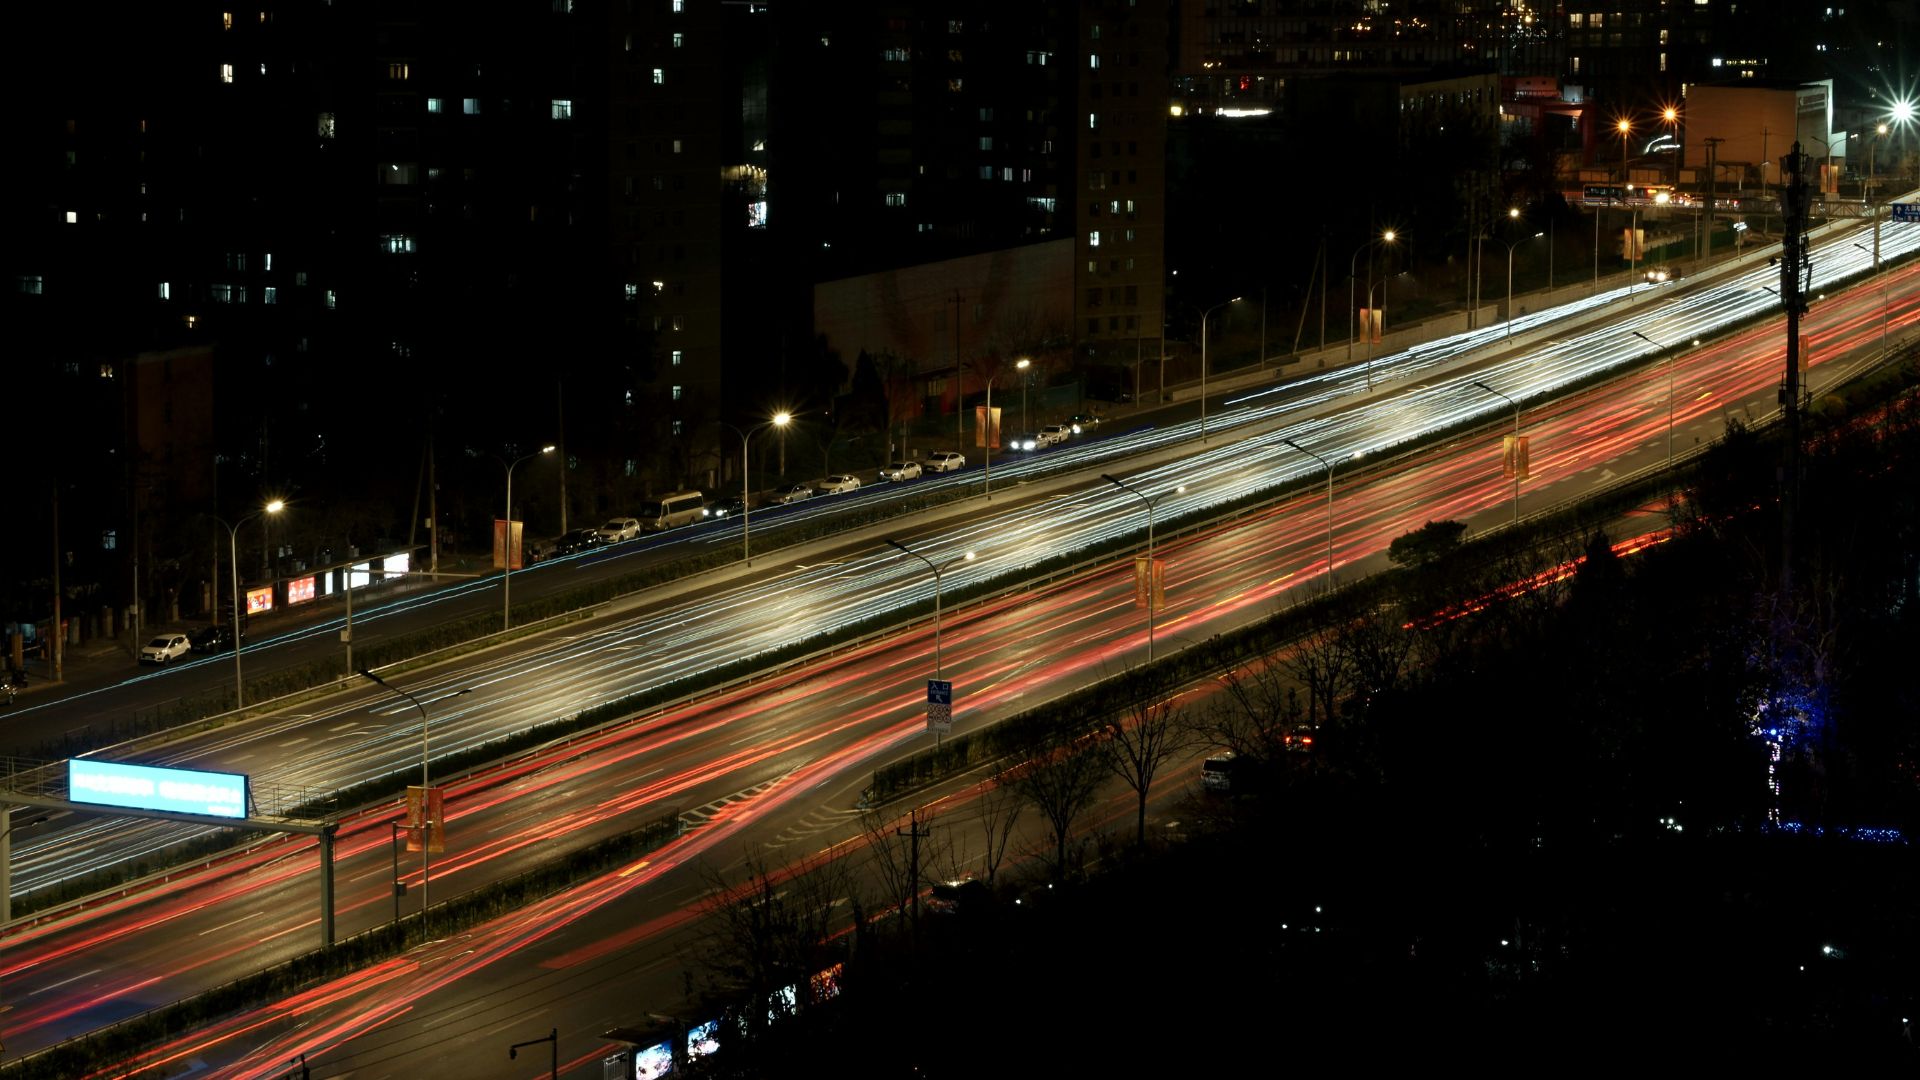
Cities at Night Offer Endless Options
Cities during blue hour give you perfect conditions for creative work. The sky balances nicely with artificial lights. Traffic creates light trails. Pedestrians turn into ghosts during your extended exposures.
Get up high for the best views. Overpasses, bridges, and rooftops work great. Highway interchanges create beautiful curved trails. Busy intersections make geometric patterns. Red taillights and white headlights look amazing together.
Getting the Right Exposure for City Shots
The trick is matching your exposure time to both light levels and motion. Too short and your trails look weak. Too long and your sky gets washed out from street lights.
Start with these baseline settings and adjust from there:
- Set shutter speed to 10 to 20 seconds
- Use f/11 aperture for good depth
- Keep ISO at 100 for clean images
- Check your histogram after each shot
- Watch for blown highlights from bright lights
Change exposure time instead of ISO or aperture when possible. Include buildings or landmarks for visual anchors. Pure light trails without context feel empty. The mix of solid buildings and flowing traffic creates tension.
Make Tourists Disappear
Long exposure photography erases crowds from popular spots. Moving people vanish during 30-second to 2-minute exposures. Only things that don’t move stay sharp.
You need ND filters for this to work in daylight. A 10-stop filter lets you shoot 30 seconds at f/16 even in bright sun. The long exposure averages out all the moving people.
Visit monuments during busy times when crowds constantly flow through. A steady stream works better than occasional walkers. More movement means more complete disappearance.
Some tourists will stop in your shot. Wait them out or time exposures between groups. Shoot three or four tries and pick the cleanest one.
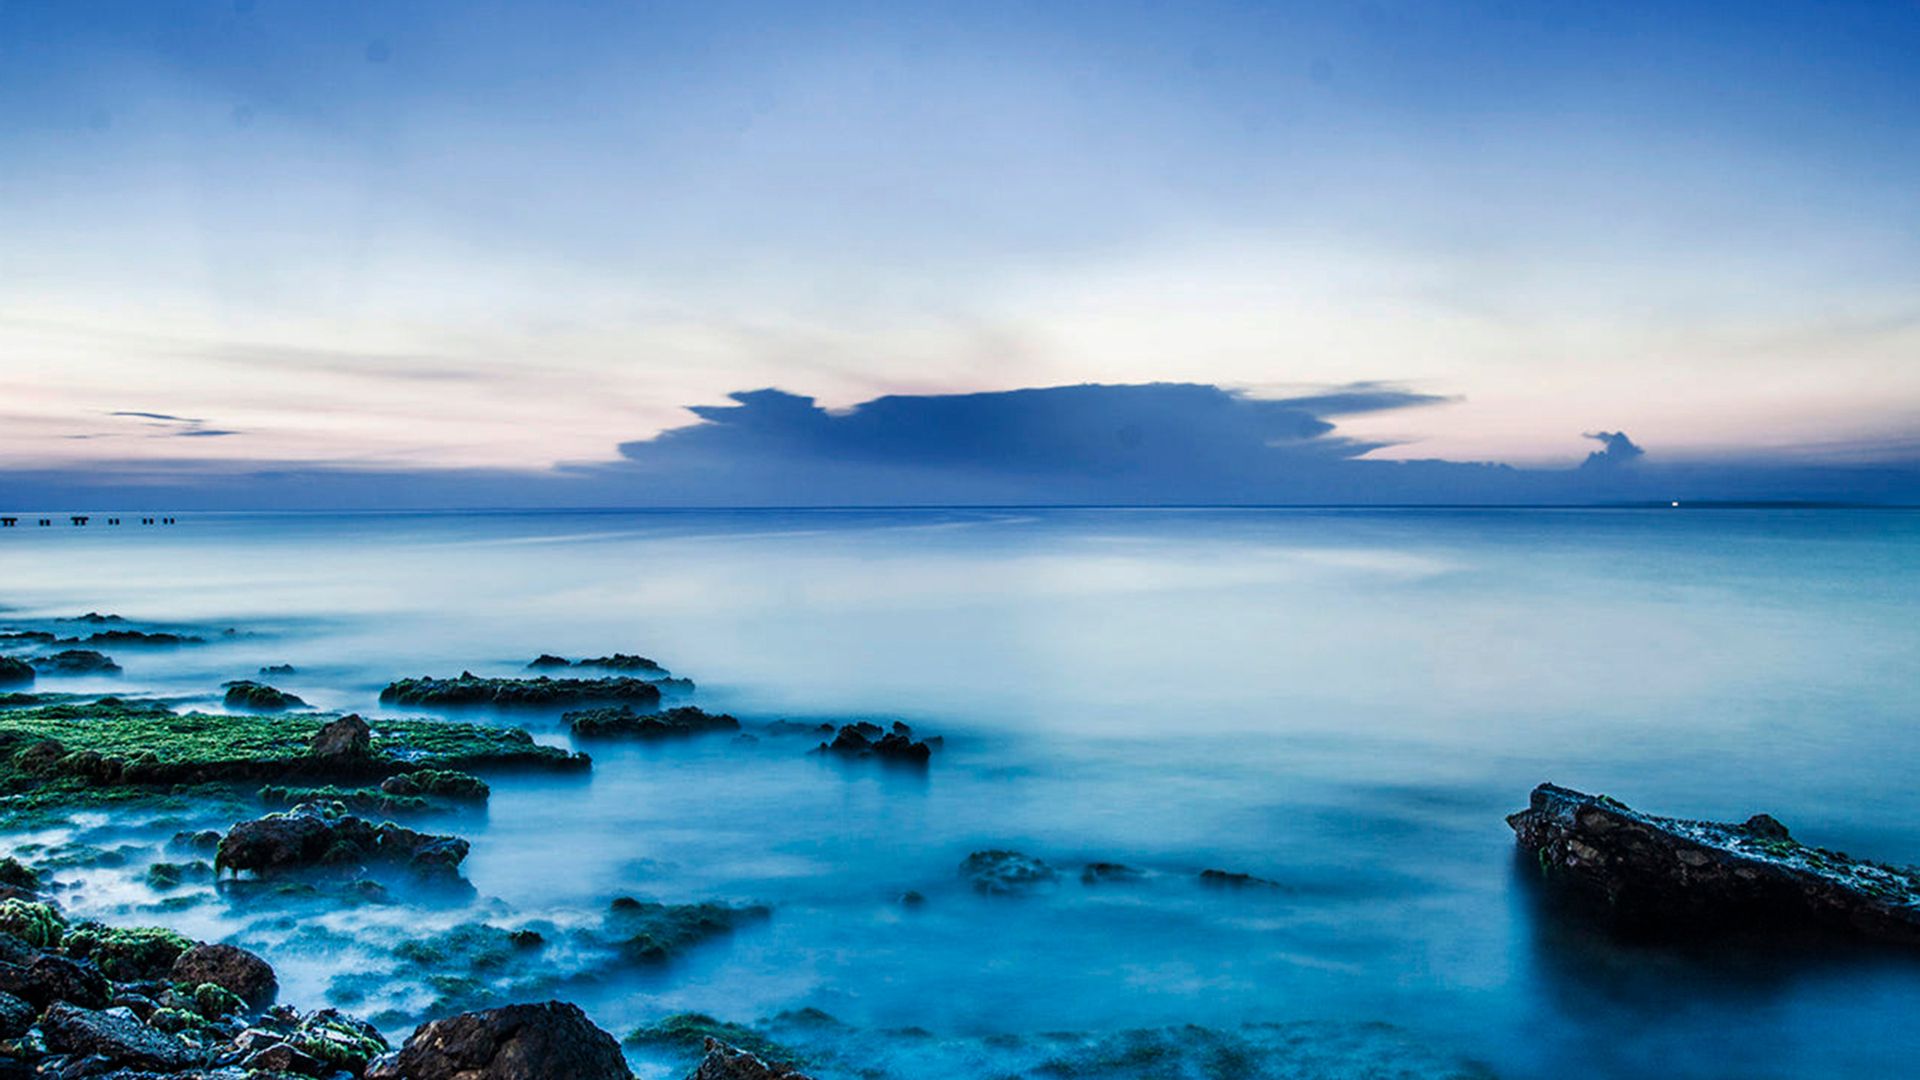
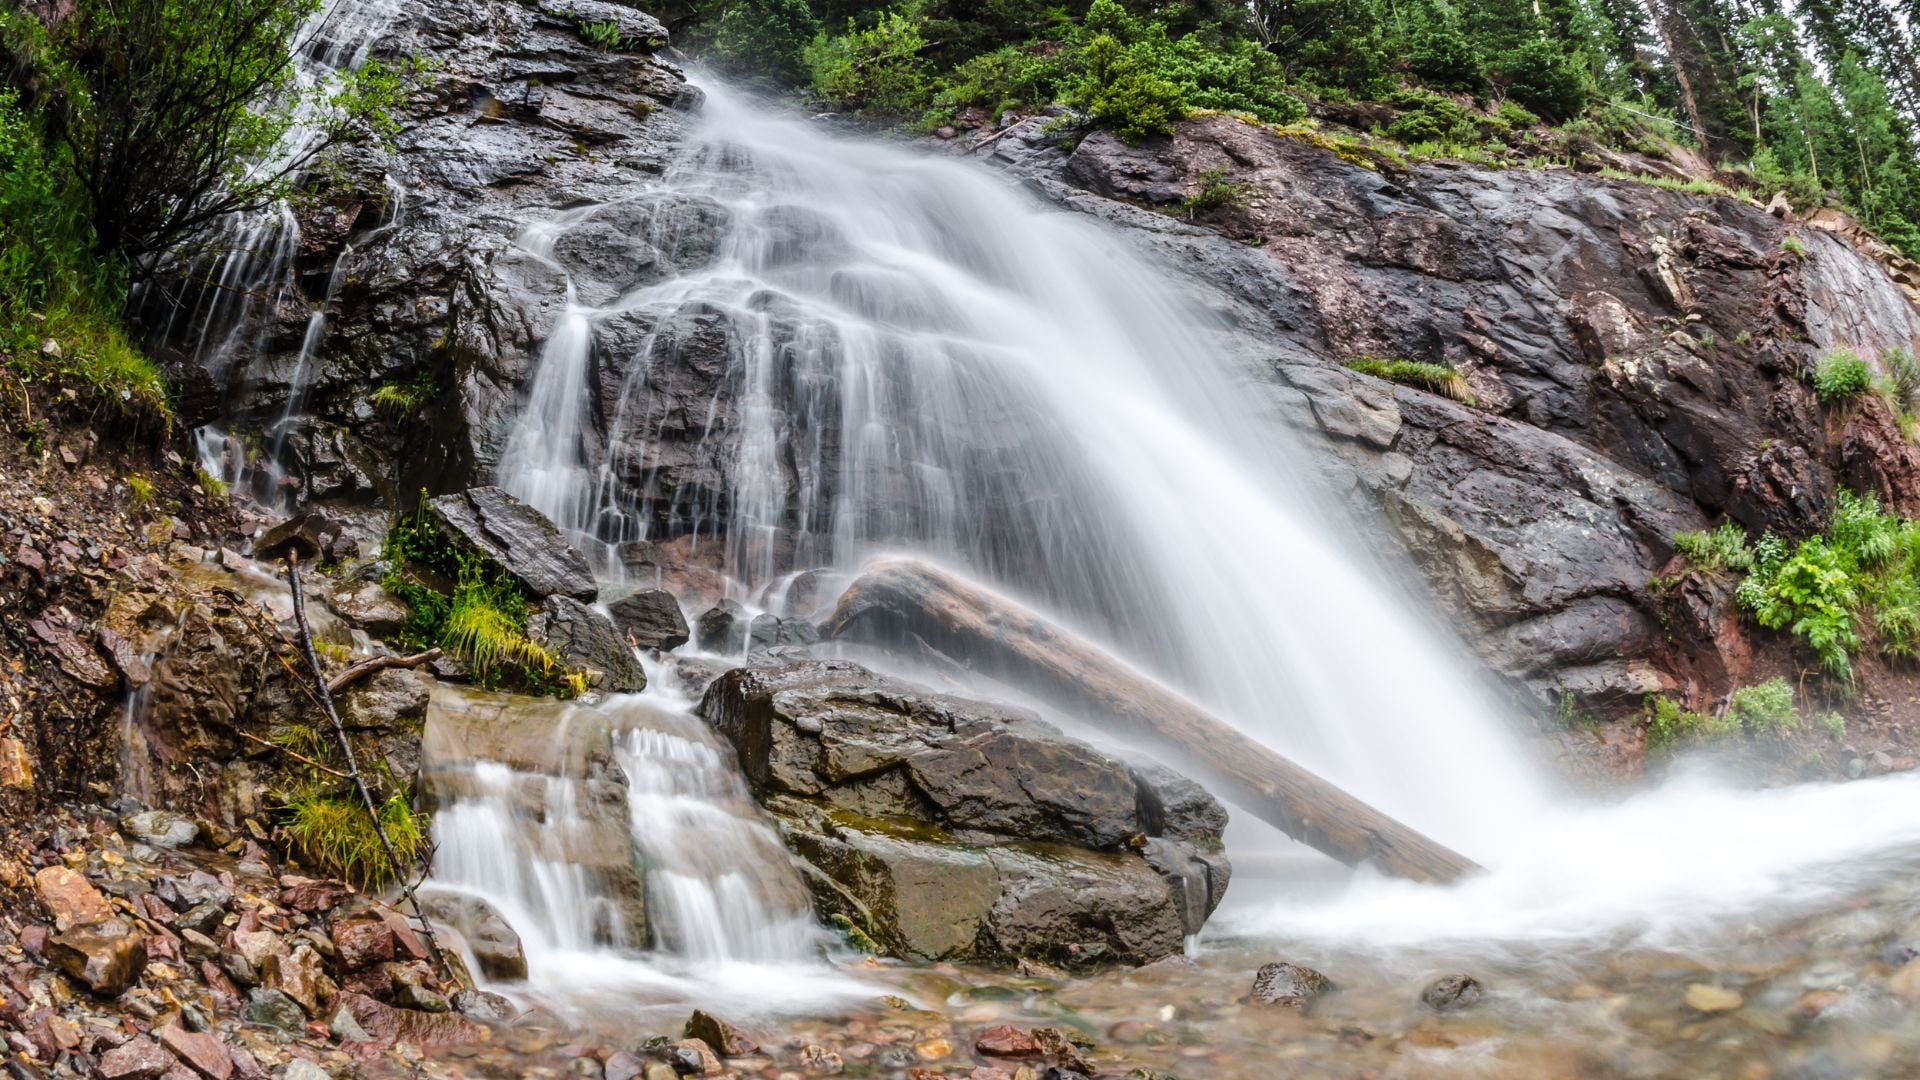
Reflected Light Creates Painterly Water Scenes
Water reflections during long exposure photography look completely different from smooth water. Gentle waves create streaky reflections. Buildings, lights, and sunset colors turn painterly. Urban waterways become impressionist art.
Dawn and dusk work best for this style. The colorful sky reflects in water. Slight waves add that artistic blur. Too much wind creates mess instead of beauty. Light movement produces the prettiest results.
Your exposure length controls how abstract things get. One to four seconds creates soft but recognizable reflections. Ten to thirty seconds makes pure abstraction. Colors blend into horizontal bands. Try different times to find what you like best.
What Gear You Actually Need
Most long exposure photography needs just a camera and tripod. That’s it. But certain tools expand what you can do. ND filters top the list for daytime shooting. They cut incoming light so you can use longer shutter speeds in bright conditions.
A solid tripod matters way more than camera quality. Any movement ruins the shot you’re trying to get. Wind becomes your worst enemy. Pick heavy tripods over lightweight travel models when you can.
Remote shutter releases stop camera shake from your finger. Even a 2-second self-timer works if you don’t own one. Just don’t touch your camera once the exposure starts.
For light painting you’ll want various light sources. Each creates different effects:
- Flashlights for basic light trails
- LED strips for ribbon effects
- Sparklers for explosive patterns
- Phone screens for soft fills
- Colored gels over flashlights for variety
- Small LED string lights for abstract patterns

Camera Settings That Give You Control
Manual mode gives you control over everything. Shutter speed matters most for creating the long exposure effect. But aperture and ISO work together to nail proper exposure at your chosen speed.
Start with ISO 100 for the cleanest images. Higher ISOs add noise that shows up more in long exposures. Only bump ISO when you really need faster speeds or wider apertures.
Use apertures between f/8 and f/16 for most shots. Smaller apertures like f/16 or f/22 let you shoot longer. But they introduce diffraction that softens images. Larger apertures like f/4 or f/5.6 mean shorter exposures. But you lose depth of field.
Always shoot RAW format for editing flexibility. Long exposures often need adjustments to highlights and shadows. RAW files keep all the data you need for corrections.
Master Creative Techniques with What You Already Own
Long exposure photography goes way beyond smooth water shots. The techniques here push creative limits. They produce images you can’t get any other way. Each method takes practice and lots of failed attempts. That’s part of the process.
Pick one technique that grabs your attention. Master it before moving on. Maybe ICM photography speaks to your artistic side. Or light painting satisfies your technical curiosity. Urban light trails give quick results. Star trails require more patience and commitment.
These creative approaches work with gear you already own. You don’t need expensive equipment. Just a camera, tripod, and willingness to experiment. Those three things open up completely new ways of seeing and capturing the world.

Darlene Lleno
Darlene Lleno brings a unique perspective to DIY Photography as someone who grew up surrounded by camera gear but chose words over lenses. With five years of writing experience, she specializes in photography content that’s both technically informed and genuinely passionate. Growing up with a photographer twin brother meant camera talk was everyday conversation in her household. While he mastered capturing moments, Darlene discovered she preferred being the subject and the storyteller behind the scenes. As a travel enthusiast and mother of two, she understands the importance of preserving life’s precious moments. When not exploring new destinations or writing for DIY Photography, you’ll find her reading or tending to her garden. Her approach to photography writing is refreshingly authentic, she may not be behind the camera, but she knows exactly what it takes to help others capture the shots that matter most.


Join the Discussion
DIYP Comment Policy
Be nice, be on-topic, no personal information or flames.