Build A Beauty Dish From An IKEA Lamp

Build A Beauty Dish From An IKEA Lamp
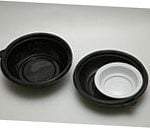
We featured a few beauty dishes before, one made from a turkey pan, and one made from soup bowls. (Even when it seems like DIY, it is actually about food).

With a recent mention about the connection between DIYP and IKEA, I thought that it would be fun to feature a beauty dish made with the very appropriate named IKEA FOTO.

It is a simple build, the smarts here are in the bracket that takes the load of the strobe head and allows for easy mounting on a lightstand or a boom.

Materials

Step 1 - Prepare a Mounting Bracket

IKEA DIY Beauty Dish

The mounting bracket is how the beauty dish attached to the strobe. It provides support for the dish to rest on and take the load away from the strobe's head.

The bracket is made with the aluminum flat bar. Use the template below (pdf, large jpg) to cut holes and bend the bar into the shape.

IKEA DIY Beauty Dish

It is easiest if you follow the a certain order:

  1. Mark the holes and the bends with a sharpie
  2. Drill the holes
  3. Make the bends as marked in step (1). After making each of the bends, place the bar on the template and make sure it fits.

Step 2 - Preparing The Strobehole

Using a dremel, cut a 2x3 inch hole in the back of the lamp. It will pretty much nuke it as an IKEA lamp, but will create a a hole just big enough for most strobes.

Trim out the hole with some rubber or gaffers tape to keep from scratching my flashes.

Build A Beauty Dish From An IKEA Lamp

Step 3 - Add the Mulberry Blank Cover

The Home Depot Mulberry Blank Cover Plate is held in place with two 4 inch 1/4-20 bolts. Screw holes on the plate were re-tapped wider to accept the 1/4-20 bolts. If you don't own a tap, you can drill a larger hole and use bolts to lock it in place. There is a nut on the back side tightened to keep the bolt from backing out.

The back side of the plate can be sprayed silver for better reflection

Build A Beauty Dish From An IKEA Lamp

Step 4 - Testing

Mount your strobe and make sure everything fits well, this is your final chance to make adjustments before doing the paint job

Build A Beauty Dish From An IKEA Lamp

Step 5 - Paint Job

Paint the dish with matte black (or sharp metallic green :)

Build A Beauty Dish From An IKEA Lamp

Sample Image

Build A Beauty Dish From An IKEA Lamp

About The Author

Dave Casius is a photographer and a DIYer based in the US, you can watch his Flickr stream here.

Get the DIYP greatness via RSS, newsletter and Twitter
Connect with the community: Facebook Page, Discussions
Share Ideas, Setups, Images and Projects on DIYP's Flickr, visit Readers Photos

Comments

Nice Wright Up!

  • May 25, 2011
  • Dave

Thanks Udi, you did a great write up and presentation of my photos and template.

Dave

This is awesome!

This is awesome!

Great Job!

I was just drafting on a piece of paper the exact same thing! I even created a checklist of the items that I would use! This was moments ago before this article appeared into my RSS reader! I'm planning to use the IKEA lamp as well but I'm going to use a convex mirror instead of the "Mulberry blank cover" - Great job done!

using convex mirror

  • May 26, 2011
  • Dave

I have a 3" convex mirror, that I also put on the back of the mulberry, but was not impressed with the results, it created more of a hot spot in the center back of the dish.  I will post some pictures in my flicker of using my dish with and with out the diffusion dome, with and with out the mirror and you can judge which is better.  A 5" convex might be better.  Even if you plan on using a convex you will need something to mount it to, The mulberry's existing screw holes are to close for the 3" convex mirror to fit. I had to cut out some notches on each side to make it fit.  A different center plate might work better.

Great job!

Just one question: Have you used 10", 15" or 20" lamp?

Rafal

???

  • May 27, 2011
  • Dave

Not sure I understand the question.  this is a 15" DIY Beauty Dish, I haven't used any 10" or 20" lamps.

Thanks, this is my answer.

Thanks, this is my answer. I've seen on IKEA site three sizes, so I was wondering which size have you used, since I couldn't find any reference to size in text.

Cheers!

Ikea = Recycle Before Use

  • May 25, 2011
  • Anonymous

Great idea and very clear presentation (thanks for the blueprint). However I was wondering if a convex reflector would provide a better light diffusion versus a flat one (here, the Home Depot Cover) ? A lot of light seems to be reflected directly to your flash, and therefore lost :/

convex mirror...

  • May 27, 2011
  • Dave

I am conterned about light lost, but using the diffussion dome seems to make the flash act as a bare bulb, and sends light in all directions, I have a 3" convex mirror, that I also put on the back of the mulberry, but was not impressed with the results, it created more of a hot spot in the center back of the dish.  I will post some pictures in my flicker of using my dish with and with out the diffusion dome, with and with out the mirror and you can judge which is better.  A 5" convex might be better.  Even if you plan on using a convex you will need something to mount it to, The mulberry's existing screw holes are to close for the 3" convex mirror to fit. I had to cut out some notches on each side to make it fit.  A different center plate might work better.

I've got the same lamp and

I've got the same lamp and produce a beautydish almost with the same technique!

It was in the bargain corner too, very happy with the results!

http://www.flickr.com/photos/davo84/5218314288/in/photostream

Looks like this lamp was screaming "DIY!!!"

  • May 25, 2011
  • Munky

I'm in the slow process of creating my own beauty light with this very shade... The lamp I'm using was also in the bargain bin (I think I paid from $3-6... can't recall exactly)... The difference for me is that I cut off the end most domed section and replaced it with plate aluminum (cut into a disk) and then JB Welded to the shade... White primer is on the inside (though this may change) and truck-bed liner sprayed on the outside...

Though it's not quite DIY - I'm also giving double duty to a bracket I acquired with a softbox set I recently purchased on the 'Bay... Figured this should give it a nice pro-look... I'm still thinking of what my final decision will be as to reflect/diffuse the light throughout the dish...

Foto is swedish for Photo

  • May 26, 2011
  • Roar Engen

Just thought I'd mention that with IKEA being swedish, it was kind of funny that the product name Foto actually is swedish for photo. I also noticed that they have a black version of it in case you don't wanna spend time painting the outside of it :-)

Very nice idea, I feel that a trip to IKEA is comming up again soon....

As it happens, there is a lot

  • May 27, 2011
  • Dave

As it happens, there is a lot of swedish (and norse & danish) in the english language being as the vikings & saxons were constantly invading the England and norther France. so there are many similar words, infact Thursday comes from the norse for Thor's Day the god of thunder.

Yah I know about the black Foto at Ikea, but when I got mine it was only in the 20" and I thought it might be to big.  had it been in the 15" I would have gotten it.

Very inspiring

  • May 28, 2011
  • Justin

Very inspiring article!

Living in Sweden and with an IKEA just around the corner I'm definately making myself one of these. BUT, for some reason there just doesn't seem to be any blank cover plates ("täcklock/doslock" in Swedish) made out of metal to buy here! The only ones that I can find are made out of plastic and approx 3" in diam.
I'm curious if the plastic one will be sufficient or if it will let light through. Any suggestions?

Disk size.

  • May 29, 2011
  • Dave

for this build, I think that the 3" might be two small.  the purpose of the disk is to block any direct flash from seeing the subject.  5" or 6" would be better.  You can cut your own 5" disk out of any rigid material (a silver CD with tape over the center, a sheet of aluminum, etc...)  if you do want to use a 3" disk you will need to bring it closer to the back, making the apparent size of the disk larger relative the the flash head.

Flash mount?

  • May 30, 2011
  • John Swarce

Thanks for the great idea!

What are you using to mount the flash to the L-shaped bracket?  I didn't see any mention of this in the instructions.   

My local IKEA only has the 20" lights in stock.  Do you think this will be too big to use?

--John

The flash mount is clear in

  • May 31, 2011
  • Dave

The flash mount is clear in the pictures, no need to mention it, supply your own.  The 20" should work fine, my template should also fit the 20" if you do use the 20" and this bracket please post the results.

Flash mount

  • July 25, 2011
  • Pete O'Hara

I see the mount in the diagram but have been googling and can't seem to find where to get one or even what the proper name is for it. Can someone point me in the right direction?

Thanks,

Pete

Cold Shoe, flash mount

  • July 26, 2011
  • Dave

This is what I am currently using:

http://www.adorama.com/LTFRIO.html

This is what is in the pictures:

http://www.mpex.com/browse.cfm/4,4148.html

but any cold shoe will do.

Dish

  • December 5, 2011
  • JTW Jr

I used the same dimensions for all the brackets on a 20" IKEA dish and it worked great. I did move the diffuser disk in to 3" as I could only find a 4" cover

white or silver cover plate?

Thanks Dave for this wonderful project! I've just a question: I've a cover plate totally mirrored (inox steel), the external side of this must to be in white color or I can leave it in its natural reflective steel? Thank you very much.

Post new comment

The content of this field is kept private and will not be shown publicly.
CAPTCHA
This question is for testing whether you are a human visitor and to prevent automated spam submissions. It is not case sensitive
13 + 6 =
Solve this simple math problem and enter the result. E.g. for 1+3, enter 4.