


How to use displacement mapping for texture wrapping and fake tatoos
Oct 30, 2016
Joseph Parry
Joseph Parry is a Commercial and Editorial photographer based in the UK that provides cinematic photography and ounces of humour. Follow him on Instagram for stories and kick ass imagery.
Share:
 Halloween is TOMORROW BABY!!!! My favourite time of year because it’s the only time I can delve into just how messed up I am and get away with it *evil laughter* today I’m going to be showing you how to “wrap” your text and textures around your image based on it’s depth (highlights and shadows).
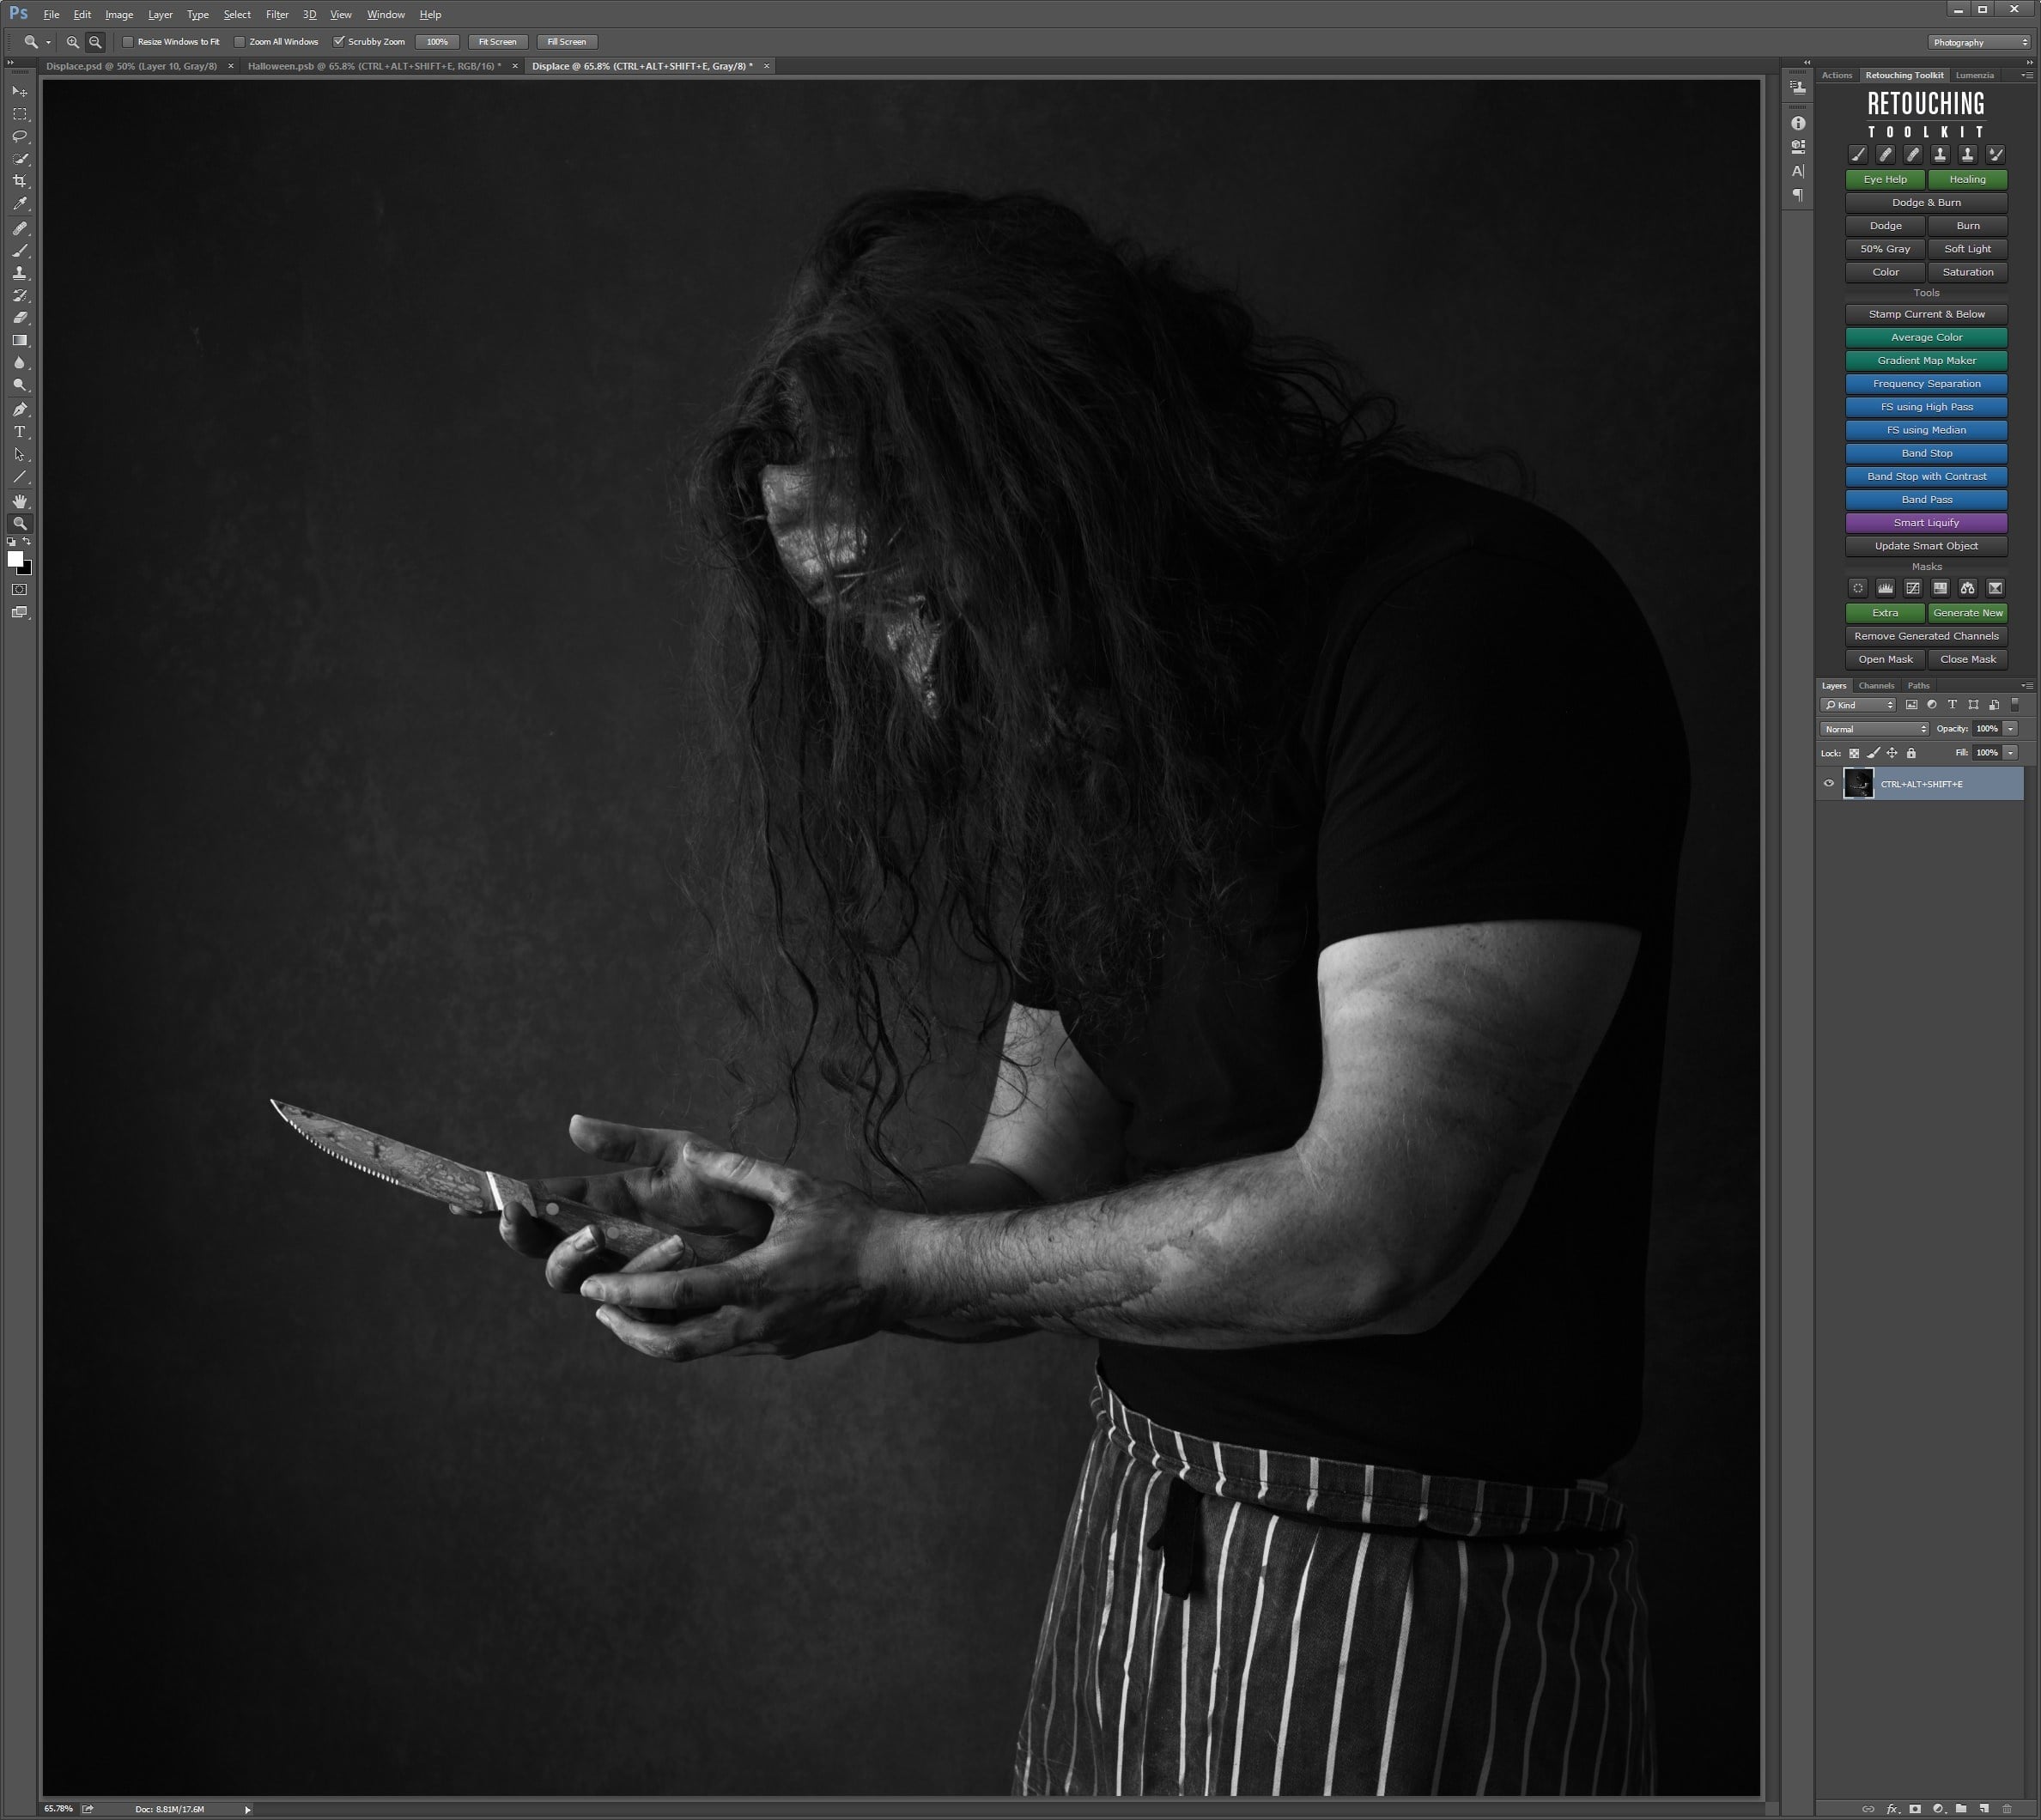
Start with your base:

Creating the displacement map:
First things first, “CTRL+ALT+SHIFT+E” on your top layer to stamp everything visible.
Now go to “Image>Duplicate” and duplicate your image (make sure it’s .psd). If it’s a huge file at this stage (.psb) you’ll need to duplicate the .psb, delete everything and then re-save it as a .pdf).

Now on your new file delete every layer except your most recent stamp layer.
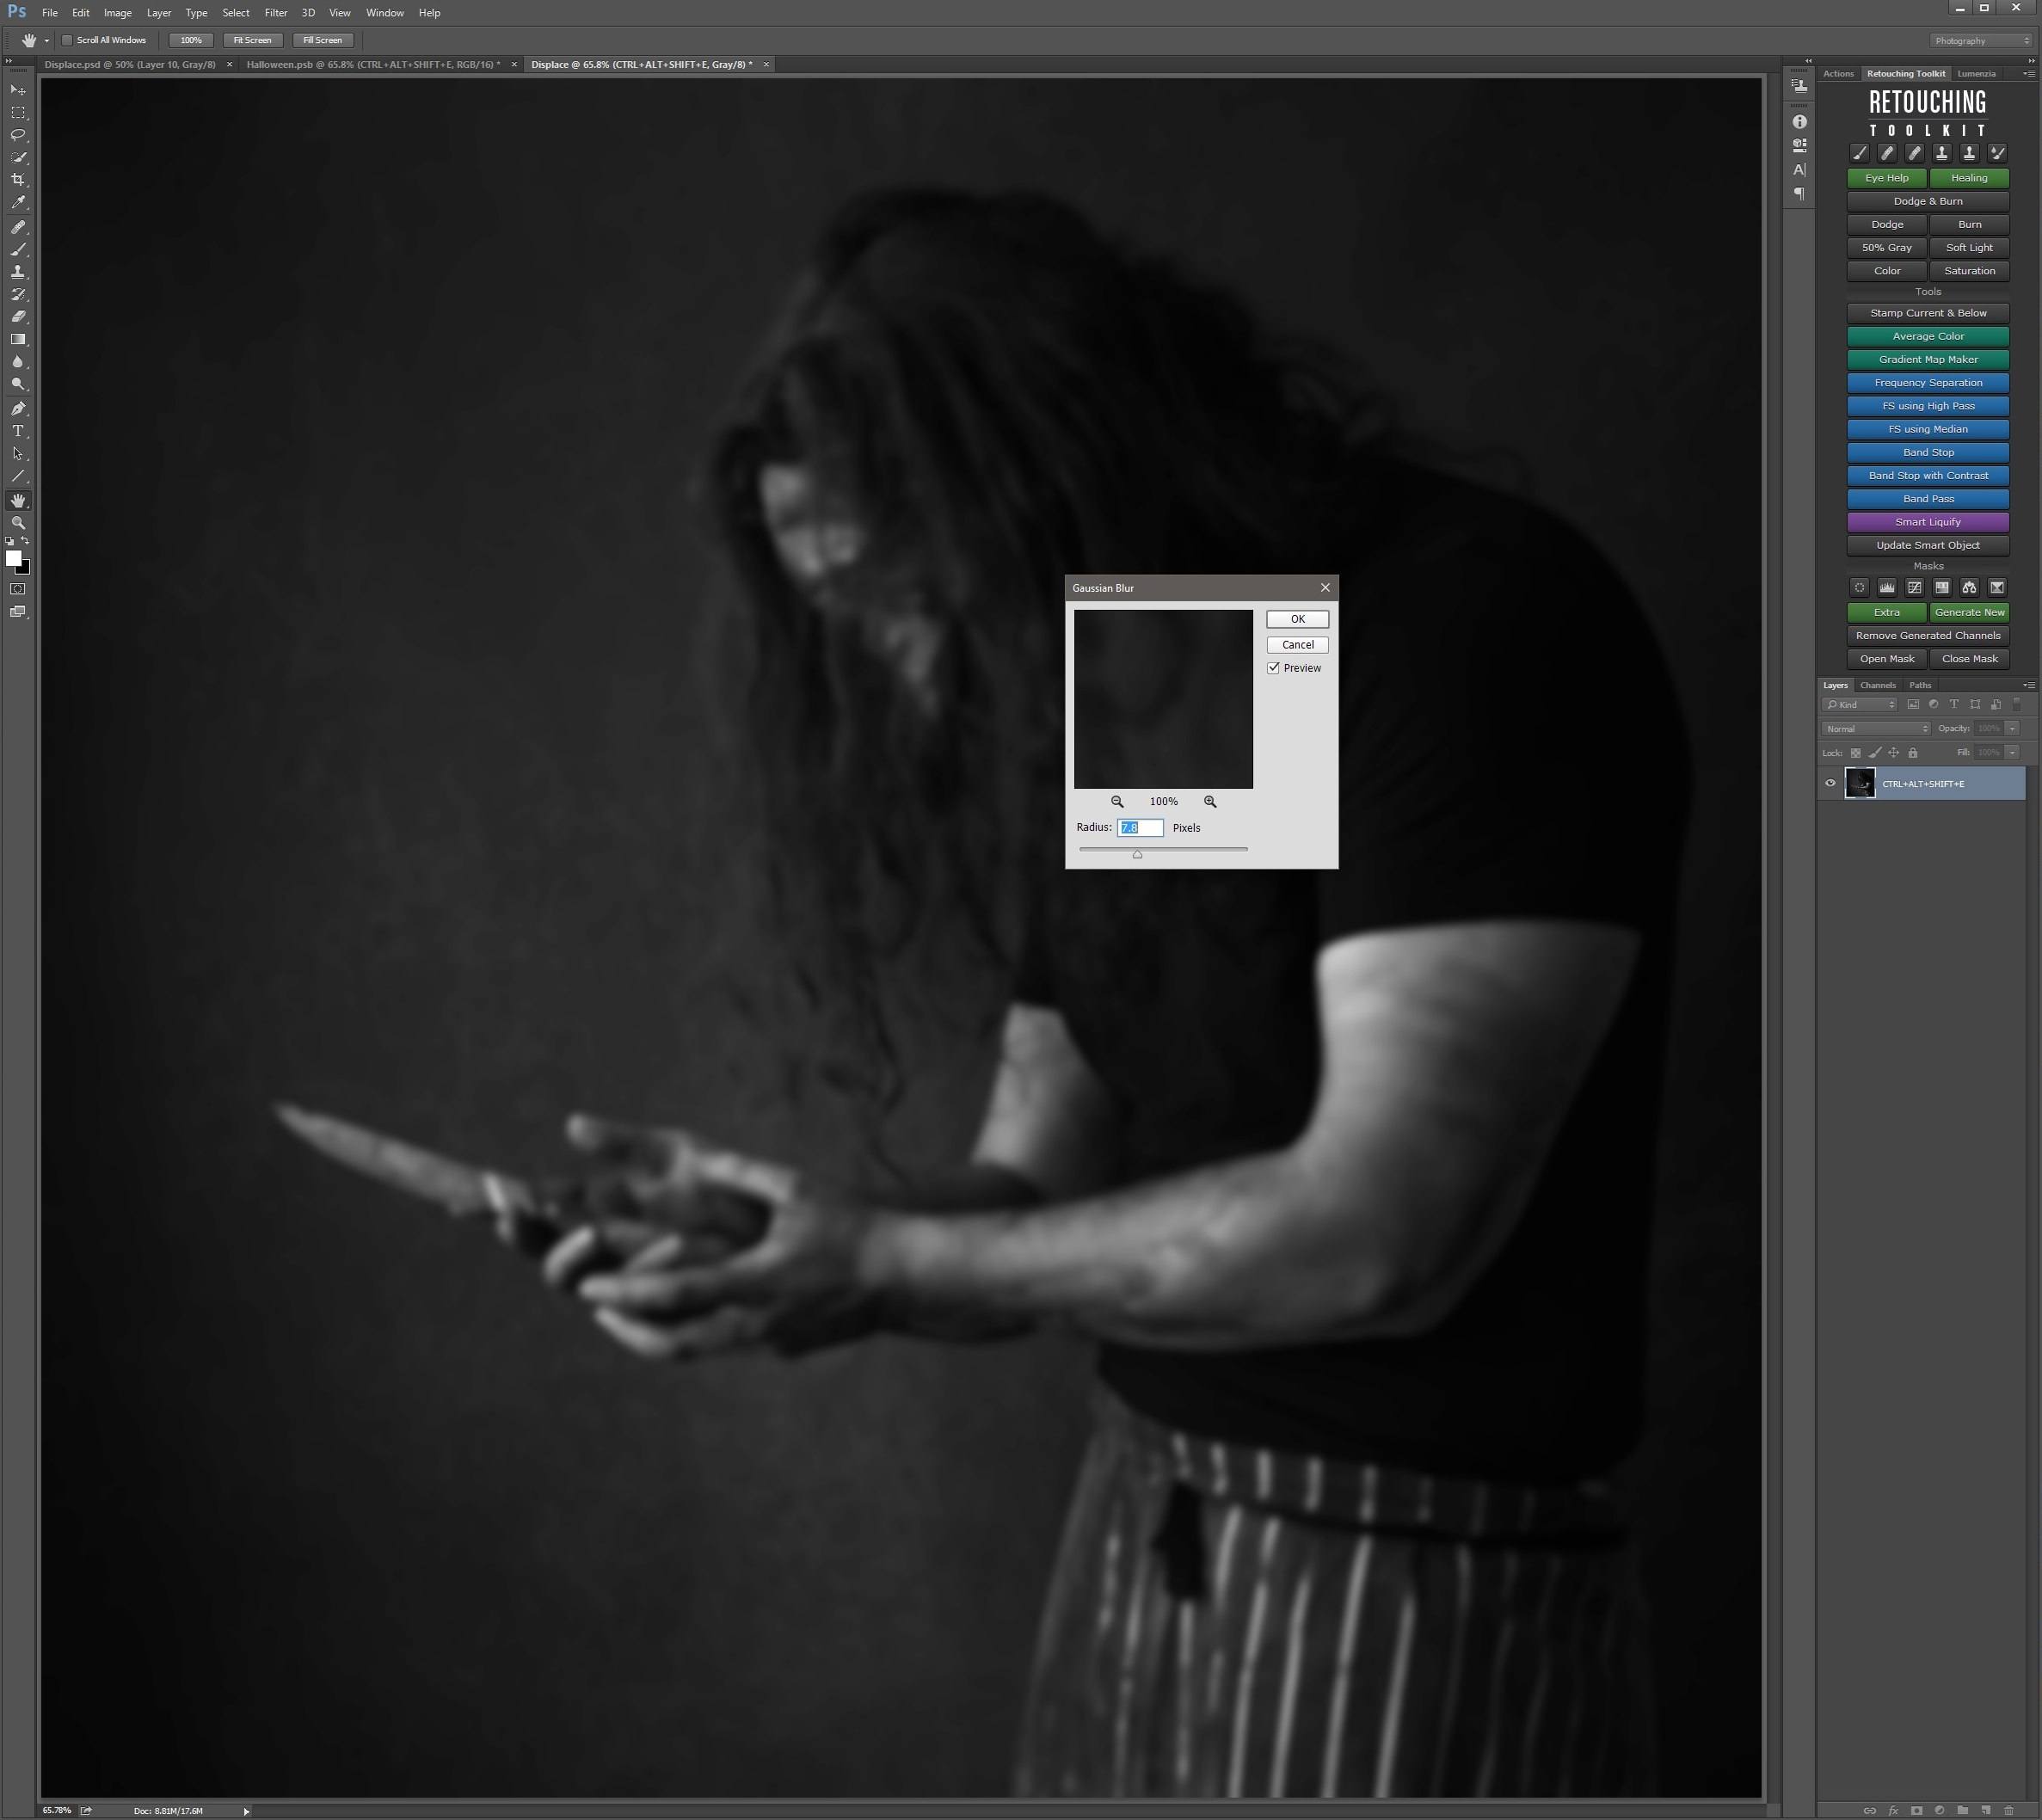
 Go to “Image>Mode” and change it to “8bit” (if it isn’t already) and also “Greyscale”. These are both a requirement for the displacement map to work correctly.
 Go to “Filter>Noise>Median” and select a number that removes the detail while retaining the edges (should look like a Max Payne comic book). For me, 8 worked well!
 Now “Blur>Gaussian Blur” and select a number that smooths out the light/dark transitions, again, somewhere around “8” worked well for me.
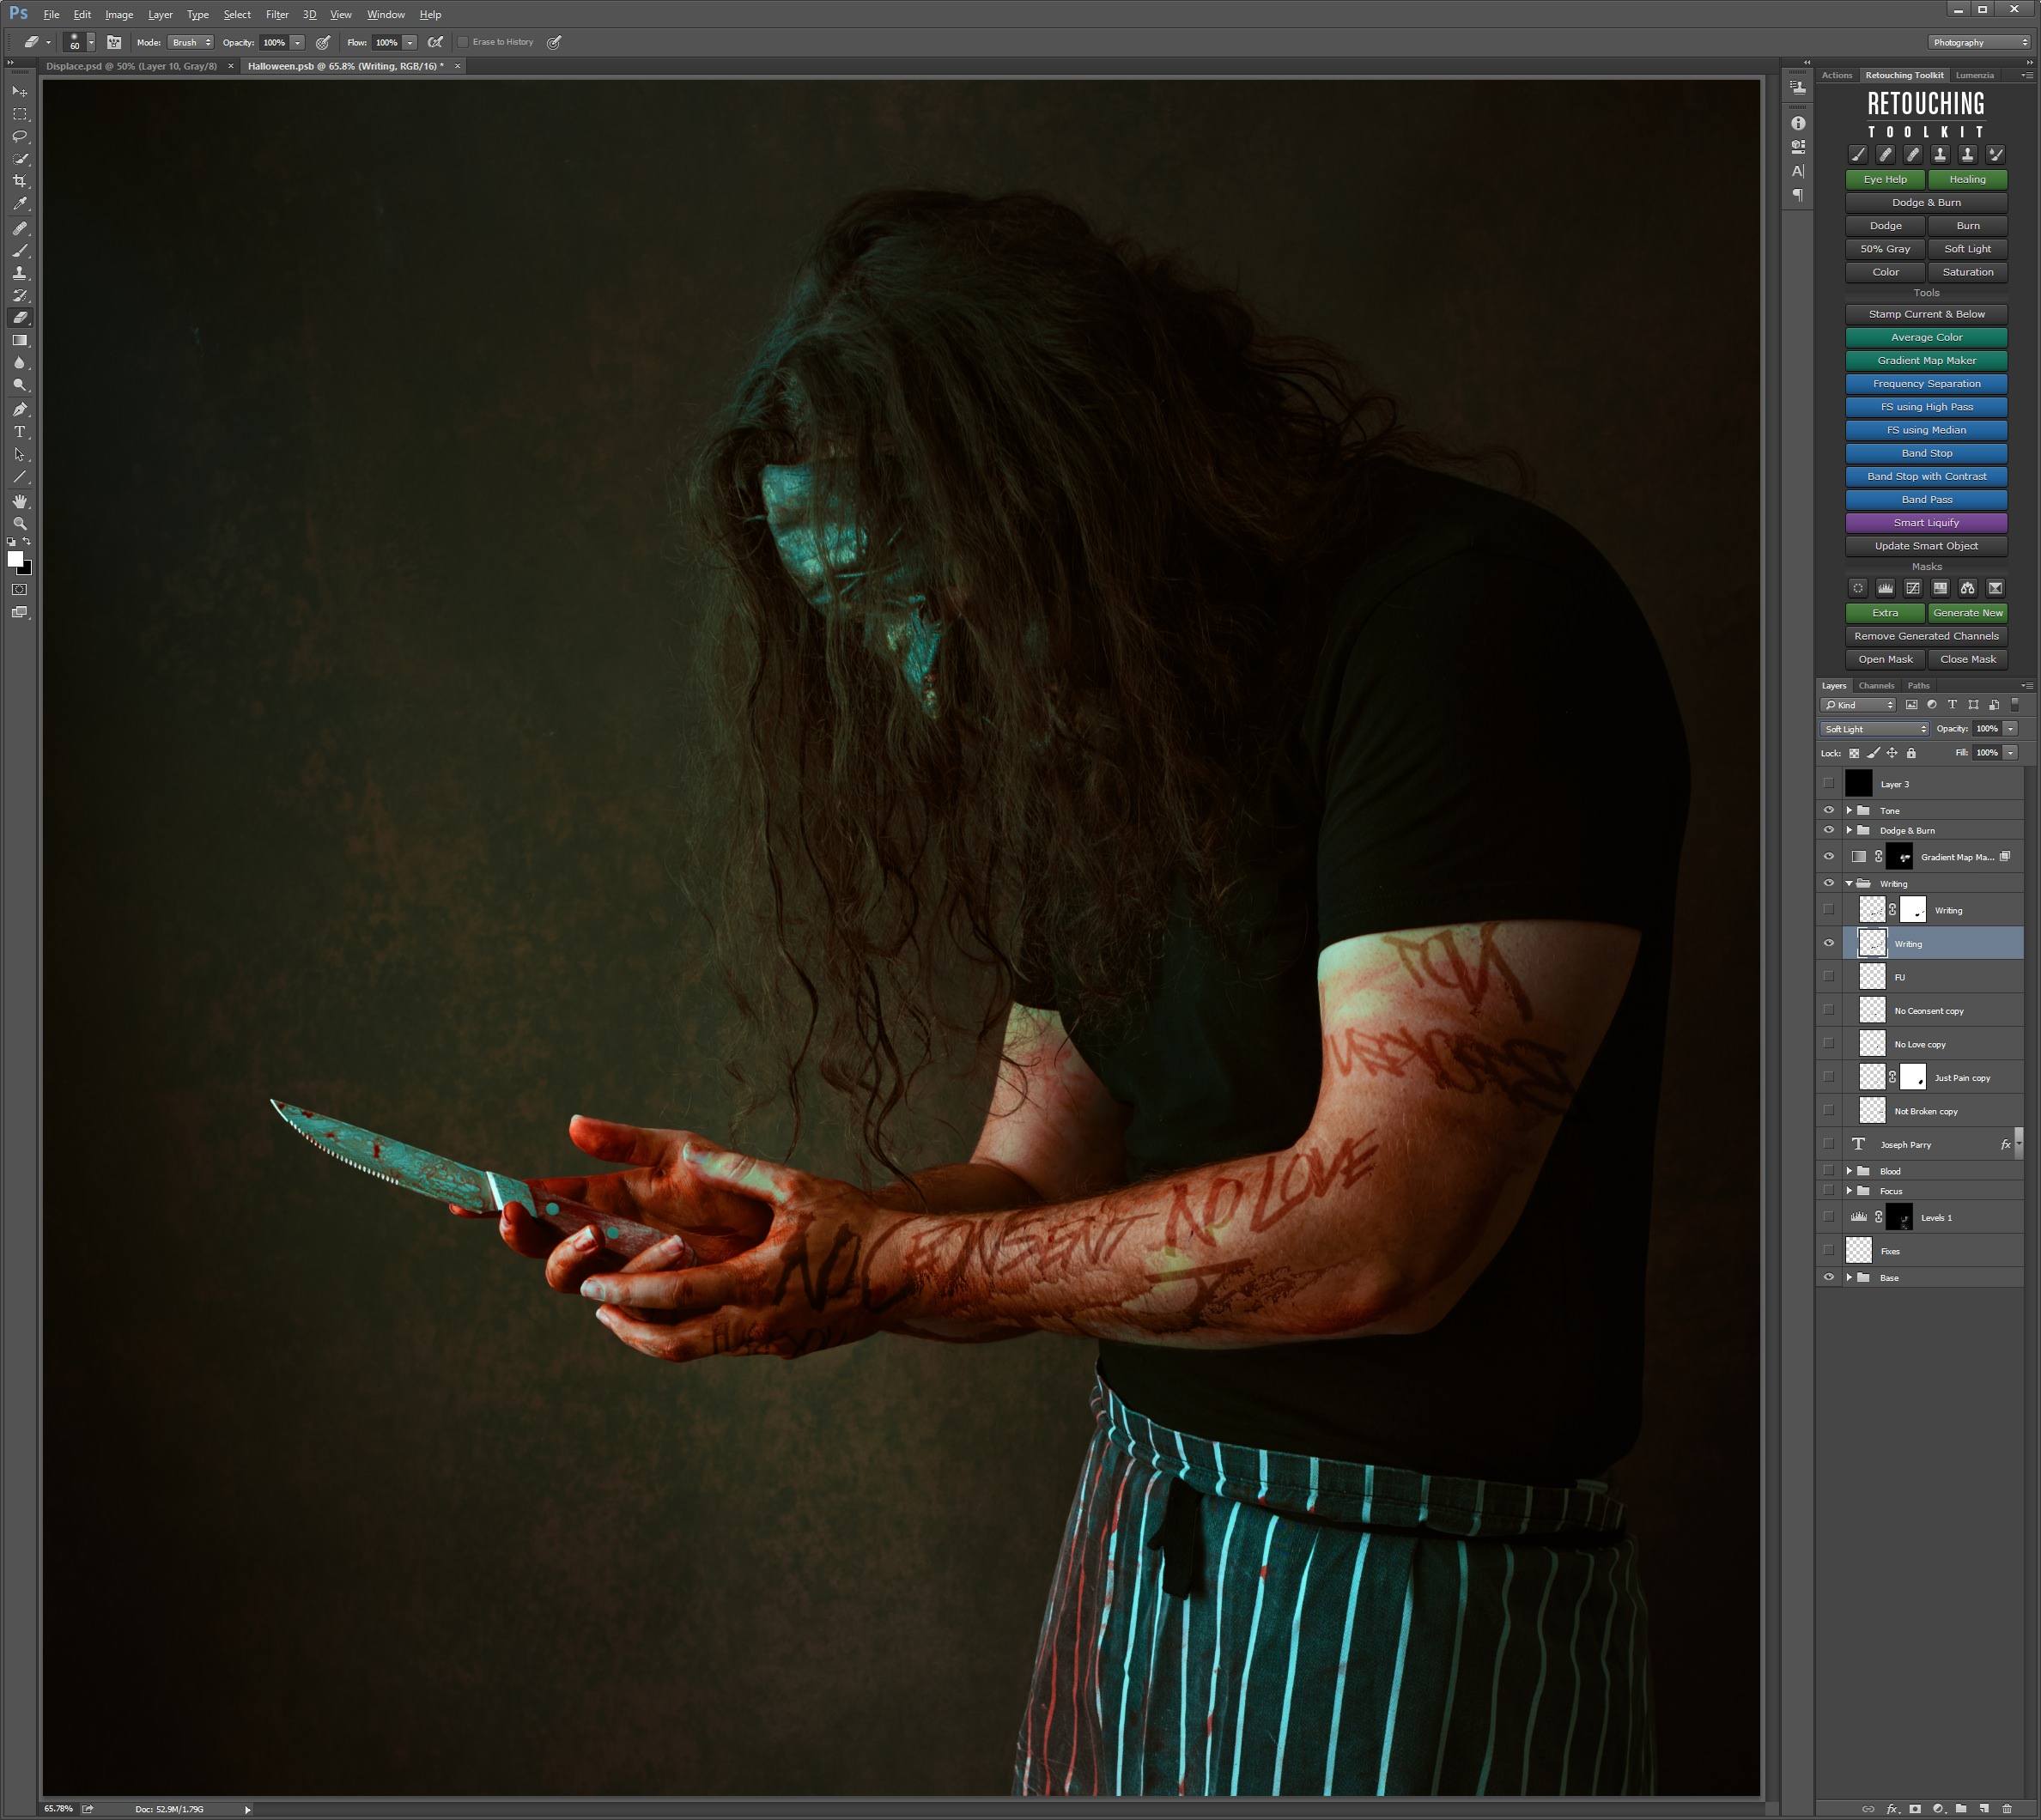
 Add your text and rasterize it so that you can edit it: (duplicate the text layer with “CTRL+J” and then select both text layers and merge them with “CTRL+E”).
 Now go to “Filter>Distort>Displace” and select the “Greyscale .pdf” we made earlier.
 Here’s a before and after of the text added and then displaced via mapping from our Greyscale file.


Make it more realistic by setting the overlay of the text layer to “Softlight”.
 Final before and after:


HAPPY HALLOWEEN GUYS!!! I’m off to climb the Brecon Beacons and livestream later today! Come check it out: Facebook.
All textures (Spray, Goo) from the incredible Raw.Exchange website!

Joseph Parry
Joseph Parry is a Commercial and Editorial photographer based in the UK that provides cinematic photography and ounces of humour. Follow him on Instagram for stories and kick ass imagery.


Join the Discussion
DIYP Comment Policy
Be nice, be on-topic, no personal information or flames.
2 responses to “How to use displacement mapping for texture wrapping and fake tatoos”
whats that “retouching” shortcut panel on the right hand side?
It’s Conny Wallström’s – http://retouchingtools.com