


This photographer creates wet plate ambrotypes with a 16×20 camera he built himself
Jan 23, 2019
Dunja Đuđić
Dunja Djudjic is a multi-talented artist based in Novi Sad, Serbia. With 15 years of experience as a photographer, she specializes in capturing the beauty of nature, travel, concerts, and fine art. In addition to her photography, Dunja also expresses her creativity through writing, embroidery, and jewelry making.
Share:

Photographer Giles Clement has performed some interesting experiments, such as mounting a large format camera to a drone. He also made his own 16×20 camera, and it all started as a sketch on a bar napkin. He uses his DIY camera to create stunning wet plate ambrotypes, and he shared with DIYP how he got to build this camera himself.
Giles had an idea which he first sketched on a bar napkin. Then, he turned that sketch into the first version of his DIY camera, using $172 worth of Home Depot lumber, some scrap plastic and several cases of beer over the course of one day. “That camera worked well for about a year and a half before I thought I should probably make something a little more professional looking if I was going to continue photographing people for money with it,” Giles tells DIYP.
The second version also began as a doodle on some paper. His first intention was to have a friend take his sketches and draw them into cad so he could get the parts machined. However, this turned into Giles himself getting cad and learning how to design as he went. So, his new camera went from sketch to functioning in a little less than six weeks.
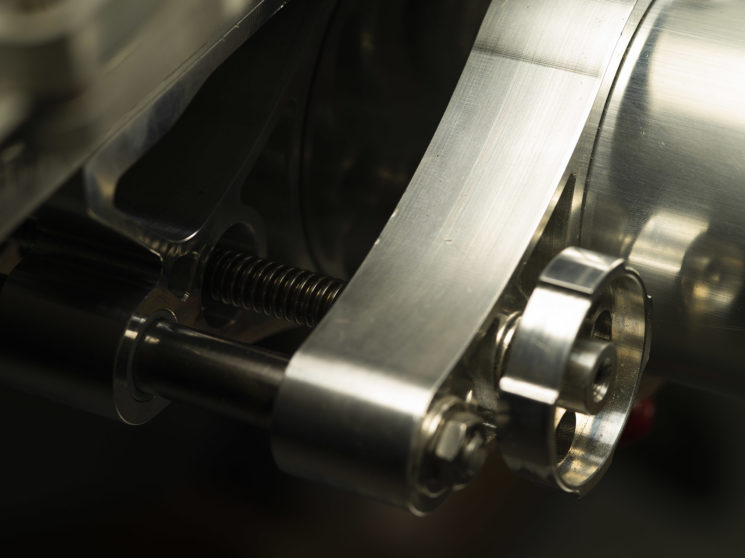
“It’s a monorail design with front and rear tilts and a rear standard screw operated focus mechanism. The ground glass moves up and back via four gas spring arms to allow for the film back to be inserted. I designed the film back to be side loading since, when shooting a portrait, the camera is pretty high up making top loading a pain. The camera is four feet long with both rails connected and it weighs in at right around 34lbs.
The camera is mostly made of aluminum and carbon fiber and the majority of it is water jet cut flat stock screwed and epoxied together. I was trying to keep the milled parts to an absolute minimum since CNC time is horrifically expensive. The bellows were made by CameraBellows.co.uk, a company which has been manufacturing bellows since the 1800’s. ”

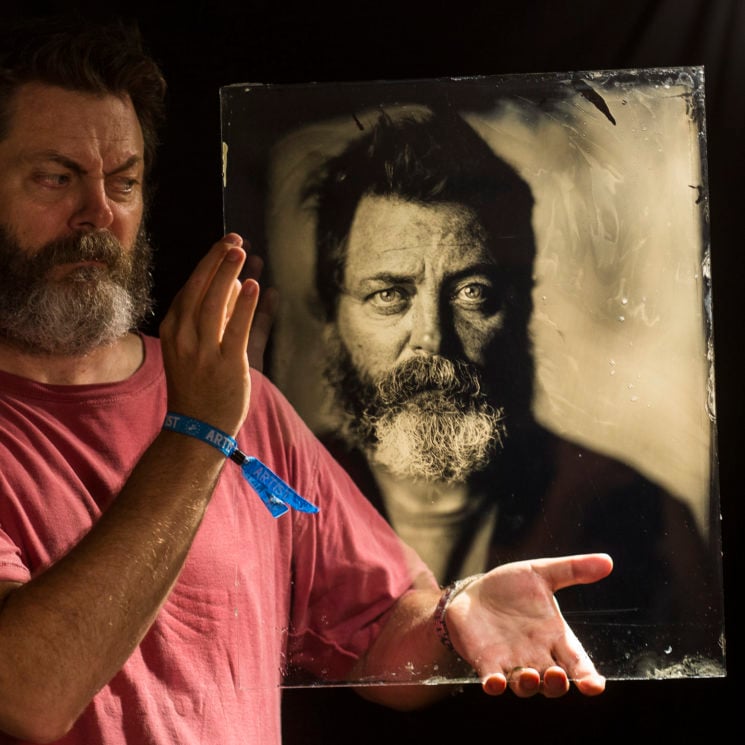
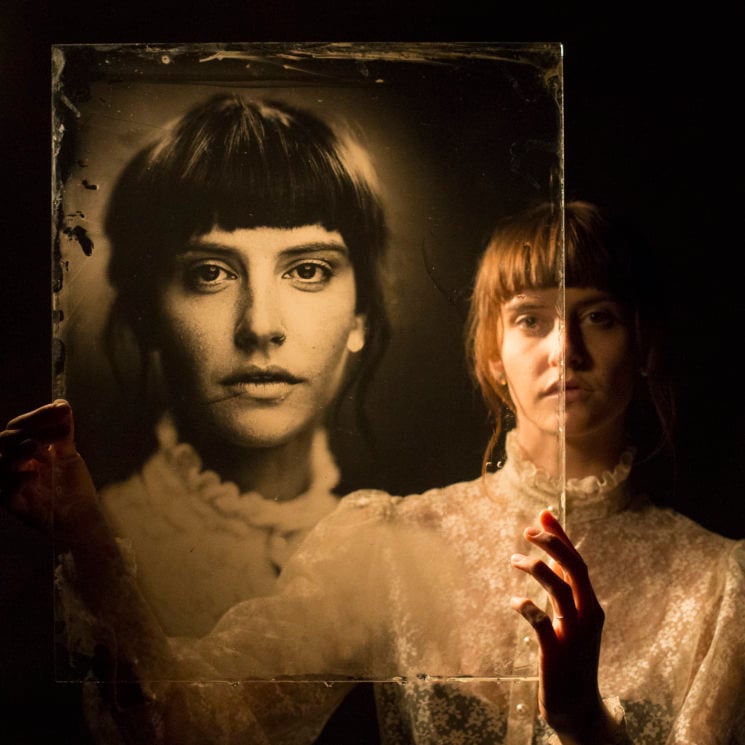
Giles uses the camera mostly to shoot glass ambrotypes. However, he adds that it could just as easily shoot film or paper. His primary goal with the camera was to make it as easy to use as his 4×5 Sinars, but he also wanted it to be beautiful and light. Although there were other, cheaper options for material and design, he says that ultimately creating of the camera how he wanted it to look was something he really enjoyed.
DIYP asked Giles about the lenses he uses with this DIY camera he made. He tells us that he’s always looking for new lenses, but right now he primarily uses a Goerz Dogmar 500mm f/4.5 ,which was made in 1918. In addition, he also has a super wide 14” f/16 and a 27” f/8 Anastigmat.
“I’d like to find a bit of a longer fast lens, or if I can’t find one, have one built. I’ll probably try to pay off the camera credit card first though.”
Seeing Giles’ projects so far, I’m looking forward to seeing what he will come up with next. And I hope that camera credit card will be paid off soon. : )
You can see more photos of the camera below, as well as photos taken with it. Make sure to check out Giles’ work on his website and follow him on Instagram, Facebook, and his YouTube channel.


Dunja Đuđić
Dunja Djudjic is a multi-talented artist based in Novi Sad, Serbia. With 15 years of experience as a photographer, she specializes in capturing the beauty of nature, travel, concerts, and fine art. In addition to her photography, Dunja also expresses her creativity through writing, embroidery, and jewelry making.
Related Posts
 Photographer creates coronavirus stop motion animation using large format wet plate photography
 I built a Frankenstein large format wet plate camera from scratch for photographing ghosts
 This photographer turned a house into a camera to shoot the world’s largest wet plate photograph
 Prepare, shoot and develop wet plate collodion through the eyes of the photographer
Join the Discussion
DIYP Comment Policy
Be nice, be on-topic, no personal information or flames.
6 responses to “This photographer creates wet plate ambrotypes with a 16×20 camera he built himself”
I am working on a similar 8×10 project. I am currently making a CNC, that I will use to fabricate the camera.
awesome stuff worth the (time) investment
incredible work! awesome results
Really great work, cheers!
I find the images mesmerising, fantastic and kind of you to share them. Thank you.
this is the type of photography that if done in digital will never be the same… there is something sooo amazing about that process and the end result is absolutely stunning … thank you for sharing.