


The Godox AD400 Pro is the best value for money strobe Godox has ever made
Oct 1, 2018
John Aldred
John Aldred is a photographer with over 25 years of experience in the portrait and commercial worlds. He is based in Scotland and has been an early adopter – and occasional beta tester – of almost every digital imaging technology in that time. As well as his creative visual work, John uses 3D printing, electronics and programming to create his own photography and filmmaking tools and consults for a number of brands across the industry.
Share:

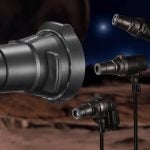
The Godox AD400 Pro is the newest portable all-in-one strobe from Godox. It’s basically a 400Ws version of the AD600 Pro. It has a few design differences and a little less power, but basically an identical feature set.
I’ve been playing with the AD400 Pro over the last couple of weeks to see how it handles and how it compares to some of the other portable strobes in the Godox product range.
First Impressions
I’d already received a question or two about the AD400 Pro before it had even arrived. I also had a couple of questions of my own that I wouldn’t know the answers to until it got here.
I received it along with the XPro-P trigger for Pentax (review here), and the round head for the AD200 Pro. So, I decided to answer the questions I’d been asked, along with my own, in a video and went over some of my first impressions.
In summary, though, it feels like a good solid light, and it seems to have all the features that were added to the AD600 Pro in a recent firmware.
I love that the AD400 Pro comes in its own case, even if it is precut foam. Many previous models of Godox light didn’t, including the AD600 Pro, unless you bought it from Adorama. The AD200 also comes in a similar, but obviously smaller, case, also with precut foam. But I do wish with this one, that there wasn’t so much wasted space inside it.
Once you’ve attached the bulb, you’ve got a bulb-shaped hole that you can’t really do anything with (unless you want to carry a spare), but at least you can fit a couple of XPro triggers in the slot that held the Bowens adapter.

Oh yes, that’s right, it comes with a Bowens adapter. Unlike the AD600 Pro, the AD400 Pro uses a smaller Godox mount. But it does come with an adapter allowing you to attach larger Bowens mount modifiers. It does keep the same light stand mount as the AD600 Pro, though. No more clicky clicky.

Attaching the Bowens adapter was quick and easy, and just requires use of the supplied allen keys. The foam case insert allows you to store the strobe with the adapter attached. The supplied reflector, too, has a removable part at the back, allowing you to attach it to the strobe even with the Bowens mount attached. This can remain attached inside the case, too.
You can see much of my initial test thoughts in the video above, but after leaving the battery to charge overnight, the first thing I noticed that the power button had moved.
On the AD600 Pro, the power button is underneath the unit, next to where the battery connects. One long press turns the unit on. On the AD400 Pro, the button has moved around to the side next to the LCD panel and the rest of the buttons. Here, pressing the button turns on the strobe, but it’s in a “locked” mode until you spin the dial and “unlock” it.

I quickly went through the settings options to see if there was anything new/different/missing compared to the AD600 Pro. Everything is essentially the same, except for an extra option. The relocation of the power button to the side replaces the button on the AD600 Pro to turn confirmation beeps on and off. On the AD400 Pro, it’s now a menu option.

As I mentioned, the AD400 Pro essentially offers the same features as the AD600 Pro with the new firmware, but with a little less power. One of the features recently added to the AD600 Pro in this firmware was 1/10th stop adjustment options.
Godox has confirmed to me that tenth stop adjustments will remain a “Pro” model only feature, so it will not be coming to the AD200, AD360II nor the Godox range of speedlights. Of course, they hadn’t told us about the new round head speedlight then. Godox hasn’t said yet whether or not that one will offer 1/10th stop adjustments.

But, it works on the AD400 Pro in the same way as it does on the AD600 Pro. That is to say, they both lack the ability to switch between 1/10th and 1/3rd stop adjustments. All of the Godox XPro triggers recently saw a firmware to also add 1/10th stop support, but you do have the option to switch to 1/3rd stop increments if you wish.
I would like to see this ability added to both the AD400 Pro and AD600 Pro strobes, too, for when dialling in power on the strobe itself. Not having this ability isn’t a dealbreaker, but it’s a handy time-saving option to have in certain circumstances.
I gave the AD400 Pro a quick test using the Godox XPro-N & X1T-N triggers, along with the Godox A1 and my ZenFone 5 and it accepted commands to change the power and fire from all of them with no problem – even at super close range, as long as the appropriate distance setting was set.

First real-world use
Many thanks to Paul and Lex for helping me out with this bit. There’s no video for it yet, though. That’ll be coming with the review for the Godox XPro-P trigger for Pentax. The video for this is now live over on the Godox XPro-P review.
To put the AD400 Pro through its paces, we took it out onto the streets of Glasgow with a 65cm softbox, and the new Godox XPro-P for Pentax to test that with a Pentax K-1 while we were at it. We also took the XPro-N to use with the Nikon D800 and the XPro-S to use on the Sony A7II.

When we initially arrived in the city, we went into a small park to do some initial tests with the AD400 Pro and to check that everything was working as intended with all three systems.
Primarily, the plan for the day was to photograph strangers on the street to see how well the Pentax compatibility worked. Specifically, this meant TTL and High Speed Sync. I also wanted to know how a Pentax user who’s struggled with limited flash options in the past reacted to using it.
Needless to say, his response to using the XPro was pretty much the same as the first time I used the XPro last year on my Nikons. But, I digress…
All three of us have shot street portraits before, so we did some tests in the park to come up with a flash setting that should work for the way all three of us shoot without the three triggers conflicting with each other.

We also wanted to spend some time with Lex to help him become familiar with the XPro trigger for use with his Pentax.
Ultimately, we decided that TTL was the way to go with all three cameras, which was something of a rediscovery for me. I haven’t had the best experiences with TTL on Nikon. D-TTL on the D100 was awful. The iTTL system that replaced it has always just felt too inconsistent for me. But with the AD400 Pro, it seems to work rather well – at least it did that day using the D800.

So off we set into the streets of Glasgow. Lex did much of the shooting during the day, while Paul held the light and I shot video. Lex has allowed us to share some of his images here.

The great (and challenging) thing about doing street portraits with flash is that you never really know what the ambient lighting conditions are going to be – especially in Scotland. The light can change every five minutes from glorious sunshine to complete cloud cover or near blackness in narrow streets and walkways.
But regardless of whether we were shooting within sync or at 1/1000th of a second, the AD400 Pro never missed a beat. Of course, most of us wouldn’t expect it to, but this is possibly the first time that anybody has tried it on a Pentax camera outside of the Godox test labs.
On all three Nikon, Sony and Pentax cameras, it fired every single time, and the TTL exposures were pretty close to where we’d have put the exposure if we were doing it manually.
Normally when I shoot TTL, it’s when I’m forced to bring my camera along to family events. I’ll set my camera to aperture priority with -2EV compensation to underexpose the ambient and pop an SB-900 in the hotshoe bounced off the ceiling set to +2EV to bring the subject up where I want it.
Partway through the day, we went to take a break in Glasgow Green park. So I tested my usual TTL method. Aperture priority with -2EV on the camera, and +2EV on the flash in TTL mode.
You can see in these two images the difference between the ambient exposure without flash, and the TTL exposure with the AD400 Pro contributing to the shot inside the 65cm softbox.

The above image also serves as a warning to keep an eye on your softbox placement when photographing people wearing glasses. I didn’t worry about it here, as it was simply a test to see how well the TTL exposure worked, but it’s definitely something to watch out for.
The AD400 Pro had already convinced me to give TTL another chance at some point in the future, but walking back through town, Lex managed to get this one of a painter working on the street.

The flash for the above shot was being held by Paul, above a crowd about 6-8 people deep. It easily managed to balance the subject in shade with the more bright natural lighting of the environment in the background.
As the day started to draw to a close, we headed to Glasgow’s Chinatown to see what potentially interesting spots we could find to photograph Lex once the street lights started to come on.
This was when I discovered how useful the AD400 Pro’s modelling light could potentially be for video. It has the same power of modelling light found inside the AD600 Pro, and we had it inside a 4ft parabolic softbox at the time, but we still managed to get a decent exposure for some video at 1/50th, f/8 at ISO800.

I was pretty close to it, but to be fair, it’s a 4ft octabox. With a smaller box, an aperture of, say f/4, I could’ve gotten quite a bit more distance and possibly been able to lower the ISO. ISO800 isn’t unreasonable for video, though.
Edit: I probably should’ve put the power & more specific details in this bit (thanks for the reminder, Ulysses).
- AD400 Pro: 30W / 4800K / TLIC 93
- AD600 Pro: 38W / 4800K / TLIC 93
Indoors, the fan that comes on when you enable the modelling light at any kind of reasonable power can be picked up by microphones – certainly the microphones I typically use. But outdoors, drowned out by a little environment noise, you can’t hear them at all.
Anyway, as mentioned, the AD400 Pro was inside a 48″ parabolic softbox, and we also pulled out an AD200 for this with the Fresnel head to act as a rim light. The street we shot in had a row of lights high up on the wall behind Lex, so we used the AD200 to help reinforce a rim light from that general direction.

Even shooting wide open at f/1.4 it wasn’t difficult to keep the power of the light low enough to not blow out the subject – a common argument against powerful strobes, in favour of speedlights.
But being able to drop the light down to 1/256 of full power, especially inside such a large modifier, it isn’t that big of a problem. Paul only had to drop down to 1/32 power here with the softbox about 2 metres away from the subject.

Despite three of us shooting the single strobe that day, that was turned on the entire time, I didn’t have to dip into my Novoo to recharge the battery at all. At the end of the day it was still showing 3 out of 4 lights on the charge indicator

Thoughts…
When we initially set out that day to test the XPro-P trigger, we hadn’t planned to have the AD400 Pro audition for us at the same time. We had originally hoped to use the AD200, but we ended up not doing. The reasons why we didn’t use the AD200 will be explained in the XPro-P review in a few days, but it forced us to use the AD400 Pro.
When I first received the AD400 Pro, I expected it to be a little smaller than it actually is. It’s still smaller than the AD600 Pro, though, and a lot more manageable. Despite being larger than the AD200, though, and quite a bit heavier at 2,441g (with the battery & Bowens adapter) vs the AD200’s 1,382g (with the bare bulb head & Bowens bracket) it wasn’t really more of a hassle to carry around all day.
For completeness, the AD600 Pro with battery and without the reflector weighs 3,232g. The AD360II head, PB960 battery pack and S-Fit bracket comes in at 1,890g.
But the AD400 Pro proved to us that it could handle the vast majority of situations any of us would find ourselves in for both our personal and paid photography work.
The colour appeared consistent throughout the power levels – at least, certainly more consistent than the AD200 and AD360II – and the recycle times were very short, even when shooting high speed sync.
On speaking with Paul, he felt that it was a similar sort of power output to his older Godox AD600BM. We put this down to the better bulb placement on the AD400 Pro.
This similarity in power seems about right to me. When I compared the AD600 Pro to the AD600BM a few months, I did see about a 1/2 to 2/3 of a stop increase on the AD600 Pro when using the same modifiers. And the AD400 Pro is about 1/2 to 2/3 of a stop less powerful than the AD600 Pro.
Pros
- It comes with a case! (The AD600 Pro doesn’t)
- The Bowens adapter is solid, can be left attached permanently, can still be used with the supplied reflector and all fits inside the case complete
- Very fast recycle times
- Consistent colour at all power levels
- Consistent TTL exposures from shot to shot (I was surprised by this, given my own experiences with TTL flash)
- Smaller and lighter than the AD600 Pro but still provides plenty of power
- 1/10th stop power adjustments all the way down to 1/256th
- New power button sequence prevents accidentally turning it on and wasting power (or burning anything) while travelling to or from a shoot
Cons
- The foam in the bag could be better designed to be able to make better use of the empty space after you remove the bulb & Bowens adapter and fit them onto the strobe
- No 1/3 stop power adjustment option on the strobe itself (but you can still do 1/3 stop increments from the trigger)
- Godox doesn’t support Sigma cameras
Ok, so maybe Paul asked me to add that last one. I’m curious to see what will happen, actually, with 3rd party flash support with Sigma’s new Panasonic/Leica alliance.
If Sigma adopts Panasonic’s flash system, then it means next year’s full frame Foveon camera should already have full support from Godox. If not, Paul will just have to keep hoping that Godox one day supports Sigma’s flash system.
Conclusion
Is the AD400 Pro worth it? I have to say yes. When you consider that the power is roughly equivalent to the earlier model AD600 Manual and AD600 TTL strobes, the price makes it a very attractive option.
- Godox AD600 Manual – $549 (B&H)
- Godox AD400 Pro – $649 (B&H)
- Godox AD600 TTL – $749 (B&H)
Compared to the AD600 TTL, it’s a no-brainer, really. Save $100, get similar light output, but faster recycle times, more consistent colour throughout the power range and 1/10th stop adjustments. If you’re thinking about the AD600 Manual, I still think it’s worth paying the extra $100 for those features alone, even if you don’t need TTL.
It might even be worth getting over the AD600 Pro ($899) if you don’t need that bit of a bump in power. Of course, that extra power does come with a bigger battery, so if you’re running the more powerful strobe at a lower power settings it will, in theory, last longer in the field – not that the AD400 Pro seems to have any battery issues for me thus far.
And if you’re starting from scratch and want to pick up 3 or 4, it’s a big price and weight saving. If I were starting over, I’d definitely be going for AD400 Pro strobes over AD600 Pro.
Is it worth getting over the AD360II ($499) or the AD200 ($299)? Well, that’s largely going to boil down to your own needs and how much weight you might want to carry around with you.
I have a pair of AD360IIs, and I’m not planning on getting rid of them any time soon to swap them out for more AD400 Pro units. If I were buying again now, though, the AD400 Pro might tempt me. The AD360II head, PB960 battery pack and S-Fit bracket comes in at 1,890g, but you are able to get a third of that weight lower down on the stand for a little more stability on location.
Against the AD200 it’s a little more tricky. It’s less than half the price for half the power. You lose the recycle time, 1/10th stop adjustments and colour consistency, but gain versatility due to the small size and weight. And you can always double them up with the AD-B2 head when you want 400Ws ($657 total)
I’m really hoping that Godox announces an AD200 Pro at some point in the near future to complete the “Pro” lineup and make this choice a little easier. Given the recent release of the H200R round head and EC200 extension head for the AD200, I think we’ll be waiting a while.
Overall, though, if you choose to get the AD400 Pro, I don’t think you’ll be disappointed.
Again, many thanks to Paul and Lex for helping out with this review. Be sure to check them both out on Instagram.
The Godox AD400 Pro is available to buy now for $649 (buy at B&H) in the USA or for £607.99 from Pixapro in the UK.
Update: I’ve had a few people asking me about size & power comparisons to a pair of Godox AD200 lights with the AD-B2 head. Unfortunately, I only have one AD200 and no AD-B2 head, but I did grab a couple of quick side-by-side shots of the two so you can judge for yourself on the size question. The power question I cannot answer at the moment.


John Aldred
John Aldred is a photographer with over 25 years of experience in the portrait and commercial worlds. He is based in Scotland and has been an early adopter – and occasional beta tester – of almost every digital imaging technology in that time. As well as his creative visual work, John uses 3D printing, electronics and programming to create his own photography and filmmaking tools and consults for a number of brands across the industry.


Join the Discussion
DIYP Comment Policy
Be nice, be on-topic, no personal information or flames.
8 responses to “The Godox AD400 Pro is the best value for money strobe Godox has ever made”
I cant wait to get my hands on one of these. Either Godox or Pixapro. My only concern is: I currently have one case (Peli 1510) in which I carry my Lumix GH5, Lumix G9 camera bodies with 12-60 Leica lenses, a 100-300 lens plus two Godox AD200/Pixapro Pika200 flash heads. I have room for two more so: do I buy two AD200/ Pika200 units or will one of these occupy the same space? Having two more 200 units will still allow my space for the new 10-25mm lens and keep my down to one case
You’re not the only one to ask me how it compares to dual 200s. I’ve added a couple of photos to the post showing at least a size comparison to a single AD200.
Unfortunately, I don’t have the AD-B2 head (or a second AD200) to do power comparisons.
At least do a full power vs 1/2.
From what I’ve been told, a pair of AD200s in the AD-B2 head isn’t quite exactly 1 stop over a single AD200. So, it wouldn’t really be a fair comparison.
Great review and video.
does the handle for the 600 fit on backwards so it still fits in the bag.?
Unfortunately not. There’s a notch cut out of it to account for the power button, and even if it would, the light stand adapter’s in the way of being able to use it :(
would you mind taking a measuring tape to it i would like to know long it is with the bowens mount and protective cap on and how wide it is with everything on it as well….the little handle and the bowens mount…trying to see how many i can fit in my bag
hi from Italy… a question John, can the flash 400pro overcome the sunlight at the midday like the 600pro?
Of courese whit the right exposure for background and good balance whit flash on subject…
I hope i’m cleare.. ;-)
Thanks
Vincent