


Make this light painting tool with a plastic bottle and some tape
Mar 1, 2021
Dunja Đuđić Kalinin
Dunja Djudjic is a multi-talented artist based in Novi Sad, Serbia. With 15 years of experience as a photographer, she specializes in capturing the beauty of nature, travel, concerts, and fine art. In addition to her photography, Dunja also expresses her creativity through writing, embroidery, and jewelry making.
Share:

When in lockdown, you gotta work with what you’ve got. And even if you’re not in lockdown, it’s always fun to make photography props and gadgets from stuff you have lying around the house. Jason D. Page teamed up with Jason Rinehart to create a light painting tool from something I’m sure we all have at home: a plastic bottle and some tape.
For this project, you’ll need:
- A plastic bottle
- Black electrical tape
- Clear tape
- Scissors
For the light painting, you’ll need a flashlight of course; and this universal connector can help you attach it to your DIY tool.
For starters, if the water bottle has a label, remove it. Then wrap the bottle with electrical tape until it looks something like this:

Then, add just a little bit of water to the bottle for extra effect in your light painting images. Cover the top of the bottle with some clear tape and then screw the cap on to make sure that the water stays inside. Your light painting tool is now ready, and the next step is to connect it to the flashlight and take some shots.
Of course, light painting works best with long exposure. Jason took some portraits of his daughter using the exposure times between 25 and 40 seconds. He kindly shared the images with us, so you can see the effect that this DIY tool creates. It’s so simple, yet it looks great!


This is only the first episode of Jason D. Page’s Around The House series of videos. I look forward to more of them because I love simple DIY projects, but I also think that now’s the best time for them.
[DIY Light Painting Tool Tutorial – Around The House with Jason Rinehart Episode 1 | Jason D. Page]

Dunja Đuđić Kalinin
Dunja Djudjic is a multi-talented artist based in Novi Sad, Serbia. With 15 years of experience as a photographer, she specializes in capturing the beauty of nature, travel, concerts, and fine art. In addition to her photography, Dunja also expresses her creativity through writing, embroidery, and jewelry making.
Related Posts
 Artist creates this shiny “crystal cave” from 18,000 used plastic cups to show how plastic is devastating our planet
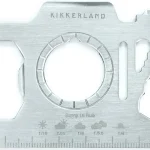 This camera shaped multi-tool could be just the thing, it even has a bottle opener
 Slow Light (Light Painting As An Additive Tool)
 Cross Section Light Painting is to Light Painting What Holograms Are To Photographs
Join the Discussion
DIYP Comment Policy
Be nice, be on-topic, no personal information or flames.
One response to “Make this light painting tool with a plastic bottle and some tape”
Very cool, subscribing to that channel. Thanks for posting this. Need more DIY posts! :)