
















How to make large prints using flour, water and laser printer
May 6, 2019
Dunja Đuđić Kalinin
Dunja Djudjic is a multi-talented artist based in Novi Sad, Serbia. With 15 years of experience as a photographer, she specializes in capturing the beauty of nature, travel, concerts, and fine art. In addition to her photography, Dunja also expresses her creativity through writing, embroidery, and jewelry making.
Share:

Printing images is a great way to keep them forever, but also to decorate the interior. I believe that many of us have prints in our home or office, and Alastair Bird has an amazing idea how to make them from some basic materials. In this video, he shows you how to turn photos into large prints using nothing but some flour, water, paper, and a laser printer.
You will need
- 2 tablespoons of flour
- a cup of water
- a large brush
- paper and laser printer
- an X-Acto knife and a ruler
- a large sheet of plywood (optional)
How to make a print
The idea and the process are incredibly simple, yet very effective. The first thing to do is go to rasterbator.net and upload an image you want to turn into wall art. You’ll get a multi-page pdf file with papers you need to print and cut them out.
When it comes to cutting, make sure to do it with precision, an X-Acto knife and a ruler will help you with this. Alastair made a 4 x 4 feet large print on a piece of plywood, and it took him around 40 sheets of paper. But of course, the number of papers depends on the size of your print.
As for the wheat paste, it’s super-simple to make. Add a cup of cold water into a pan, put it on the stove and whisk in two tablespoons of flour. Make sure to whisk thoroughly so there are no lumps, and bring the mixture to a boil. Once it boils, it will thicken, and you need to leave it to cool down. Keep in mind that this mixture is something like a pudding –if you leave it uncovered, a thick crust will form on top. So, put the lid on it and let it cool.
Now is the time to turn your papers into a large print. Apply the wheat paste with a brush onto the plywood, one row at a time. Stick the papers on it, making sure to line them correctly. Apply the paste on top of the papers, not just underneath, so they don’t buckle too much. Finally, leave everything to dry and there you have it, your large print is done!
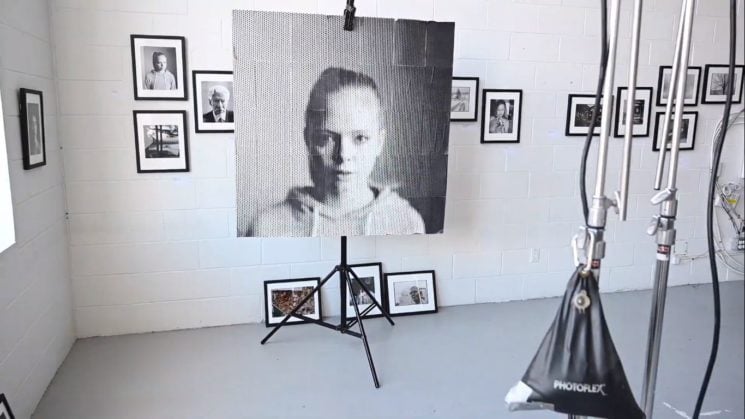
Prints like this are made from dots, and they’re meant to be large and viewed from a distance. Like Alastair, you can use a piece of plywood as well, but prints like this can be applied directly on a wall, too. As a matter of fact, I believe this is how I’ll decorate the only wall in my flat that’s still empty. Now I just need to find the perfect image!
[Making Big Prints with Wheat Paste | Underexposed with Alastair Bird]
See more from DIYPhotography.net on Google
Add DIYPhotography.net as a trusted source. This makes
our stories more likely to appear in your Google Search results.
 Add as a preferred source on Google

Dunja Đuđić Kalinin
Dunja Djudjic is a multi-talented artist based in Novi Sad, Serbia. With 15 years of experience as a photographer, she specializes in capturing the beauty of nature, travel, concerts, and fine art. In addition to her photography, Dunja also expresses her creativity through writing, embroidery, and jewelry making.



Join the Discussion
DIYP Comment Policy
Be nice, be on-topic, no personal information or flames.
5 responses to “How to make large prints using flour, water and laser printer”
Sorry, but this was inevitable.
I totally want to do this but I have no wall space!!
Well, that’s one way to invite pests to eat your artwork.
Carla Royal ☹️
We can use a software call TilePhotos that allow to make column or raw of any photo, it is free https://www.macupdate.com/app/mac/30913/tilephotos I had using in the past for my prints(laser) in A4 to make large prints for linocut and mokuhanga 4×6 24 sheets of A4