


How To Build A Slick Strobe Power Pack
Dec 1, 2013
Udi Tirosh
Udi Tirosh is an entrepreneur, photography inventor, journalist, educator, and writer based in Israel. With over 25 years of experience in the photo-video industry, Udi has built and sold several photography-related brands. Udi has a double degree in mass media communications and computer science.
Share:
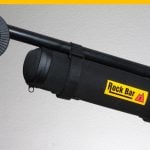
Today we are going to show you how you can build an external slick battery power pack for a Canon strobe (we are using the 430EX II, but newer models will work too, as well as Yongnuo 560 II and alike)

This is very useful, when you shoot outdoors and need many flashes with a short rechargeable time between pops.
This battery pack, aside from its slick look, is easy to transport, well protected and have a long operational time.
Specs
Here are the specs to drool over:
- Up to 1300 pops in manual mode 1/1 (Canon 430EX II)
- Battery is easy to transport and is protected inside the bag
- Low cost hardware to build it
- Optional voltmeter to check the battery power
Needed Hardware (prices estimated)

- Rechargeable maintenance-free lead battery | 22,45 €
6V 12Ah 2100g 151x94x50mm - Charger for lead battery | 14,95 €
6V 0,8A 175g 85x65x35mm - 2 X Plug: 5,5mm 2,1mm | 1,31 €
- Extension Cord | 3,89 €
Plug & socket 5,5mm 2,1mm - Cable with 5,5mm 2,1mm socket | 2,39 €
- Switch on/off | 1,90 €
- PVC rigid foam board 3mm black | ~ 5 €
- Fuse & fuse holder | 3 €
I´ve taken a 15A fuse. I have measured up to 12A at the flash by 1/1. - Camcorder Bag | 15€
- Wood strip 30x15mm (Distance piece) | 2 €
- Battery dummy for the 430 Ex II (3d printing or with round wood rod) – see dummy options here and here.
Adding a Voltmeter (optional)

- Green LEDs (5 in one housing) | 2,60 €
- 5 Resistors for LEDs ~ 250 Ohm
- 2 Resistors for voltage divider
- Arduino pro mini 3,3V (you can also use other microcontrollers) | 10 € and code
Step 1 – Fitting The Case
Measure the bag, switch and LEDs and cut the PVC board to fit.
But the board and fit the switch and LEDs into the board. Fix the LEDs with glue.


Step 2 – Making The Housing
Saw the wood and glue
it on the bottom of the PVC board.
Put the battery into
the bag and check that the board fits.


Step 3 – Electronics
It is quite simple, so there is only a picture and no diagram :)
6V + from the battery: Connect the cable to the fuse, from the fuse to the switch, from the switch to cable with the socket.
GND from the battery: Connect the cable to the cable with the socket.
(The charger and the flash can be connected to the cable with the socket)


Optional:
With voltmeter you have to connect the Arduino Vin Pin to the 6V on the switch. GND to GND from the battery.
Every LED needs a resistor from the + to a digital pin from the Arduino. Connect the LED GND to GND Arduino.
Build a voltage divider and connect it between Vin and GND. Connect an analog pin at the middle of the voltage divider.
Step 4 – Battery Dummy
Build a battery dummy for the 430 EX II to connect the external battery pack. I built it with a 3D printer, but you can also build it with a round wood rod.
Connect the 5,5mm 2,1mm plug on the battery dummy.
Now you can connect the flash with the Extension Cord and battery pack.


Step 5 – Fitting The Charger
Connect the other plug at the end of the charger. Now you can charge the battery pack

Step 6 – Stickers, YAY!
At the last step, I put stickers on the PVC board for a nice look.

Step 7 [optional] – Arduino code
Upload the Arduino code to the pro mini.

Step 8 – Finish and Show Off

Endurance Test
I did an endurance test to find out how many pops I can get with this battery.
I used a microcontroller that triggered 50 flashes in 10 min. I checked the status every 10 minutes. You can see the results below.

About The Author
Benjamin Gahle, 28, is an automotive Photographer from Vreden, Germany. He needs long lasting and portable equipment.
He likes to tinker with technology and often build useful things for his studio. You can follow his website here and his facebook here.

Udi Tirosh
Udi Tirosh is an entrepreneur, photography inventor, journalist, educator, and writer based in Israel. With over 25 years of experience in the photo-video industry, Udi has built and sold several photography-related brands. Udi has a double degree in mass media communications and computer science.


Join the Discussion
DIYP Comment Policy
Be nice, be on-topic, no personal information or flames.
13 responses to “How To Build A Slick Strobe Power Pack”
Awesome and a great amount of work on your part. Thanks for sharing!
Novice question: Is there a specific benefit to using an SLA battery as opposed to an approx.power equivalent of (8) 18650 Li-ion batteries which would be about 1/3 the size and 1/4 the weight?
Availability. You can locally pick up a 6V gel cell for kids’ motorized cars or emergency security lights more places than Li-Ion batteries.
Is it possible to build something like this but meant for a 250-500ws monolight? Possibly with a car battery or something?
ask and you shall receive: https://www.diyphotography.net/super-easy-diy-rechargeable-battery-power-pack-for-event-photographers
SWEET!! Thank you!
I write a tutorial in the next time about this:
https://fbcdn-sphotos-e-a.akamaihd.net/hphotos-ak-ash3/581976_510530129014702_537281614_n.jpg
https://fbcdn-sphotos-g-a.akamaihd.net/hphotos-ak-frc3/q86/s720x720/972061_510530175681364_1730407787_n.jpg
that would be awesome!
That’d be awesome Benjamin!!!
for argument sake…how about just using a battery backup (ups) and a simple dc adapter (wall wart)? yes, it goes dc–>ac–>dc, but the efficiency of the converters now is really good (>90%). so there’s an off-the-shelf solution that you can also use in the field for other devices. $50 and you’re done.
Instead of 3d printing dummy AA batteries or using dowel rod you can get AAA to AA adapters on ebay for 50 cents to 1 dollar on ebay. Also do a search for “5.5 female pigtail”. For about 4 to 6 dollars and a little work that gives everyone a power adapter for their flash.
Hi I would like to know how do I make a battery power solution to power a LED video light. It’s actually a LED floodlight with a normal British 3 pin plag. It’s 240v and the power rating of the light is 300 watts. I’d like to power a couple of these lights if possible for around 4-5hours on a full charge. Is it possible?
I think it’s better to make a high voltage external power supply and use a standard flash connector for it. I made myself this one http://www.andrew.lan4.net/sb/ – very satisfied.