


A Slick DIY Self Contained photobooth
May 17, 2015
Udi Tirosh
Udi Tirosh is an entrepreneur, photography inventor, journalist, educator, and writer based in Israel. With over 25 years of experience in the photo-video industry, Udi has built and sold several photography-related brands. Udi has a double degree in mass media communications and computer science.
Share:

Photographer John Nakatsu of K+J Studios operates a photobooth on events. On of the challenges with these kinds of botoh is to make them portable, and easy to set up. John came up with quite a clever solution to make the entire botoh self contained and easy to port without losing quality and fun.
The pictorial below goes through all the steps, so you cna get inspired on creating your own. Here is how he did it:
Finished product!

Here is how it looks like when working


Materials

- White ABS sheeting
- Microsoft Surface Pro 1
- USB fans
- USB 3.0 powered hub
- printer – DNP DS40
- various miscellaneous items
- Camera – Canon T3i

Build
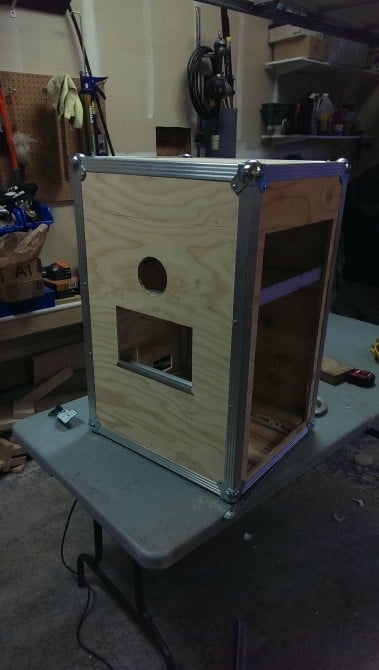
Cutting the plywood to size. The box is essentially a custom road case. I used 3/8″ sanded plywood for the sides. The edges are held together with aluminum extrusions. All the road case stuff was purchased through Reliablehardware

We used aluminum throughout to help strengthen the photobooth without adding too much weight. Some 2x4s and a 2×6 attached to some aluminum for stability. This will be the bottom.

I originally planned on having it mounted on a speaker stand. Here we are drilling the holes for the speaker mount. It works, but is kind of a pain to lift everything up onto the stand so I just sit it on a table instead now. I can still mount it, if I ever need to! The stand is meant for large speakers, and can accommodate up to 150lbs

The sides are going up

and the rest of the sides….

Here you can see how the printer snugly fits inside

This is the aluminum U-channel that will be used to hold the Surface.

Holes cut out for the Surface and camera

More holes for the fans and cords

Door hole cut. The box is only assembled temporarily until I put on the ABS sheeting

Added a crossbar for support

Here are some views on the thing assembled:

And an inside view on the cross bars

Here is how the camera is mounted with another crossbar


I have some hooks mounted on the bottom to strap down the printer, which turned out to be unnecessary.

Here is where we got so far

Adding a cable outlet and a fan

Pre drilling holes to attach the wood and ABS to the aluminum case frame


Gluing the ABS sheeting to the plywood

Now the whole thing is starting to come together…

Loctite on the bolts keeps it tight

prettifying the lens and surface holes with aluminum framing

I can slide the Surface into the U-Channel

Here is how the printer door slot looks like

And making sure that the hole is aligned with the printer…

Here is the finished door (and slot) on their hinge.

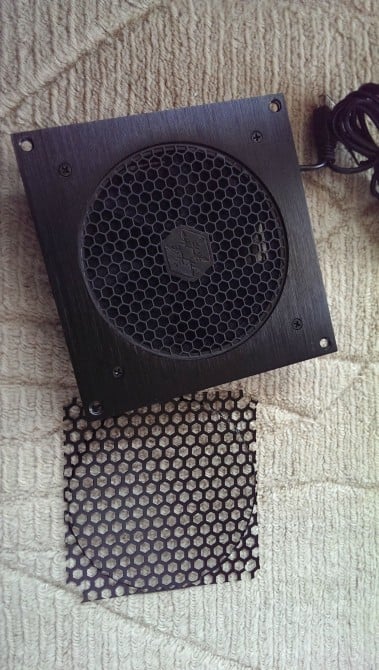
For the air intake I got a filter to help keep dust out. It just barely didn’t fit inside the fans cover

So of course I sanded the edges down until it fit
Everything installed. Lots of zip ties and velcro

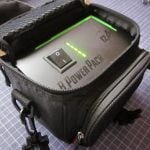
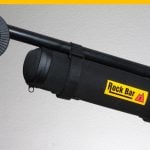
I also got a folding cart to make moving everything a bit easier. The printer is removed for transport since it weighs >30lbs. The other tubs have my props, a hand steamer for the backdrop, the backdrop, the printer, and some other various things. The backdrop and lightstands are in the bag in the front. The Pelicans have my photo and video gear

Software
The booth is running DSLR Remote Pro by Breeze Systems on a Microsoft Surface Pro 1. I chose the Surface Pro since you can get the older models cheap now on eBay.
The software requires a full version of Windows to run, so you can’t use an android tablet or the Surface RT. It also functions as the touch screen with controls for the photobooth. Since it only has one USB 3.0, I have it plugged into a powered USB 3.0 hub (make sure it’s a powered hub!)
To see more of the photobooth in action head over to K+J studios.

Udi Tirosh
Udi Tirosh is an entrepreneur, photography inventor, journalist, educator, and writer based in Israel. With over 25 years of experience in the photo-video industry, Udi has built and sold several photography-related brands. Udi has a double degree in mass media communications and computer science.


Join the Discussion
DIYP Comment Policy
Be nice, be on-topic, no personal information or flames.
11 responses to “A Slick DIY Self Contained photobooth”
Nice build! Clean setup inside, I like that.
From one who built a photobooth himself (–> vintage photobooth).
Harm
Nice woodwork, nice feature with the prints….. but the big hazzle (from my point of view..!) is how the camera is triggered, how the image is processed in the tablet and what was used to feed the printer. The main stuff is missing in this article.
I am also thinking about to build such a booth – and honestly…. the box is my least problem…. :-(
bump
just out of curiosity, what photobooth software are you using?
It’s too bad that the most important details of how this works were left out. Almost anyone can build a box, we need the software and camera controls.
Read the article, he lists the software he uses…
The article was updated after it was originally posted to include the software, etc.
Hi guys! This is my booth. For those wondering, it is running DSLR Remote Pro by Breeze Systems on a Microsoft Surface Pro 1. I chose the Surface Pro since you can get the older models cheap now on eBay. The software requires a full version of Windows to run, so you can’t use an android tablet or the Surface RT. It also functions as the touch screen with controls for the photobooth. Since it only has one USB 3.0, I have it plugged into a powered USB 3.0 hub (make sure it’s a powered hub!). The printer is a DNP DS40, and the camera is a Canon T3i. Since the T3i lacks a PC port to sync, I added a hotshoe adapter which runs to the Alien Bee 400 monolight. I also chose to run the T3i off an AC adapter so that I don’t have to worry about battery life on the camera.
Hey guys, just follow the link to the software provided
“DSLR Remote Pro for Windows now includes a complete software solution for a professional photobooth. Please see our photobooth page to find out more.”
http://www.breezesys.com/Photobooth/index.htm
Hello, beautiful project, only one thing you can have the measures of the box structure, to get an idea
thank you
I would really like to the measurements to the everything as I would like to build this myself. . .do you think you can share this information with some of us novice.