


Use these five tips to create more interesting timelapse videos in Adobe Premiere Pro
Oct 5, 2022
John Aldred
John Aldred is a photographer with over 25 years of experience in the portrait and commercial worlds. He is based in Scotland and has been an early adopter – and occasional beta tester – of almost every digital imaging technology in that time. As well as his creative visual work, John uses 3D printing, electronics and programming to create his own photography and filmmaking tools and consults for a number of brands across the industry.
Share:
Timelapse is one of those rabbit holes you can dive down for days. The amount of different styles and techniques out there today is just mindblowing, as is the massive amount of actual timelapse content out there to be inspired by. But while there are a lot of amazing timelapses on the web, not all timelapse creators start out as experts from the first day. Even once you’ve got your shooting technique down, there’s still work that can be done in the edit to make it more interesting.
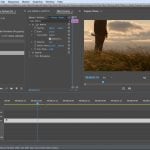
That’s what Matthew Vandeputte looks at in this video – five different ways to improve your timelapses and take them to the next level when editing within Premiere Pro. Now, his video does specifically mention Premiere Pro, but you can do these techniques in just about any editor. It might just be called something a little different or be accessed a different way, but you should be able to follow these in most editors.
You’ll want to watch the video for more in-depth discussion on each of these tips, but here’s the breakdown…
- 00:10 – Steadying your timelapse with warp stabiliser (even if you used a tripod)
- 01:05 – Fake camera movement with pans and zooms
- 03:10 – Speed ramping your sequences
- 04:06 – Faking motion blur for those sped-up sequences
- 04:48 – Animated masking to create transitions
I’ve been shooting timelapse for years and there is at least one tip in this video that I’d never actually used in any of my own timelapse videos before. It’s a common technique when people are shooting slow-motion video and I’ve used it before for that but not for timelapse. That’s the one about speed ramping. This is definitely something I’m going to have to try with my next timelapse!

John Aldred
John Aldred is a photographer with over 25 years of experience in the portrait and commercial worlds. He is based in Scotland and has been an early adopter – and occasional beta tester – of almost every digital imaging technology in that time. As well as his creative visual work, John uses 3D printing, electronics and programming to create his own photography and filmmaking tools and consults for a number of brands across the industry.
Related Posts
 How to easily edit your videos to a musical beat with just a few clicks in Adobe Premiere Pro
 Adobe Premiere Pro gets auto-tonemapping for HDR & Log videos
 These five simple and cheap tricks will make your smartphone videos more interesting
 7 great tips for working with photographs in Adobe Premiere Pro
Join the Discussion
DIYP Comment Policy
Be nice, be on-topic, no personal information or flames.