


Make Your Own Custom Digital Camera Filters
May 8, 2026
David Prochnow
Our resident “how-to” project editor, David Prochnow, lives on the Gulf Coast of the United States in Ocean Springs, Mississippi. He brings his expertise at making our photography projects accessible to everyone, from a lengthy stint acting as the Contributing How-To Editor with Popular Science magazine. While you don’t have to actually build each of his projects, reading about these adventures will contribute to your continued overall appreciation of do-it-yourself photography. A collection of David’s best Popular Science projects can be found in the book, “The Big Book of Hacks,” Edited by Doug Cantor.
Share:
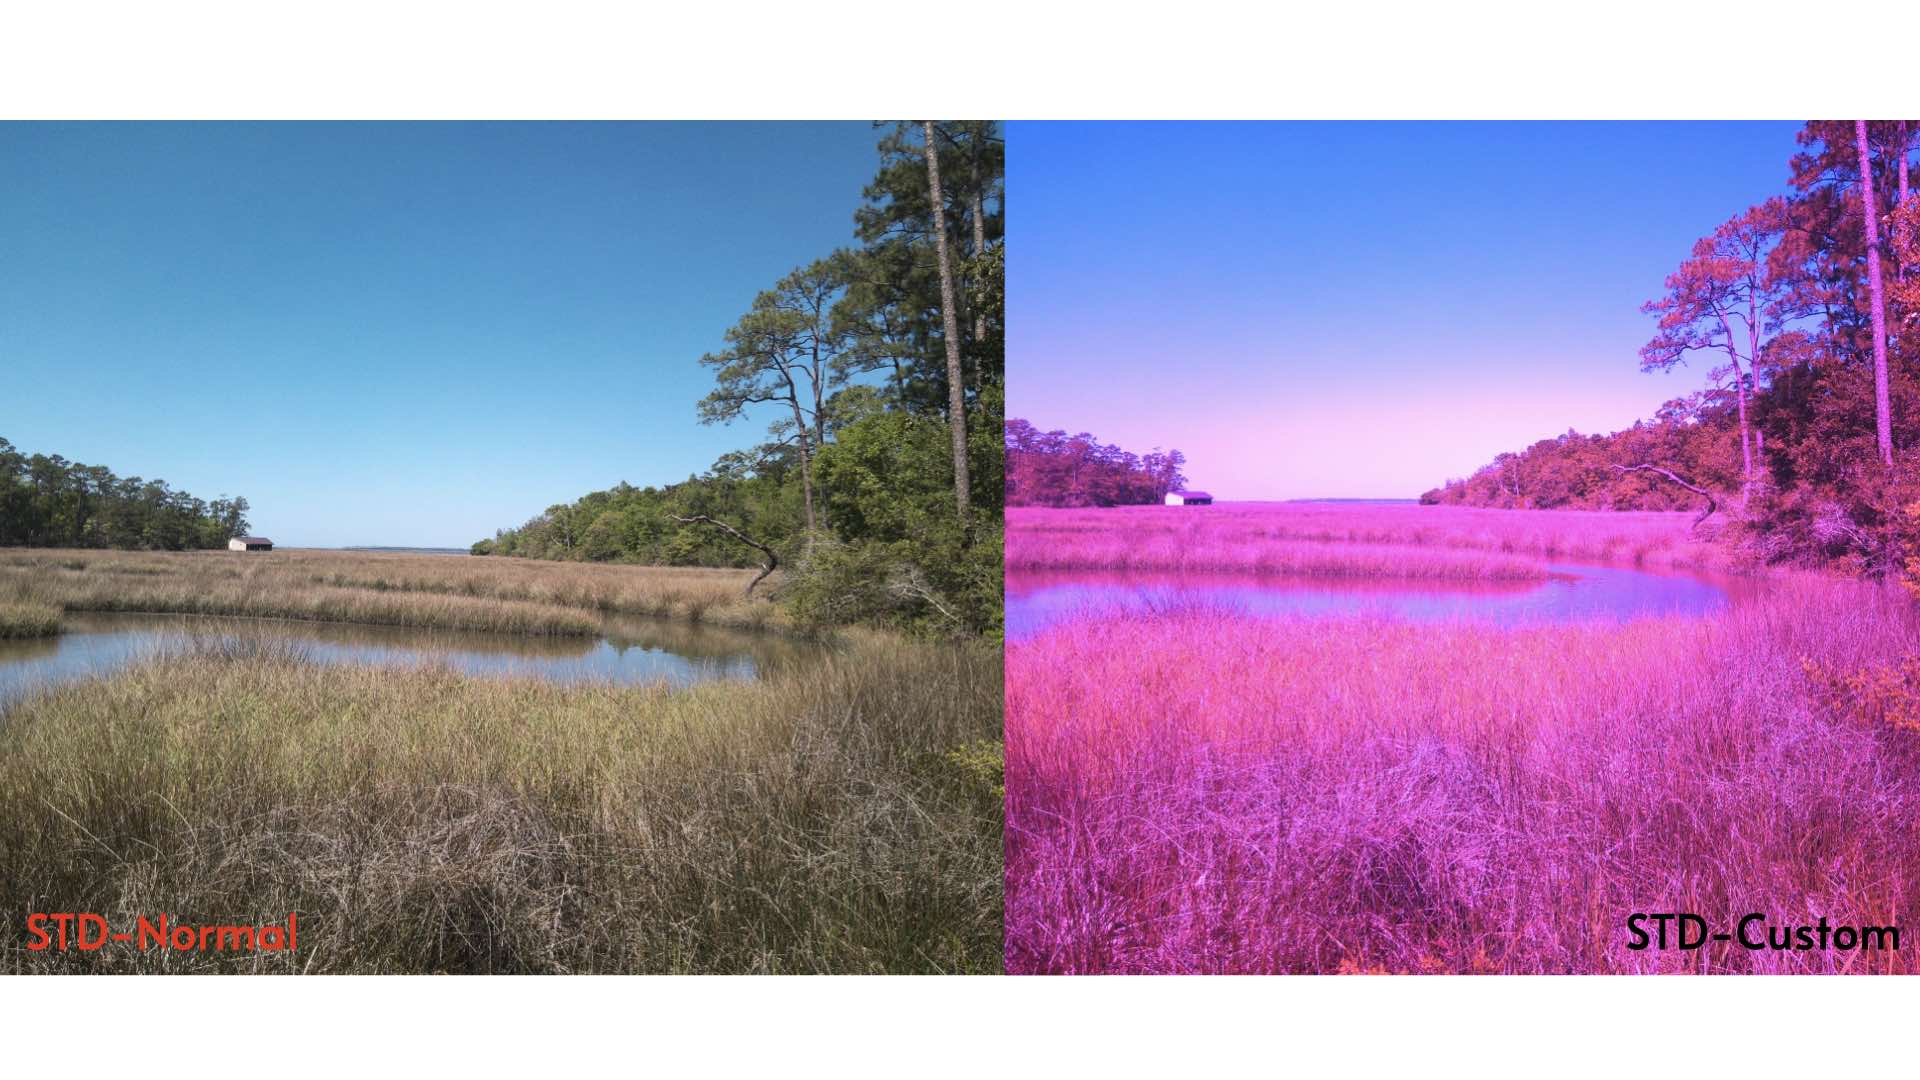
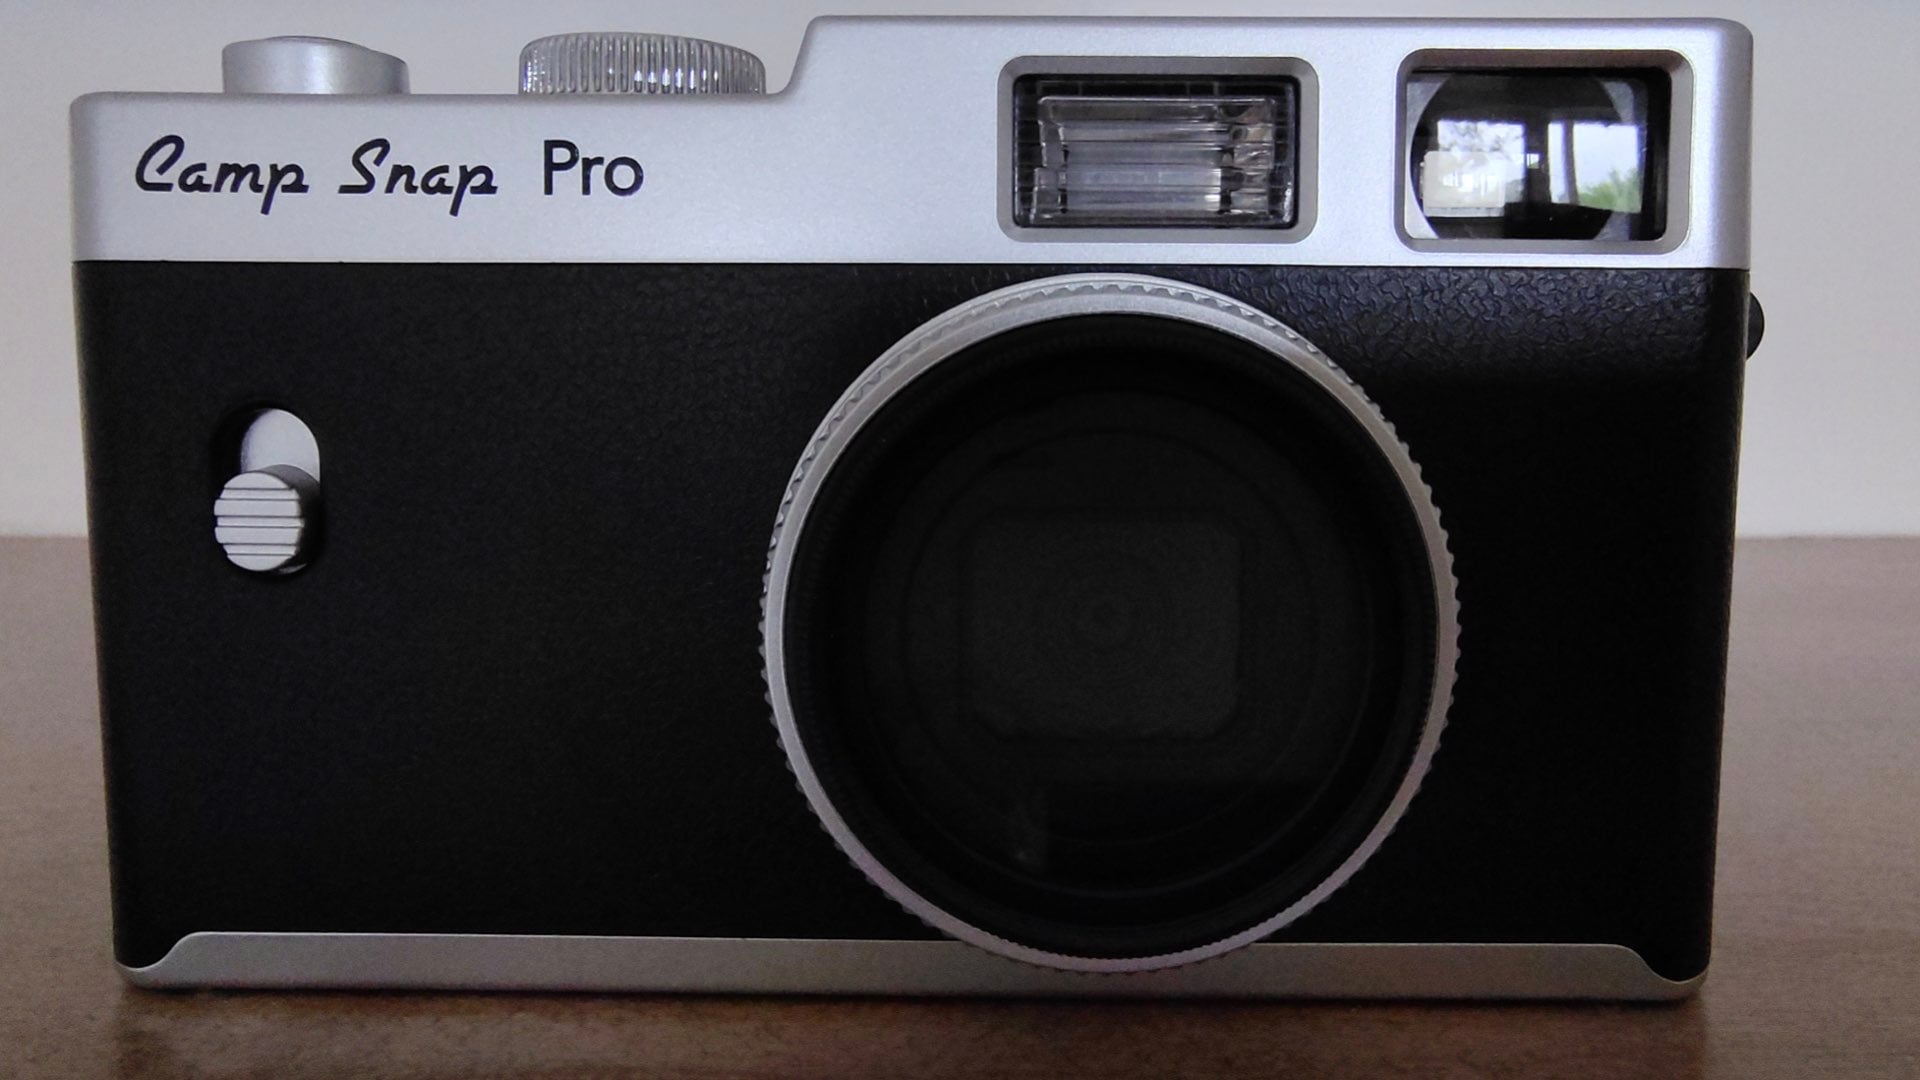
OK, you’re convinced that the Camp Snap Pro is the ideal camera for entrusting to your young photographer for summer camp. You just wish that the camera had more options for color filters and film simulations.
Thankfully, the Camp Snap Pro is one of the few low-cost cameras that is able to let you program your own filters and simulations. Don’t let that requirement of “programming” scare you off. It’s just a simple matter of creating your preferred look and letting a Web site do all of the programming for you.
EZ Filter Programming
Your first step in programming your own Camp Snap Pro digital filter is to stop your browser at the Build Your Own Filter page. Once you’ve arrived, click on the similarly titled, Build Your Own Filter, button.
This whisks you to the CS Filter Builder V1.2.2 workbench. OK, you actually stay on the same Build Your Own Filter page, but your browser’s view is shifted to an anchor lower on that same page.
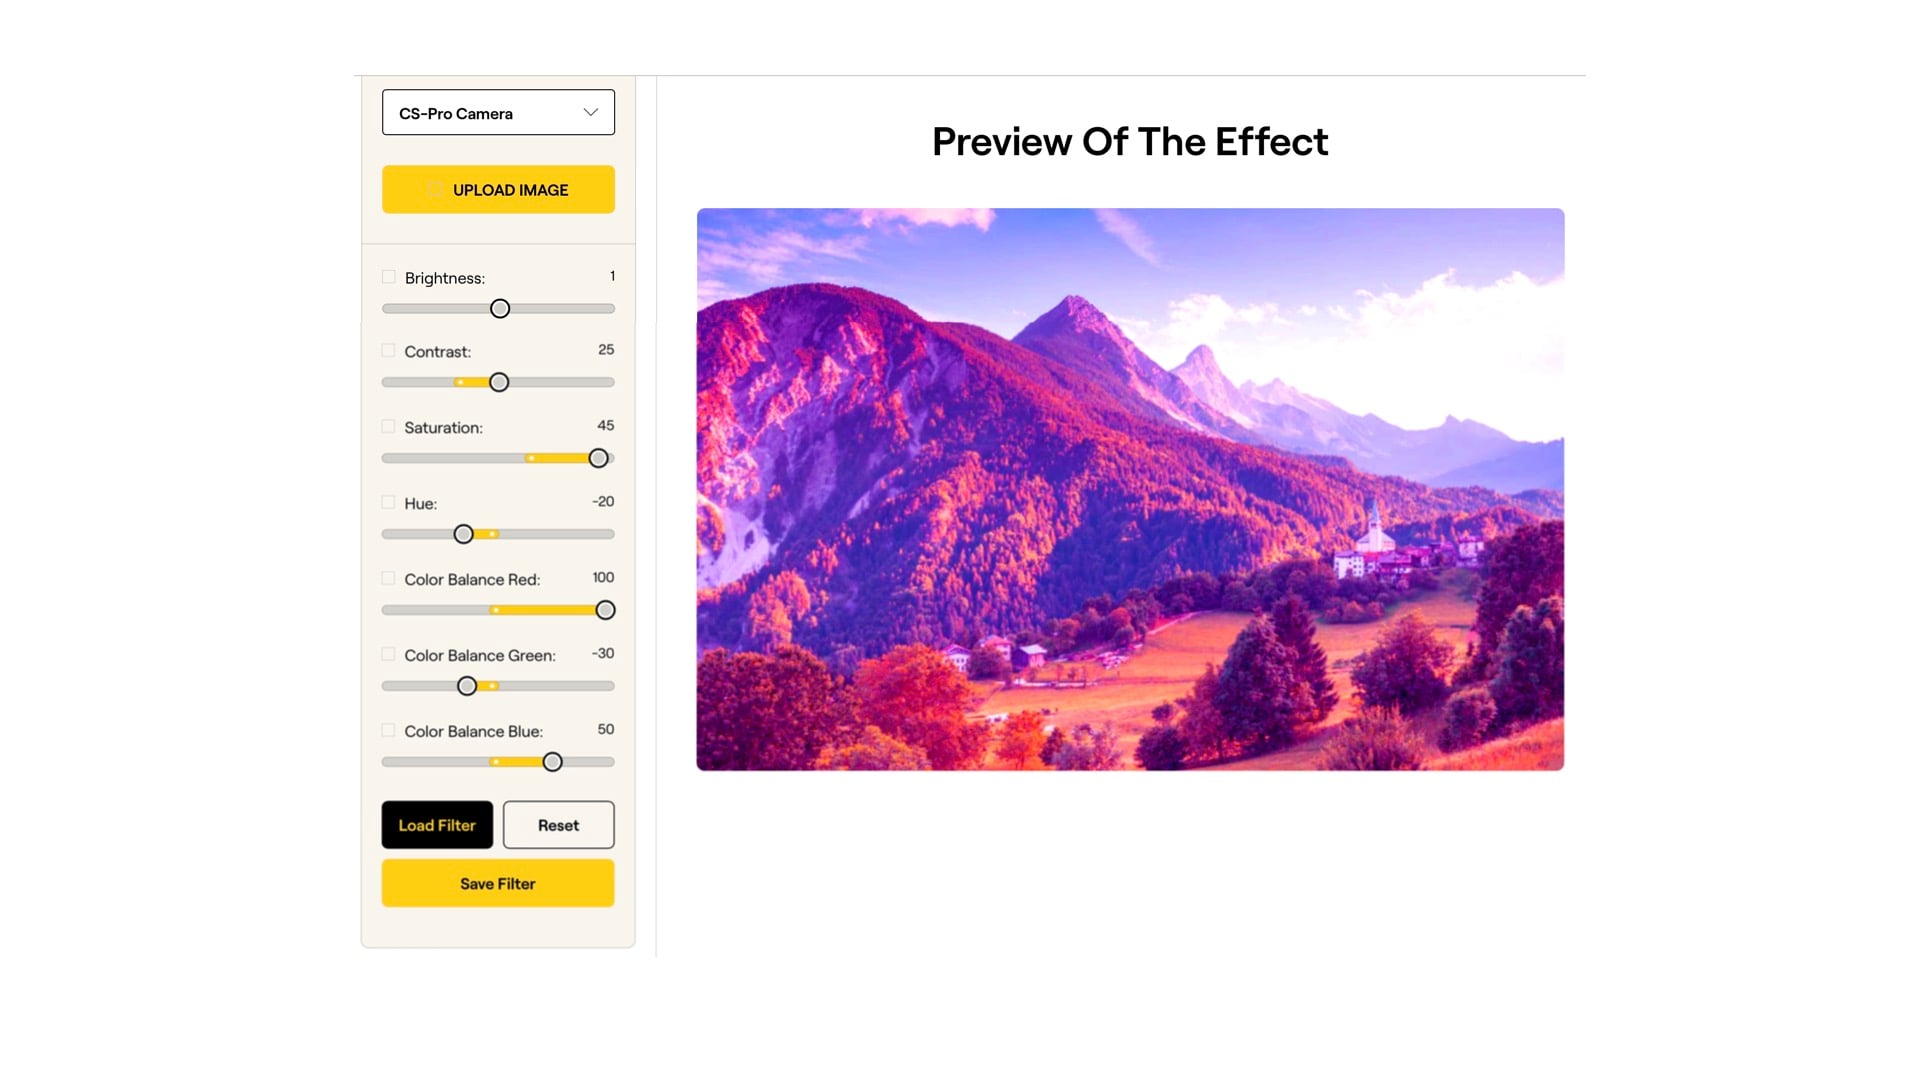
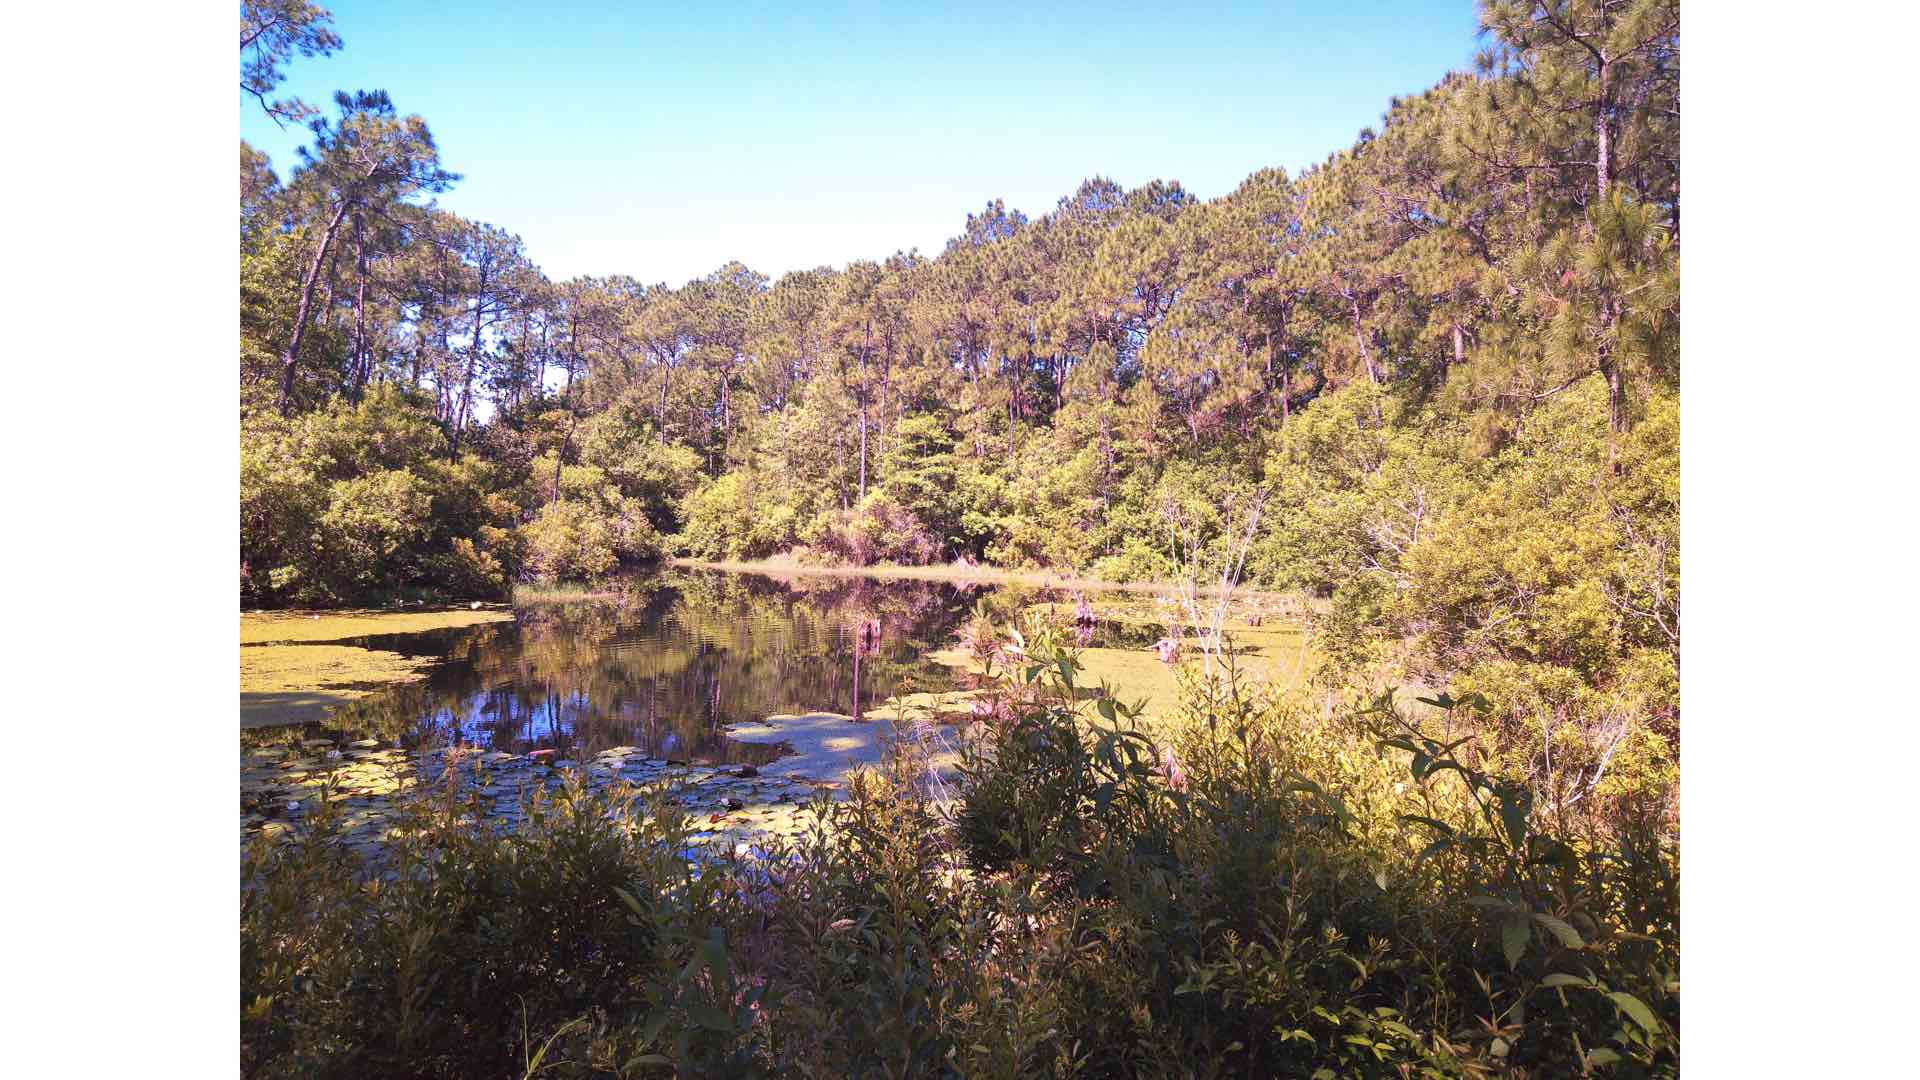
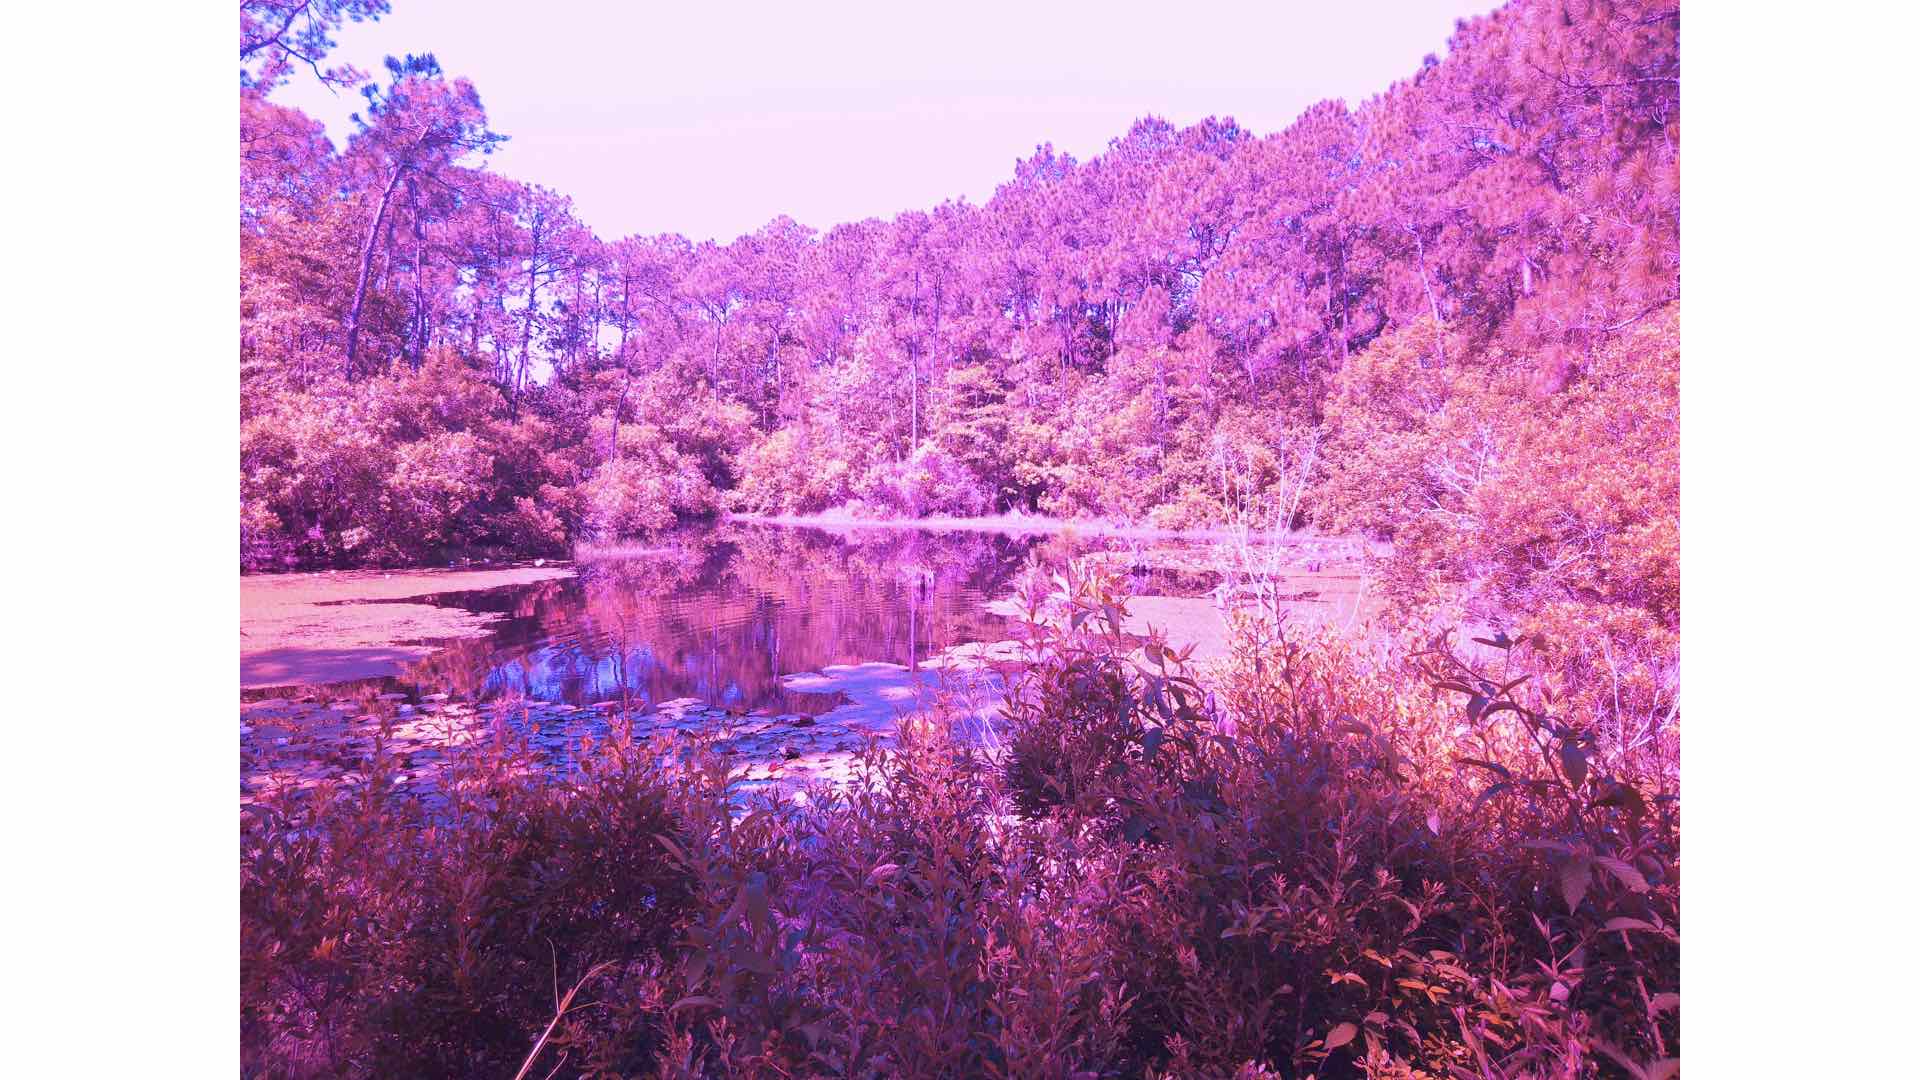
You start at the dropdown menu, Select Camera Model, highlight CS-Pro Camera and you’re ready to begin programming a filter. Rather than using the default image for simulation of your color calibrations, you can optionally upload one of your own photographs.

The remainder of your filter creation work pertains to adjusting the sliders (e.g., brightness, contrast, saturation, etc.) while viewing the instantaneous results on the adjoining image. When that image looks correct, click the Save Filter button, name the file “std,” and click OK.
Oops, you don’t like what you’ve created, then click the Reset button and start over. You also have the option to load a friend’s previously created filter file and make your own adjustments.
Tips, Tricks, and Techniques
While it seems easy enough, there are a couple of tips, tricks, and techniques that’ll make your filter foolproof. First, and foremost, your saved filter will have a .flt file extension. While this sounds kinda computer-like, it’s only an abbreviation for “filter.”
Likewise, this FLT file is actually just a text file with a fancy extension. In fact, if you’d like, you can edit this file with a plain text editor. Here’s what’s inside an FLT file:
- lum:1
- contrast:25
- rgain:100
- ggain:-30
- bgain:50
- hue:-20
- sat:45
In this file, the Brightness setting is abbreviated “lum” for luminance or luminosity.
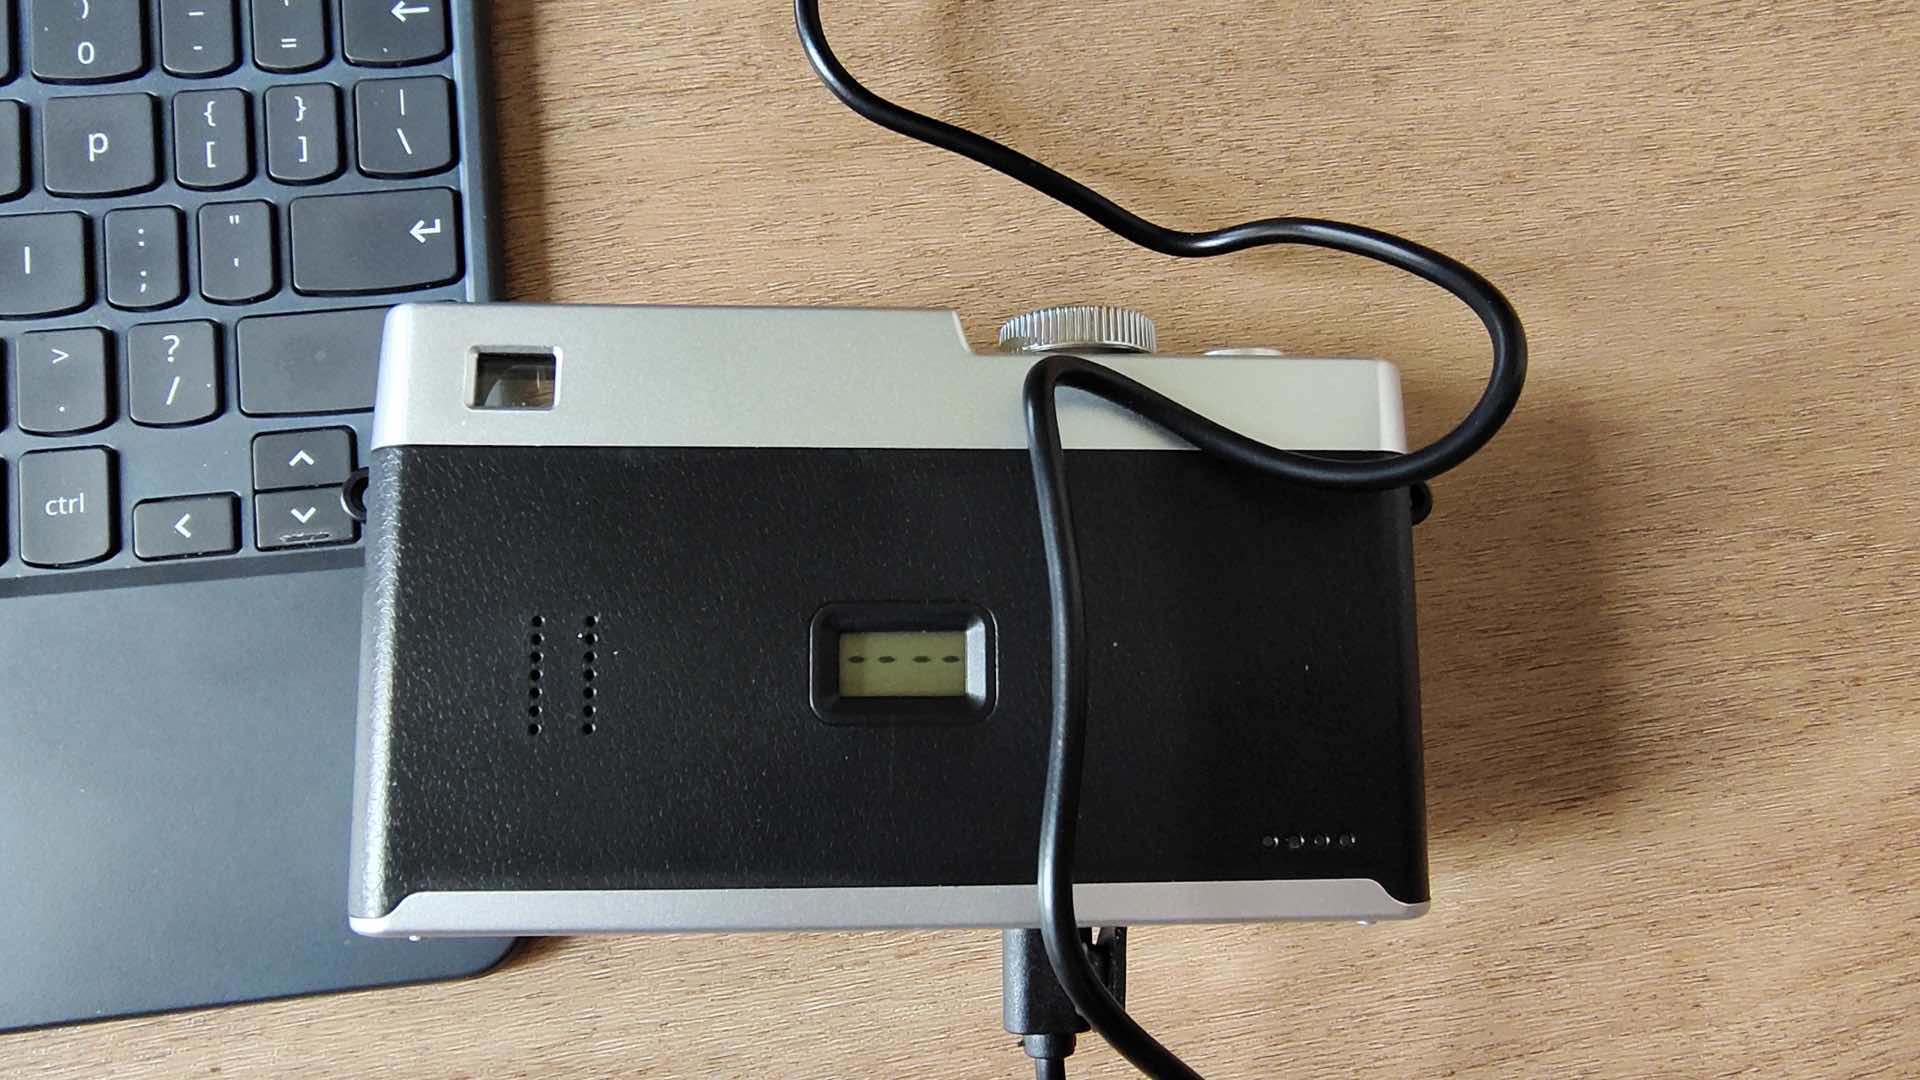
Next up, is how do you load this FLT file into the Camp Snap Pro? First, plug in a USB connection between the camera and your computer. Once this Camp Snap Pro camera’s storage device connection is established, transfer the saved FLT file into the main or root directory of the camera. A simple drag-and-drop of the file onto the camera will work.
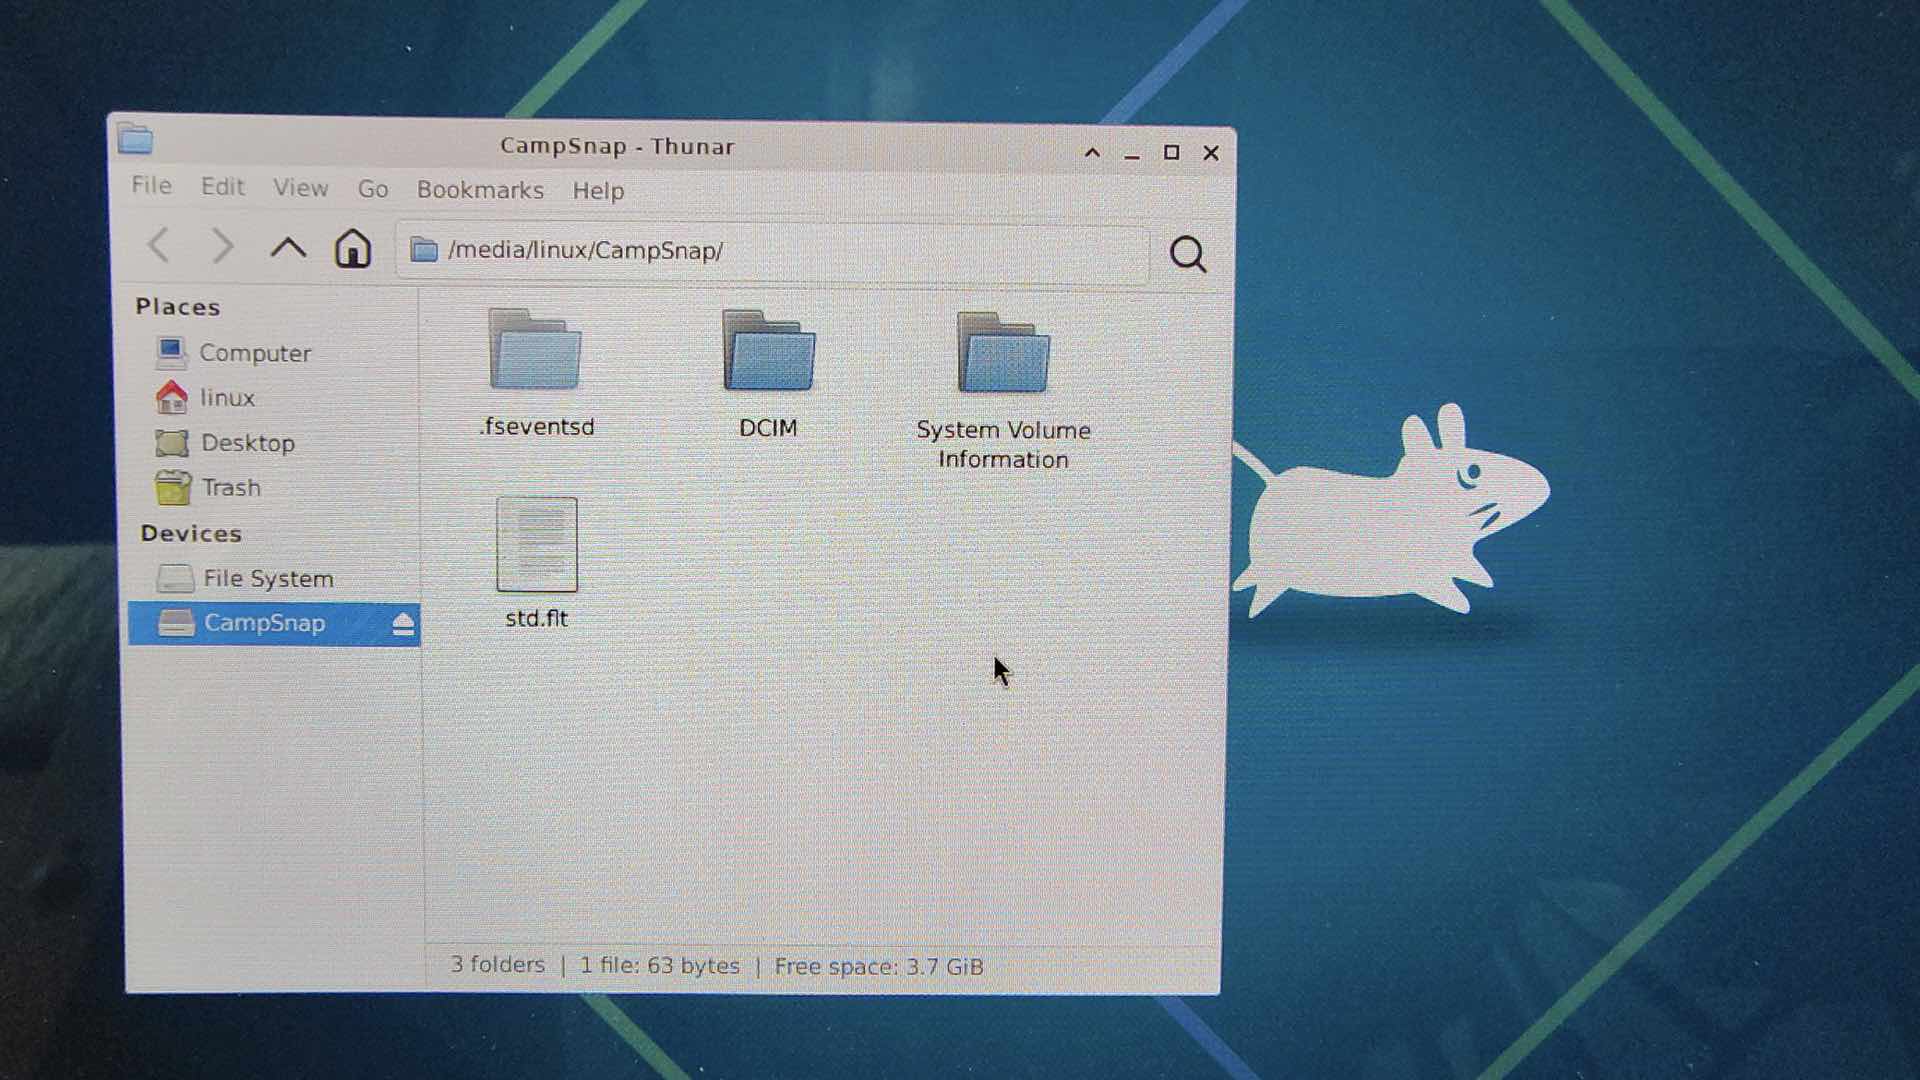
Disconnect the camera and the filter will be ready to use. This attempt at usage highlights another trick that you’ll have to master.
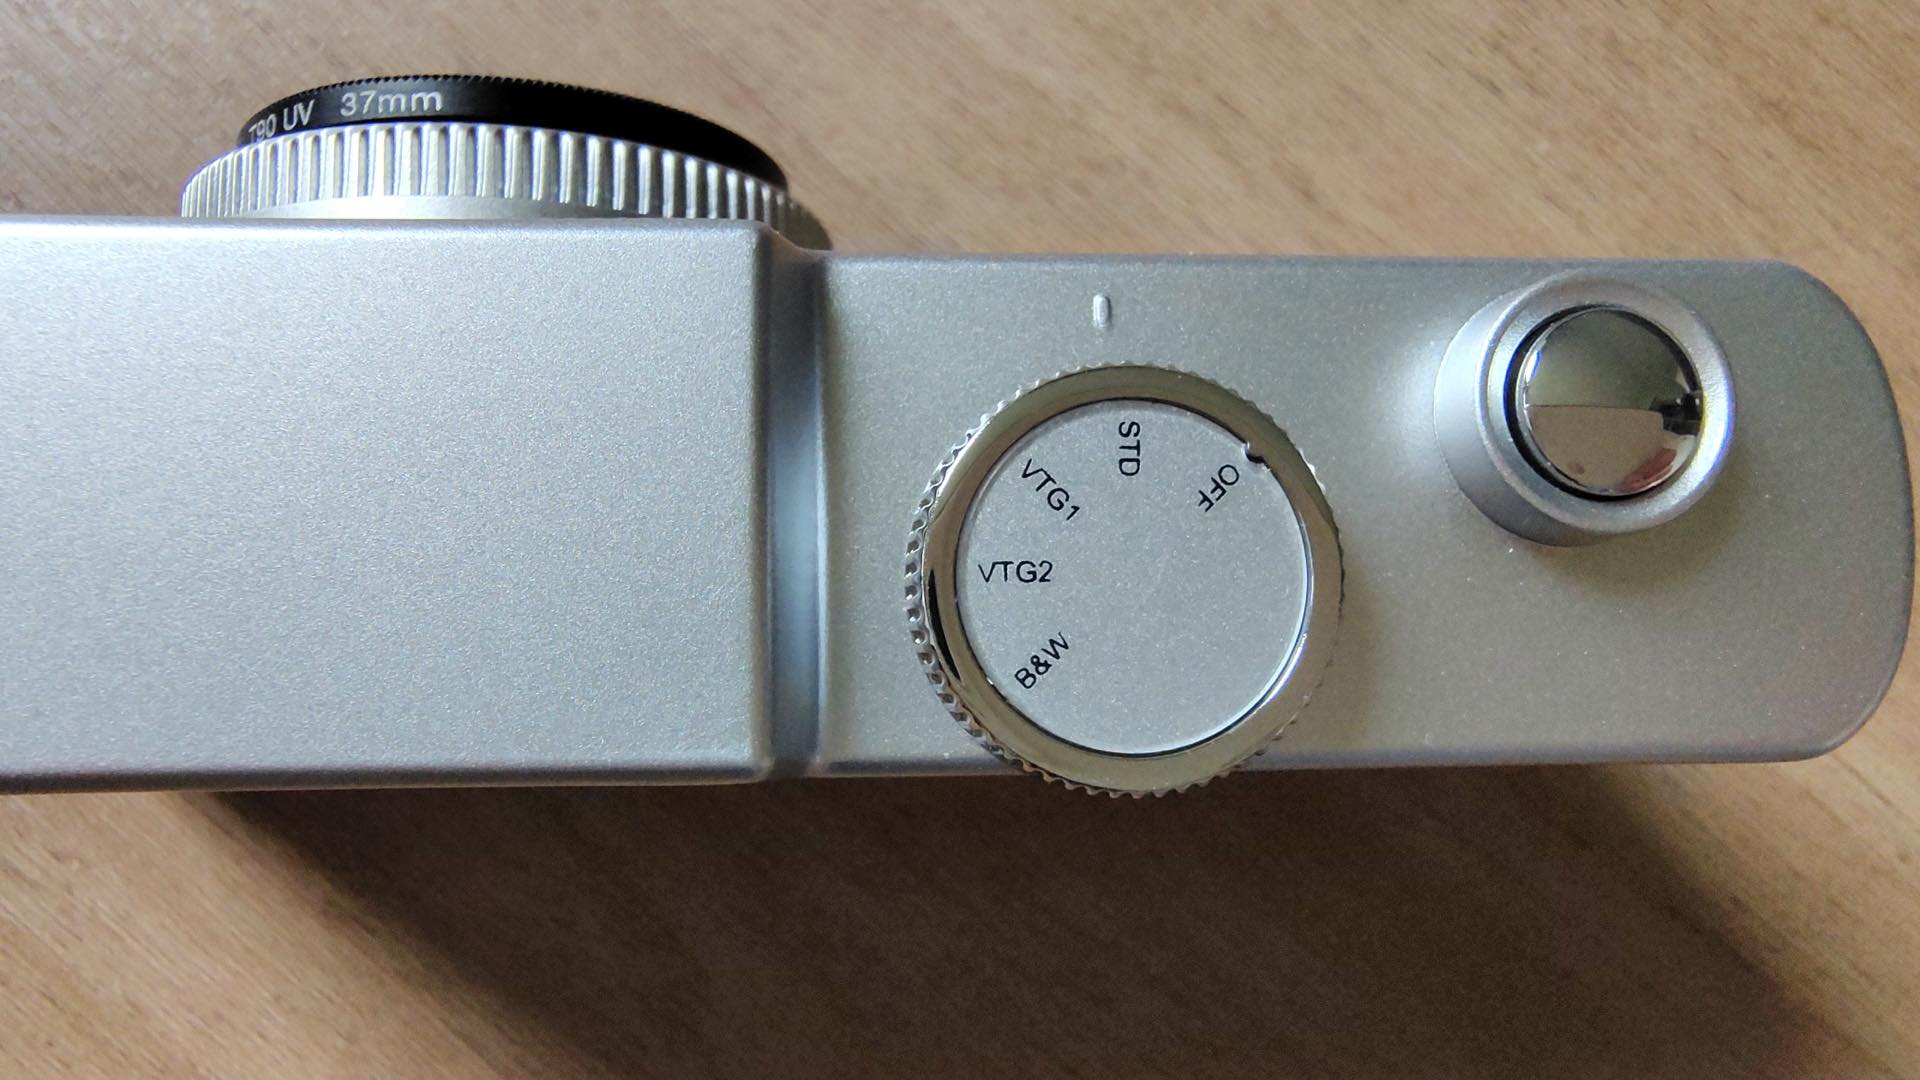
Your saved file should be named after one of the four preset Camp Snap Pro filters: std, vtg1, vtg2, or bw. In other words, naming your filter std.flt will work. In this context, your new/saved filter will be accessible via the STD filter switch on the camera.
“But how do I return my camera to the stock STD filter switch setting,” you ask? Easy; just return to your computer and, again, make a USB connection with the camera. This time, however, open the camera’s storage device and remove/delete the std.flt file from the root directory.
Disconnect the camera and when powered ON, the original filter settings will return for the STD switch. This is a great way to fearlessly test numerous filter options on your camera.
Be sure to ask your young photographer which stock filter setting they would like to change. Likewise, creating the preferred camera filter could be a joint parent-child programming lesson. Imagine the beneficial knowledge that can be gained from programming a filter and then seeing the photographic results. That’s awesome-sauce for a youngster! Together, you’ve just made a personalized, unique view of life for use at this year’s summer camp.
Enjoy.

David Prochnow
Our resident “how-to” project editor, David Prochnow, lives on the Gulf Coast of the United States in Ocean Springs, Mississippi. He brings his expertise at making our photography projects accessible to everyone, from a lengthy stint acting as the Contributing How-To Editor with Popular Science magazine. While you don’t have to actually build each of his projects, reading about these adventures will contribute to your continued overall appreciation of do-it-yourself photography. A collection of David’s best Popular Science projects can be found in the book, “The Big Book of Hacks,” Edited by Doug Cantor.

Join the Discussion
DIYP Comment Policy
Be nice, be on-topic, no personal information or flames.