


Take Infrared (IR) Pictures With Your Digital Camera
Mar 31, 2007
Udi Tirosh
Udi Tirosh is an entrepreneur, photography inventor, journalist, educator, and writer based in Israel. With over 25 years of experience in the photo-video industry, Udi has built and sold several photography-related brands. Udi has a double degree in mass media communications and computer science.
Share:
 In this article, I will show you how to make a cheap infrared (IR) filter for your digital camera out of bits and pieces such as cardboard rolls, electrical tape, and some black processed photographic film (old negatives). This is just getting a brand new Hoya R72 IR filter for free.
The idea for this project came while researching IR light. When I discovered unexposed processed film made an effective IR filter, I literally had to put my house upside down to fish out some old negatives. Sadly, I also destroyed the zoom motor on my trusty Canon A60 by making a case that was too tight. You will see I have included several warnings here to prevent you from making the same mistake! I am now the proud (and poorer) owner of a brilliant Canon A710…
The video underneath details the building process. It also shows you in detail how to test your camera for IR capability; it suggests some of the settings you should use; and it features some IR photographs. It is recommended you watch it if you are going to make this IR filter.
I also have provided written and photographic instructions on how to make the filter. Finally, you will find some IR pictures at the bottom of this page. Enjoy!
Here is a picture of how this projects looks when it is complete:

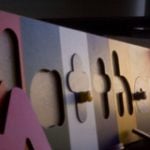
And here are some pictues taken with the infra red (IR) filter:


Step 1 – What you will need:
- scissors
- glue
- strips of cardboard or better, some rolls of cardboard that will just fit over your camera’s objective (sticky tape rolls, loo roll… anything that looks to be the right size).
- some electrical tape
- a square of hard plastic cover (from a file, or book), the thinner the better, as it is easier to cut, but fairly rigid and slightly larger than your camera’s objective.
- a black permanent marker
- some black processed film (the black bit at the end of old negatives). This is the key element as unexposed (black) processed film is visually opaque but IR transparent.

Step 2 – Test your camera for IR sensitivity
This rough test is done by pointing a TV remote control at your digital camera and pressing a button. You should be able to see the IR led on your remote (the white light here). The brighter, the better (different digital cameras have different IR sensitivities).

Step 3 – Making the case’s main body
Find a cardboard roll that will fit snuggly (but not too tightly, otherwise putting it on and off might destroy the zoom’s motor) over the camera’s objective.
Alternatively, cut a strip of cardboard to fit, and fashion it into a ring with some black electrical tape (see video).


Step 4 – Fashion a smaller, thinner ring of cardboard…
… to fit snuggly inside the big ring… If it is loose, make it snugger with some layers of electrical tape.

Step 5 – Cut a ring of plastic…
… to fit on top of the big cardboard roll. It should be the size of the outer big cardboard roll on the outside, and the size of the inner small cardboard roll on the inside (see the video).
Its width should be enough to prevent the smaller cardboard roll from falling out.
Glue this plastic ring to the big cardboard roll.


Step 6 – color everything black (the inside of the rings too)…
… with a black permanent marker, if you haven’t done so already.

Step 7 – Cut two circles of black processed film…
… to fit snuggly inside the big cardboard roll… They should be prevented from falling out by the plastic ring glued to the top. Secure the pieces of film by inserting the small cardboard roll inside the big one (this will clamp them in place).
Of course, this filter case can also be used with different color filters… You can experiment with various colored, transparent pieces of plastic or film.


Step 8 – Place the filter on the objective
Make sure it is not so loose as to let any light in, yet not so tight as to ruin the camera’s zoom motor when putting it on and off. The filter case should be allowed to fall off when you retract the zoom.

Step 9 – Settings
Set the white levels manually, if your camera allows you (refer to the manual on how to do that). Otherwise your pictures will come out red (see picture below).

Generally, the lower the ISO, the less grainy your pictures will be. I was able to obtain good results in very average daylight with an ISO of 100, and a shutter speed of 10 seconds. Obviously, a tripod is required for such pictures.
Crank up the ISO, and in broad daylight you can take pictures with an exposure of less than 1 second. You will need to experiment with the various settings on your camera. Enjoy! (Jump to the top to see the infra red pictures again).
Hey! did you use this DIY to take a picture? post a comment and brag!!
This article was contributed by Sam Noyoun a member of the DIYPhotography.net instructibles group (check his other instructibles, and videos – this guy ROCKS!)

Udi Tirosh
Udi Tirosh is an entrepreneur, photography inventor, journalist, educator, and writer based in Israel. With over 25 years of experience in the photo-video industry, Udi has built and sold several photography-related brands. Udi has a double degree in mass media communications and computer science.


Join the Discussion
DIYP Comment Policy
Be nice, be on-topic, no personal information or flames.
3 responses to “Take Infrared (IR) Pictures With Your Digital Camera”
Nice
Maybe he’ll see the luminiferous ether while he’s at it.
An IR Filter would keep IR wavelength light OUT of the image, not put it in. In order to get good IR images you need to filter the other colors of like and let in the IR light.