


Prism Lens Photography: Creating Creative Light Effects
Nov 17, 2025
Darlene Lleno
Darlene Lleno brings a unique perspective to DIY Photography as someone who grew up surrounded by camera gear but chose words over lenses. With five years of writing experience, she specializes in photography content that’s both technically informed and genuinely passionate. Growing up with a photographer twin brother meant camera talk was everyday conversation in her household. While he mastered capturing moments, Darlene discovered she preferred being the subject and the storyteller behind the scenes. As a travel enthusiast and mother of two, she understands the importance of preserving life’s precious moments. When not exploring new destinations or writing for DIY Photography, you’ll find her reading or tending to her garden. Her approach to photography writing is refreshingly authentic, she may not be behind the camera, but she knows exactly what it takes to help others capture the shots that matter most.
Share:
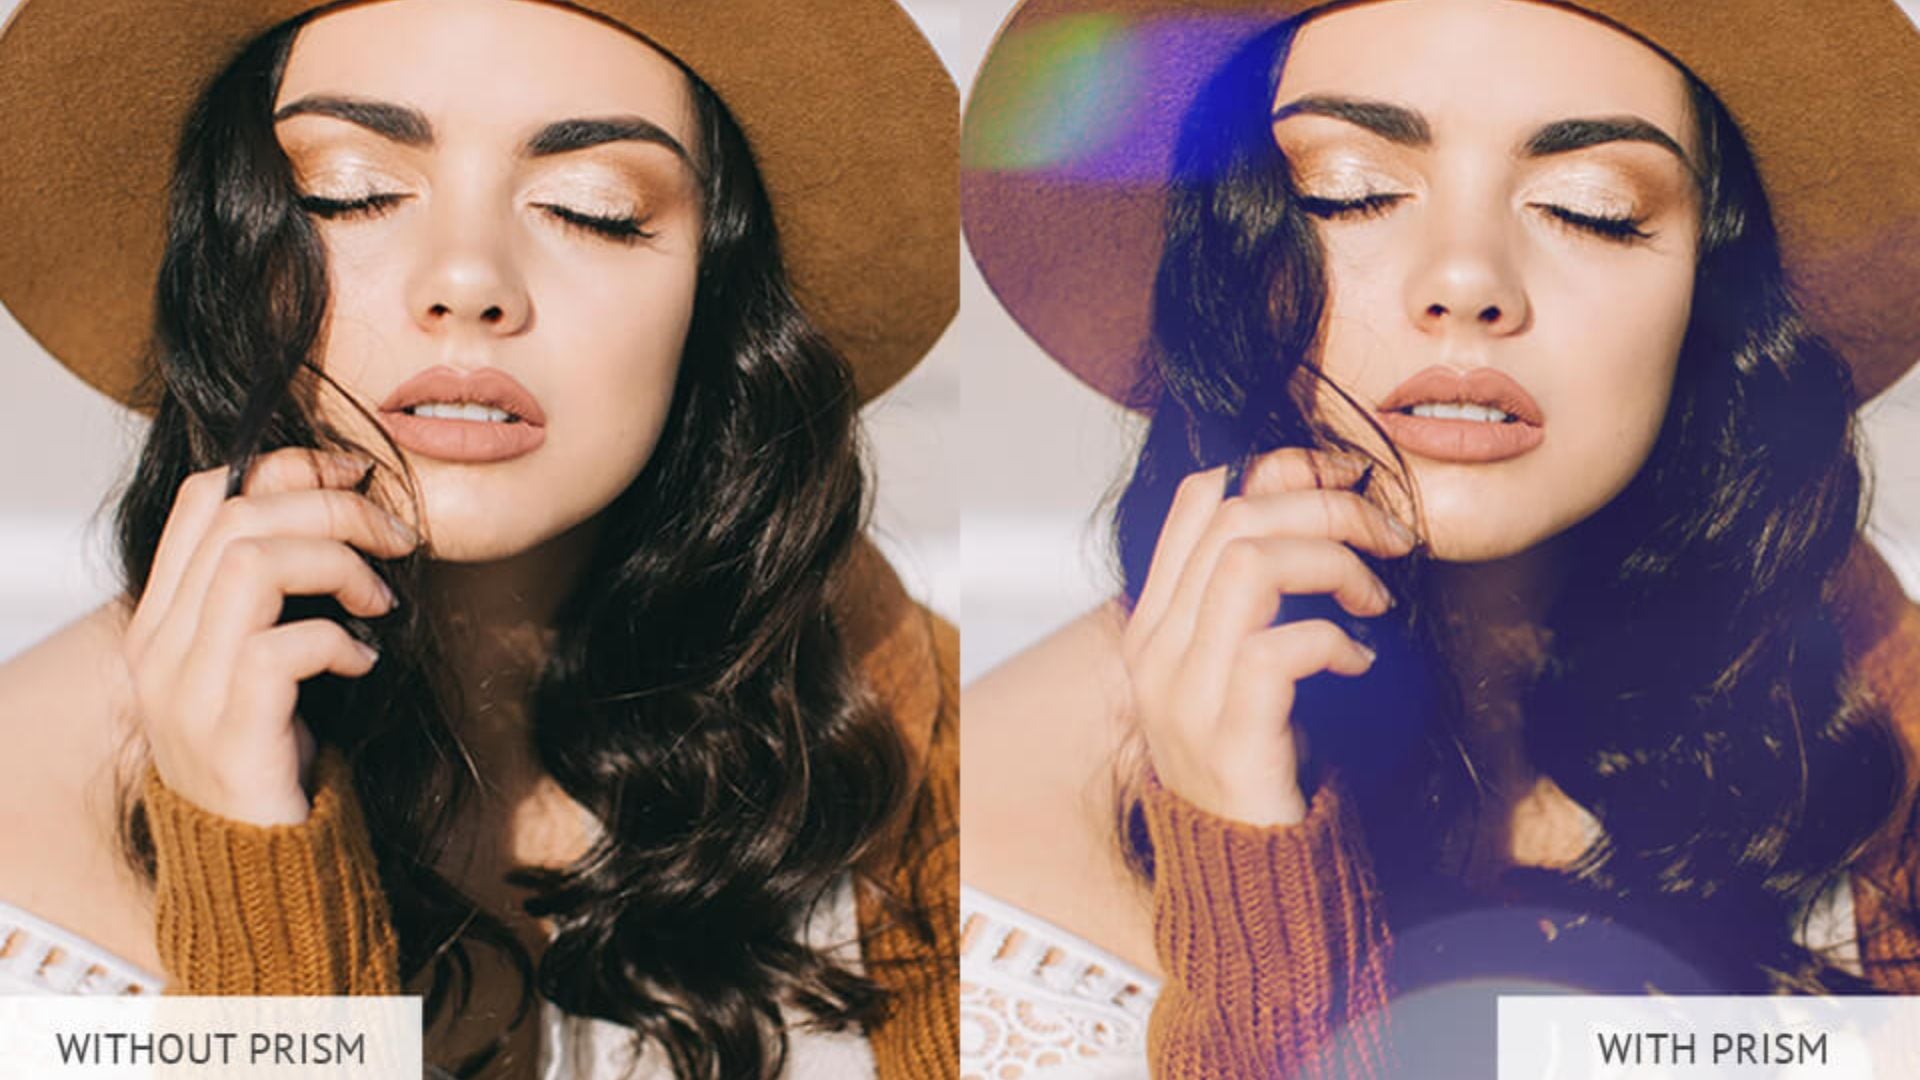
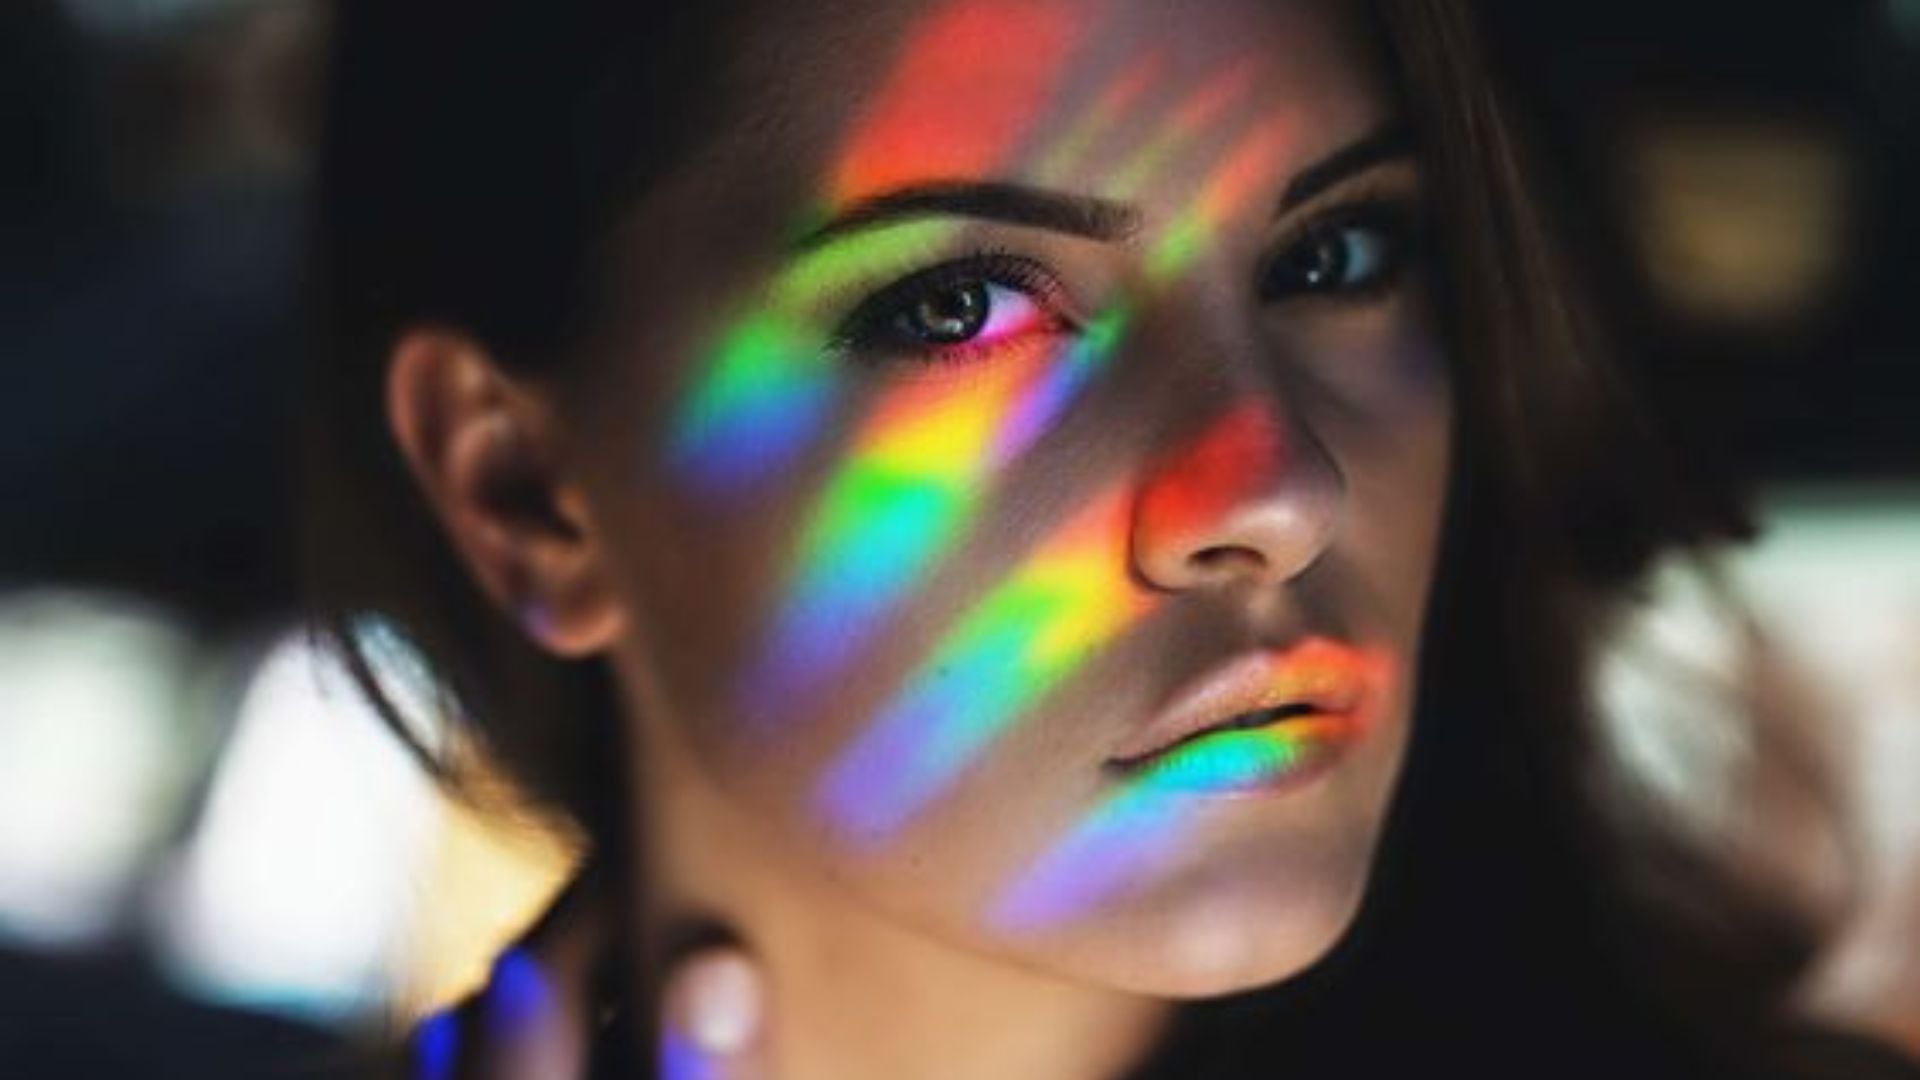
Prism lens photography turns regular photos into something special by bending light in cool ways. You hold a simple glass prism near your camera lens and watch as rainbow colors splash across your shots. The technique works with any camera and costs almost nothing to try.
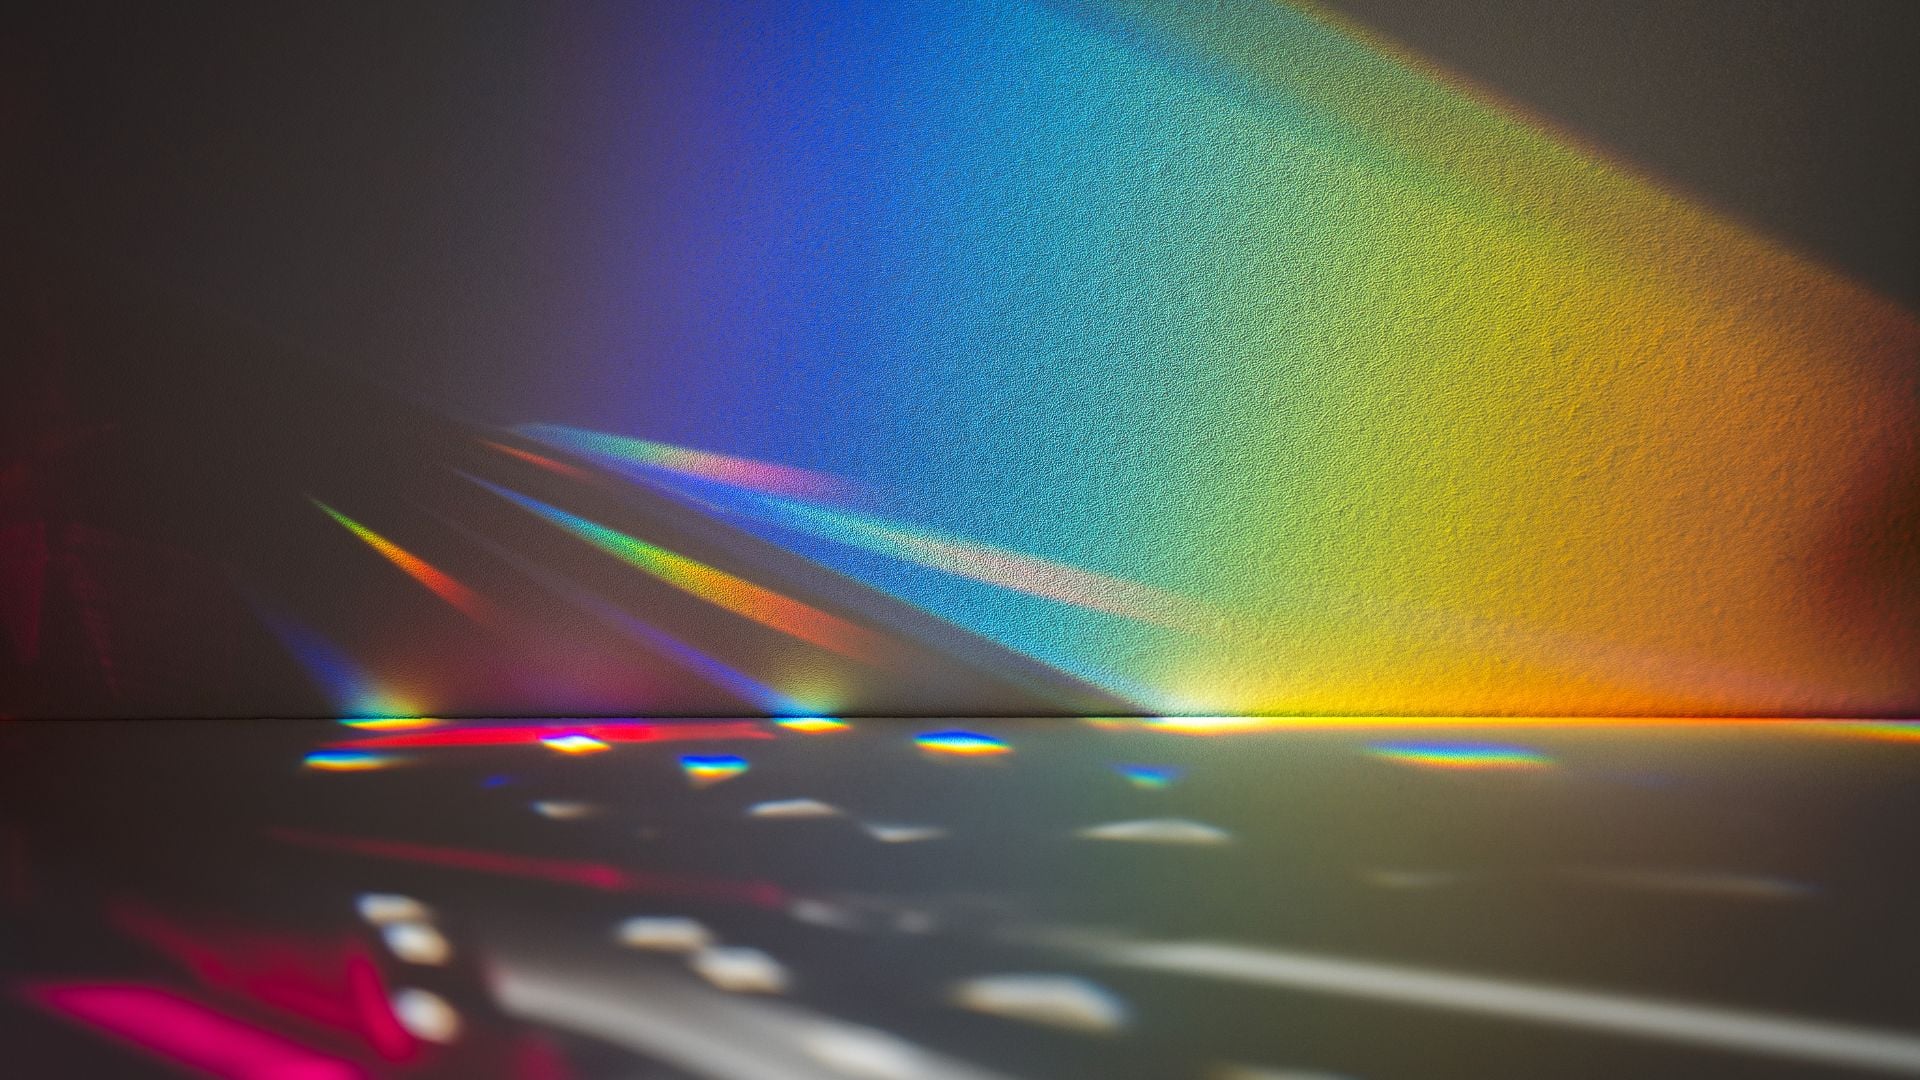
Light hits the prism’s angled surface and splits into different colors. Each wavelength bends at its own angle, creating those rainbow effects you see. Move the prism around and you control where those colors land in your frame.
Getting Started with Prism Photography
You need just two things to start: a camera and a basic triangular prism. Craft stores sell these for $10 to $30. Even the cheap ones work great when you’re learning.
Your camera type doesn’t matter much. DSLRs work fine, mirrorless cameras work fine, and even phones produce good results. Manual focus helps you stay in control, but autofocus can work too. Sometimes the prism confuses the autofocus though.
Lens choice makes a bigger difference than camera type. Wide-angle lenses between 24mm and 50mm give you the most room to play. You can position your prism in more places with wider lenses. Prime lenses with big apertures like f/1.4 create softer rainbow blurs.
Practice Makes Perfect
Start indoors where you control the light. Use table lamps, window light, or even your phone’s flashlight. This lets you learn without fighting changing sunlight. You’ll figure out what works before taking things outside.
Hold your prism at different distances from your lens. Close placement creates subtle color washes. Pull it back a few inches for bold rainbow streaks. Small moves change everything.
Basic Prism Lens Photography Techniques
Understanding distance and angle is key to prism lens photography. The closer your prism sits to the lens, the softer the effect. Moving it away creates sharper, more defined color bands.
Rotating your prism changes everything about your shot. Each face of a triangular prism refracts light differently. Spin it slowly while looking through your viewfinder. Watch the colors shift and merge as you turn it.
Here’s what happens when you rotate:
- Colors separate and combine at different angles
- Some positions create concentrated color bursts
- Other angles spread soft washes across your whole frame
- Finding the sweet spot takes practice
Working with Sunlight
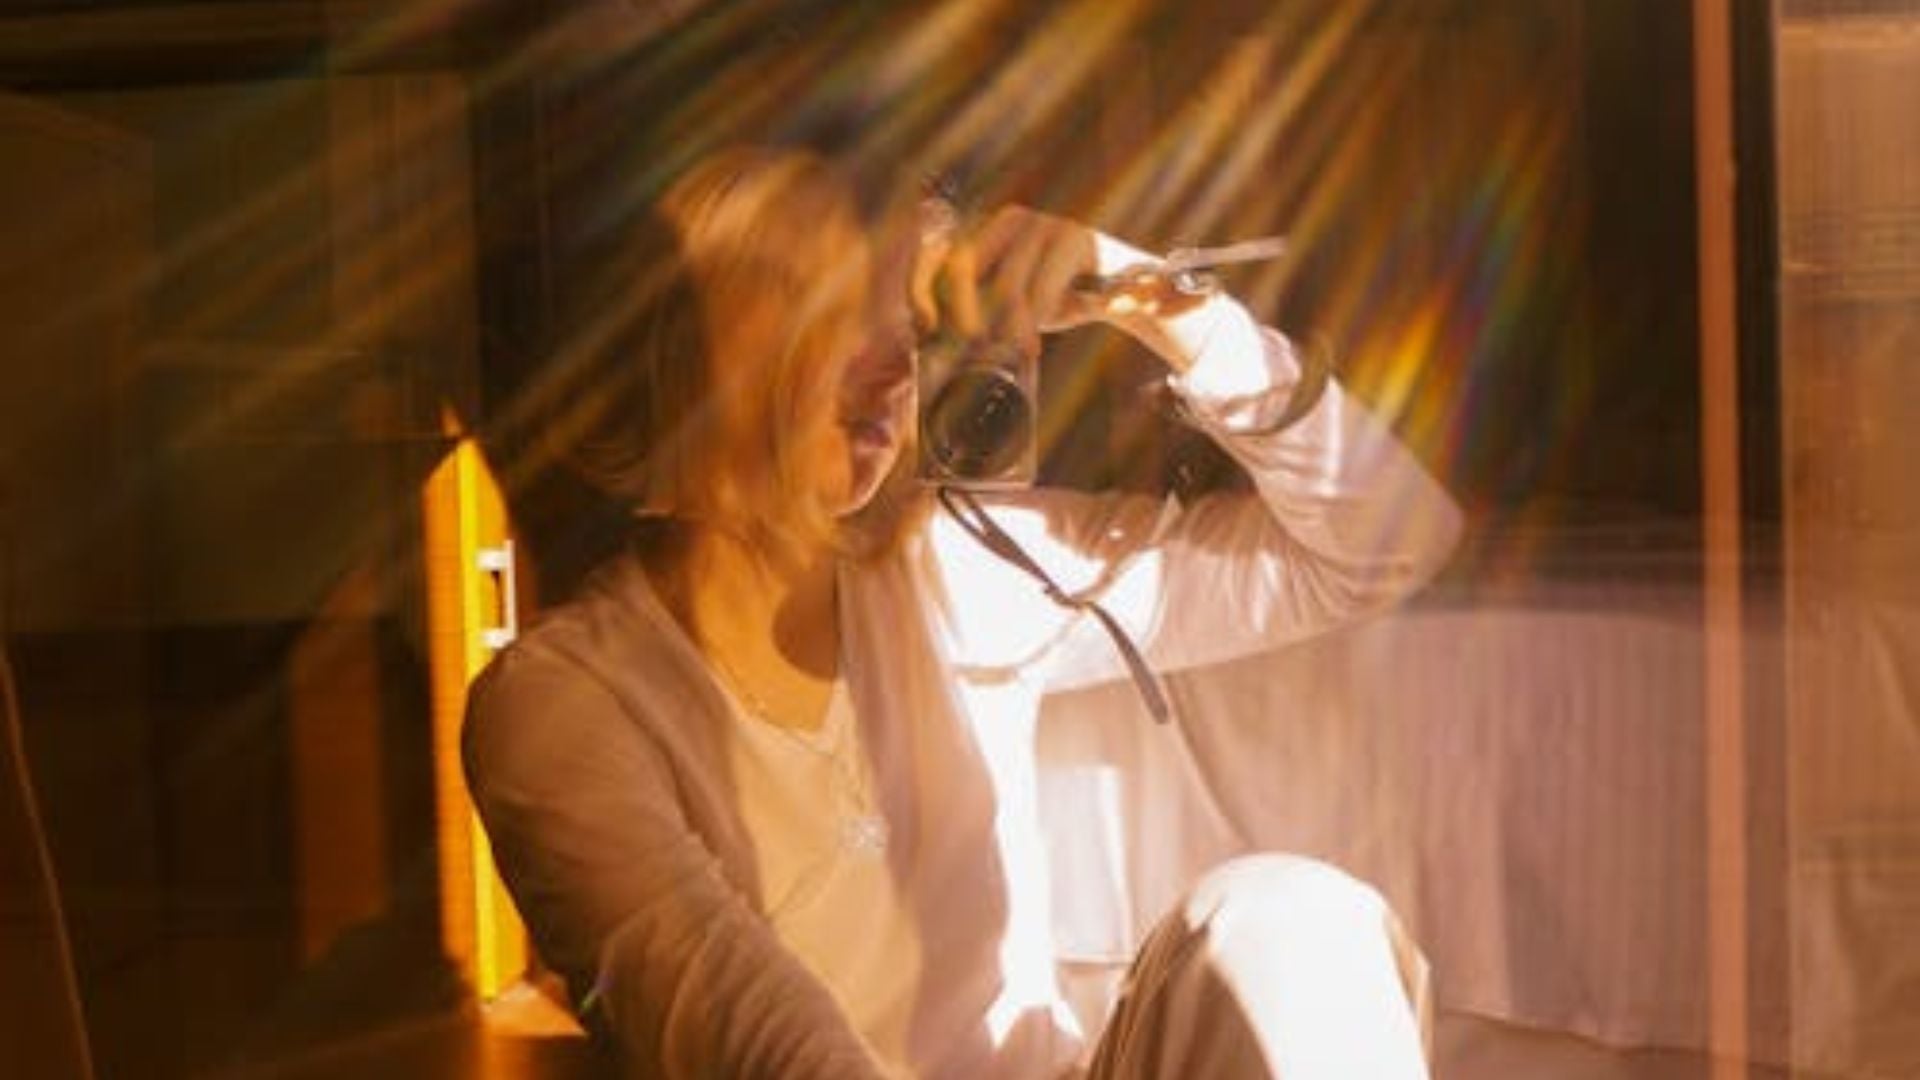
Natural light gives you the strongest prism effects. Golden hour creates warm tones while blue hour adds cool colors. Direct sun produces bold, saturated rainbows. Overcast days make gentler, softer effects.
Try backlighting your subject with the sun from behind. Position your prism to catch those rays and bounce them forward. The contrast between bright edges and colored light adds depth. Your subject gets a natural glow.
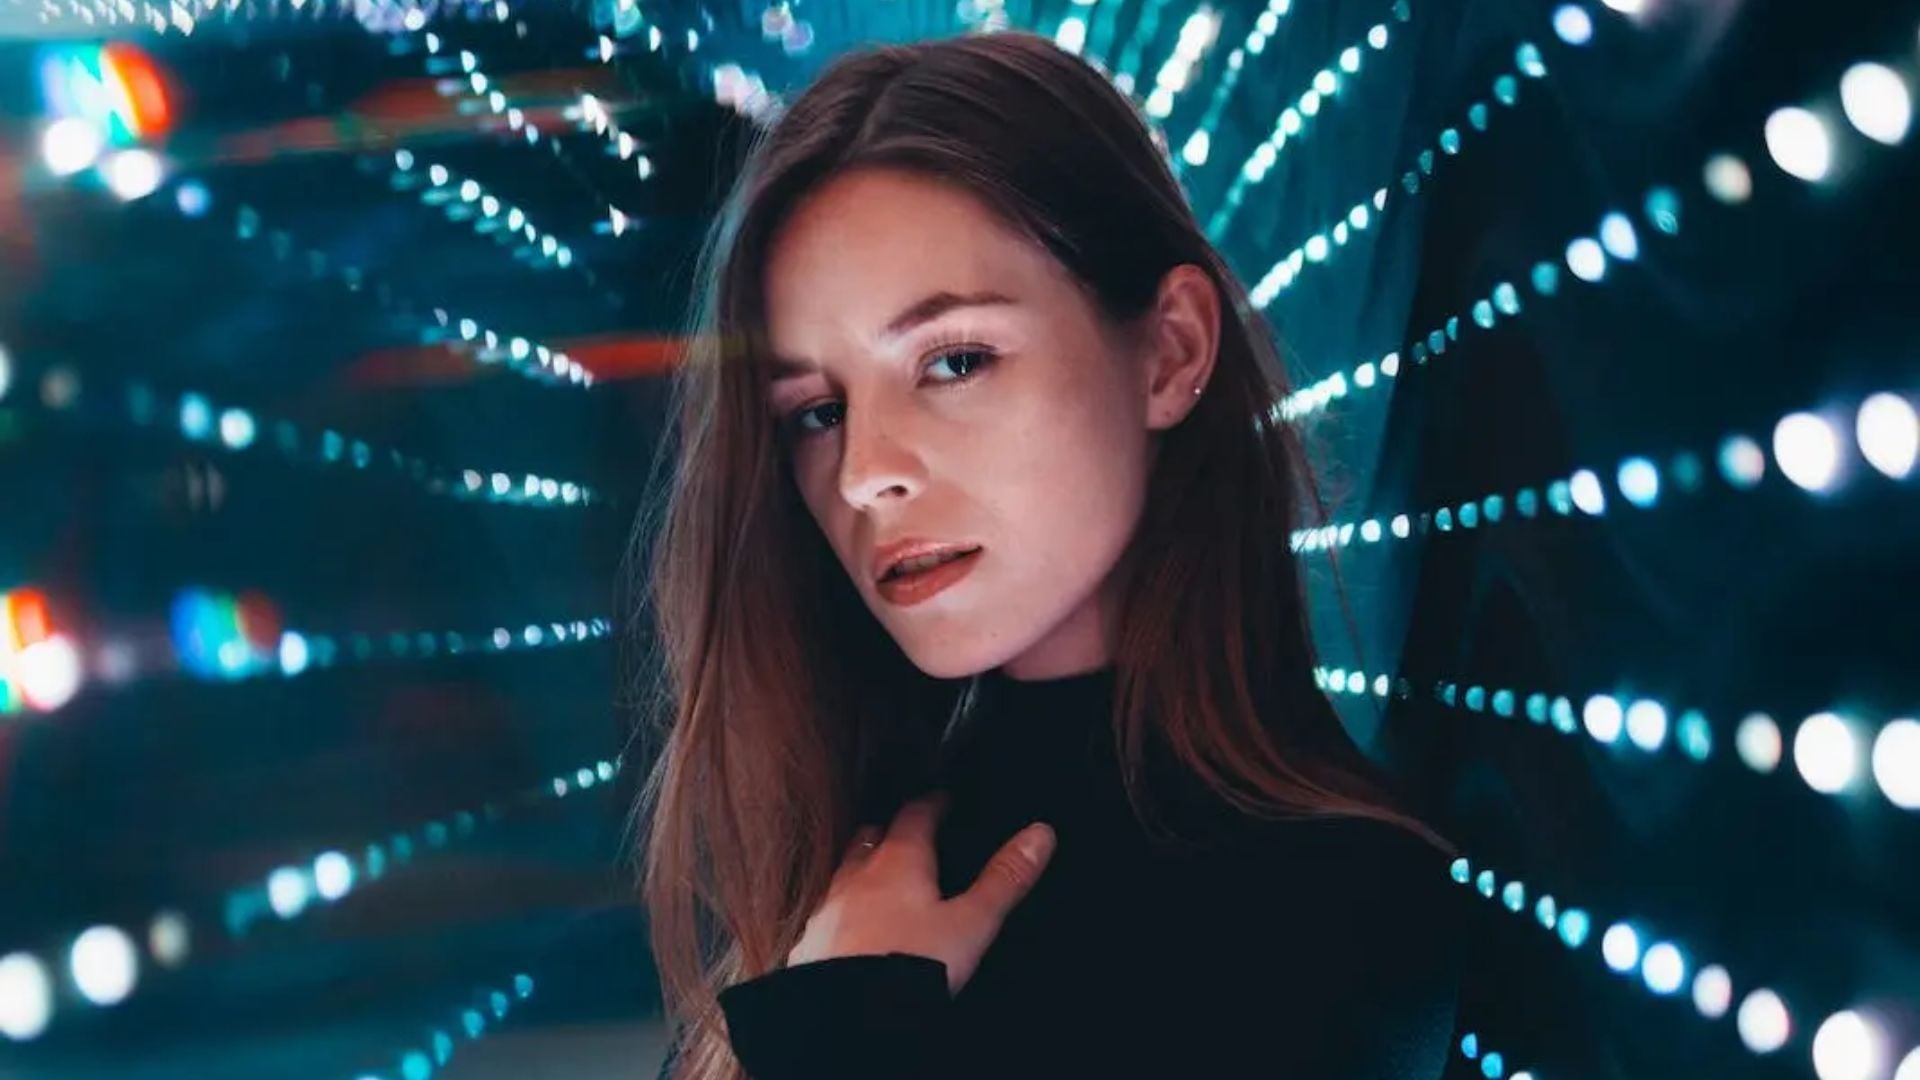
Window light works beautifully for portrait photography sessions indoors. Big windows act like giant softboxes. Side lighting through windows lets you paint color gradients across faces. Morning and afternoon sun through windows gives you perfect natural spotlights.
Playing with Artificial Light
Street lights and neon signs become creative tools after dark. Cities overflow with point light sources perfect for prism work. Each light type has different colors. Warm streetlights create amber and gold refractions. Cool LED signs make blues and purples.
Studio lights give you total control over your lighting setup. Put lights at specific angles for predictable effects. Using multiple lights lets you layer different colors. Add colored gels to lights for even more options.
Ring lights create circular rainbow halos at certain angles. The continuous light ring refracts into geometric patterns. Beauty dishes and softboxes produce softer overlays than bare bulbs. Try different light modifiers to see what you like best.
Camera Settings for Prism Work
Prism lens photography needs specific settings for sharp, properly exposed images. Your aperture choice balances creativity with technical needs. Wide apertures between f/1.4 and f/2.8 create dreamy, soft effects with blurred rainbows.
Narrower apertures from f/5.6 to f/11 keep more things sharp. The extra depth of field works well for environmental portraits or landscapes. You keep your subject and background detailed while adding color.
Shutter speed depends on your light and what look you want. Bright outdoor scenes might need 1/500s or faster to avoid blown-out highlights. Low light needs slower speeds like 1/60s or longer. Use a tripod below 1/125s for sharp shots while holding a prism.
Keep ISO as low as possible for clean images. Start at ISO 100 to 400 in good light. You might push to ISO 1600 or 3200 in darker spots. Modern cameras handle high ISOs well. The colorful effects can hide some noise anyway.
Getting Sharp Focus
Autofocus fights with prisms blocking the view. Switch to manual focus for better results. Focus on your subject first, then add the prism. This stops your camera from focusing on the glass instead.
Back button focus helps a lot here. You lock focus on your subject separately from taking the shot. Then you move the prism without accidentally refocusing. Your subject stays sharp while colors change.
Some photographers still use autofocus modes successfully. They position the prism away from their focus points. Active AF points stay on the subject while the prism affects the edges.
Creative Ways to Use Prisms
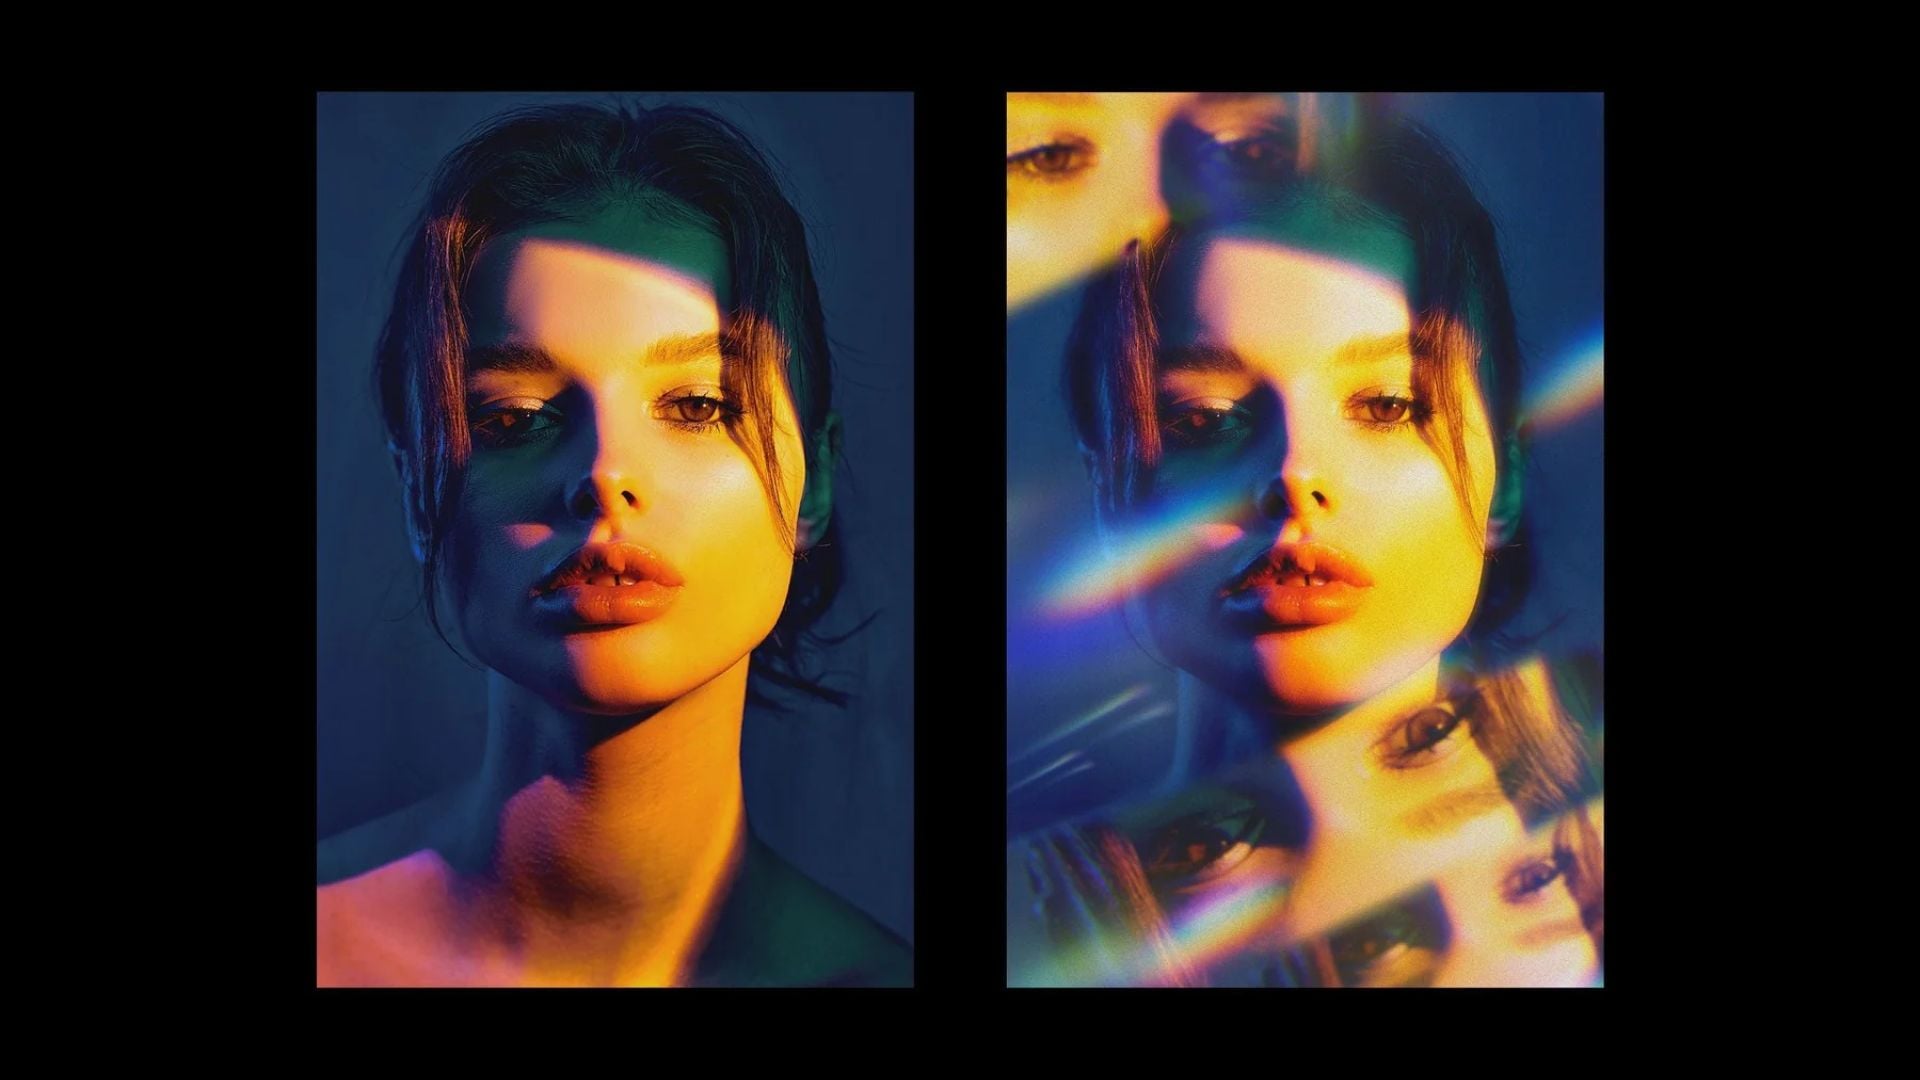
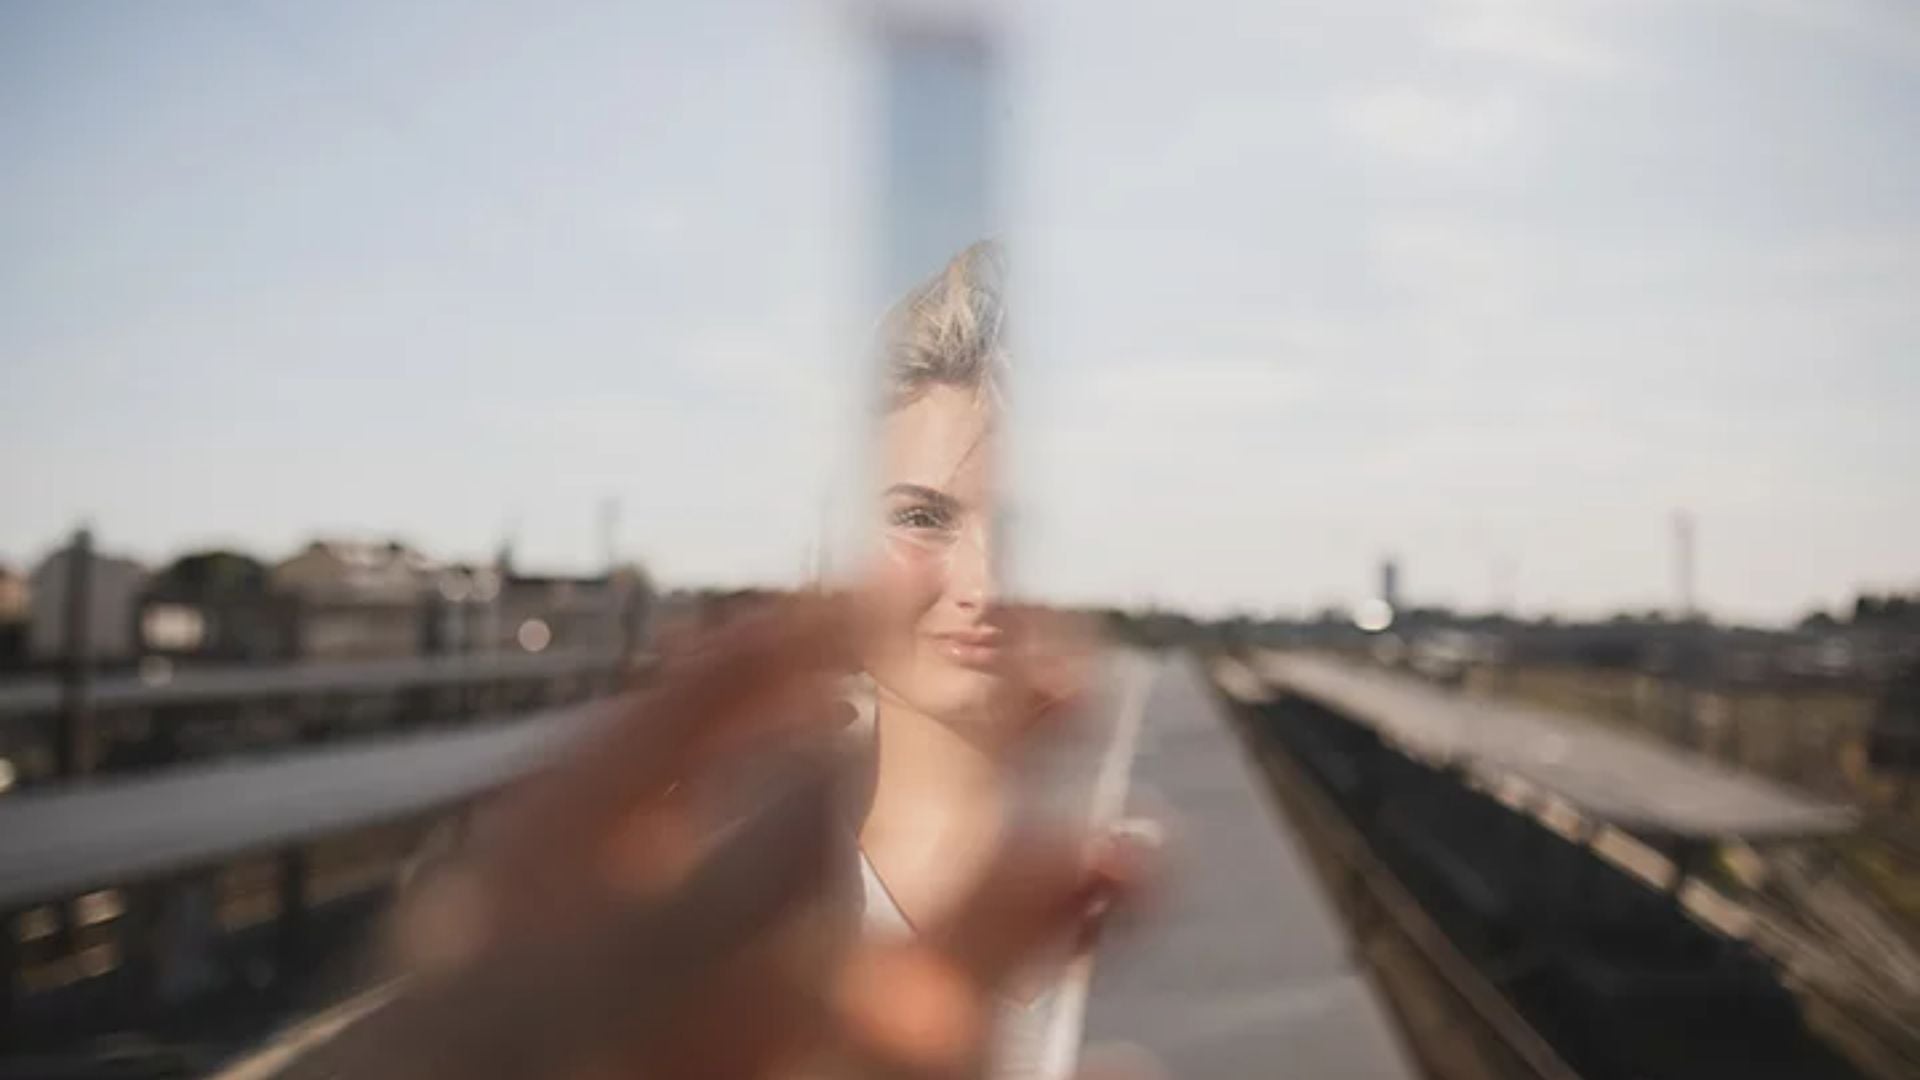
Portraits benefit from subtle prism work. Position your prism to wash color across one side of your subject’s face. The contrast between clear and colored areas adds interest without overwhelming the shot. Small movements create different moods.
Double exposures with prisms create layered, surreal images. Shoot one frame with color effects, then shoot again without the prism. Merge the results to show your subject clearly with ethereal overlays. Many cameras have built-in multiple exposure modes now.
Landscape photography transforms with smart prism placement. Add rainbow flares to sunrises for extra drama. Create foreground color in plain compositions. The technique makes familiar locations feel fresh.
Product and Still Life Work
Commercial photography uses prism effects to make products pop. Jewelry, cosmetics, and tech gain appeal with subtle rainbow touches. The prisms suggest quality without distracting from the product. This works great for social media where eye-catching visuals perform better.
Food photography benefits from warm prism tones during golden hour. Amber and gold refractions complement food colors naturally. Catch window light with your prism and redirect it across your setup. The technique adds professional polish that phones can capture.
Advanced Prism Techniques
Multiple prisms unlock new options. Hold two at different angles for complex color patterns. The intersecting refractions create kaleidoscope effects. This takes practice since you’re juggling two prisms and a camera.
Crystal prisms with cut facets make more complex refractions than smooth ones. Each facet works as a separate surface, multiplying rainbow effects. These cost more but offer unique looks. Thrift store chandelier crystals work as cheap alternatives.
Prism balls or crystal balls add spherical distortion with color effects. The curved surface bends light differently than flat faces. You capture inverted scenes inside the sphere plus rainbows around edges.
Mixing Techniques
Prism photography pairs well with long exposures. Move your prism during multi-second shots to paint with rainbow light. The motion blur creates dreamy color trails. This shines during blue hour with city lights.
Here’s what works well together:
- Long exposures create light trails with rainbow colors
- Moving the prism during exposure paints color across the frame
- Blue hour provides perfect ambient light levels
- City lights become colorful streaks and patterns
Freelensing with prisms generates extreme tilt-shift with color shifts. Detach your lens slightly while holding a prism near the sensor. This advanced technique needs careful handling. The results show unique focus planes with intense colors.
Prism work enhances bokeh in out-of-focus areas. Point light sources in backgrounds become colorful orbs. City lights, string lights, or candles transform into art. Soft bokeh plus color creates a magical atmosphere in night shots.
Fixing Common Problems
Lens flare from direct light can overwhelm your image. Angle your prism to redirect harsh light away from your lens. Your hand position matters here. Shield your lens with your palm while holding the prism to block glare. This takes coordination but helps a lot.
Unwanted reflections from the prism sometimes show up in frame. These appear as geometric shapes or prism edges. Move the prism farther away or change your angle to remove them. Sometimes these add to the effect though.
Color casts affecting everything happen when the prism covers too much lens. Pull it back or use smaller sections of it. You want intentional color effects, not overall contamination. Partial coverage gives the best balance.
Editing Your Prism Photos
Post-processing refines your images without overdoing effects. Adjust white balance so your subject has accurate skin tones despite colors. Local adjustments in Lightroom let you enhance effects while keeping proper exposure.
Clarity and contrast affect how distinct your rainbows appear. Increasing clarity sharpens color transitions. Reducing clarity creates softer, dreamier effects. Your creative vision determines the right choice.
Saturation makes or breaks prism images. The colors often look vibrant straight from the camera but might need subtle boosts. Don’t oversaturate until colors look fake. Vibrance sliders provide more natural enhancement than straight saturation.
Building Your Prism Kit
Basic kits start with one triangular prism under $20. This covers most learning needs. Buy from craft stores, photography shops, or science supply companies. Glass quality matters less than you think for creative work.
Expanding means adding different prism shapes and sizes. Rectangular prisms create different effects than triangular ones. Small prisms make subtle colors while larger ones generate dramatic coverage. A varied collection costs $50 to $100.
Prism holders and clamps free both hands for camera work. DIY solutions using small tripods or magic arms work perfectly. Some photographers 3D print custom holders for their prisms. This accessory improves your shooting experience significantly.
Quality glass prisms outlast plastic and produce clearer refractions. The optical clarity difference shows when you compare materials. Glass also resists scratching better. Invest in quality glass once you commit to regular prism lens photography.
Finding Inspiration and Growing
Study photographers using prisms to expand your vision. Instagram and photography blogs showcase different approaches to this technique. Notice how artists use prisms subtly versus dramatically. Both styles work depending on your message.
Experimentation drives improvement more than following rules. Shoot the same subject with your prism in fifty positions. Review those images to understand what works and why. This trial process teaches you faster than any tutorial.
The weather you normally avoid becomes a creative opportunity with prisms. Rain creates interesting refractions through water droplets combined with glass. Fog softens backgrounds while prisms add color dimension. Snow reflects light beautifully for vibrant effects.
According to Digital Photography School, understanding light behavior is fundamental to all photography. Prism work teaches you about light in ways standard photography doesn’t. You develop intuition for predicting how light bends and refracts.
Seasonal Changes
Different seasons offer unique light qualities perfect for prism lens photography experiments. Winter’s low sun creates long shadows and dramatic side lighting. Summer’s bright sun works best during golden hour. Spring and fall provide moderate light that forgives mistakes.
Your prism skills translate to better overall lighting awareness. You start noticing light qualities you ignored before. This heightened sensitivity improves all your photography work. Prism techniques become one tool in your expanded toolkit.
Practice at different times of day to see how light changes your results. Morning light has a different color temperature than afternoon light. Evening light creates different moods than midday. Each time offers new creative possibilities.
Tips for Better Prism Photos
Keep your prism clean for clear refractions. Fingerprints and dust affect light transmission. Wipe it down with a microfiber cloth before shooting. Clean glass makes cleaner colors in your final images.
Experiment with prism distance constantly. What works for one scene fails for another. The distance between the prism and lens changes color intensity and spread. Try near, middle, and far positions for each setup.
Watch your composition while adding prism effects. The colors should enhance, not overpower your subject. Balance is key. Your viewer should see your subject first, then notice the creative color work.
Start with subtle effects and build from there. New photographers often go overboard with prisms at first. Less is usually more when you’re learning. You can always add more color in post if needed.
Shoot RAW format for maximum editing flexibility. RAW files capture more color information than JPEGs. This gives you more room to adjust white balance and exposure later. The extra data helps when working with unusual lighting.
Practice regularly to develop your style. Prism photography has no rules, just techniques. Your unique approach develops through repeated shooting. What works for other photographers might not work for you.

Darlene Lleno
Darlene Lleno brings a unique perspective to DIY Photography as someone who grew up surrounded by camera gear but chose words over lenses. With five years of writing experience, she specializes in photography content that’s both technically informed and genuinely passionate. Growing up with a photographer twin brother meant camera talk was everyday conversation in her household. While he mastered capturing moments, Darlene discovered she preferred being the subject and the storyteller behind the scenes. As a travel enthusiast and mother of two, she understands the importance of preserving life’s precious moments. When not exploring new destinations or writing for DIY Photography, you’ll find her reading or tending to her garden. Her approach to photography writing is refreshingly authentic, she may not be behind the camera, but she knows exactly what it takes to help others capture the shots that matter most.
Related Posts
 Nope, those 30-year-old Terminator 2 bullet effects weren’t CGI, they were practical effects
 Understanding and Creating ‘Realistic’ Camera Shake In After Effects
 These variable lens filters come with built-in creative effects
Join the Discussion
DIYP Comment Policy
Be nice, be on-topic, no personal information or flames.