


Now You Can Enlarge Negatives with Your LomoMod No.1: Build the LomoMod No.1e Enlarger
Aug 16, 2025
David Prochnow
Our resident “how-to” project editor, David Prochnow, lives on the Gulf Coast of the United States in Ocean Springs, Mississippi. He brings his expertise at making our photography projects accessible to everyone, from a lengthy stint acting as the Contributing How-To Editor with Popular Science magazine. While you don’t have to actually build each of his projects, reading about these adventures will contribute to your continued overall appreciation of do-it-yourself photography. A collection of David’s best Popular Science projects can be found in the book, “The Big Book of Hacks,” Edited by Doug Cantor.
Share:

Modifying the Lomography LomoMod No.1 is a source of nonstop fun. Whether you’re striving for a medium format camera with some personal pizzazz or attempting to augment its versatility like a LomoMod No.1.5, this cardboard camera kit priced at $59 is a flexible blank canvas waiting for your inspirational input.
No matter where your LomoMod No.1 DIY activities take you, however, shooting 120-format photographs could leave you asking one question. How can I enlarge my medium format negatives? Other than investing in building and equipping a traditional darkroom, your choice is, err, well, no choice. You’ll have to ship your negatives to a photographic lab and order an enlargement.
[Related Reading: Lomomod No. 1 review: a fun and frustrating DIY cardboard camera with a liquid-filled lens]
That is, until you convert your LomoMod No.1 into an enlarger. Say, what? Yes, that’s right, by using a dead-simple, non-destructive conversion process, any LomoMod No.1 can be easily made into a LomoMod No.1e enlarger.
Blow Up Your Negatives, but Not Your Budget
Before you begin “building” your LomoMod No.1e enlarger, there is one additional product that you might need to purchase. You will need a bright light to illuminate the negative while it is inside the camera. Ideally, this light source should be battery-operated, use a diffused lens, have an adjustable power output, and, most importantly, fit inside the back of the LomoMod No. 1 camera. The Ulanzi VL49 Video Light Panel has been tested and it works. If you have a fave LED light panel, try it, it might work.
Once you’ve secured your light source, it’s time to modify your LomoMod No.1 into an enlarger. Begin this process by removing the back from the camera and setting it aside. Likewise, remove the 120 take-up spool from the film chamber and set it aside, too. Now pickup your camera, oops, enlarger and find a dark household room with bright white walls: a bathroom or utility room would be an ideal choice. Use a box, a stack of books, or a tripod to hold the enlarger while it is aimed at a white wall.
[Related Reading: An Unofficial LomoMod No.1.5 Medium Format Camera Also Shoots 35mm Film]
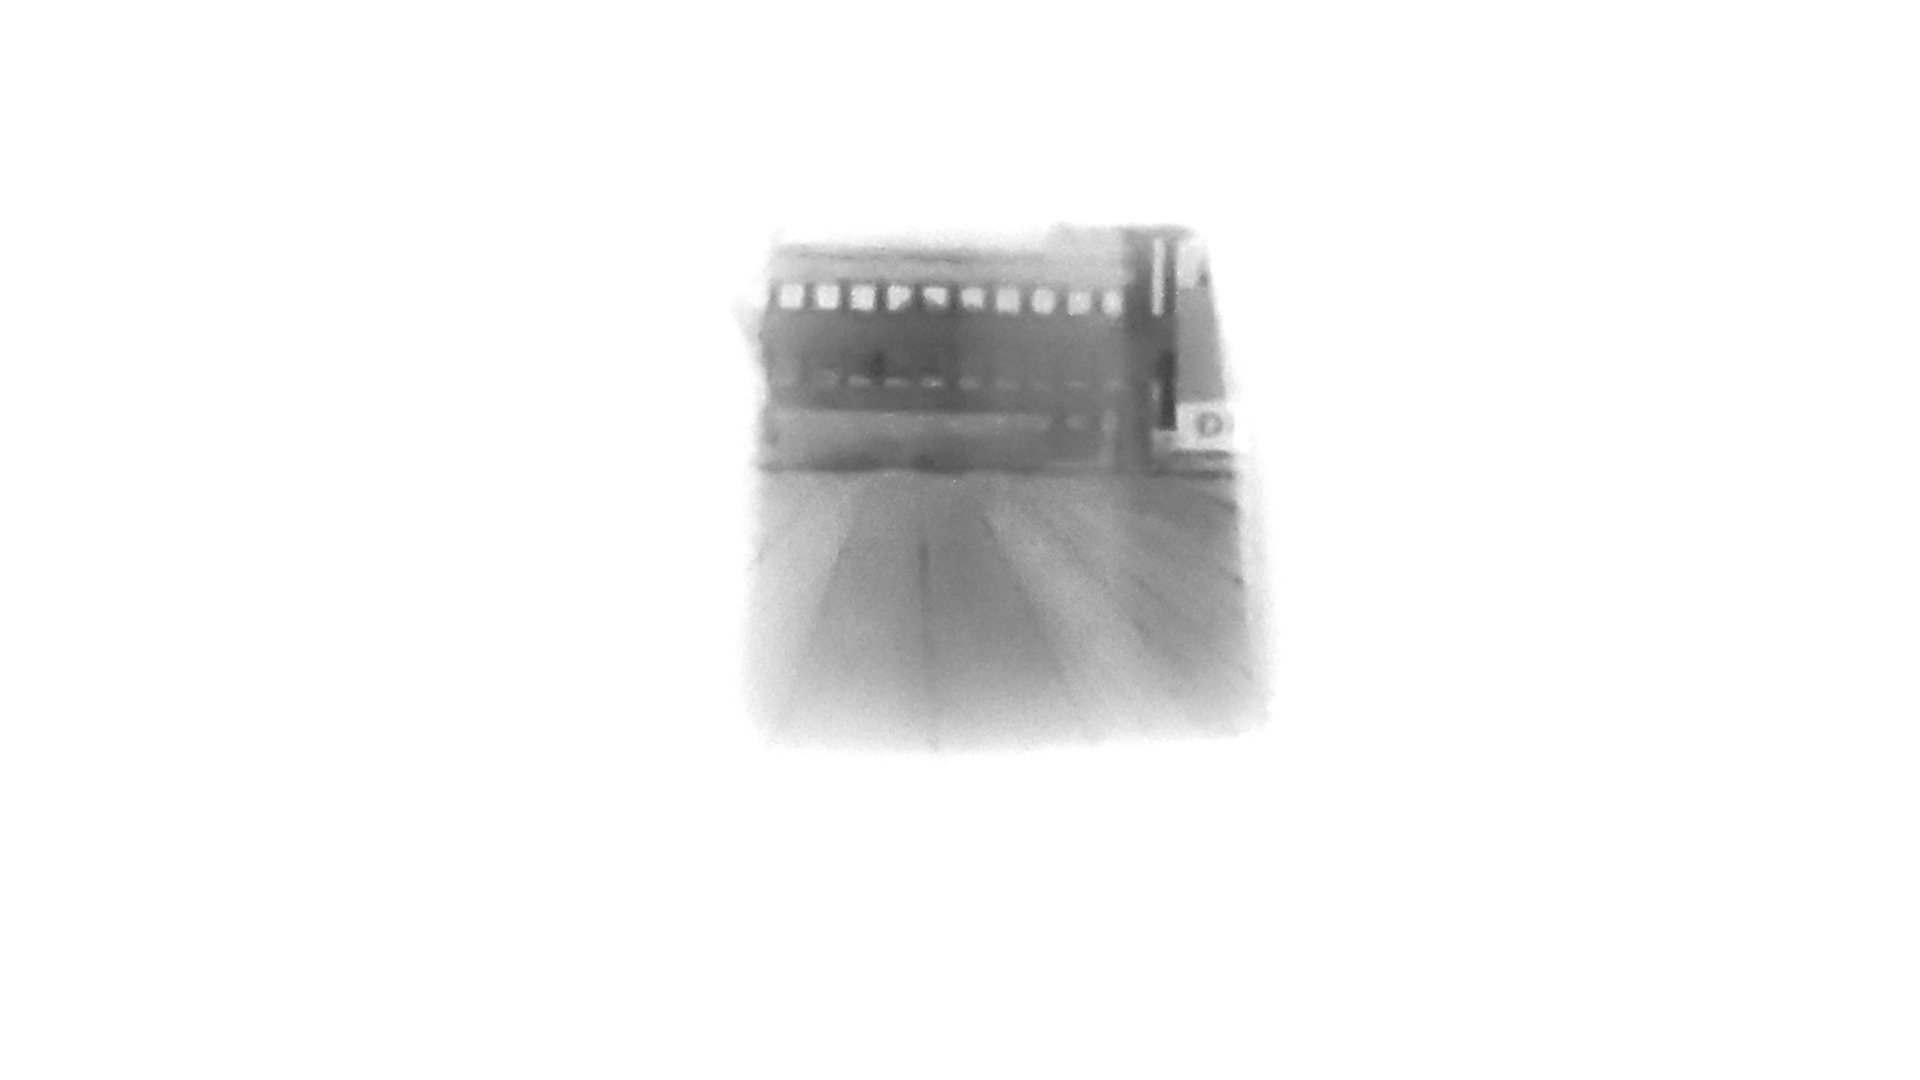
Find a sample negative to use as a test for evaluating the enlarger setup. Ensure that this negative has strong contrast and features an easily recognizable subject. Now slide the negative into the rear of the enlarger along the guide rails of the light chamber. This is the area where the film is exposed when the LomoMod No.1 is acting like a camera. The emulsion side should be facing the Sutton Water Lens.
Take the LED light panel, turn it upside down, and push it into the light chamber. Use the threaded hot shoe adapter tightening knob for wedging the panel against the cardboard layers inside the light chamber. The suggested VL49 light panel won’t hold the negative tightly enough against the light chamber. Therefore, use a couple of rolled bathroom tissue squares and squeeze them into the space along the sides between the light panel and the negative.

Switch on the light panel and select it’s brightest illumination setting. On the front of the Sutton Water Lens, set the “T” (Time) switch on the shutter speed mechanism to the open position. Turn off the room lights and slide the enlarger away from the wall. Moving the enlarger is how you “focus” the negative. One to three feet should work for projecting a clear image on the wall.
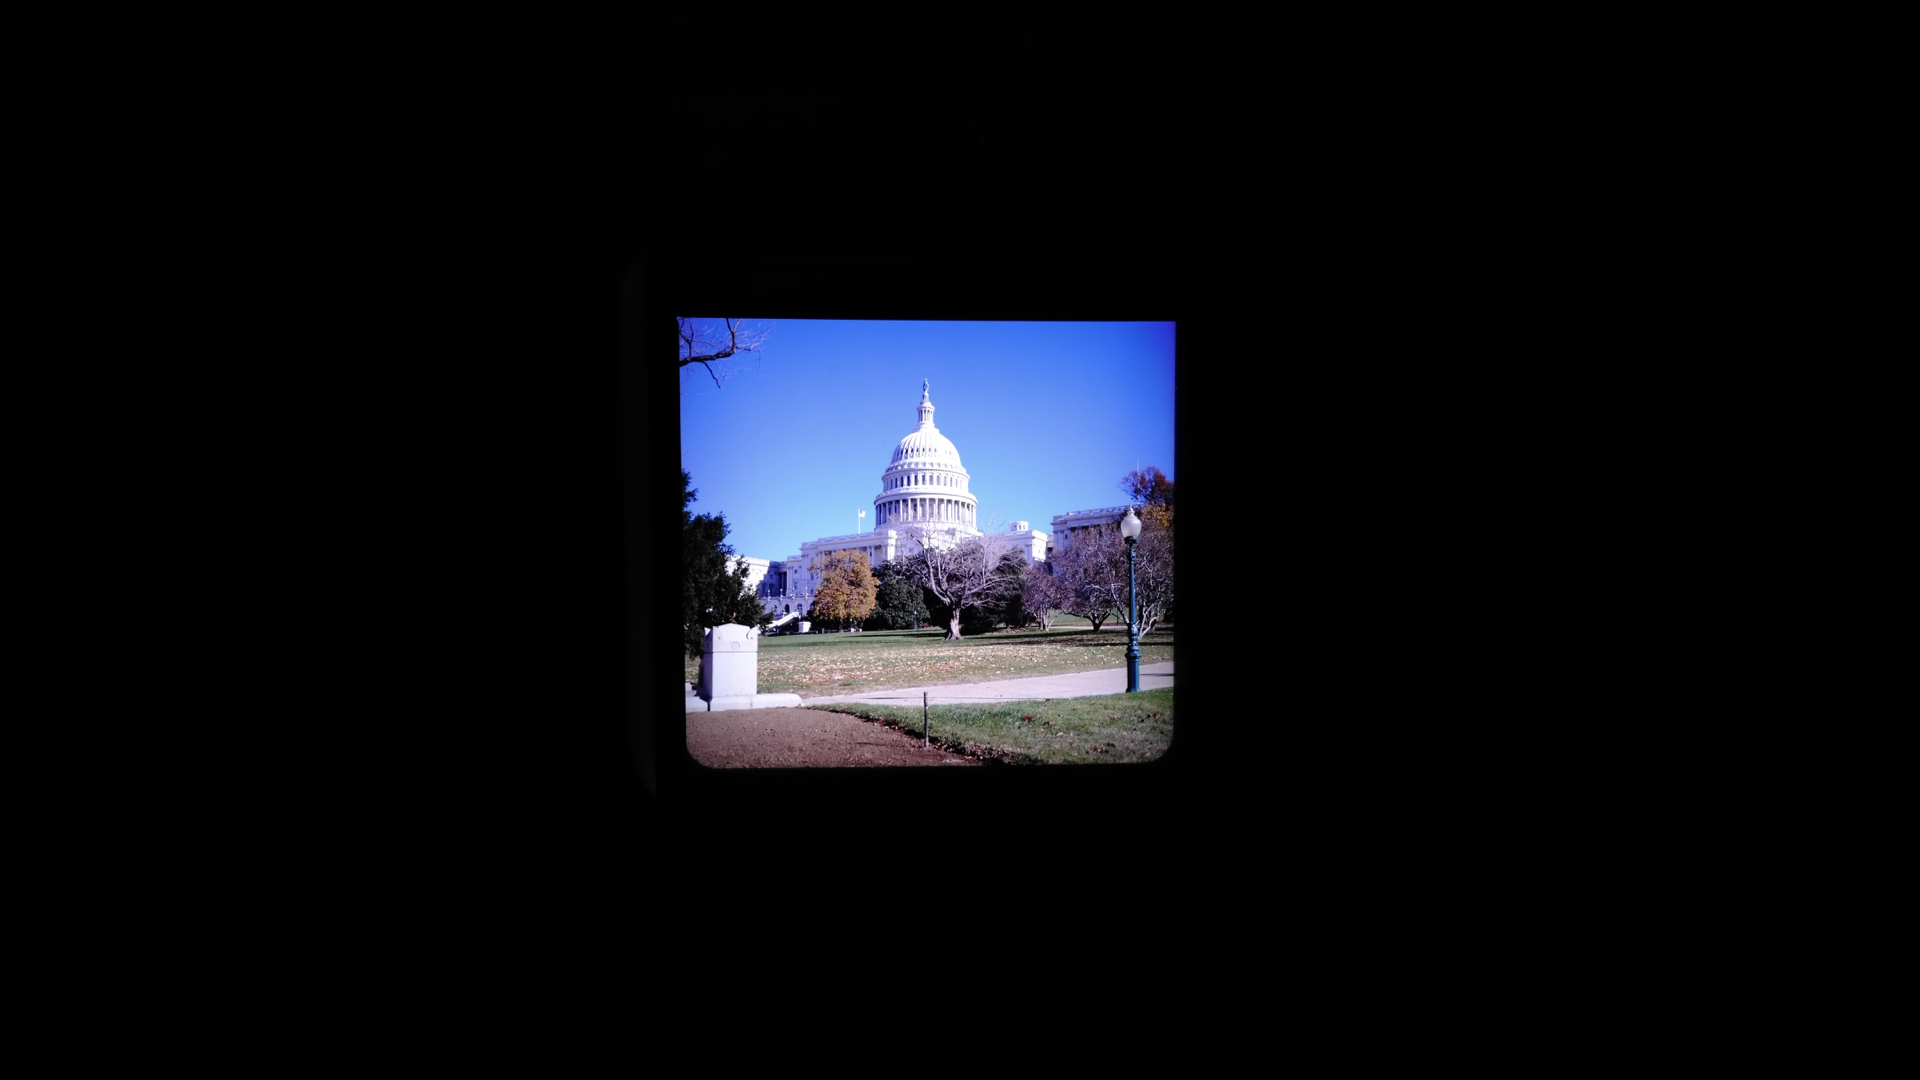
Once you’ve achieved the desired focus and enlargement of your negative, use your smartphone to take a photograph of this projection. You can convert this negative to a positive by visiting the Lomo digitaLIZA Lab Web site, uploading the saved negative, and adjusting the converted image with the lab’s online tools.
Finally, if the converted positive photograph isn’t the highest quality, you can try swapping the Sutton Water Lens with a dedicated enlarging lens. For example, a Schneider-Kreuznach Componon-S 80mm f/5.6 enlarging lens can be added to the LomoMod No.1e for projecting higher resolution images. Regardless, the LomoMod No.1e enlarger modification is another demonstration of the versatility of the original Lomography design.
Enjoy.

David Prochnow
Our resident “how-to” project editor, David Prochnow, lives on the Gulf Coast of the United States in Ocean Springs, Mississippi. He brings his expertise at making our photography projects accessible to everyone, from a lengthy stint acting as the Contributing How-To Editor with Popular Science magazine. While you don’t have to actually build each of his projects, reading about these adventures will contribute to your continued overall appreciation of do-it-yourself photography. A collection of David’s best Popular Science projects can be found in the book, “The Big Book of Hacks,” Edited by Doug Cantor.
Related Posts
 Lomomod No.1 lets you build your own camera from scratch without screws or glue
 How to build a DIY 35mm slides and negatives copying machine
 An Unofficial LomoMod No.1.5 Medium Format Camera Also Shoots 35mm Film
 Lomomod No. 1 review: a fun and frustrating DIY cardboard camera with a liquid-filled lens
Join the Discussion
DIYP Comment Policy
Be nice, be on-topic, no personal information or flames.