


How to use light painting to make your own unique DIY backgrounds in-camera
Apr 25, 2018
John Aldred
John Aldred is a photographer with over 25 years of experience in the portrait and commercial worlds. He is based in Scotland and has been an early adopter – and occasional beta tester – of almost every digital imaging technology in that time. As well as his creative visual work, John uses 3D printing, electronics and programming to create his own photography and filmmaking tools and consults for a number of brands across the industry.
Share:

Coming up with unique and interesting backgrounds can be a challenge, especially in the studio. But it can be easier than you think. All it takes is a little light in the darkness. Light painting is typically seen out on location. The wonderful work of photographers like Eric Pare and Zach Smidt shows that off amazingly well. You can use it in the studio, too, though.
In this video, Joe Edelman shows us how we can use light painting to create some pretty cool unique backgrounds in the studio. Joe shoots Olympus cameras, which offer an advantage over other brands when it comes to this kind of thing with the Live Composite feature. It’s not essential to the technique, but it definitely makes life easier.
Olympus’ Live Composite feature essentially shows your long exposure building up as it happens. It’s not really just one exposure, though. It takes a series of images, the first being the ambient light in the room, and then continuously shoots more, only adding the brightest parts of the image to the previous one. It’s a bit like layering multiple images in Photoshop using the Lighten blend mode. Except it’s all done in-camera at the time of capture.
Although Live Composite is not essential for light painting techniques, it can be a very handy feature to have. Especially in the studio for a portrait session. But you can do the same thing with just about any camera by throwing it into Bulb mode. You’ll also want to turn autofocus off so that it’s not always hunting during the exposure to lock onto a target in the darkness.

For Joe’s technique using Live Composite, the first shot is the ambient light in the room, which is in darkness. The second shot then fires the strobes so that we can see the subject. The subsequent shots are when Joe paints the background with light to build up that long exposure without affecting the subject.
For most other cameras, you’ll want to be on bulb mode, with your flash set to front curtain sync (the default state on most cameras), and then just leave the shutter open for as long as you need. Unlike with Olympus cameras that support Live Composite, though, you won’t actually be able to see your final shot until the end of the exposure.
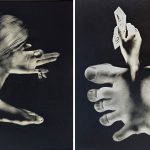
As to which light painting tools to use, Joe says just use what you have available. He uses a Yongnuo YN360 LED video light for some of them. But he also has some crazy looking multicoloured LED gloves. But you could use literally anything that puts out light. Even your smartphone or tablet.
It’s worth experimenting with different light sources to see which you like the look of. As with many things in photography, it’s going to boil down to personal preference.

John Aldred
John Aldred is a photographer with over 25 years of experience in the portrait and commercial worlds. He is based in Scotland and has been an early adopter – and occasional beta tester – of almost every digital imaging technology in that time. As well as his creative visual work, John uses 3D printing, electronics and programming to create his own photography and filmmaking tools and consults for a number of brands across the industry.
Related Posts
 “Chimacabres” are unique creatures created by combining daguerreotype with light painting
 Cross Section Light Painting is to Light Painting What Holograms Are To Photographs
 This $20 DIY ring light isn’t the kind of ring light you think it is – it’s for light painting
 Don’t spend a fortune on backgrounds, here are 3 ideas to make your own
Join the Discussion
DIYP Comment Policy
Be nice, be on-topic, no personal information or flames.
5 responses to “How to use light painting to make your own unique DIY backgrounds in-camera”
Thanks for sharing this great idea of making DIY background using light.
I wish my Nikon had this, it looks like something I’d have tons of fun with! :)
Hello John, I like your article. It was fantastic with some superb information about the use of light painting.
Gonna try this at home. Thanks!
Great blog with it’s name, great
stuffs with great blog,Thanks.
Photo Retouching Services