


How To Upgrade A Canon Lens
Oct 28, 2012
Udi Tirosh
Udi Tirosh is an entrepreneur, photography inventor, journalist, educator, and writer based in Israel. With over 25 years of experience in the photo-video industry, Udi has built and sold several photography-related brands. Udi has a double degree in mass media communications and computer science.
Share:
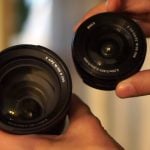
Take a long hard look at the this lens. Are you familiar with it? Does it look ‘right’?

This is because it is a special upgraded lens made by clubsnap’s member nntenzo.
I am adding this little addon. This is a funny post. I don’t think anyone will take this for L glass. especially with the typo. This is just something to make you smile with your morning coffee.
Here is how you get one yourself:
- You would need the following Acrylic Colors: (nntenzo used a Singaporean brand called OMNI, but almost any acrylics will do): White, Yellow & Black
- Some brushes, or better yet an air brush.
- Clear “Decal” paper (make sure you get the right type for your printer, Laser or Inkjet. The Inkjet type also needs a spray for “fix” the decal)
Here are the steps:
step 1: mix the first three colors until you get a color close to a 70-200 lens. The main color is white. Add a drip of black to become a little gray.
To give your lens a bit of an oldish look, Add a little bit of yellow.
You can add a bit of water to the mixture but not too much or paint will sag. Acrylic paints can dissolve in water before it dies. While dry, it is water resistant.
step 2: Apply tape to demarcate the area that don’t want to be painted. Keep the front and rear caps on, and don’t be shy about the tape.
step 3: Take a deep breath and paint using a soft brush. (If you have access to an air-brush with compressor you can carefully spray it, it comes out as much, much nicer work) and let it dry for few days
step 4: Use decal paper to put the logos like Canon, 50mm etc…. (just look for the logos online. If you look at the sample lens above closely, there is a small typo: 0.45mm/1.5ft instead of 0.45m/1.45ft
step 5: This is a crucial step to the process. Put two strips of tape about 2mm apart at the edge of the white color. Use a red permanent marker to draw the red line.


[via ClubSNAP]

Udi Tirosh
Udi Tirosh is an entrepreneur, photography inventor, journalist, educator, and writer based in Israel. With over 25 years of experience in the photo-video industry, Udi has built and sold several photography-related brands. Udi has a double degree in mass media communications and computer science.
Related Posts
 Food photographers, upgrade your modifiers before you upgrade anything else
 Should you stick with your kit lens or upgrade to something more expensive?
 Upgrade Your iPhone With An APS-C Sensor And f2.0 Lens Simply By Sliding It Into This New Case
 The Rylo 360 camera gets a free 5.8K video resolution upgrade with new firmware
Join the Discussion
DIYP Comment Policy
Be nice, be on-topic, no personal information or flames.
One response to “How To Upgrade A Canon Lens”
hahahahahahahaha! nice, real nice… unfortunately in my country rubber bands were different, i cant do that….