


How to easily shoot long exposure photographs at night
Jan 22, 2019
John Aldred
John Aldred is a photographer with over 25 years of experience in the portrait and commercial worlds. He is based in Scotland and has been an early adopter – and occasional beta tester – of almost every digital imaging technology in that time. As well as his creative visual work, John uses 3D printing, electronics and programming to create his own photography and filmmaking tools and consults for a number of brands across the industry.
Share:
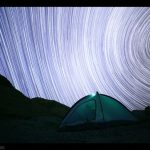
Long exposures are a lot of fun to shoot and experiment with. Although they can take some time to create (they are long exposures, after all), you’re never quite sure what you’re going to get until it’s finally over and the shutter closes. But they’re a lot easier to shoot than most people think. In this video, Pierre Lambert breaks down the process into simple steps.
One of the great things about long exposure photography is that it forces you to learn about the exposure triangle. It’s a simple formula that helps you to understand how you can adjust your ISO, aperture and shutter speed while still maintaining a good exposure. But before we get to that, let’s take a look at the basic steps to getting a good night time long exposure.
- Put your camera up on your tripod (yes, you need a tripod)
- Set up a 2 or 5-second delay timer on your camera, so that when you hit the shutter, you can let go of the camera. This prevents you from accidentally introducing camera movement into your shot.
- Experiment. Set your ISO high so you can get some quick shots to figure out your composition.
Once you’ve got something that you like the look of, this is where the exposure triangle comes into play. The idea with long exposure is, as the name suggests, to lengthen the duration your shutter is open to capture events over time in a single shot. But when you extend your shutter you let light hit the sensor for longer, so you need to reduce the light somewhere else. Namely, your aperture or your ISO.
Doing it with your aperture is fairly straightforward. If you lengthen your shutter speed by a stop, close down your aperture by a stop. This will give you more depth of field, and for something like a long exposure city shot, you’ll want to make sure you have enough depth of field to get everything you want in focus.
Once your lens aperture is giving you the amount of depth of field you need, the next step is to lower the ISO. You want to bring this down as low as possible to minimise the amount of noise in the image. But, remember, it’s night time. It’s dark. And once you start getting shutter speeds in the range of full seconds, they can get very long, very quickly. So, depending on how much depth of field you need, and how big a slice of time you wish to capture, your ISO may not be all the way down as low as your camera can go.
But that’s basically the process for shooting. Easy, huh? If you don’t want to deal with a 2-5 second delay before the start of each photo, or want to shoot long exposures longer than your camera will allow (typically 30 seconds), you can use a wired or wireless trigger, instead.
Post-processing long exposures is a different matter entirely and is as varied a process as working with any other type of photograph. Pierre goes through his post workflow for a long exposure shot he created. His post work on this particular image is fairly extensive, but you’ll be able to pick up a lot of tips and tricks along the way, so it’s well worth a watch.

John Aldred
John Aldred is a photographer with over 25 years of experience in the portrait and commercial worlds. He is based in Scotland and has been an early adopter – and occasional beta tester – of almost every digital imaging technology in that time. As well as his creative visual work, John uses 3D printing, electronics and programming to create his own photography and filmmaking tools and consults for a number of brands across the industry.


Join the Discussion
DIYP Comment Policy
Be nice, be on-topic, no personal information or flames.
8 responses to “How to easily shoot long exposure photographs at night”
I like to zoom while I’m doing long exposures!! Fun at the county fair.
shouldn’t it be how to easily?
Oops, fixed, thank you. :)
That title is giving me a brain aneurysm
One of mine
Or you can use live time on an Olympus camera and watch the image expose and just finish it when it looks right.
Love the shadows on the water!
No mentioning of how to determine correct exposure time. What is labeled “experimenting” can be cut down to a few seconds to give you the correct long exposure.
https://jmlobert.blogspot.com/2015/01/high-iso-preview-hip.html?q=hip&m=1