


How to fake the 2 stops magic bullet in Photoshop.
Oct 2, 2016
Joseph Parry
Joseph Parry is a Commercial and Editorial photographer based in the UK that provides cinematic photography and ounces of humour. Follow him on Instagram for stories and kick ass imagery.
Share:
Hey guys! Today I’m going to be showing you a cool tip for how to manipulate a natural light image within photoshop to be able to drag some of that control back between the subject and background separation that get’s stripped away when shooting with a strobe. Obviously you can find a better lit location but sometimes you find something great that doesn’t have the separation you wished for.
Here’s a great article on how to achieve the “real” effect with a strobe.
Here’s a shot with and without my tip:


What I’m doing here is obviously taking the background darker to create a stronger separation between the subject (focus point) and the background (environment / supporting palette). A few key things to remember here are with regards to exposure, clean outline on the subject (for easier selection / cleaner image) and why not just use a strobe?
With exposure what we’re trying to get here is purely taste, there are no specific rules required for this method to work, however blown out highlights will look a little odd the more you push them darker in post, so just be aware that you might have less wiggle room when shooting really blown out shots (unless you like the faded look of course!).
Here’s my base exposure from the SOOC (Straight Out Of Camera):
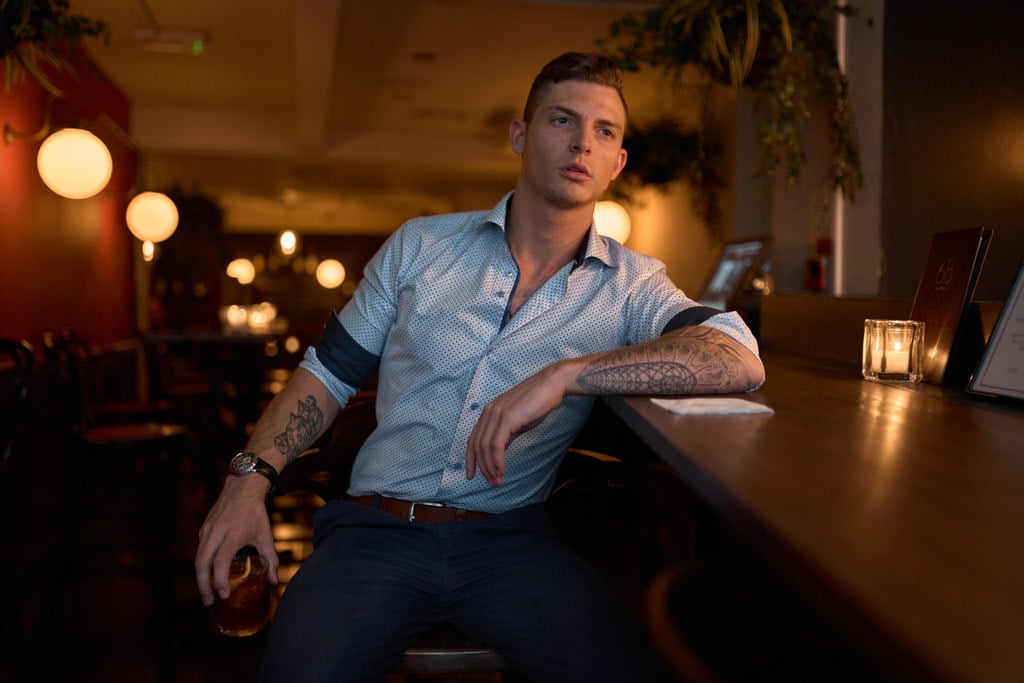
So as you can see my exposure is pretty “normal” a little on the dark side perhaps, though personal preference. So let’s look at the idea behind why on earth didn’t I just use a damn strobe if I wanted separation?
Well 2 reasons. No, 3 reasons! Firstly, there was no room in the location (my back was touching the window), secondly I didn;t have permission to shoot in the venue I was at (You can get aay with shooting with a camera alone vs setting upa strobe where insurance comes into play) and lastly on a photoshoot walking around London I didn’t want to have to lug heavy gear around with me (modifiers etc).
OK onto the method!
First all you need to do is use the quick select tool and make a rough outline of your subject (the cleaner you shoot it in camera the easier this will be). Honestly this selection DO NOT NEED TO BE PRECISE. Mainly because we can always gently paint in any hard edges later if required.
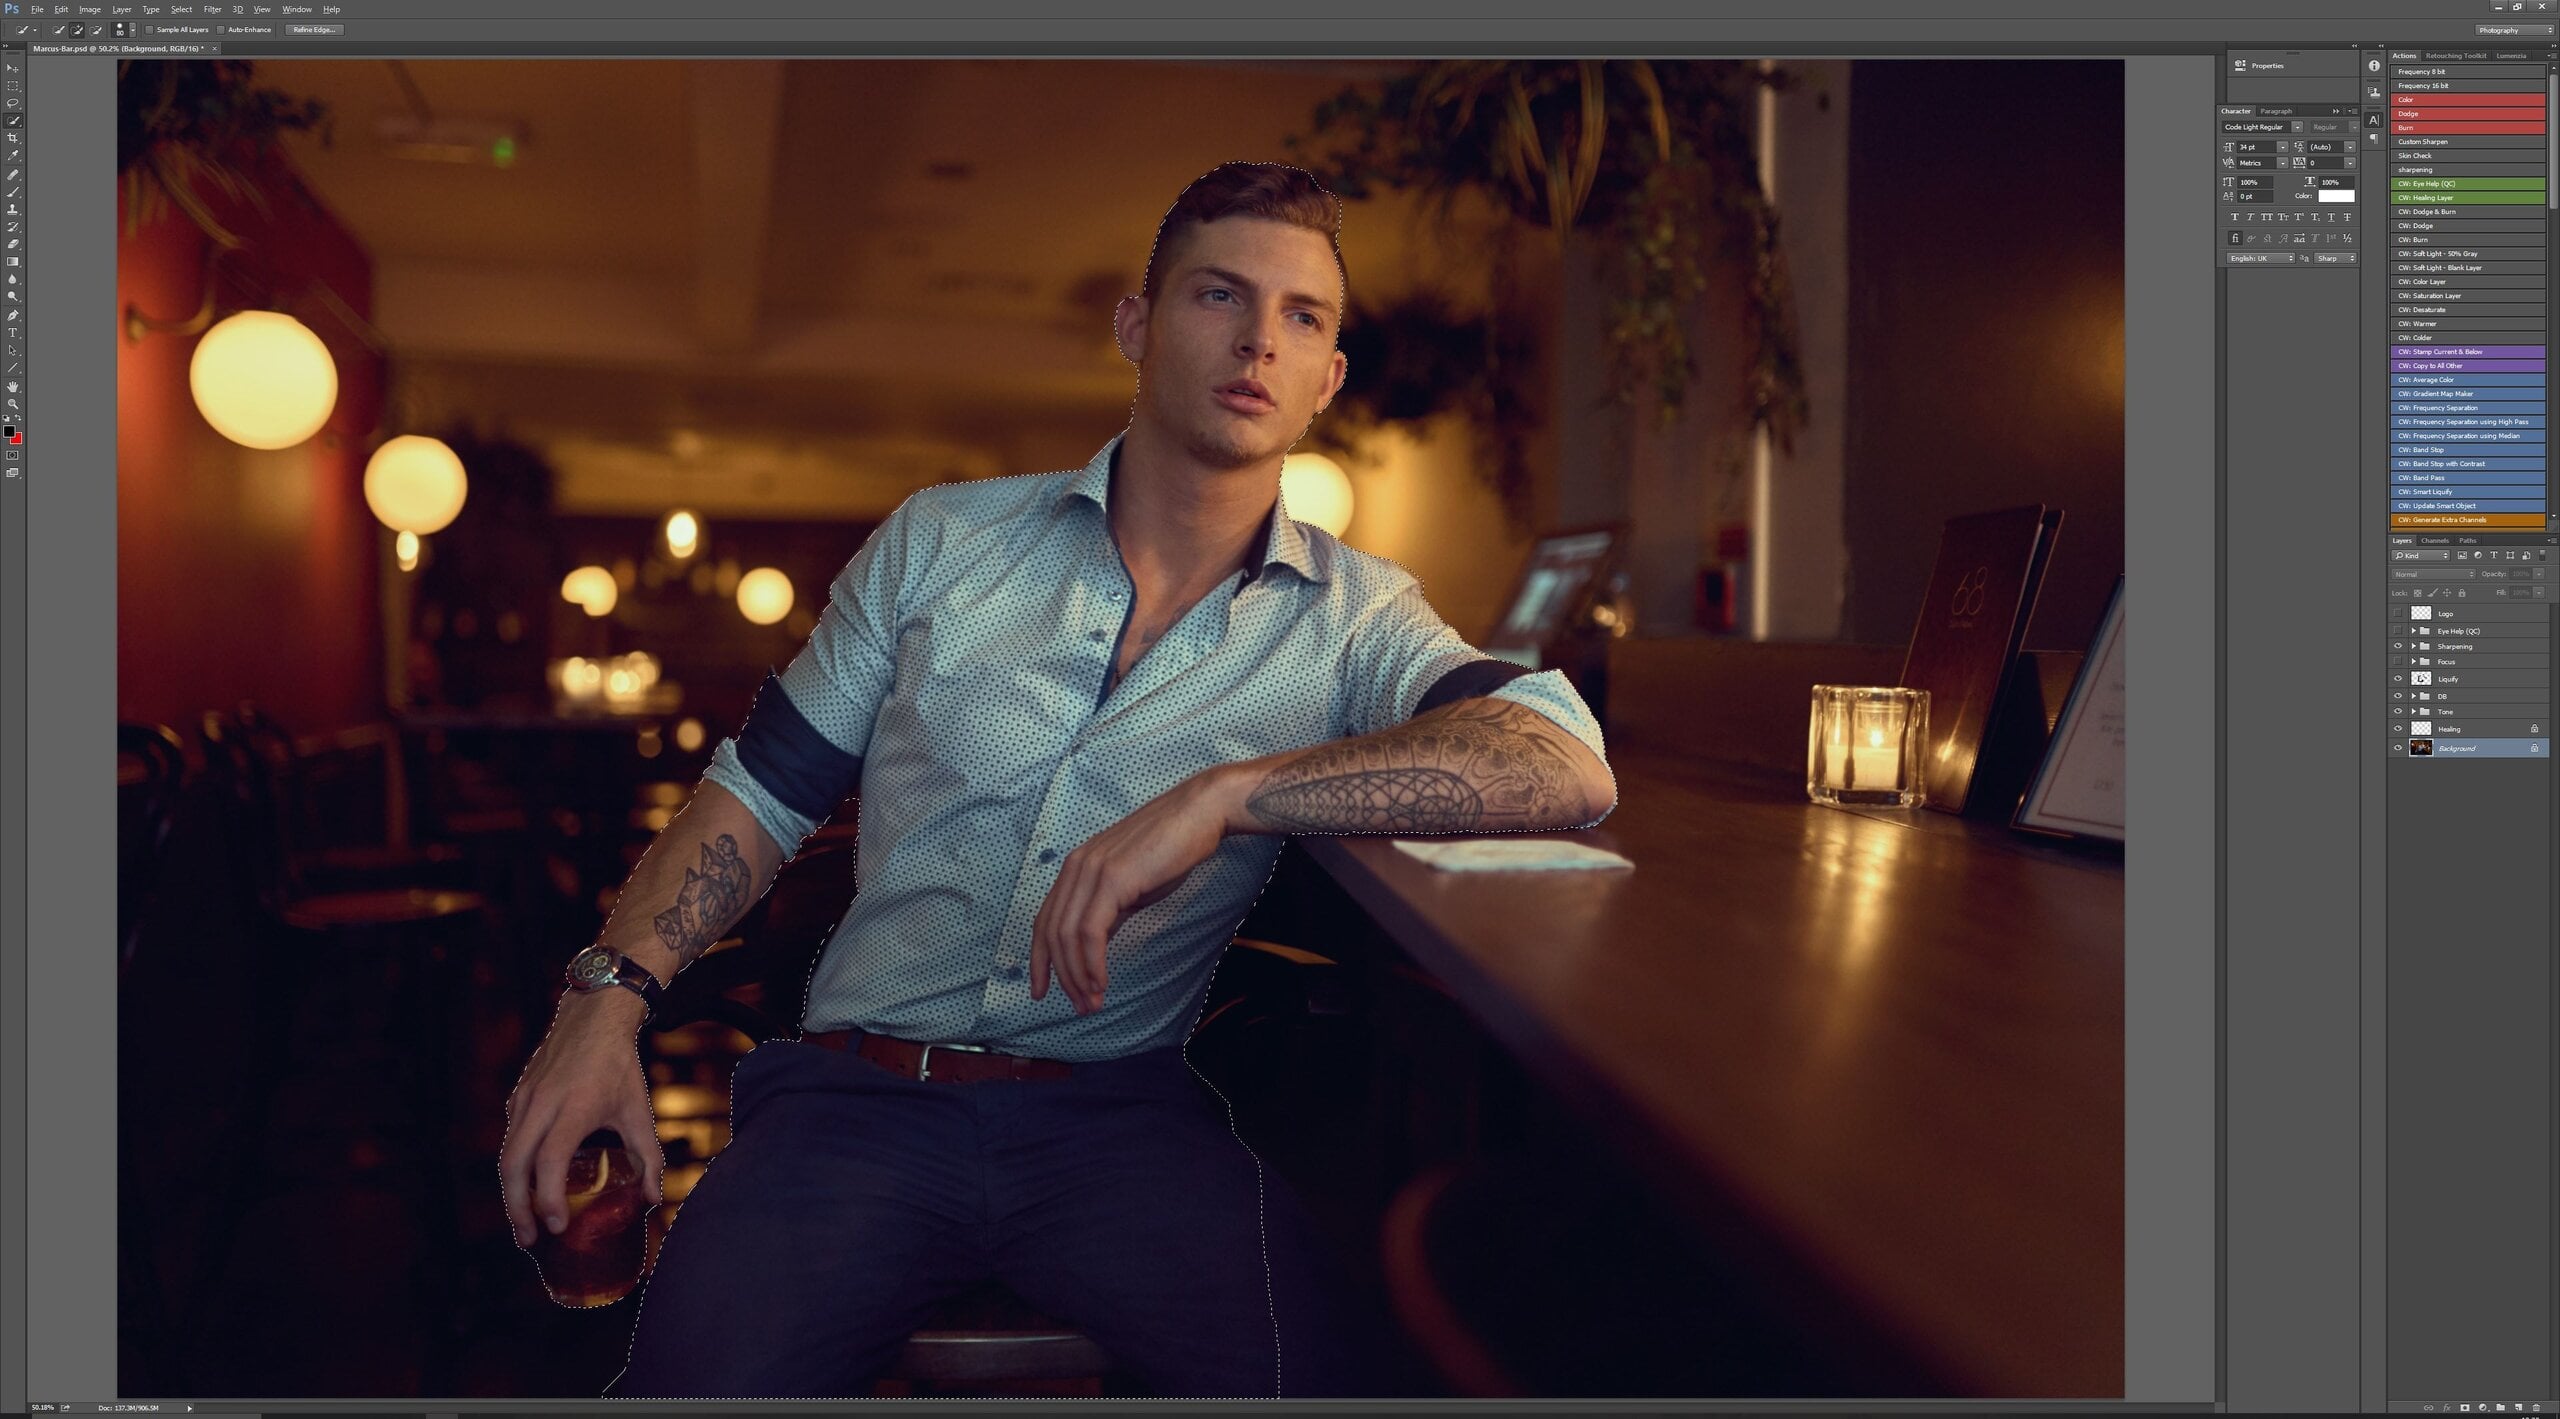
Once you’ve done this selection click on the adjustment layer icon at the bottom (the circle which is half grey and half white) and select curves.
You can also use “channels” for a better selection if you need the extra finesse, I wrote an article on how to do this here.
Here’s a channels selection:

Now press CMD+I or CTRL+I to invert the mask (we want to darken the background not the subject. Drag down the highlights to taste (understand that the further you drag it the more “messed up” the image will become. But we certainly have a few stops of play room ;).

And here’s the before and after again:
Hope this helps you in those situations where you find a great location and nice lighting but still wish you had control over the separation between subject and background!
Cheers guys!
-JP

Joseph Parry
Joseph Parry is a Commercial and Editorial photographer based in the UK that provides cinematic photography and ounces of humour. Follow him on Instagram for stories and kick ass imagery.


Join the Discussion
DIYP Comment Policy
Be nice, be on-topic, no personal information or flames.