DIY Photography

Your one stop shop for everything photo-video

  • News
  • Inspiration
  • Reviews
  • Tutorials
  • DIY
  • Gear
Search

Submit A Story

How To Create A Land Cross Section Photo In The Studio

Jan 15, 2016 by Simon Ellingworth Leave a Comment

  • Share
  • Tweet
  • Flipboard
  • WhatsApp

Salomon Speedcross 3 by Simon Ellingworth at Amersham Studios

When we were asked to produce some creative product shots for a new client, I thought Challenge accepted! The product was an awesome high end cross country trainer with incredible grip on various surfaces and was to be photographer while not been worn.

I wanted to show multiple surfaces, but from a different perspective so decided to create a quick and dirty land cross section to sit the trainer on.

Here’s how to do it and it only cost a grand total of £10 to build.

What you will need:

  • A large plastic box (mine was £6)
  • Sand (mine cost £4)
  • Duct tape
  • Wood, or polystyrene, or any semi ridged sheet material you have laying around
  • A saw or jigsaw
  • A rock (found mine in our garden)
  • Shovel to dig up some soil and grass
  • Carving knife
  • Spray bottle with water in

Step 1:

cross-section-04

Take your box and cut two vertical lines where you want its front to open.

Tape these closed with duct tape

(With foresight, cut a line at the bottom to join both vertical cuts)

Step 2:

Place your rock inside and then cut any semi ridged sheet material (I had some polystyrene to hand) to fit behind the rock. This will create a divide so it will take up less soil and sand to fill it.

I cut this so it fitted snuggly and the duct taped it in.

Step 3:

cross-section-05

You need to create some divides for the soil and sand – I had some transparent plastic material lying around, but cardboard, wood or plastic would work just fine.

Cut them and duct tape them in to create compartments

Step 4:

cross-section-06

Fill with your materials. I used more pieces of broken polystyrene to at the rear of each compartment so it requires less sand and soil.

I literally dug a small hole in the garden and filled it with that, I saved the worms and popped them at the front and used a carving knife to trim the grass sod.

Step 5:

Place your box where you are going to shoot it, setup your lighting and get ready to open your box front.

TOP TIP:

If you slope your box back backwards the cross sections are less likely to fall out.

I used a bit of wood to do this.

Step 6:

cross-section-08

Carefully remove the tape and open the box, I sprayed the surface of the soil and sand to keep it moist. You’ll need to snap out your section or have the foresight to cut between both vertical cuts.

Step 7:

Process and tidy up, by which I mean turn down the visual noise. If it’s light or bright and not adding value to your image, get rid of it!

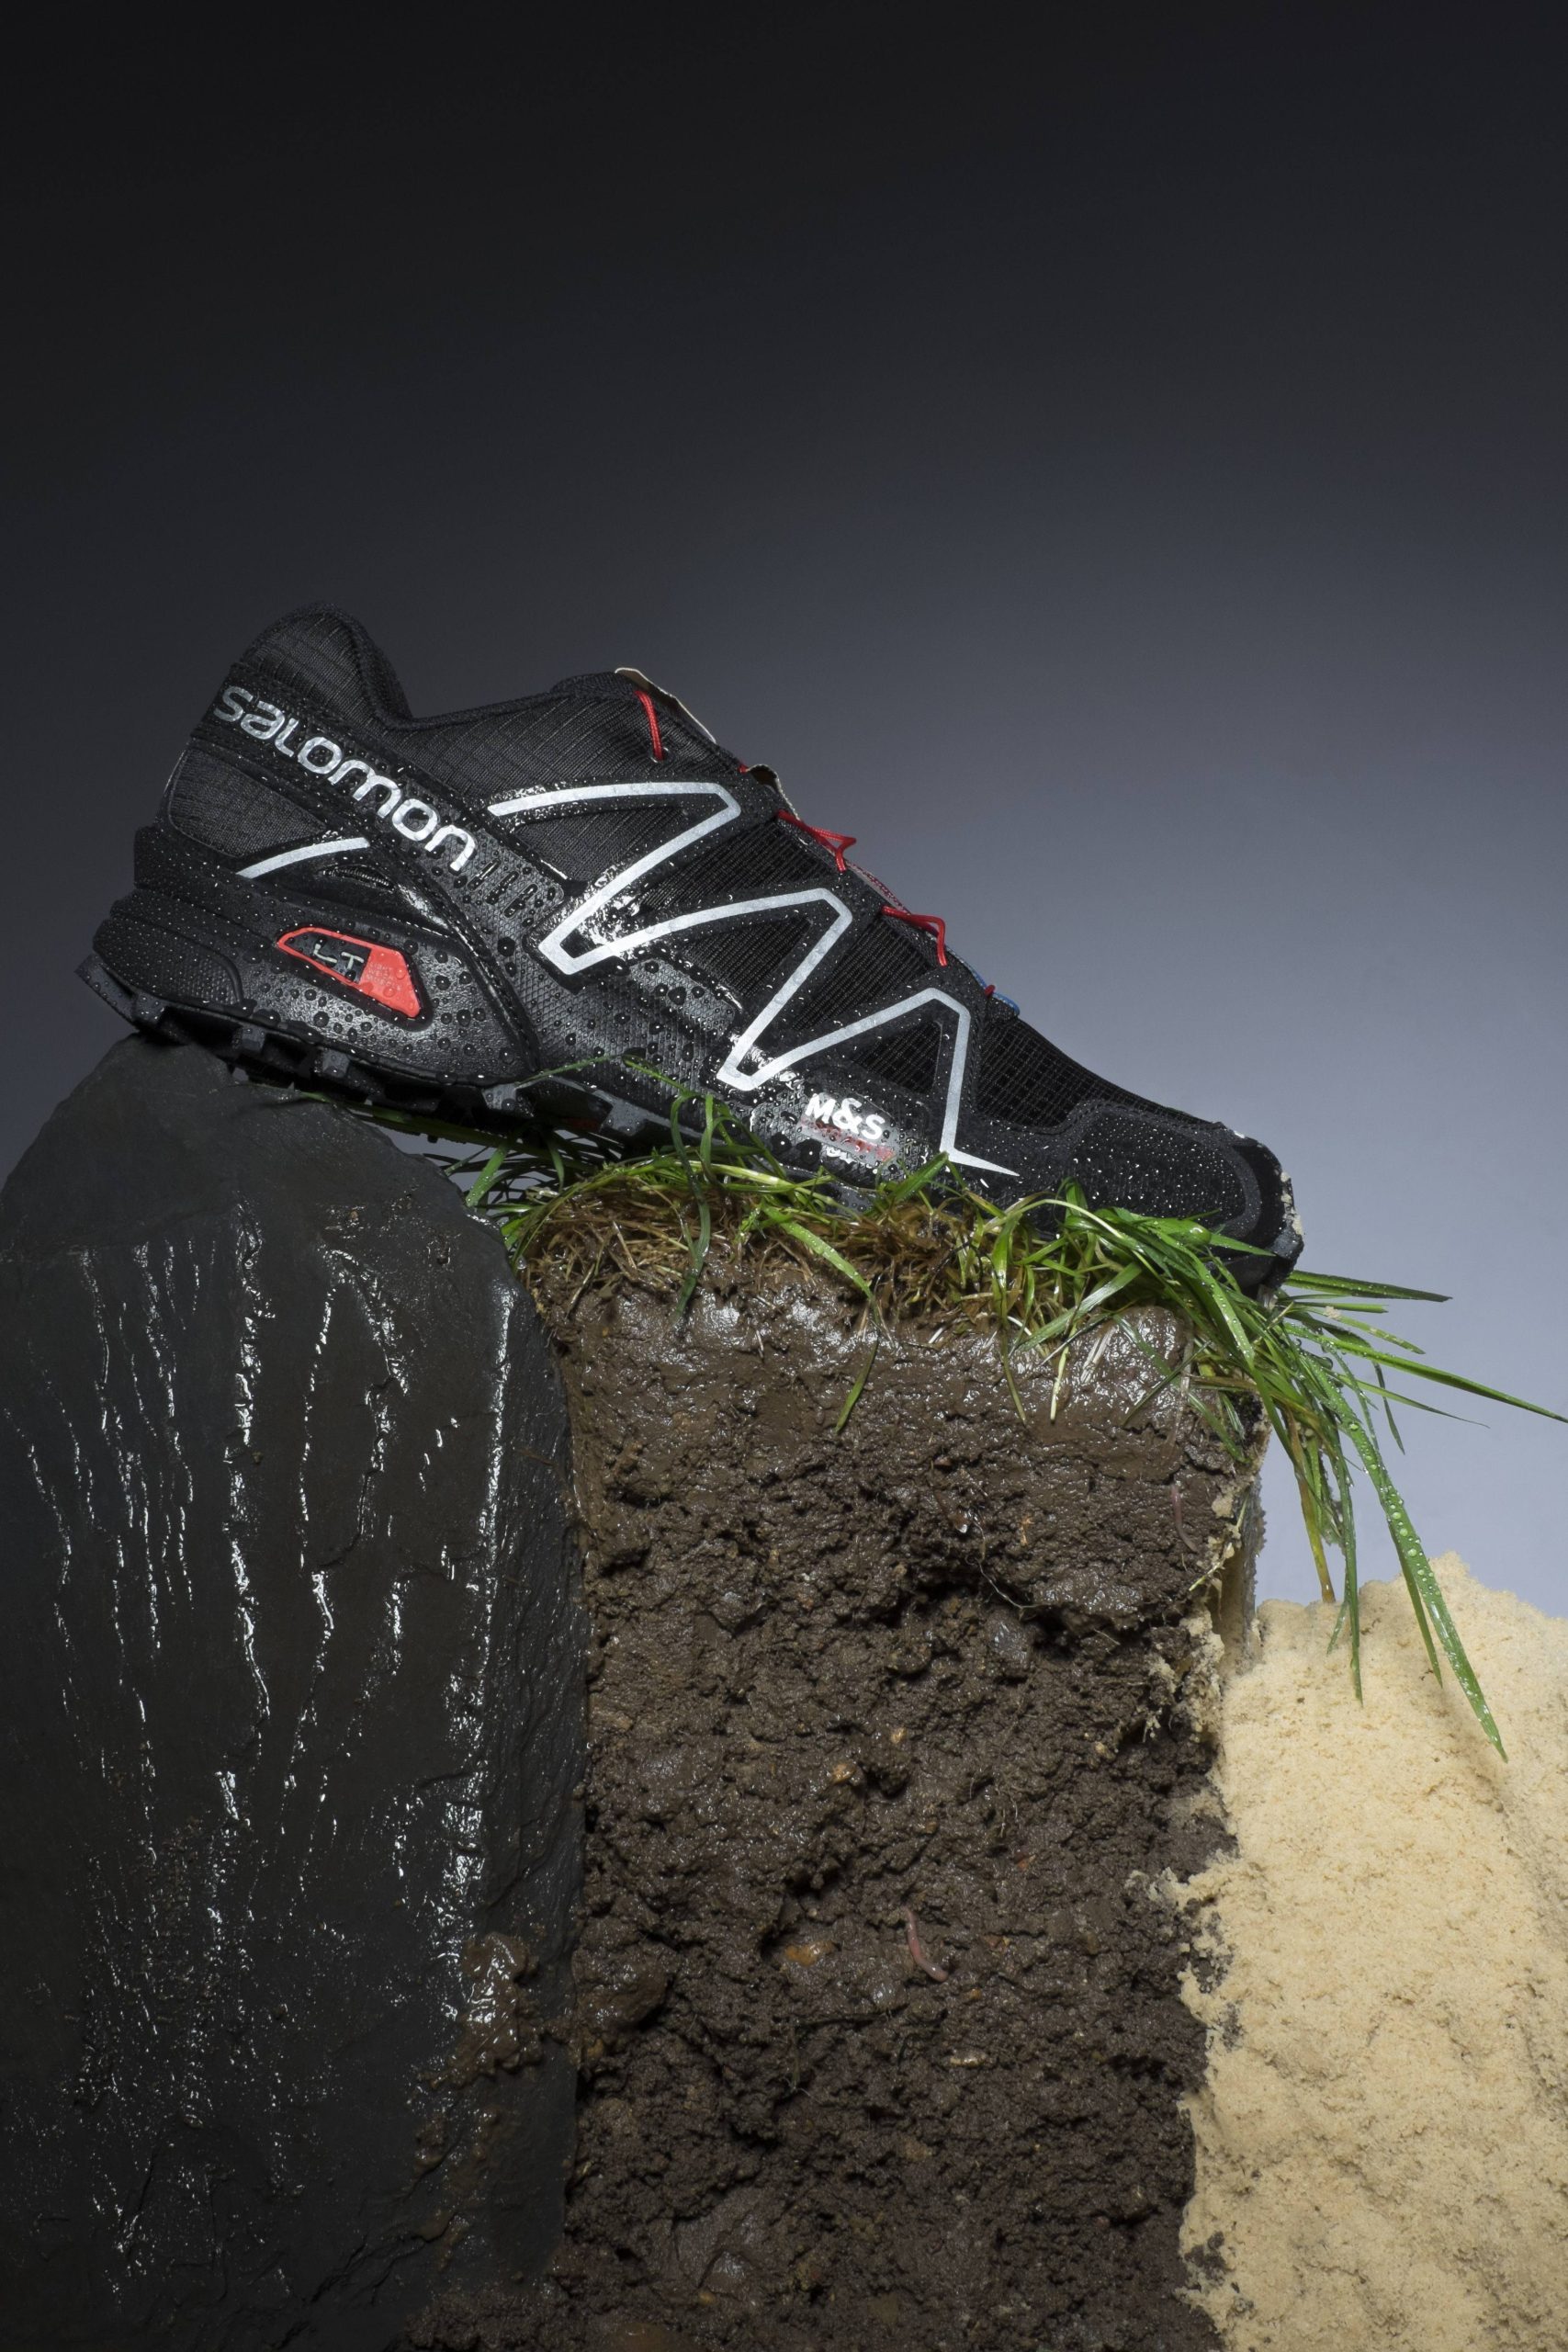
Here is the Final photo:

Salomon SpeedCross 3

Salomon SpeedCross 3

About The Author

Simon Ellingworth is the architect of The UK’s premier training centre and hire studio – Amersham Studios.

In 2013, he was a finalist in the ‘International iPhone Photography Awards‘, ‘Mobile Photography Awards‘ & ‘Professional Photographer of the Year‘, previously runner up in ‘Professional Photographer of the Year‘ and ‘Sony World Photography Awards‘.

FIND THIS INTERESTING? SHARE IT WITH YOUR FRIENDS!

  • Share
  • Tweet
  • Flipboard
  • WhatsApp

Related posts:

Default ThumbnailDoing Cross Section Light Painting Is The Opposite of MRI Default ThumbnailCross Section Light Painting is to Light Painting What Holograms Are To Photographs This Timelapse Shows A Cruise Ship Cut In Half, Then Added A MIddle Section ‘Liking’ and sharing a photo in Thailand can land you 30 years in prison

Filed Under: Tutorials Tagged With: photo break down, product photography, Shoe, Simon Ellingworth, still life

Guest Author: from diyphotography.net

About Guest Author

This article was contributed to DIYP by a member of our community. If you would like to contribute an article, please contact us here.

« This DIY editing hub clears up space on your desk and streamlines your post-production workflow
Datacolor Spyder5Pro Giveaway! ($189 Retail Value) »

Submit A Story

Get our FREE Lighting Book

DIYP lighting book cover

* download requires newsletter signup
DIYPhotography

Recent Comments

Free Resources

Advanced lighting book

Recent Posts

  • Comparing iPhone 13 vs iPhone 14 for astrophotography
  • Don’t buy a Z8 directly from Nikon, customers say
  • YouTube is killing off “Stories” to focus on Shorts and Live
  • Four ways to shoot epic stop motion hyperlapse with a smartphone gimbal
  • Canon reported to be working on a “zoomable” teleconverter

Udi Tirosh: from diyphotography.netUdi Tirosh is an entrepreneur, photography inventor, journalist, educator, and writer based in Israel. With over 25 years of experience in the photo-video industry, Udi has built and sold several photography-related brands. Udi has a double degree in mass media communications and computer science.

Alex Baker: from diyphotography.netAlex Baker is a portrait and lifestyle driven photographer based in Valencia, Spain. She works on a range of projects from commercial to fine art and has had work featured in publications such as The Daily Mail, Conde Nast Traveller and El Mundo, and has exhibited work across Europe

David Williams: from diyphotography.netDave Williams is an accomplished travel photographer, writer, and best-selling author from the UK. He is also a photography educator and published Aurora expert. Dave has traveled extensively in recent years, capturing stunning images from around the world in a modified van. His work has been featured in various publications and he has worked with notable brands such as Skoda, EE, Boeing, Huawei, Microsoft, BMW, Conde Nast, Electronic Arts, Discovery, BBC, The Guardian, ESPN, NBC, and many others.

John Aldred: from diyphotography.netJohn Aldred is a photographer with over 20 years of experience in the portrait and commercial worlds. He is based in Scotland and has been an early adopter - and occasional beta tester - of almost every digital imaging technology in that time. As well as his creative visual work, John uses 3D printing, electronics and programming to create his own photography and filmmaking tools and consults for a number of brands across the industry.

Dunja Djudjic: from diyphotography.netDunja Djudjic is a multi-talented artist based in Novi Sad, Serbia. With 15 years of experience as a photographer, she specializes in capturing the beauty of nature, travel, and fine art. In addition to her photography, Dunja also expresses her creativity through writing, embroidery, and jewelry making.

Copyright © DIYPhotography 2006 - 2023 | About | Contact | Advertise | Write for DIYP | Full Disclosure | Privacy Policy