


DIY

Double Your Light Stand As A Portable Backdrop Mount System
Dec 4, 2008
Udi Tirosh
In the following article, Martin Kimeldorf will show us how to make a backdrop stand that can be mounted on your I-carry-it-anyway lightstand. I don’t…
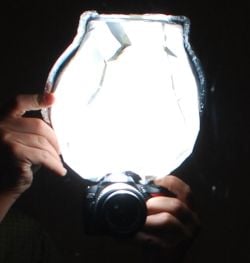
The Headphones Pop Up Flash Diffuser
Dec 2, 2008
Udi Tirosh
In this article Mohamed Talal shows us how to make a simple diffuser for a DSLR pop up flash. There are three things that separate…
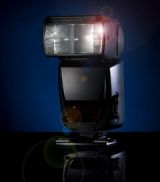
Exploring Small Strobes: Going Wireless
Nov 26, 2008
Udi Tirosh
Welcome to this multi-part series of articles on Exploring Small Strobes by Yanik Chauvin from Yanik’s Photo School. In part 1 on Exploring Small strobes,…

Avoiding The Double Reflection
Nov 24, 2008
Udi Tirosh
On my Ode to my Power Supply Unit post I got quite a few comments about that nasty double reflection. I just had to fix…

Two Ways To Get Background Circles
Nov 16, 2008
Udi Tirosh
As you probably noticed, there is a certain background setup I’ve grown to like in the last few weeks. It is a setup that produces…

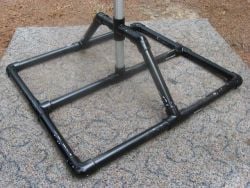
DIY Ghetto-Fab Portable Backdrop Stand
Nov 13, 2008
Udi Tirosh
This backdrop holder by Edward Holtzman is one the fastest-to-assemble / cheap-to-build / quick-to-store / don’t-piss-wife-with-photo-junk projects I have seen. Riding on the PVC wave,…
PVC Backdrop/Light Stand
Nov 9, 2008
Udi Tirosh
I love nothing better than a good PVC construction. This is why I was so happy when David Turman sent in this great PVC stand….
An Ode To My Power Supply Unit + Setup Shot
Nov 7, 2008
Udi Tirosh
There comes a time at any man’s life, where he enters their workroom oh-my-god-kids-what-is-going-on-room and something smelled funny. Smells metallic. Burning. My socks on fire?…
Holding a Nuclear Reactor – A Balloon Shot Anatomy
Nov 4, 2008
Udi Tirosh
One of the things I like best is High Speed Photography, it is an art that combines a hard technical challenge, along with an opportunity…

Exploring Small Strobes: Why Use Speedlights Off Camera
Oct 29, 2008
Udi Tirosh
Welcome to this multi-part series of articles on Exploring Small Strobes by Yanik Chauvin from Yanik’s Photo School. In part 1 on Exploring Small strobes,…