


How to build your own DIY LED Light Panel for under $200
Oct 18, 2016
John Aldred
John Aldred is a photographer with over 25 years of experience in the portrait and commercial worlds. He is based in Scotland and has been an early adopter – and occasional beta tester – of almost every digital imaging technology in that time. As well as his creative visual work, John uses 3D printing, electronics and programming to create his own photography and filmmaking tools and consults for a number of brands across the industry.
Share:

We’ve shown you a few different DIY LED light panels before, but technology and techniques evolve. LEDs are always coming out that are better, cheaper, brighter and with higher CRI than the previous generation. Photographers and videographers are now able to more easily address their needs with DIY lighting options, and often at a much lower cost than the commercially available options.
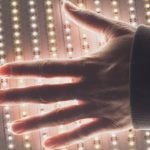
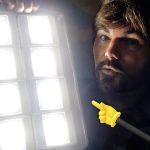
In this video from Makify, Vinny walks us through the construction of this super bright LED Light Panel. It has high CRI LEDs and a “video-safe dimmer”. This dimmer is “video-safe” because it allows you to increase and decrease the brightness of the light while filming without flicker.
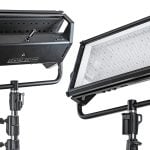
It’s certainly one of the more solid looking DIY light panels I’ve seen. It also has an appearance that doesn’t scream amateur in front of potentially paying clients.
You’ll need to do a little shopping. Here’s a breakdown of all the components Vinny used.
- Quick set epoxy – $17.40
- Aluminium flat bar – $17.51
- Aluminium channels with diffusers – $49.99
- Construction adhesive – $5.79
- LED Strip lights – $26.75
- 4 wire ribbon cable – $10.96
- Step-down voltage converter – $16.58
- Power adapter – $18.60
- Velcro staps – $2.97
- Power cord – $6.11
As well as these you’ll need a piece of board, and a few other bits of hardware to be able to attach everything to a light stand. Call it an extra $20 for those extra bits. For under $200, you’ve got yourself a pretty solid LED light panel. It’s a great option for use in the studio or other indoor location where you have power readily available. It could be modified to work with standard RC batteries fairly simply for use on location, though.
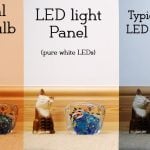
Personally, I wonder about those diffusers over the aluminium channels. They may be great for mood lighting under your kitchen cabinets or a display unit in your living room, but are they accurate? They don’t appear to be designed specifically for photography, so they may cause a colour shift or even block certain wavelengths.
So, if you wanted to avoid those, you could save yourself $50. I might consider still using the channels, though, if I were to build one. Instead of the supplied diffusers, I’d cut my own to slot in out of some Rosco Tough Frost. It would probably eat less light, and have much less of an effect on the colour of the light.
Have you built your own LED light panels? What problems did you run into and how did you overcome them? What other tips do you have for those who want to make their own? Let us know in the comments.
[via ISO1200]

John Aldred
John Aldred is a photographer with over 25 years of experience in the portrait and commercial worlds. He is based in Scotland and has been an early adopter – and occasional beta tester – of almost every digital imaging technology in that time. As well as his creative visual work, John uses 3D printing, electronics and programming to create his own photography and filmmaking tools and consults for a number of brands across the industry.
Join the Discussion
DIYP Comment Policy
Be nice, be on-topic, no personal information or flames.
3 responses to “How to build your own DIY LED Light Panel for under $200”
well for “under 200$” i can buy such a thing from china….
At last!!! DIY projects!!!!! Thanks for the video it is really interesting!
You could also use lights behind a light guide panel of plastic, might even be cheaper.
http://www.acplasticsinc.com/categories/lighting-plastics