


The easy way to create colour grade LUTs in Photoshop for your videos
Mar 23, 2019
John Aldred
John Aldred is a photographer with over 25 years of experience in the portrait and commercial worlds. He is based in Scotland and has been an early adopter – and occasional beta tester – of almost every digital imaging technology in that time. As well as his creative visual work, John uses 3D printing, electronics and programming to create his own photography and filmmaking tools and consults for a number of brands across the industry.
Share:

Lookup Tables (LUTs) are a wonderful feature of most video editing software. They’re sort of like presets that allow you to get a consistent look across multiple clips that when edited together form a sequence. They allow you to remap one set of colours and brightnesses to another.
Generally, there are two different types of LUTs. Corrective LUTs and creative ones. This particular video from Nathaniel Dodson is more about creative LUTs. Looks that you can give to your videos for artistic effect. He shows us two ways to create them using the Infinite Color Panel, as well as manually with adjustment layers.
Creating looks with the Infinite Color Panel is pretty easy. It essentially gives you a set of possible adjustment layers of your choosing that it can create, and a button to click which randomly generates a final look.
Because it isn’t just a regular Photoshop filter and actually creates separate adjustment layers on top of your image, if you get something even close to a look that you like, you can then go in and manually tweak and refine things. Or, if it just gives you something you love right off the bat, you can use that.
But once you have that look you like, creating a LUT file is as easy as going File -> Export -> Color Lookup Tables in Photoshop’s menu.

A dialogue box pops up asking you to enter a description, copyright information and a few settings. Nathaniel briefly explains those settings, but if you just duplicate his settings, then you’ll probably be good unless you know you specifically need something else.

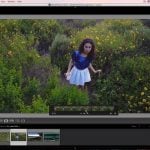
The LUT file can be output in one of several formats, but 3DL and CUBE are generally the most common, and these can be read by most editing applications, such as Adobe Premiere Pro. To bring it into Premiere Pro is as simple as adding Lumetri Color onto your footage (or an adjustment layer above all your footage), and then loading the LUT into the basic correction section.

And then it’s simply applied to your footage.


Sure, there are a million different ways to grade your footage. And you can do it all within Premiere Pro. Personally, though, I’ve found that Photoshop offers a lot more control with its adjustment layers than Premiere Pro has ever been able to give me. So, if I can create my grade in that and then bring it into Premiere Pro or other editing software, then that’s what I’m going to do.
When I create my looks in Photoshop for videos, I do it using the other method Nathaniel shows in the video. That’s manually creating the adjustment layers I need to get the look that I’m after. While it takes a little more time, it lets me get complete control of how I want the final image to look – and I usually already have a process in mind.
But after that, the process for exporting it out of Photoshop and into Premiere Pro is exactly the same. DaVinci Resolve, Final Cut Pro and many other editing applications also support LUTs, and they allow you to get a consistent look to all your footage in any of them.
So, if you want to be able to easily grade your videos in Photoshop, now you know how.

John Aldred
John Aldred is a photographer with over 25 years of experience in the portrait and commercial worlds. He is based in Scotland and has been an early adopter – and occasional beta tester – of almost every digital imaging technology in that time. As well as his creative visual work, John uses 3D printing, electronics and programming to create his own photography and filmmaking tools and consults for a number of brands across the industry.


Join the Discussion
DIYP Comment Policy
Be nice, be on-topic, no personal information or flames.
2 responses to “The easy way to create colour grade LUTs in Photoshop for your videos”
Don’t even know if this is a valid question, but is there any way to take an ase file or an Adobe Swatch file, and turn those colors into a LUT?
How to convert a selection color from blue to orange in Photoshop