


Take your studio outside with this field macro photography guide
May 23, 2017
John Aldred
John Aldred is a photographer with over 25 years of experience in the portrait and commercial worlds. He is based in Scotland and has been an early adopter – and occasional beta tester – of almost every digital imaging technology in that time. As well as his creative visual work, John uses 3D printing, electronics and programming to create his own photography and filmmaking tools and consults for a number of brands across the industry.
Share:

The world of macro photograph is one that can absorb a photographer completely. You start off simple, perhaps with a reversing ring photographing small things around the house. Then you find a bug or two, buy a macro ringflash. Perhaps a speedlight or two, small reflectors and maybe even a softbox. But there’s only so much you can shoot at home on the kitchen table.
Getting out on location to shoot macro can be great fun. But the issues dealing with tripods or hand holding available light shots can be a pain. The typical go-to is the ringflash mentioned earlier. But there are some tricks to taking your tabletop studio out on location. In this pair of videso, Paul Morgan from Wex walks us through his mobile macro studio, and how he uses it on location.
In Part 1, Paul talks about the benefits of putting together a mobile studio to document nature. He shows the gear he uses, and plenty of tips for getting around problems you may face on location.
If i were going on a longer trek, I’d probably substitute a few bits of gear. Swapping two of those tripods out for lightweight light stands would be a good start. But, as Paul mentions, they can often present challenges on location due to the uneven ground. Personally, I use Manfrotto Nano stands on location. The legs on these lay “flat”, so even if the ground slopes, I can use a bag to help weigh them down to compensate.
I’d probably also switch out the Nikon SB-900 speedlights for something with built in receivers. This way, you don’t have extra items (and batteries to power them) in your bag, and those extra points of failure.
Part 2 shows the setup in action, and how to get studio like results while using it all. The goal is to capture natural subjects while minimising the impact we have on the environment.
Paul starts with plants, because they’re less likely to run away, he says. Choosing a blooming Blackthorn as his subject, he specifically sought one out on the edge of the field. This puts it in easy reach of an open space to set up the kit.
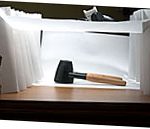
The first thing to do is to take a simple ambient light exposure of the subject for framing and composition. Once this has been decided, position the background to fill the frame behind your subject. Paul suggests having this background backlit. This can be done either with the natural sunlight on a bright day, or by using a speedlight.

The key thing to remember is that you don’t want the flash right up against the background. The closer it gets to it, the more focused and central the hotspot. Having it some distance apart allows it to evenly light the entire surface.
Then you’ll want to position your main key light in such a way that it complements the subject. Here Paul simply held it in his hand slightly above camera right.

Then it’s just a case of balancing the power of each light with your exposure settings. You’ll want the flash on your background powerful enough that it’s not grey, but not so powerful that it flares into the camera and destroys the edges of your subject.

Shifting over to photographing wild bugs that aren’t quite so static, may require a little more ingenuity. Paul uses a custom “device” which allows him to “pose” bugs inside a curved piece of transparent acrylic. This sits above a softbox, acting as the background & backlight. It’s fairly simple to build yourself, though, and full instructions on that can be found on the WEX website.

It seems to produce some very effective results.

Once you start working like this on location, you’re going out with a purpose. You can’t easily throw all this lot in a bag and go on a 10 mile hike. So, plan ahead, figure out exactly what you’ll need to take, and find suitable bags to carry it all in.
Personally, I’d suggest avoiding camera bags completely. Look more toward proper hiking and camping rucksacks which spread the load more safely and evenly. I use a big Vango Rucksack when I’m taking a lot of kit to shoot on location. It’s so much easier on the back, and can carry a lot more.
You don’t have to take all this lot out with you to shoot macro on location, though. I’ve done it with just a speedlight in a small softbox, using the natural environment as the background. But, working this way does present its advantages, and certainly offers more options.
[via ISO1200]

John Aldred
John Aldred is a photographer with over 25 years of experience in the portrait and commercial worlds. He is based in Scotland and has been an early adopter – and occasional beta tester – of almost every digital imaging technology in that time. As well as his creative visual work, John uses 3D printing, electronics and programming to create his own photography and filmmaking tools and consults for a number of brands across the industry.
Related Posts
 Depth of Field: the ultimate beginner’s guide to controlling depth of field using lens aperture in nature photography
 Home Studio Photography: Your Complete Guide To Building A Photography Studio At Home
 The Origami Studio (An Extrapolation to The $0.02 Macro Studio)
 How to photograph bugs in the field that look like they were shot in a studio
Join the Discussion
DIYP Comment Policy
Be nice, be on-topic, no personal information or flames.
3 responses to “Take your studio outside with this field macro photography guide”
being a “available light” fanatic, it’s way too much gear.. but i bet he gets the shots i miss out on.
I haven’t tested the macro waters yet, but after this video I’ll probably be more inclined to experiment.
Dion