


One Weird Trick for Taking the Greatest Independence Day Sparkler Photos In the World
Share:
Ok – so maybe its not really a weird trick – but unlike a lot of internet headlines, we’re actually going to give you some great tips for taking really cool photos of kids with sparklers on the 4th of July.

But now that your curiosity is piqued, you know you just have to continue reading to find out what the trick is!
Camera Gear for the Greatest Independence Day Sparkler Photos In the World
1. Real Camera
As much as we all like to pretend that a mobile phone can take great photos – for the greatest sparkler photos in the world you actually need a real camera for this technique…ie. a camera with a hot shoe or a sync port.
2. Tripod
Now that most real cameras can take photos in the dark – for the greatest sparkler photos in the world you have to go a little old school and pull out that dusty tripod from your grandfather’s basement.
3. Off Camera Flash
This is the special sauce – to take sparkler photos with both motion blur of the sparklers in action and a visible subject, you have to have an off camera flash. It doesn’t matter how you trigger your flash, you can use a simple sync cable, wireless radio triggers (I used Cactus V6 radio triggers) or your camera’s built in wireless triggering system – but one way or another you need to get your flash off of your camera.
4. Color Temperature Orange (CTO) Gels x2 (Optional)
You don’t absolutely need to gel your off camera strobes, but to mimic the look of the ambient light coming from the sparklers a double CTO gel does the trick.
5. Sparklers!
There is a lot of trial and error involved in this technique, so it helps to have a lot of sparklers ready to go. Plus, its just a lot of fun to play around waving sparklers on Independence Day.
Sparkler Photos – Step by Step
First, you need to wait until just the right time of day – when the exposure level of the ambient light is just dropping below the exposure level of the sparklers. What that means is that if you take a photo set for a proper exposure of the sparklers, the ambient light from the scene is just slightly darker. This is usually about a half hour after sunset.
But you have to be prepared, you will only have a window of 15 – 20 minutes between when the twilight ambient is too bright and overpowers the sparklers and when the light level drops to night time darkness.
Or, you can wait until full night, but then you loose the background.
Next, frame the scene and set up your camera on a tripod.
Set your exposure for the sparklers and let the light come to you. For photos of sparklers, you want a shutter speed of at least a half second in order to capture the light streaks from the sparklers.
In this photo, my camera is set to 1/2 second shutter speed, f/2.8, ISO100. If you want a really blue sky, set your white balance to tungsten, or you can just leave it on auto.

(On a side note – is anyone else amazed that sparklers are still legal? Give two kids a hot stick shooting sparks and what is their first instinct? Hey, lets have a sword fight – nothing could go wrong with that!)
Now here is where the trick comes in.
Set up your off camera flash with two CTO gels.
As you can see in the first photo, with a half second exposure, our subjects are just a blur. With the flash, we are still going to expose our photo for the sparklers, but we are going to use the flash to freeze the action so that we can see the features of our subject. The resulting photo will look like this:

This photo was taken with the exact same settings as the first – 1/2 second shutter speed, f/2.8, ISO100, except an off camera flash was used to freeze the features of my subject.
It is important to note that you have to set your camera to use rear curtain sync. (If you’re not sure how to set your camera to rear curtain sync, check your manual or dig around in the flash settings menu). Rear curtain sync tells your flash to fire at the end of the exposure – without rear curtain sync, your flash will fire at the beginning of the exposure and the effect of freezing your subject will be lost.
The goal here is to mimic the orange glow from the sparklers which is why we are using a strobe with a double CTO gel.
In this photo, my off camera flash (a Nikon SB-800) is set about 10-15 feet away from my subject to camera left and set to 1/16 power. I only wanted the flash to light the subject and not the rocks or the background, so I zoomed the flash head in as much as it would go and asked my voice activated light stand (my wife who was holding the flash), to shield the light from hitting the ground by blocking the light spill with her hand.
Now that you have the camera and strobe set up, you can play around by varying your shutter speed for different effects with the sparklers.
For example, in this photo, I increased the shutter speed to 1 second which shows a lot more light trails from the sparklers.

However, to keep the background exposure the same, I also had to decrease the aperture by one stop to f/4.0 and increase the power on the flash to 1/8th.
In the next photo, I increased the shutter speed to 3 seconds – and you can see that the effect changes again.

Once again, to keep the background exposure approximately the same, with a shutter speed of 3 seconds, I changed the aperture to f/5.6 and increased the power on the flash to 1/4.
Have Fun And Take Lots of Sparkler Photos
The most important tip I can leave you with is to have fun and take a lot of photos.
There is quite a bit of trial and error involved so not every photo will turn out. You can ask your kids to try not to wave the sparklers in front of their face, but I usually find that its better just to let them have fun and play without too much direction.
You may also notice that the freezing effect of the flash is not the same in every photo. You will get the most definition from the flash if it catches your subject while they are moving around. If they stay stationary for most of the exposure, they will look blurrier as they will be mostly lit by the light from the sparklers and not the flash – like this:

Tips for Photographing Fireworks
Once you’re done playing around with the sparklers – its time for the main attraction – the fireworks!
Since you’ve already got your camera set up on a tripod, you can follow Our Best Tips for Photographing Fireworks to capture a few photos like this:

For this photo my camera was set to a 2.0 second shutter speed, f/2.8 and ISO 800. The reason I went up to ISO800 is because even though the night was getting progressively darker, I still wanted to capture some of the ambient light in the sky and background.
Any Questions or Comments?
If you have any questions about this technique for photographing Independence Day sparkler photos – please leave a comment below.
We’d also love to know how your own sparkler photos turn out – are your photos really the greatest Independence Day sparkler photos in the world?
(By the way, all the images in this post were actually photographed on Canada Day – its pretty much the same sort of celebration, just a few days earlier).

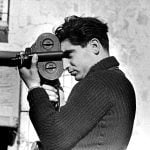
JP Danko
JP Danko is a commercial photographer based in Toronto, Canada. JP can change a lens mid-rappel, swap a memory card while treading water, or use a camel as a light stand.
Related Posts
 This is the story of Robert Capa, “the greatest war photographer in the world”
 The Greatest GigaPixel Ever Live Stream
 Why do Pros never own the latest and greatest gear (and why their gear is in such bad shape)?
 Adobe draws on Hollywood’s greatest filmmakers to create this long form content creation guide
Join the Discussion
DIYP Comment Policy
Be nice, be on-topic, no personal information or flames.
7 responses to “One Weird Trick for Taking the Greatest Independence Day Sparkler Photos In the World”
There is no trick, but a few standard tips, there are a few of them (not one) and none of them are even remotely weird. Complete title failure.
Nobody likes sour grapes.
I disagree. I think it is completely out of the box and weird to have his wife use her hand to shield the flash. :) good tips, thank you!!
I don’t have an off camera flash. :-( Can you recommend an inexpensive one or cheap alternative?
tnx
Thanks for the tips. I have been searching for how to tips and find your tips to be the most detailed and helpful.
I have been trying without adding the flash and getting very blurred subjects no matter how still they tried to be. I will play with the off camera flash and hopefully get better results.
Thanks again for sharing.
Does the white balance setting matter on the camera? I have done sparkle shots before, but this last time I wanted to warm up the flash to mimic the sparkler temp. I put on 1 CTO, but my sparkler sparks went more white and my strobe filling in the couple went more blue than when I had no gel.