


How to make a cheap DIY double drop system for epic droplet photography
Dec 2, 2019
Dunja Đuđić
Dunja Djudjic is a multi-talented artist based in Novi Sad, Serbia. With 15 years of experience as a photographer, she specializes in capturing the beauty of nature, travel, concerts, and fine art. In addition to her photography, Dunja also expresses her creativity through writing, embroidery, and jewelry making.
Share:

Photographer Steve Kazemir makes amazing droplet photos and has some unique ideas for taking them. He has come up with an automated double drop system to create some colorful and playful droplet photos. Steve built it from scratch, from cheap components that you can easily find on Amazon, eBay, Home Depot or in your own garage. In this video, he shares with you how he did it, so you can try and make your own, too.
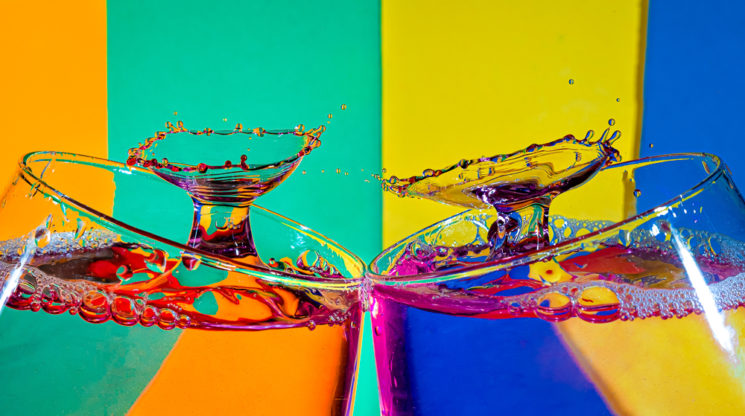
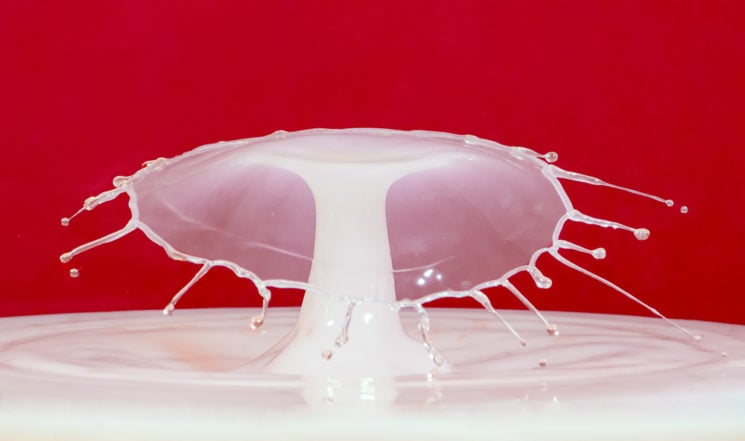
If you are slightly confused about the double drop system, Steve explains in the video. Basically, when only a single droplet hits the water surface, a crown forms first. Then comes a tiny “pillar” of water called the Worthington jet. When you let the next droplet hit this Worthington jet, you get that cool “umbrella” effect. Like here:

After clearing this up, now, wouldn’t you want to take droplet photos like this? Steve shares everything about it in his video: from building the setup to taking photos. Plus, there are plenty of useful tips and tricks for all of you who want to try (or already do) droplet photography. Steve’s video lasts a bit over 20 minutes, but it’s super-fun to watch. He doesn’t only use up the time to share useful information, but he is also a really fun guy. Here’s what you will see in the video:
- 1:10 What is a double drop – the part I explained a bit above, but Steve does it in more detail and with some more examples.
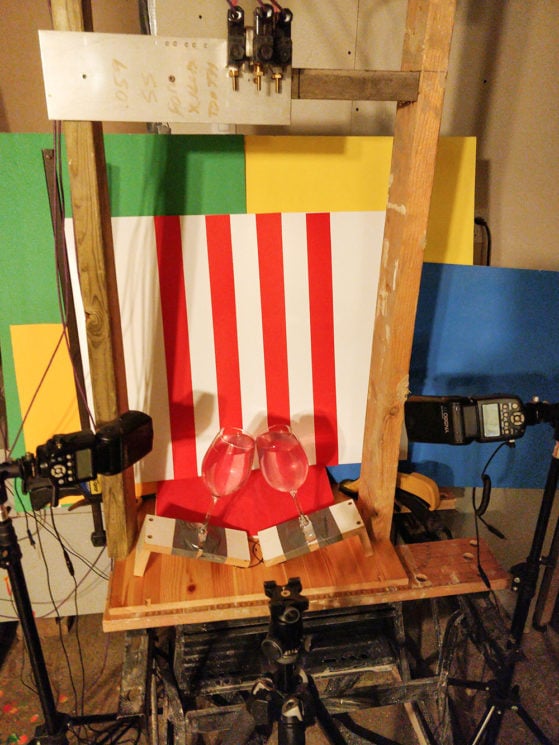
- 2:20 System overviews – the system contains a liquid reservoir, a drop solenoid, a drop zone, and a system controller. Steve gives an interesting analogy, comparing them to “an IV,” “a heart,” a toilet,” and a “brain.” It sounds weird, but it gives everything a dose of humor and actually makes it easy to understand the system.
- 3:28 Liquid reservoir – a liquid reservoir is easily made from a cup, a tube, and some tape, all of which you can find at Home Depot. Or even lying around the house. Steve also discusses the best kind of liquid to add to the reservoir. It can be plain water, but he prefers adding some food coloring to it and makes it a bit thicker with Guar gum or Xanthan gum.
- 7:27 Drop solenoid – drop solenoid is the system with nozzles that releases the droplets into the drop zone, and it’s controlled by the “brain” of the whole system.
- 10:31 Drop zone – the drop zone is a bowl, a glass or any other container you fill with water (or other liquid).
- 14:36 System controller – this is the “brain” of the system. Steve put it together and programmed it himself, and you can find the components on eBay. He made one of the boards himself, and he’s willing to share the schematics and PCV files with his patrons, so head over to his Patreon and support him.
- 16:35 Camera and flashes – Steve also shares the gear and the settings he uses. It’s important to note that you don’t need anything too fancy. He uses two Yongnuo speedlights and a Fuji mirrorless camera. As for the lens, he advises you to experiment. He uses an 18-55mm kit lens that came with his camera, and it does the work.
- 21:21 Conclusion
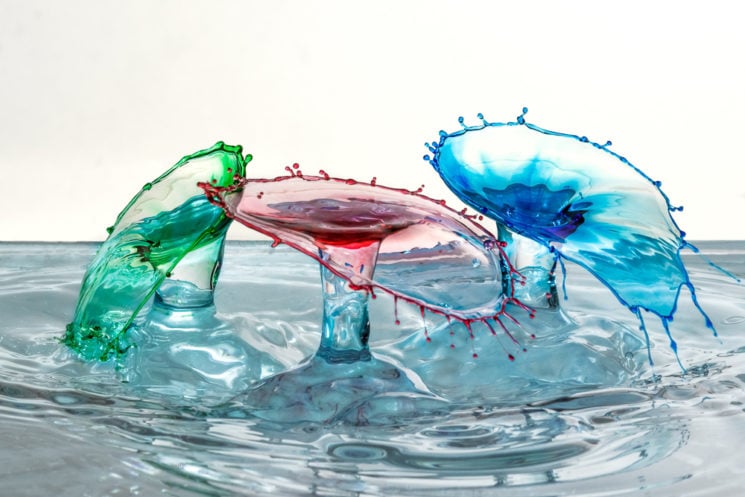
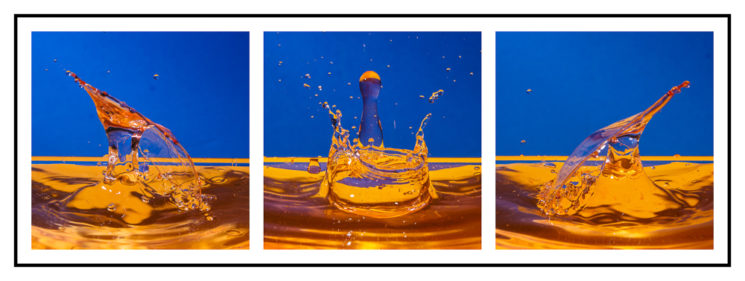
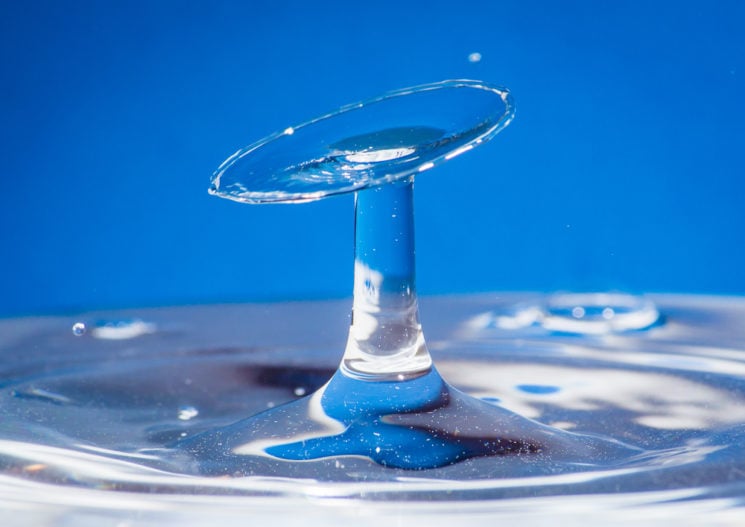
I’m sure you’re intrigued by this system and what kind of photos it will help you to create. Steve kindly shared some of his images with us, and you can see them below. Make sure to check out Steve’s work on his website and follow him on Facebook and Instagram. You can also show your appreciation for his work via Patreon and buy a calendar with his droplet images here.


Dunja Đuđić
Dunja Djudjic is a multi-talented artist based in Novi Sad, Serbia. With 15 years of experience as a photographer, she specializes in capturing the beauty of nature, travel, concerts, and fine art. In addition to her photography, Dunja also expresses her creativity through writing, embroidery, and jewelry making.


Join the Discussion
DIYP Comment Policy
Be nice, be on-topic, no personal information or flames.