


How to create the Thanos “Super Punch” from Infinity War in Premiere Pro
May 21, 2018
John Aldred
John Aldred is a photographer with over 25 years of experience in the portrait and commercial worlds. He is based in Scotland and has been an early adopter – and occasional beta tester – of almost every digital imaging technology in that time. As well as his creative visual work, John uses 3D printing, electronics and programming to create his own photography and filmmaking tools and consults for a number of brands across the industry.
Share:

I can’t say for sure whether or not this tutorial includes any spoilers as I’ve not actually seen Avengers: Infinity War myself yet. But I would imagine there maybe are, even if it’s just spoiling an effect or two. It seems Thanos has some kind of pretty powerful “Super Punch” in the film (again, haven’t seen it, don’t know). Jordy Vandeput over at Cinecom has deconstructed the effect to bring us this tutorial on how to recreate it in Adobe Premiere Pro.
If I hadn’t mentioned it, I haven’t seen the film. So, I’m not entirely sure how closely this resembles the effect in the film, but it still looks pretty cool regardless.
The first part of selling any visual effect is having the right props, especially for something like this. Unfortunately, they couldn’t find the right props, but they did find a pair of Hulk fists. They spraypainted them gold to look a little more like the glove Thanos wields, and then added their own infinity stones with thick coloured paints.

As you might have guessed, there’s a little compositing going on in this effect. Multiple clips are recorded and then layered on top of each other with various cutouts and speed adjustments. This means that you need to put some forethought into the final clip.
First, you need to think about the action taking place. Person 1 throws a punch, Person 2 goes flying into a wall. But how does that look? The punch is hitting with such force, for example, that the acceleration will be much faster than a regular punch. And they’ll probably hit the wall at a higher level, too.
To accomplish the fast acceleration, a rope is tied around the waist of the person being punched. As the punch appears to land on-camera, the rope is pulled, which jerks the subject away from the fist quite quickly. He then lands on a mattress. You do want to be careful with this, though. Do your research into how this can be done safely or it can cause injury.

As the footage is layered, you need to shoot everything from a tripod. If you want to make it look like your camera’s moving, then you’ll need to simulate that in post once you’ve completed the effect. So the next clip involves removing the people and mattress from the frame in order to get a nice clean background plate.

The final shot, of course, is the victim running backwards towards the wall and jumping against it.

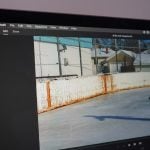
From here the process now is all in Premiere Pro. It’s a fairly simple process that has a somewhat confusing series of steps to try and type out in text. Easy if you watch the video, though. Essentially, it involves layering, masking and some motion keyframing.
It’s very similar in principle to this tutorial from Andrew Kramer. In it, Andrew shows how to make it look like somebody was hit by a car. Of course, he does it in After Effects, and it’s a more advanced version of the effect. But it’s definitely worth watching if you want to find out more about this type of technique, or want to try and incorporate it with a green screen.

John Aldred
John Aldred is a photographer with over 25 years of experience in the portrait and commercial worlds. He is based in Scotland and has been an early adopter – and occasional beta tester – of almost every digital imaging technology in that time. As well as his creative visual work, John uses 3D printing, electronics and programming to create his own photography and filmmaking tools and consults for a number of brands across the industry.
Related Posts
 Premiere Pro gets dynamic Lumetri previews and Premiere Rush is now native to Apple M1 Silicon
 The digitalfoto Thanos Pro II is a low budget almost-all-in-one alternative to the Arri Trinity
 Use these five tips to create more interesting timelapse videos in Adobe Premiere Pro
 10 pro (but simple) Premiere Pro editing tricks you need to know
Join the Discussion
DIYP Comment Policy
Be nice, be on-topic, no personal information or flames.