


How to change the eye color in Lightroom in two steps
Apr 3, 2020
Dunja Đuđić Kalinin
Dunja Djudjic is a multi-talented artist based in Novi Sad, Serbia. With 15 years of experience as a photographer, she specializes in capturing the beauty of nature, travel, concerts, and fine art. In addition to her photography, Dunja also expresses her creativity through writing, embroidery, and jewelry making.
Share:

For changing the color of the eyes in portraits, most of us would most likely use Photoshop. But have you tried doing it in Lightroom? It’s quite simple and you can do it in just two steps and get great results. In the video below, Anthony Morganti will show you how.
It’s worth noting that you can change the eye color in any photo, but the results will vary. It all depends on the original color of your model’s eyes. Still, if you wanna try it out in Lightroom, here’s what you need to do:
Step 1: Open the Brush tool, reset all settings and make sure that the auto mask is off. Bring the saturation all the way down to 0, because you first want to remove the color from the eyes. Paint in the eyes with the brush to turn them grey.
Step 2: Use another brush and pick a color. Paint in the color and adjust the hue and saturation if necessary, and that’s basically it.
You can also play with contrast, brightness, clarity, and other sliders if necessary. You can also sample the color from another image and transfer it to the eyes in the photo you’re editing, and Anthony shows you how in the video.
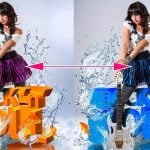
I was curious to try out the method, so I took a stock photo and quickly changed the eye color of the girl in it. Here’s how it turned out:


Have you used Lightroom to change the color of the eyes? Or perhaps even for colorization of black and white photos?
[Change The COLOR of a Person’s EYES in Lightroom via FStoppers]

Dunja Đuđić Kalinin
Dunja Djudjic is a multi-talented artist based in Novi Sad, Serbia. With 15 years of experience as a photographer, she specializes in capturing the beauty of nature, travel, concerts, and fine art. In addition to her photography, Dunja also expresses her creativity through writing, embroidery, and jewelry making.


Join the Discussion
DIYP Comment Policy
Be nice, be on-topic, no personal information or flames.