


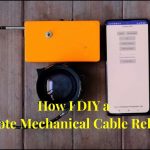
Camera Shutter Release Cable Extension Kit
Aug 9, 2009
Udi Tirosh
Udi Tirosh is an entrepreneur, photography inventor, journalist, educator, and writer based in Israel. With over 25 years of experience in the photo-video industry, Udi has built and sold several photography-related brands. Udi has a double degree in mass media communications and computer science.
Share:
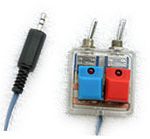
 We’ve had our share of photography cables, dead mouse included. We even had a flash TTL extension cord.
This project from Brian Carey – whom you may remember from the camera stock project – is not a typical cable, but more of an extension cord. The nice thing about it is that it lays out the basics for almost any cable work.
I’ve got a few photo projects in mind where I won’t be able to be at the camera when I want to take the shot. So what will I do? Well, I could buy one of those wireless remote control shutter release units? There are some cheap units on the market but I suspect their reliability may be questionable. I could take the plunge and spend a few more dollars and get something good, and maybe I will in the future, but for now I’ve decided to make this kit. This will get me by.
With this kit the shutter release is connected to the camera, it is not wireless! I can operate the camera from 40’ or 12 meters away. You may be able to extend further, but this is the maximum distance in which I tested it.
What You’ll Need:
- Two shutter release cables
- Two extension cables
- Two male and one female TRS (tip, ring, sleeve – aka, phone plug) connectors

I have a Canon 50D and I had bought a couple of cheap shutter release cables with the Canon N3 plug on eBay and I used one of those for this kit.
Build The Extension Cable
I cut this cable into two pieces and used both ends. I soldered a male TRS connector to the cable leading from the hand unit and I soldered a female plug to the piece of the cable which connects to the camera. I call this cable the patch cable. I also purchased two 20’, 6 meter extension cables. The jacks have to be at least three conductors. I used 1/8″ or 3.5 mm. Of course the extension cables you choose have to have the same type of connectors.
You could use 3/32″, 2.5-mm phone plugs like those used on some EOS Digital Rebel cameras and use one of those shutter release cables! I haven’t tried this but it should work. Or you could use a mouse to trigger your camera with a mouse. All those variations share the same principles.
Below you’ll find the connector pinouts. Shown at top the N3 connector on the side of the camera.

You should use a multimeter to ensure you have the same pin configuration on your female plug (not shown here). I plugged the male into the female and verified the connections, tip to tip, ring to ring and sleeve (common) to sleeve (common).
The Final Kit

The final kit consists of the hand controller with a male TRS connector, extension cables with a female TRS connector on one end and a male on the other and a patch cable with a female TRS connector on one end and a Canon N3 connector on the other.
Of course there’s no reason why this couldn’t be adapted for Nikon, 4/3’s or any other camera system.
You may be able use a cable release designed for another camera for this project. I used one I had for an older Minolta autofocus SLR. I simply cut off the plug, traced out the connections and soldered on a male TRS connector! These cables can be used without the extensions as well.
The only suggestion I would make at this point is that you turn your camera off when connecting and disconnecting. I found as I was adding the extension or remote with the camera on the shutter was firing. This shouldn’t cause a problem with the camera but I thought it would be easier on the camera if I turned it off first.
Three Last Notes
Please be careful when using a soldering pencil, they can cause serious burns. Also be careful and be sure to wear safety glasses.
If you love hacking cables you’ll love this all pin outs site, which is all about pinouts (and I mean this in the most honest way possible)
If you liked this project, you may want to pay a visit to Brian’s portfolio. He has some remarkable photography to back up his tech skills.

Udi Tirosh
Udi Tirosh is an entrepreneur, photography inventor, journalist, educator, and writer based in Israel. With over 25 years of experience in the photo-video industry, Udi has built and sold several photography-related brands. Udi has a double degree in mass media communications and computer science.


Join the Discussion
DIYP Comment Policy
Be nice, be on-topic, no personal information or flames.