


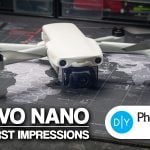
Autel Evo Nano drone – Is it really a DJI Mini 2 killer?
Mar 26, 2022
John Aldred
John Aldred is a photographer with over 25 years of experience in the portrait and commercial worlds. He is based in Scotland and has been an early adopter – and occasional beta tester – of almost every digital imaging technology in that time. As well as his creative visual work, John uses 3D printing, electronics and programming to create his own photography and filmmaking tools and consults for a number of brands across the industry.
Share:

This review of the Autel Evo Nano has taken a little longer than I’d anticipated to complete due to the abysmal weather we’ve been having here in this part of Scotland over the last few weeks. But I think this has turned out to be a bit of a blessing in disguise.
You see, when the Autel Evo Nano first came to me, there were quite a few features missing or not fully working. Even after its general release and people could actually buy it, it still had a few issues. But now, most of them seem to have been resolved and I’ve been able to fly it to its current full potential now that the weather has perked back up.
I posted my first look at the Autel Evo Nano in early January and from what I was able to test at the time, I was quite impressed and it showed a lot of promise. Of course, that promise was dependent on Autel following through with the firmware updates, which they seem to have done for the most part. We’ll get back to those in a bit, but let’s have a look through some of the features and what makes it stand out from other <250g drones.
The main features
I’ve mentioned this before in the first look, but the biggest standout feature of the Autel Evo Nano over the competition is the fact that it features obstacle avoidance. Obstacle avoidance is rumoured to be coming in the DJI Mini 3 but at the moment, the Autel Evo Nano (and Nano+) is the only <250g drone on the market that offers it. For many drone users in this class, this is a pretty big deal and it works very well in my experience.
Unlike the DJI Mini 2 and Hubsan Zino Mini SE, the Autel Evo Nano and Nano+ are aimed more towards photographers, filmmakers and YouTubers looking for something that fits their needs in the <250g class. They’re not drone enthusiasts but they know that they want to use one occasionally and don’t want to have to carry around a bigger drone and deal with the licenses and restrictions that <250g drones aren’t subject to.

It features a decent flight time of 28 minutes with no wind. In reality, I was getting closer to around 24-25 minutes, but with three batteries in the Premium Bundle, that still offers a decent amount of flying time when you’re just trying to get some behind the scenes shots, establishing shots or b-roll for your vlog. The Premium Bundle also comes with a triple battery charging plate so while you’ve got one up in the air, you can be getting your other two charged up from a power bank if you want to keep going for longer. If you’ve only got the basic package with one battery, you’ll have to charge up through the drone itself.
It features a 3-axis gimbal with -125° to 35° pitch, -34° to 33° roll and -25° to 25° of yaw (pan), which results in some very smooth footage. You can also manually adjust the pitch while flying to point straight down, straight ahead or anywhere in between. You get GPS, GLONASS and Galileo so the drone knows where it is at all times, and that information is relayed back to your smartphone via the controller – which operates on 2.4Ghz and provides up to 10km of unobstructed range (but remember to obey line of sight rules where you’re flying!)
It shoots up to 12-megapixel DNG raw files as well as 48-megapixel JPG images. The latter sounds impressive, but don’t get too excited just yet. You’ll see why later on in this review. It’s handy if you’re scaling back down to go to the web and want to just grab some quick shots to post to social media, but other than that, the 48-megapixel option isn’t as amazing as it sounds. The 12-megapixel raw files if can produce, though, are excellent.
It offers a max wind resistance of Level 5, meaning it should be able to handle winds up to 19-24mph and it seems to handle winds of that speed quite well. You can definitely feel it struggling a little but it’s certainly not uncontrollable by any stretch of the imagination. And when it comes to pure flying speed, you get 5m/sec (11mph), 10m/sec (22mph) and 15m/sec (33mph) options. At the 15m/sec setting, you are pushing the stabilisation limits of the gimbal and the rolling shutter limits of the sensor, but there is an option to prioritise video, which will adjust the drone’s flight characteristics to help ensure usable footage without jello wobble.
We’ll go into some of the features in more detail as we go through the review but first, let’s talk about…
Firmware Updates
Firmware updates on the Autel Evo nano are both a breeze and a pain. They’re a breeze because they’re easy. As long as the drone battery and controller are both fully charged, you fire ’em up and the app tells you “Hey, you’ve got new firmware!” you click a button and wait 15 minutes. Fantastic.
A pain because every time there was a firmware update that updated the battery firmware, I had to redo it all over again every time I installed a different battery that hadn’t seen the latest firmware update process yet. I wish there were a “short” update that only did the battery if you plugged one that needed updating vs having to do the complete ~15-minute upgrade sequence on the entire drone again.

If you’re out in the middle of nowhere and think you’re good because you updated your drone right before you left the house (like I did this morning) and then while you’re out you discover that your other two batteries need to suck half an hour of your time between them while you’re updating their firmware, too, then that’s a lot of your flight time gone in just sitting around waiting, not to mention the reduced capacity and consequent flight time after each battery has been upgraded once you are finally able to get it up in the air again.
So, any time you plan to leave the house with the drone, be sure to check if there’s a new firmware available the night before and upgrade everything, including any spare batteries, so that the next morning, there’s a good chance you’ll be ok. Of course, there is still the chance they could release one the morning of the flight (or even during your flight), but doing it the night before increases the chances of a smooth flight.

Ideally, I’d like to see an option in the app to do a mini update just for batteries that doesn’t take as long as updating the whole drone all over again each time. Alternatively, and I’m not sure if the charging dock supplies any communication with the batteries, but if we could use the dock plugged into either a USB port on our computer or smartphone with an app to just update the batteries in one fell swoop without the drone having to be powered up, that would be ideal.
Fortunately, I don’t expect the firmware for the batteries will need to be updated all that often. So you’re more than likely not going to encounter this situation regularly. But when it happens, it will annoy you. And the more batteries you have, the more it’ll annoy you.
The other thing right now, though, is that the only reason there are so many firmware updates at all at the moment is that the drone is still quite new and Autel is rushing to implement those features they promised. Fortunately, now that many of the changes and fixes that need to be done have been done, the firmware update frequency is already slowing down, minimising the impact on prep and flight time. Also, most of the updates coming now aren’t essential and urgent updates and you are usually able to hit cancel and do them later, instead of being grounded until you do update.
Update: The v1.2.14 firmware, released on March 28th, now allows you to update the battery firmware individually, so you don’t have to go through the entire update process!
App Updates
Along with the firmware updates, we’ve seen app updates, allowing us to configure and take advantage of the new features that the firmware updates have brought with them.
And as a quick aside, the App updates, as I’ve just discovered on my latest trip out with the drone can also be quite annoying. If you’ve got your smartphone set to automatically update apps, beware that your settings will be reset with each app update! I just spent the first gloriously sunny Scottish afternoon (as in, warm enough to wear a t-shirt) out with the drone only to find out when I got home that I’d been shooting JPG all day instead of DNG raw because the app updated itself automatically at some point in the last few days.
We can now access the high-resolution 48-megapixel (8000×6000) photo mode, for example. Unfortunately, the DNG raw files option is only available in the 12-megapixel (4000×3000) mode, although I’m not sure that really matters. I’ll explain why later when we get onto the photos bit.

We now also have access to a variety of frame rates. including 24fps. So, if you’re editing and mixing in with footage shot on the ground at frame rates other than 30fps, it’s now become a lot easier without having to interpolate or interpret footage to match.
If your smartphone is set to automatically update your apps, then you’ll always have the current version each time you load it up. But, again, do be aware that this will reset your settings each time it updates – at least on Android. I really hope Autel can find a way around this so it remembers your settings between updates. If you care more about not having to double-check your settings every time you fly, then you might want to disable auto-updates for this one.
The Flying Experience
One of the things that Autel has unlocked in recent firmware is the full speed capability of the Autel Nano (and Nano+) allowing it to fly at the full 15 metres per second (around 33.5mph) in sport mode as well as maximise its wind resistance. Now, even early on I found its wind resistance to be quite good as long as you didn’t need to move quickly and just needed it to maintain a steady position. The new update just makes it that bit more stable in the air and allows it to have a little more power available when required.

One thing that does seem to have changed slightly is that instead of completely disabling obstacle avoidance once you go into sport mode, it simply says that it might be invalid and not all that accurate. Which makes sense. If you’re hurtling towards something at 34mph and it detects something in front of it, then it might not be able to stop in time, even if it can see that it’s there. When you are in the Smooth or Standard modes, though, the obstacle avoidance is fantastic. Annoyingly so, sometimes, if you’re intentionally trying to get close to something. But disabling it briefly is only an on-screen click away.

Other than this, the flying experience is pretty much as it was before. That is to say, it’s pretty good. For such a small drone, it handles itself in the air very well. And even though the new limit is supposed to be ~33.5mph, I actually managed to get 36.4mph during one test flight – I did manage to get 37.something in another flight but wasn’t capturing my phone screen at the time.

It does take a little while to get up to that speed, but it handles it pretty well. As mentioned above, though, it can take a little time for it to stop of its own accord and even pulling the stick back into reverse only slows it down so quickly. So, if you’re going to fly at these kinds of speeds be absolutely sure that there’s nothing in front of you. You really are doing it at your own risk, as the warning dialogue suggests.
At the slower speeds, it flies just as it did before in my first impressions, but it is a little more stable in the wind than it was. The wind was fairly low here today, at a constant 7-10mph, but gusts were getting up to around 31mph. Fortunately, the gusts didn’t happen that often but it managed to stay mostly steady when they happened.
Photos
Ok, let’s get the bad news out of the way first, because that’s an easy one. As mentioned, firmware updates now give us 12-megapixel DNG raw files as well as 48-megapixel (8000×6000 pixels) JPG images. This sounds like it should be good news but having had a play with it, I’d probably just forget the 48-megapixel option exists. Why? Well, it just looks like an upscaled 12-megapixel (4000×3000 pixels) image along with all the artifacts you’d typically expect from a small sensor upscaled this much in your phone. If this is indeed what’s happening and it’s simply upscaling, it would explain why there’s no raw option for 48-megapixel images.
From doing some tests, I’ve found that you’ll generally get better quality just shooting 12-megapixel DNG raw, processing that and then upscaling in Photoshop with its Super Resolution feature or something like Gigapixel AI. This is pretty disappointing, really. I’m sure the camera could quite possibly have contained a 48-megapixel sensor. After all, many smartphones contain 48-megapixel sensors that spit out 12-megapixel Quad-Bayered files, but those phones also usually offer the ability to output a completely unprocessed 48-megapixel DNG raw file, too, that you can process on your own time and in your own way.

I’m not entirely sure which sensor is inside the Evo Nano, but if it is 48-megapixel and it’s doing the Quad-Bayer thing to bring the output down to 12, then hopefully, this accessing the full resolution is something that Autel will be able to implement at some point. The way things are implemented right now will definitely upset some people who’d bought the Evo Nano for its high-resolution stills capabilities. Of course, this isn’t exactly a high end, high spec drone, so we probably shouldn’t expect too much.

Now, with all that being said, the 12-megapixel raw files are rather good and have excellent detail. If you’re only posting online and not making huge huge prints then 12-megapixel will likely be just fine. And because they’re DNG, you can process them in pretty much anything that supports raw without having to wait for software updates (as we typically do every time a new DSLR or mirrorless camera is released).

There’s a little chromatic aberration on the Nano’s camera towards the edges of the frame in high contrast areas, you’ll also want to dial in some lens correction and there does seem to be a bit of a shift towards yellow, but it’s easily taken care of in Lightroom or Adobe Camera RAW (and presumably Capture One and most other raw processing applications). And if you create a profile with your own custom defaults for Nano files, then it’s pretty much just a one-click cleanup after that to take care of those issues on future shots.
That’s what I did here, using the DataColor SpyderCHECKR in its 48-swatch configuration to create a custom preset for Adobe Camera Raw that I could then apply at will to DNG files imported from the drone.


One great feature of the app is the panoramic shooting mode. This allows you to shoot spherical, wide-angle, horizontal or vertical panoramas of the scene before you – or rather, before the drone. It parks itself in the air as best it can and then shoots a series of images, shifting its rotation and camera tilt in between each, which it then stitches together in the app in order to create your final panoramic image. Here’s a horizontal pano I shot while I was out that was created within the app.

What I particularly like about them is that as well as the app being able to merge together a panoramic image for you, you can choose to keep the original raw files, too. This allows you to get a quick preview of how the area (and your pano) looks but then also lets you stitch together your own panoramic using something like Hugin or Photoshop. The in-camera stitches are great for just quickly seeing yourself or sharing with a friend in WhatsApp or whatever, but being able to do it yourself with complete control at the computer provides a much better result.

It makes sense that the Photoshop version would look better than the in-app one, though, because you can process the raw files to look exactly the way you want them to and you can more easily correct for the obvious curvature shown in the in-app stitched image. Going the desktop editing route also creates a much larger image – in this case, after cropping out all of the clear spots to produce a final panoramic without gaps, my image above resulted in 10,852 pixels across and 4003 pixels high – as opposed to the app’s relatively measly panorama resolution of 1899×633.

Video
This is an interesting one because one of the things Autel fixed in one of the firmware updates was the jelly wobble like effects of rolling shutter. When I took the drone out on its initial run after it first arrived, I didn’t see any kind of rolling shutter effect at all. This time around, though, after the firmware update that supposedly fixed it, I saw quite a lot on some of the clips. It wasn’t noticeable at all on my phone when previewing the flight but it’s very obvious when watching the footage back on the computer.
It didn’t show up in every shot, though, and I suspect it’s a combination of the increased speed options available now and the fact that the camera’s shutter speed was so much faster now compared to before due to it being a much brighter day – this was the first day we’ve seen good sun with clear blue skies in quite a while! So, my shutter speed was closer to around 1/5 00th of a second to prevent things blowing out rather than the 1/50th of a second I’d like to shoot at. Quite often, I had to shoot at 1/400th or faster in order to get a good exposure.
In darker areas where I was able to get closer to 1/50th of a second (shooting 24fps – we’ll get to that), there was no noticeable rolling shutter jelly wobble that I could see when played back on the desktop. So, I suspect that once ND filters become readily available for the Evo Nano, this issue will resolve itself. Freewell does have a set of ND filters available for the Evo Nano and Evo Nano+ but they still appear to be on pre-order and aren’t quite shipping yet. I have no idea how good they are, but I’d be interested to find out and to see if it does indeed solve the rolling shutter wobble issue by letting me shoot at a more reasonable shutter speed.
Another update in the firmware (I said we’d get to it) is the fact that we’re not limited to just 30fps anymore. Now we can adjust the frame rate to 25fps or 24fps. For me, that means 24fps. It’s the one frame rate that seems to be available on all cameras, regardless of where you are in the world, so it makes it easy to edit footage from different cameras together without having to mess around with interpolating or interpreting (speeding up or slowing down) it to prevent skipped or duplicate frames and jerkiness.

The quality of the footage is pretty much the same as that shown in my first impressions, which you can see below, although full manual exposure control is available now and there are on-screen zebra stripes in the app, making it pretty easy to nail your exposure (as long as it’s not so bright you can barely see your phone screen).
The “Pro” mode offers full exposure over ISO, shutter speed and white balance for both stills and video, allowing you to easily switch between the two. You can shoot a photo or start & stop video recording using either the app’s display or a button on the drone’s controller under your right forefinger.

The video footage the drone produces looks really good and is great to work with in post and it’s not taxing on the system at all (unlike most of the DJI footage I’ve tried to edit on Windows) vs the 4K footage I get from my Panasonic mirrorless cameras. When you’re exposing for the highlights to prevent them blowing out, the shadows and midtones do lack a little contrast and punch, but it’s fairly easy to compensate for that in post. Here are some ungraded vs quick grade comparisons in DaVinci Resolve.


It’s tough to shoot in bright conditions because you’re trying to see the screen while battling the sun and you’re not seeing great contrast and colour on your screen (although this will largely depend on the phone you’re using) so your only real guidance is those zebra stripes. A live histogram in the app would be a nice feature to see in the future. Hopefully, we’ll also get some low contrast “flat” profiles at some point as well (or LOG, please!) that will allow it to capture a greater dynamic range in the footage and if we’re not quite so spot on with the exposure, it’ll be a little more forgiving.
Update: The app now has a live histogram, that can be moved around the screen to a convenient position. It also has HDR and LOG Colour available as options now, too!
Until then, I’ll keep erring on the side of caution in Pro Mode to not blow out the highlights and just hope I can pull back enough detail from the shadows and midtones in the edit – which is working well for me so far.
The automated flight modes
There isn’t much to say about the automated flight modes except that they’ve still yet to impress me. There’s still no active tracking for having the drone just follow you around – unless Autel snuck in a firmware update when I wasn’t looking – and I think this is the main issue with the other automated flight modes the Evo Nano has. It just seems to lose me as a target all the time, even when I’m standing still.
A number of times when I went to test out the flight modes – Rocket, Fade Away, Orbit and Flick – where even while trying to set up the move, the drone (or the app?) would see me and then it wouldn’t half a second later, and then it would again, and then it wouldn’t. And if it managed to hold onto me long enough for me to actually choose myself as a target, then it would lose me again either before I was able to start the shot or within a second or two of getting into it.
This shouldn’t really happen with a subject wearing blue jeans and a black shirt against an open grassy field. Yet, it did. Repeatedly. Others have reported better success with them in posts I’ve seen on Facebook but they’re not really working for me.
While I would like to see that these modes did work as intended, the fact that they don’t isn’t a massive deal to me because it’s rare that I’d ever use any of them anyway. But, the whole follow tracking thing… I really hope that works the way we expect it to when Autel finally adds that feature in a firmware update. And, I hope the other automated shot modes get fixed, too, because even though I won’t use them all that much, lots of people will want to.
I might even change my own mind on how much I need them at some point now the weather’s getting better, too. As I venture back out into Scotland’s wilderness, if I’m vlogging in the middle of nowhere and have nobody else to film me, I’ll want to have a few drone shots of myself doing something a little more natural and interesting than staring at the controller screen trying to fly the drone manually.
But for now, I’m not relying on them at all and we’ll see how well they do once Autel releases the firmware to add active tracking.
Update: Autel has now implemented tracking features into the Evo Nano, including “follow me” function. They could still do with a little tweaking, but overall, they work quite well. Depending on the shot you’re trying to get, you might need to do it a couple of times for safety, just to be sure you’ve got what you need. But if you fire up your Evo Nano and it doesn’t have tracking, be sure to update to the latest version of the app as well as your drone’s firmware.
Overall thoughts and conclusions
Automated flights notwithstanding, the Autel Evo Nano is a decent drone for what it is; a <250g drone. It’s teeny tiny and slips into a lens slot in your typical photography backpack (although you’ll need a camera-sized slot for the controller), it doesn’t have the flight and permit restrictions of larger drones in much of the world, and it produces very usable photos and video footage. And while I complained a bit about the firmware updates early on in this review, the fact that Autel has been so quick to jump on issues that pop up and actively work on improving the drone in such a short space of time says a lot about the company as a whole.
The obstacle avoidance is fantastic, although perhaps a little too sensitive at times. Flying it through woodlands, there were times it refused to fly because it saw a random twig or leaf hanging that it didn’t really have much chance of hitting if it carried on straight forward for a little bit more. I wouldn’t want to disable the obstacle avoidance completely in these situations, but I wish there were an option to adjust the “safe” range. So far I haven’t been able to find one. This should be an easy fix should Autel shoots to implement it in a future firmware update, but I expect it would be another “at your own risk” option.
Pros
- Obstacle avoidance is great (too great sometimes)
- 4K video and 12MP DNG raw stills
- 2.7K live preview resolution to your smartphone
- Great flight range with solid communication
- Good wind resistance
Cons
- Automated flight modes aren’t always (often?) reliable
- It’s expensive compared to other <250g drones
- Smartphone app resets settings when it updates
- 48MP JPG images don’t look great
- No active track follow mode (yet!)
Is it the DJI Mini 2 killer that some proclaim it to be? Well, in some ways, yes. In other ways, no. The Autel Evo Nano (and Nano+) is targeted towards more demanding consumers who have a need for a small drone for specific uses and expect high-quality footage and photos. And while there is most definitely some crossover, the DJI Mini 2 is targeted more towards the average consumer who wants a drone to play with but doesn’t want to spend the thousands of dollars that more advanced higher-end drones typically demand.
So, I think the two can co-exist happily and I don’t see them really as competitors. I think we may start to see a shift and clearer separation in the markets with less of a crossover in drone choice between general consumers and photographers, filmmakers and YouTubers who want to shoot photos and video to mix in with footage shot on their ground-based cameras. That being said, depending on what eventually gets released in the form of the DJI Mini 3 and what its price point will be, Autel may find itself facing a bigger challenge ahead – especially if an active track follow mode doesn’t come to the Evo Nano quickly!
For now, though, the Autel Evo Nano definitely stands well above the competition in the <250g space offering excellent video and photo quality (as long as you don’t use the 48MP mode) with an easy flying experience. Autel also doesn’t have a built-in tracking system in their drones that can be easily abused by others. This alone will be worth the extra cost over the competition for some, especially in certain parts of the world.
The Autel Evo Nano is available to buy now for $799 for the standard package or $949 for the premium bundle which includes two spare batteries, six spare sets of props, a propeller strap, a triple battery charging dock and a shoulder bag.
Note: It’s worth pointing out that Autel has increased its prices on products in the USA since the initial announcement of the Evo Nano due to tax levies on Chinese imports into the USA. The basic EVO Nano package was $649 and the Premium bundle was $799. These have now been increased to $799 and $949 respectively. They’re not the only American company that has been forced to pass these expenses onto the consumer, though, so don’t take it personally!

John Aldred
John Aldred is a photographer with over 25 years of experience in the portrait and commercial worlds. He is based in Scotland and has been an early adopter – and occasional beta tester – of almost every digital imaging technology in that time. As well as his creative visual work, John uses 3D printing, electronics and programming to create his own photography and filmmaking tools and consults for a number of brands across the industry.


Join the Discussion
DIYP Comment Policy
Be nice, be on-topic, no personal information or flames.
7 responses to “Autel Evo Nano drone – Is it really a DJI Mini 2 killer?”
Zino mini also is below 250 and has obstacle avoidance
The obstacle avoidance on the zini mini isnt very good from the reviews I have seen. Has something changed recently? I generally like Hubsan products but I skipped considering the mini from the bad obstacle avoidance reviews.
I have had terrible experiences with range and signal strength on autel, it’s not nearly as solid signal as dji. Lots of things seem to interfere with it.
I’ve not had that issue at all here, but I suppose it will depend on the environment in which you’re flying (city vs country) and where in the world you are (I get a lot of wireless interference on certain frequency ranges in the USA, for example that I don’t in the UK and vice versa – some that get a lot of interference here are a dream to use in the USA).
I’ve actually owned two of them and both were terrible with the signal. I even purchased third party antennas. It’s much weaker than dji signal in every environment I tried.
Yes, using two identical products in the same environment should yield identical results. That’s not unexpected. I’ve had mine to the limits of visual line of sight and had no drop out or issues at all.
heh..weird. that in my experience is one of the FEW things Autel does better with