


$10 vs. $30 seamless backdrop for portraits: should you save money on backdrops?
Feb 6, 2019
Roger Rosales

We love it when our readers get in touch with us to share their stories. This article was contributed to DIYP by a member of our community. If you would like to contribute an article, please contact us here.
Share:

Photography.
It’s expensive. And who really has the money to buy all the name brand photo gear? I certainly don’t. With that said, expensive equipment does NOT make the photograph. The photographer does. Which is why I am exploring various non photography specific gear and using it for my photography.
Let’s take seamless background paper for example. A roll of Savage 53″ x 36′ will cost you $30 at B&H. That’s not exactly cheap, especially if you’re just starting out, have a family; are a student or simply just don’t have enough funds to throw at expensive gear. Now, let’s compare that $30 roll to Pacon’s Fadeless construction paper that costs you $10 for a 48″ x 12′ roll.
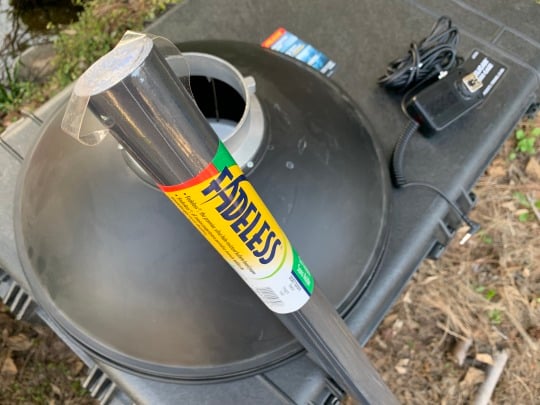
For $10 you get a roll wide enough for portraits & headshots. At 12′, however, you really can’t roll this sucker out for a full sweep. Pacon offers a 50′ roll that costs you $28.44 on Amazon, however, if you’re going to spend that much…buy the Savage. It’s just better. However…The idea is to save money. And if all you plan or want to shoot are headshots or portraits of single (as in one person at a time and not a group shot) individuals, the $10 could save you a ton of money.
Recently my previous employer moved to the midwest from it’s Los Angeles location. Needless to say, I found myself unemployed in the traditional sense. However, I see it as an opportunity to go full on freelance with my photography. And without a steady income coming in now I have to be very deliberate with my spending. So, I decided to try out the Pacon Fadeless paper rolls.
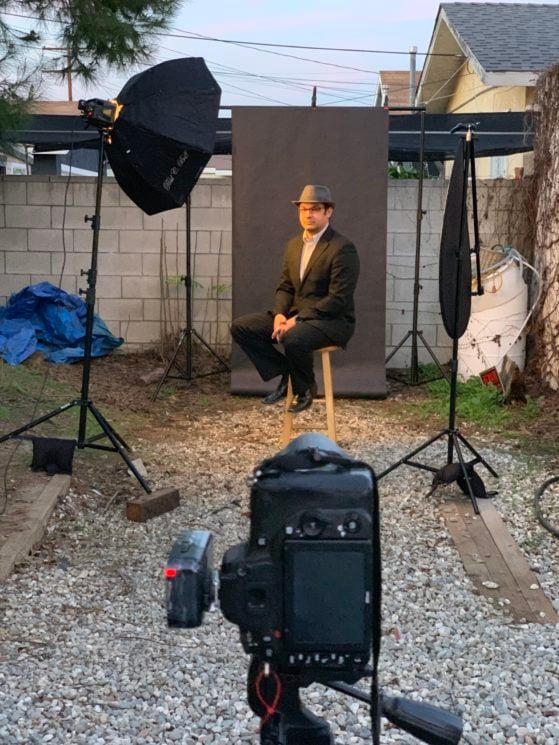
After purchasing the roll I called up my buddy to help me out with a test shoot. I setup in my backyard and started shooting! I ended up using a two light setup as seen below:

To my surprise, the backdrop did really well. Of course, it has it’s drawbacks. It’s very thin compared to the Savage rolls and as you can see in the image above it creases pretty easy. However, the look I was going for was a very dark and moody one so I wasn’t lighting the backdrop and was using it primarily to help facilitate a black background. Of course, I could’ve used a white background, used the inverse square law and yadda yadda to get the same look, but I decided to go this route.
As with any portrait, you have to be very careful with your lighting, and this was no exception. If you’re going to go the route of the el cheapo I highly suggest you shoot tethered on a bigger screen. Those creases in the back become pretty visible once you open your raw files. The histogram won’t be much help here in detecting the background wrinkle texture. Here’s a straight from camera sample with ONLY a B&W conversion done to it in lightroom:

Now, with a little bit of burning in Photoshop you can eliminate the ugly texture in the background. Here’s the fully edited version:
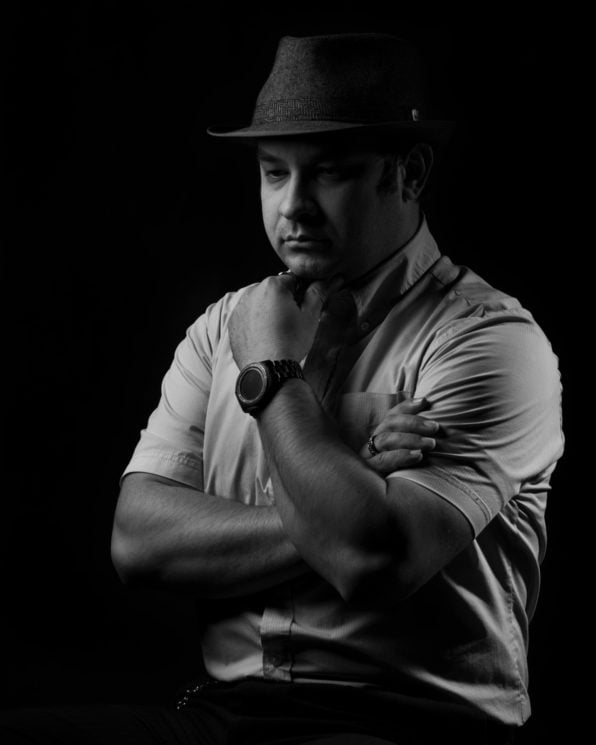
The background is much cleaner now and you would never be able to tell I used a cheap $10 roll of paper. It requires some extra editing time but not by much if you get your lighting right. And this is why I highly recommend shooting tethered so you can view the images on a larger screen and adjust your lighting as needed.
I did not. But that’s OK. This was only a test shoot and it showed me exactly what I wanted to see. The weaknesses of going the cheap route. In the next image below the background is MUCH smoother and cleaner and I did not have to do any burning in order to get it to look this way. My light didn’t change, however, I got a much cleaner backdrop. I believe the reason is because the wind helped smooth out the creases by stretching the background a bit and I just so happen to have caught it in the right moment. As a matter of fact, I upped the black value to +25 in lightroom.

Overall, I think it’s worth spending the extra money and going with the Savage rolls instead, however, these Pacon backdrops will do in a pinch and if you’re tight on cash. Some extra work in post will be involved but if you shoot it correctly and get the best looking raw files possible it shouldn’t be a headache at all.
I will be trying out their colored rolls next…
About the Author
Roger Rosales is a photographer based in Los Angeles, California. You can find more of his work on his website, blog, Facebook, and Instagram. This article was also published here and shared with permission.
We love it when our readers get in touch with us to share their stories. This article was contributed to DIYP by a member of our community. If you would like to contribute an article, please contact us here.


Join the Discussion
DIYP Comment Policy
Be nice, be on-topic, no personal information or flames.
4 responses to “$10 vs. $30 seamless backdrop for portraits: should you save money on backdrops?”
10 vs 30 … seriously ?
Can someone explain to me why one goes outdoors to take an indoor type of picture. I do understand that space can be an issue, but still I do not get it.
It’s generally just a space issue. I have to do it too. Where I live you either own a studio or shoot outside. No one leases studio space per hour in my area. :(
As MegaNickels already mentioned, it really comes down to space. The reality is, it doesn’t matter where you make the image as long as you know how to execute your vision. There’s no right or wrong place to shoot a portrait. Also, if I have the space outdoors to shoot a portrait why pay for studio space when I can achieve the exact same results for free? Granted, there are certain comforts of a studio that shooting outdoors will never have, but if it’s a shoot just for fun and you’re shooting a friend or just doing a test shoot, there’s no sense in renting studio space.
Now, if it was a paid gig for a client, that’s a different story…Hope this clarifies things a bit. Thanks for reading!