


3 Lights Studio for Under $100
Jan 6, 2008
Udi Tirosh
Udi Tirosh is an entrepreneur, photography inventor, journalist, educator, and writer based in Israel. With over 25 years of experience in the photo-video industry, Udi has built and sold several photography-related brands. Udi has a double degree in mass media communications and computer science.
Share:
 One of the nice things I like about DIYP is the community that is starting to build around it. After everyone has done a round of introduction, and got to know the general audience of this blog, I must admit that I still get a kick from photographers sending a note or sharing a technique via the mail, or on the flickr group.
The setup below is a twist on the 3 lights basic setup I got on the mail from Adam Hand. It is a great setup for starters, and HEY! it is under 100$. Adam, the floor is yours:
Any one who has worked in photography for a while knows that lighting is more important than the subject, lens and camera (look at Edward Weston’s work). However, if you research studio lighting you will find that it can cost as much or more than your lens and camera.
For years I was perfectly content shooting without lights, until I worked a couple of years at photo studios that were outfitted with the best gear money can buy. After using the equipment at work I was very excited about building up my own studio. But of course I didn’t have thousands or even hundreds to spend after I bought my digital SLR and some good lenses. So I invested a lot of time doing research and experimenting, and I owe lots of what I learned from right here at DIYphotography.net.
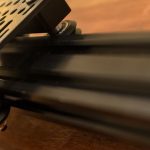
I decided to start my studio with slave flashes, and found they work great. The type of slaves I used are wireless, battery powered, have a wide open unfiltered bulb, and amazingly cost under $25 a piece. They can be found on all the major online photo sites. They also have a socket on the bottom so they can be attached to a tripod.
I use mini-tripods for mine ($2-$5 online or discount stores), which keeps my studio more portable. If you look at figure 1, you will see my simple setup.

Another great thing about these lights is they are more powerful and the recycle time is less with NiMH rechargeable batteries. After I bought the slaves, I found the pop up flash on my digital SLR wouldn’t trigger them, but my point and shoot digital camera would. I realized that most digital SLRs meter the scene with a pre-flash before firing the actual flash and taking the picture, this sets off the slaves too early. So I needed to find a cheap way to trigger the slaves.
Next I bought a shoe mounted flash that came with a PC cable, so I could fire the flash off the camera. The PC input on the flash is also nice since I can buy a longer PC cable and trigger the flash from across the room. These flashes range from $30-$50 on the major photo sites.
You can also get a higher guide number if you buy really old used equipment. These work great at triggering my slaves. I bought a flash that I could rotate the flash around and angle it up to bounce it off of the ceiling or walls.

Now this next part is very important when picking and using your flash… be certain that you never put a generic or older model shoe mounted flash directly on your hot shoe. If you do put on a flash not designed for your digital or auto focus camera you could damage the circuitry when you fire the flash because of the potentially high voltage given off by the flash. Most newer cameras have a max rating of 6-12 volts on the hot shoe, but older flashes can give off as much as 400 volts.
The best way around this is to use the PC adapter on your hot shoe, or to be absolutely sure you can purchase a safe sync. I just use the PC adapter (it came with my flash) and I haven’t had an issue with it. If you’ve been watching the prices, you’ll notice you could easily get these 3 lights for under $100.
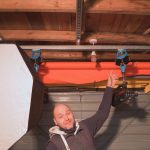
Now that you have your lights you may be wondering what to do with them. The first thing I did was find ways to outfit them with a soft box (my favorite tool). I made a version of the “Flash Mounted homemade DIY Softbox” found on this site to fit my slaves. See figure 3 and be sure to leave an opening in the side to the slave will detect the master flash.

If you look at figure 4 you will see the setup I used, and image A is
the shot I took of myself with that setup. The lighting looks very much
like soft natural light, but it was actually done with my little studio.


If you look at figure 5 and image B you will see another type of effect you can achieve with this same low cost kit. This little set may not have lots of power, but it is fantastic for portraits, and you are limited only by your creativity. I hope this tutorial is helpful and you have as much fun surprising yourself as I did.


Here are some more Lighting techniques:
– Lighting Diagrams, Planning and Explaining
– Light Like a Butterfly
– The Ghetto Studio
– Getting Fired by My Daughter – a Homage to X Man
– The Strip Light That Won’t Strip You

Udi Tirosh
Udi Tirosh is an entrepreneur, photography inventor, journalist, educator, and writer based in Israel. With over 25 years of experience in the photo-video industry, Udi has built and sold several photography-related brands. Udi has a double degree in mass media communications and computer science.

Join the Discussion
DIYP Comment Policy
Be nice, be on-topic, no personal information or flames.