


This is why you need to pre-process moon images – a complete guide to using PIPP software
Sep 22, 2024
Soumyadeep Mukherjee
Soumyadeep Mukherjee is an award-winning astrophotographer from India. He has a doctorate degree in Linguistics. His work extends to the sub-genres of nightscape, deep sky, solar, lunar and optical phenomenon photography. He is also a photography educator and has conducted numerous workshops. His works have appeared in over 40 books & magazines including Astronomy, BBC Sky at Night, Sky & Telescope among others, and in various websites including National Geographic, NASA, Forbes. He was the first Indian to win “Astronomy Photographer of the Year” award in a major category.
Share:

Taking multiple images of the moon to get a clear and noise-free image is a common practice. While photography and post-processing are important for creating a beautiful picture of the moon, pre-processing your images contributes much to your image. It is an important aspect of your workflow to get the best results.
Why crop your lunar images
If you use a telephoto lens, even at a high focal length of 600 or 800 mm with a DSLR or mirrorless camera, the lunar disk will only take up a small area in your FoV. While post-processing the image, we end up cropping the image significantly. However, when you are taking multiple images, and stacking them, we do the cropping right at the beginning. This not only helps us to speed up the whole post-processing workflow but also takes up less memory in the PC.
What does PIPP do
PIPP (Planetary Imaging Pre-processor) is a free software that helps us with cropping RAW moon images in batches. Apart from cropping, lunar photographers use PIPP for the following reasons:
Centre the lunar disk: While cropping the moon images, PIPP also helps the centre the lunar disk in the frame. This makes the stacking software do its job easily and more accurately.
Convert RAW images to TIFF: Inside PIPP, you get the option to save your pre-processed images as TIFF files. Most of the lunar stacking software cannot work with RAW formats.
Equalize histogram: With the “Histogram Equalisation” option on PIPP, you can equalize the brightness of all of your images. This is important especially when the seeing is not good and you end up getting varied luminance data.
Start your preprocessing by organizing your files
While we are always in a hurry to post-process our images to see the final results, we forget to organise our files. If you are a lunar photographer, it is quite common to have a bunch of moon photos that you have taken over months and years. But if you want to go back to an image-specific day for some reason or if you need to create a project, you must organize your images accordingly.
Once you are done taking photos of the moon, start copying your files to your PC (or any other storage you use). Create a folder, preferably with the date or other details to help yourself easily identify the files later. If you have taken calibration frames, create a separate sub-folder for light frames, dark frames etc. within your main folder.
Move on to PIPP for the next stage
Once you have organized your files, it is time to start working with PIPP. Download and install the software (if you haven’t already) and open it. Now, we will go through each of the 7 tabs in the PIPP control panel.

Source File
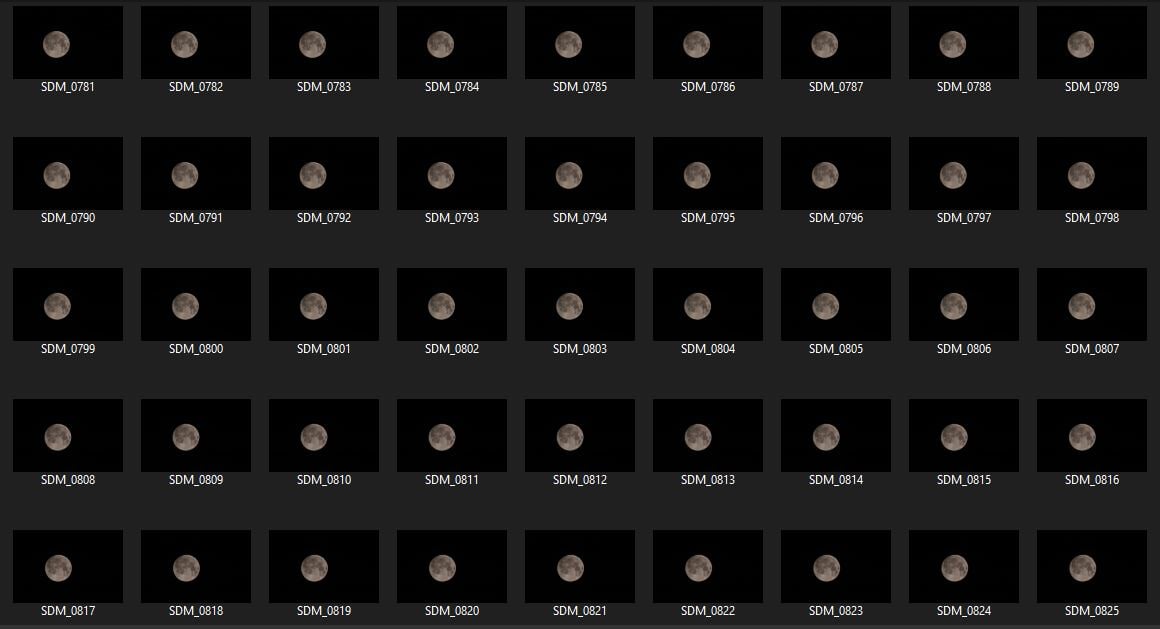
Click on the “Add image files” and add all the moon images from the session. You can click command/control + A or click on the first and last image holding on to the shift key.

All your lunar images will be fed into PIPP and a second interface will open which shows your image.

Input Options
The default setting works fine for most of the images. Normally, you are not required to do anything on this tab.

Processing Options
If your image has a lot of noise, you can turn on the “Enable Median Noise Filter”. Note that this does not reduce noise in the output images, but only applies a noise reduction while pre-processing your images.
Turn on the “Stretch Histogram White Point to” and put an input. By default, it is at 75%, which works just fine. I prefer to set it at 100%.
Turn on the “Set Histogram Black Point to 0%”.
Turn on “Equalise R, G, and B Channels Individually”. This helps with colour-calibrating your data and makes things easier during post-processing.

Within the “Frame Stabilisation Mode”, select the “Object/Planetary” mode. The “Surface feature” works well with extreme close-up images taken with a telescope. Turn on “Enable Object Detection” and click on “Test Detect Threshold”.

The second interface will pop up and show the lunar disk with a red mask. By default, the “Auto Object Detection Threshold” is turned on and it does a fair job most of the time. However, if the red mask is not accurate, you can turn it off and tweak the numbers. The goal is to create a mask that perfectly covers the lunar disk, not more, not less.

Turn on “Centre Object in Each Frame” and leave it at “None”.
Turn on “Enable Cropping” and choose the Crop Width and Crop Height. I normally keep 2000 for height and width (shooting with an APS-C sensor and a 600mm focal length).

Click on “Test Options”. This will again open the second interface and show a preview of your final output. This will include your chosen setting for histogram equalization and cropping settings.
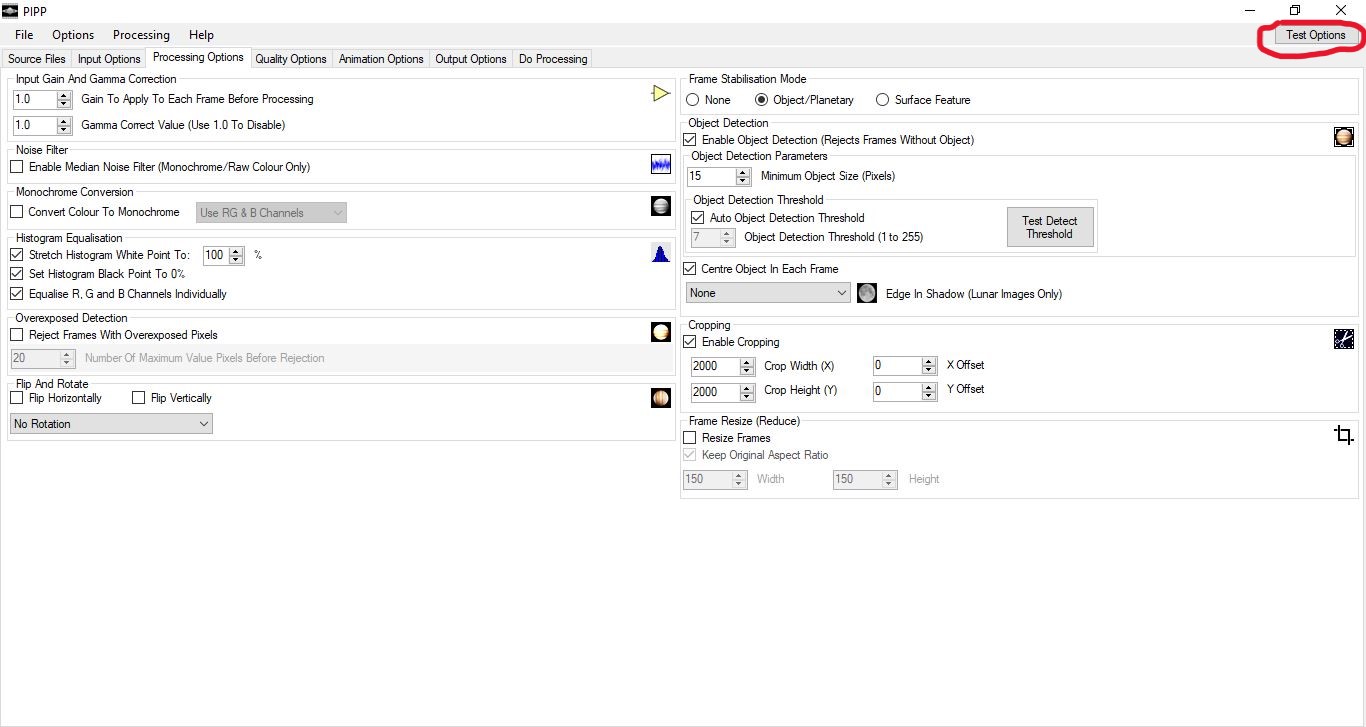
You can tweak both settings to your liking and keep checking the preview with “Test Options” till you are happy with it.

Quality Options
Turning on “Enable Quality Estimation” will create metadata for each of the images where PIPP will evaluate their quality. This might be necessary if you want to select the best images to stack. However, I leave it turned off and rely on the stacking software to evaluate the quality of the images.

Animation Options
Unless you are creating a video or a GIF with your lunar images, there is nothing to tweak here.

Output Options
This section decides the output format of your pre-processed data. Choose the “TIFF” option as it is the best and most recommended format.
By default “Create Subdirectory” is turned on. Your output images will be saved within a subfolder inside the source folder. You can change it as per your requirement.

Do Processing
Once you have done all the steps mentioned above, click on “Start Processing”. PIPP will start doing its job.

You can monitor the completion percentage.

Once the processing is completed, all your output images will be saved with the PIPP subfolder inside your source folder.


Now you are ready to stack your images and post-process them.
Clear skies!

Soumyadeep Mukherjee
Soumyadeep Mukherjee is an award-winning astrophotographer from India. He has a doctorate degree in Linguistics. His work extends to the sub-genres of nightscape, deep sky, solar, lunar and optical phenomenon photography. He is also a photography educator and has conducted numerous workshops. His works have appeared in over 40 books & magazines including Astronomy, BBC Sky at Night, Sky & Telescope among others, and in various websites including National Geographic, NASA, Forbes. He was the first Indian to win “Astronomy Photographer of the Year” award in a major category.
Related Posts
 The Complete Guide To Shooting The Moon On A Budget
 Complete Workflow Of A Beauty Portrait Editing Process Using Capture One Pro
 Photoshop plugin veterans Alien Skin Software is changing its name to Exposure Software
 I finally used my DIY UV box for making Van Dyke wet prints – Here’s my complete process
Join the Discussion
DIYP Comment Policy
Be nice, be on-topic, no personal information or flames.
4 responses to “This is why you need to pre-process moon images – a complete guide to using PIPP software”
Windows only. The “home page” – which is a Google site (http://sites.google.com/site/astropipp) requires me to log in. A post-mortem can be found at http://web.archive.org/web/20230317102714/https://sites.google.com/site/astropipp/ which is not very confidence-building.
I wonder if ImageMagick could pull off at least the autocropping trick, e. g. with
http://www.imagemagick.org/script/command-line-options.php#trim
http://www.imagemagick.org/script/command-line-options.php#fuzz
You could then have an attempt at super resolution with Enblend/Enfuse/Hugin, there is a quite old thread over there at https://photo.stackexchange.com/a/60845 explaining the process.
StarStax (https://markus-enzweiler.de/software/starstax/) might work as well, but it seems a bit aged.
You can try downloading PIPP from the link mentioned in the article.
I’m not sure if ImageMagick will do the job. Even if it does the autocropping (which can be done in Lightroom too), the alignment may not be possible.
Starstax is for star images, mainly to create star trails. It doesn’t work for this purpose.
This is a very nicely done guide! The only thing I will inject from my personal experience is that most of these are not needed when using modern stacking software such as Autostakkert. I have had great success just using PIPP to convert my raws to tiff without any other processing and then letting Autostakert handle the rest.
Appreciate your words, Paul. I have done that myself too, just converting with PIPP and moving straight to AS3/AS4. But for beginners, it is always a good idea to get the whole picture. Using a higher MP count camera or a slow system almost mandates the cropping. The best thing about this is, that neither fiddling with the settings nor pre-processing with all the features with PIPP, takes much time. I always love experimenting with the settings and would encourage others to do the same.