


This is the perfect rig for the Sony FX3
Nov 8, 2024
Udi Tirosh
Udi Tirosh is an entrepreneur, photography inventor, journalist, educator, and writer based in Israel. With over 25 years of experience in the photo-video industry, Udi has built and sold several photography-related brands. Udi has a double degree in mass media communications and computer science.
Share:

As the team is shooting more clients’ videos, we needed to upgrade our setup from a simple “talking heads” setup where we used a simple cage to a more robust solution that will handle power, video transmission and the ability to move quickly without eating time. It was time to update the rig.
I have been using the new rig from SmallRig for a few weeks now, and I have to say that I am incredibly happy. I am using a single battery to power the entire setup, have the tripod set on wheels, moving around became a breeze. This rig is also light enough to go hand-held, though it is not as light as a bare cage. The rig is built around the HawkLock system ($139.99), which proved to be extremely customizable.
Pick any two
No rig can do it all. If you look at standard shooting scenarios, you’d see the most common ones are Tripod, Hand-held, Gimbal, and Shoulder mounted. And there is no rig that can do them all. (or at least no rig that I found). The requirements collide. A full rig with a battery, monitor, and other accessories will probably not fit well on a gimbal. A well-balanced shoder rig can go on and off a tripod but would be awkward to hold by hand. You probably see where this is going. There are tradeoffs to any solution, and I needed to pick my use cases for this rig.
For our team, we shoot horizontally on a tripod 90% of the time and sometimes handheld. This was the driving use case for building this rig. If, for example, we shot more gimbal work or needed vertical video, we would have to build another rig. That said, for use, which is 90% tripod – 10% handheld, we are pretty optimized.
Camera rig power supply
The rig is running a few accessories, and it also need a constant and reliable power source. I chose the SmallRig VB99 Pro ($249.99) for this. I have been using this battery extensively for almost a year now, and it provides anything you can dream of from a small battery: Small (“mini”) form factor, high current draw, clear status display, and most importantly, plenty of ports. Let’s break it down.

I am mounting the battery directly to the cage with a SmallRig V-Mount Battery Mounting Plate ($79). It goes directly under the case and connects to a tripod plate. I placed the battery right behind the camera, which would block the screen if it was flat against the body. But I have the FX3 LCD on the side, in a way that kinda reminds more cinematic cameras. I will be using an external monitor so, the LCD would mostly be used for settings.
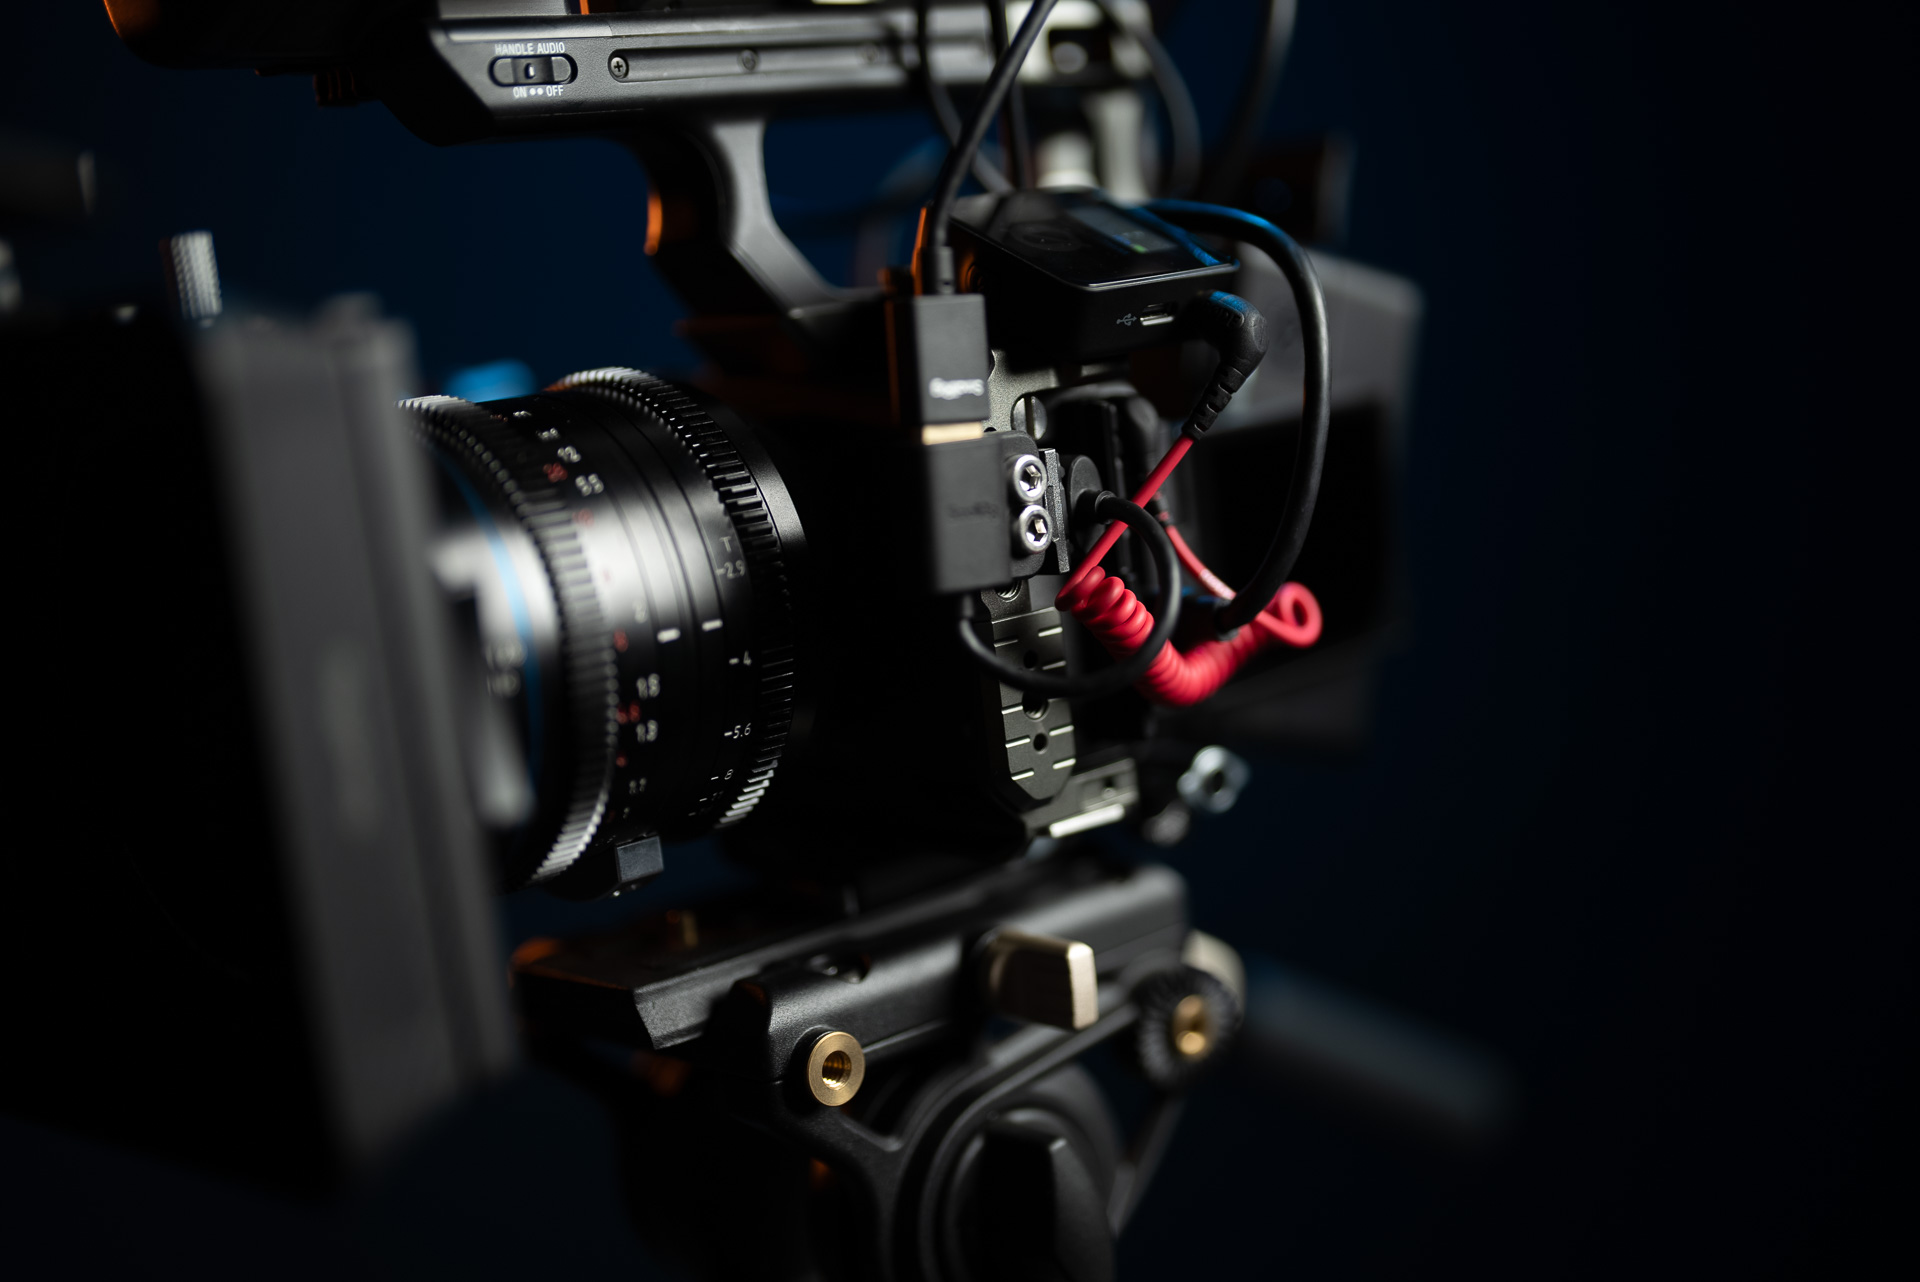
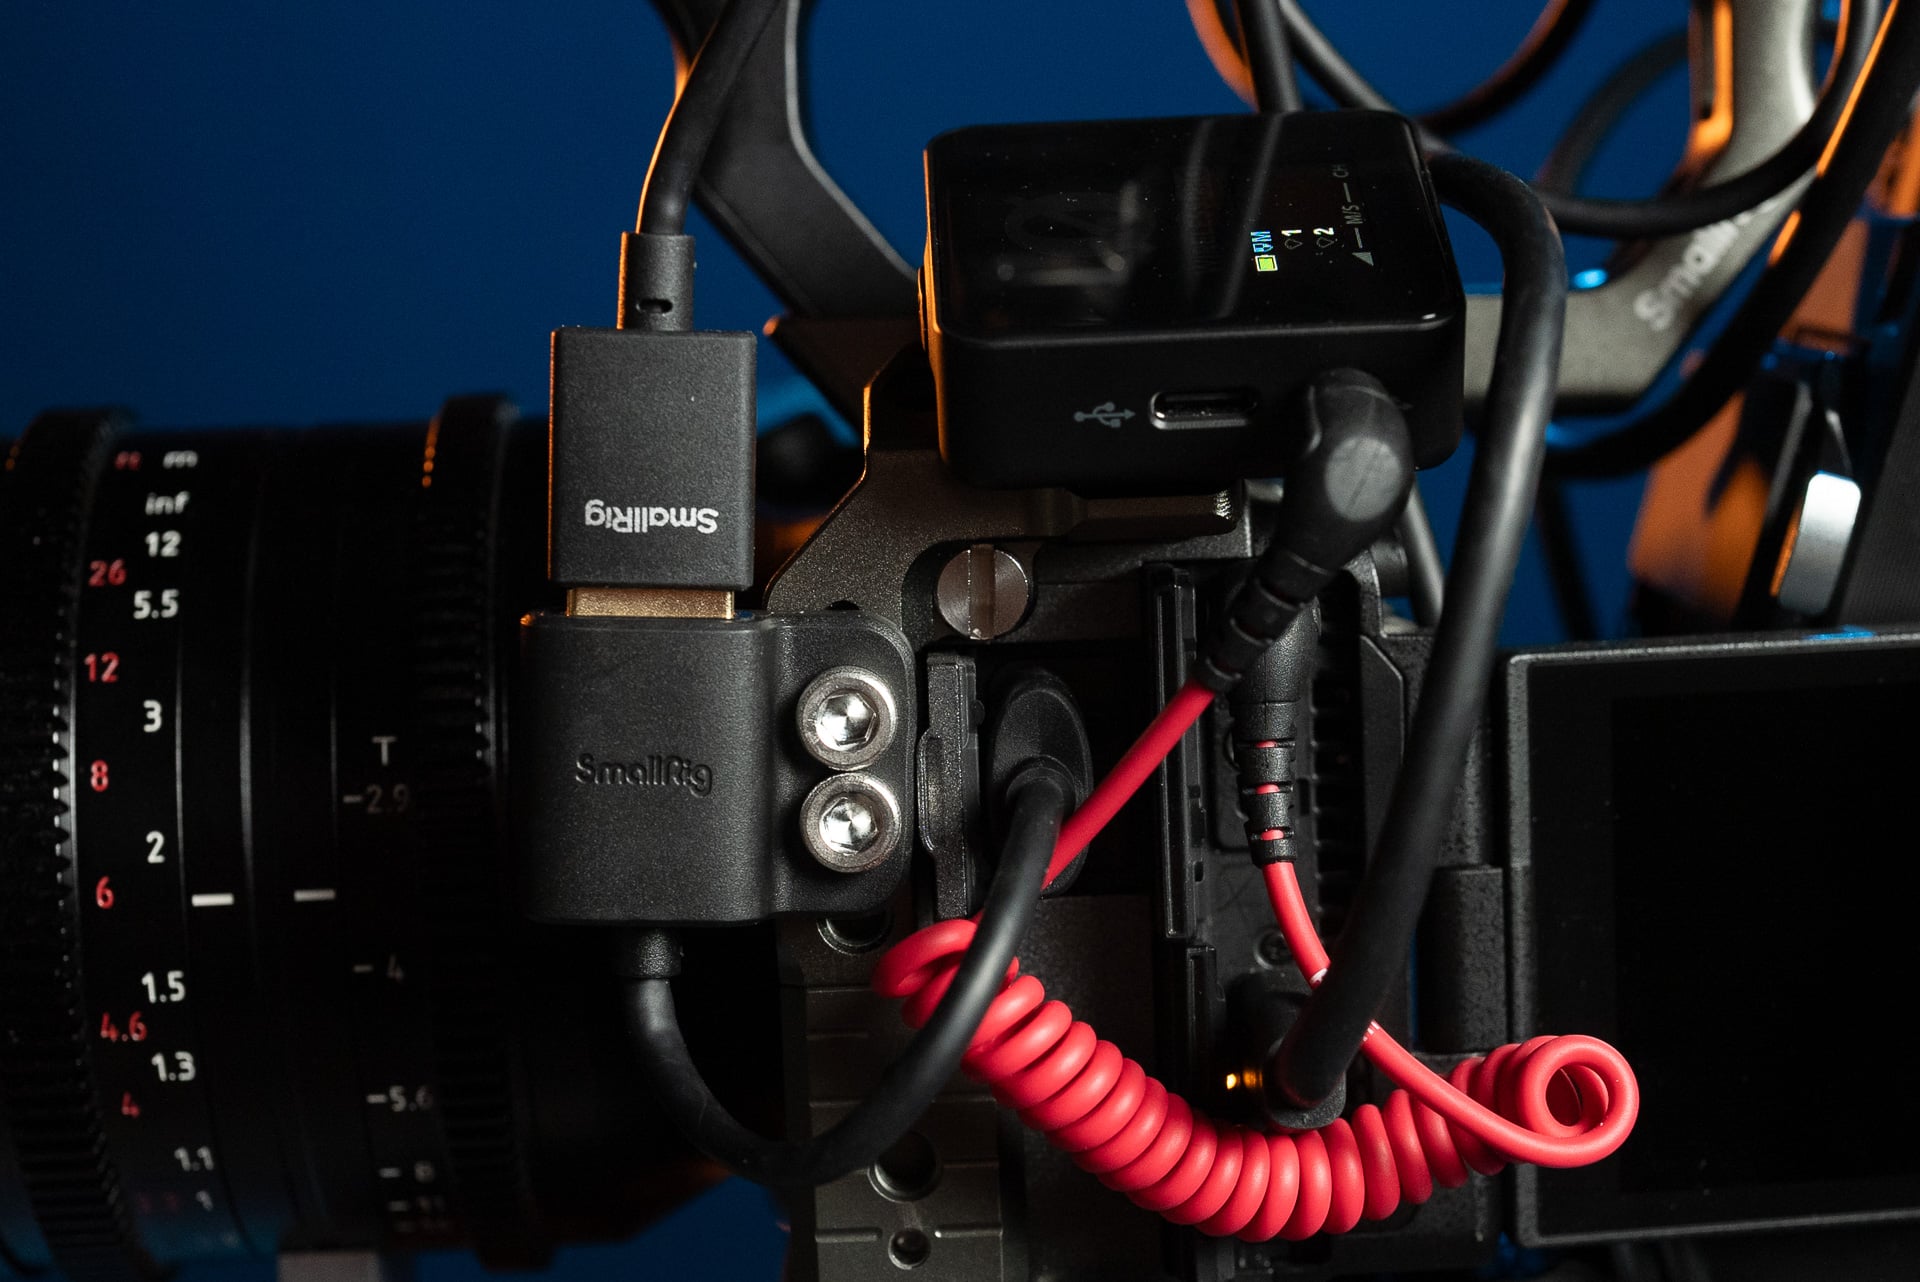
- Camera power: DC barrel dummy battery ($49.99) – I absolutely love this solution. It gives the camera power in a “traditional” way while keeping both the DTAP and the USBC ports free for other uses.
- Monitor and Wireless transmission: DTAP to dual NPF mount ($36) – I am using the DTAP on the battery to power two devices: a monitor (either a no label 7-incher or an Atomos Ninja), and a Hollyland Pyro S transmitter. The nice thing about this DTAP connector is that it’s dual-sided and can power two devices at the same time. It even shows you the power draw, so you can verify you are within specs. If you don’t have this converter, you can power the transmitter with a USB-C from the VB99.
- Audio: USB-C – While I am not a fan of powering audio while recording, I do have a spare USB port on the battery that I can use to power a microphone or a light (Rode Wireless Pro in the photo above).
Monitor, video transmission, audio, and lenses
There are plenty of options for mounting gear on the cage. Here is how I handled it, but feel free to adapt. The three main components that go on the rig are a monitor, a transmitter, and some sort of audio.
Depending on the audio we need, we may choose to feed directly into the camera or into the handle. Either way, the receiver or mic will go on the cold shoe mount on the right of the cage. I am not a big fan of the Sony handle microphone loop, and I had that one surgically removed, so any microphone would go on that cold shoe. (OK, it was just a couple of screws).
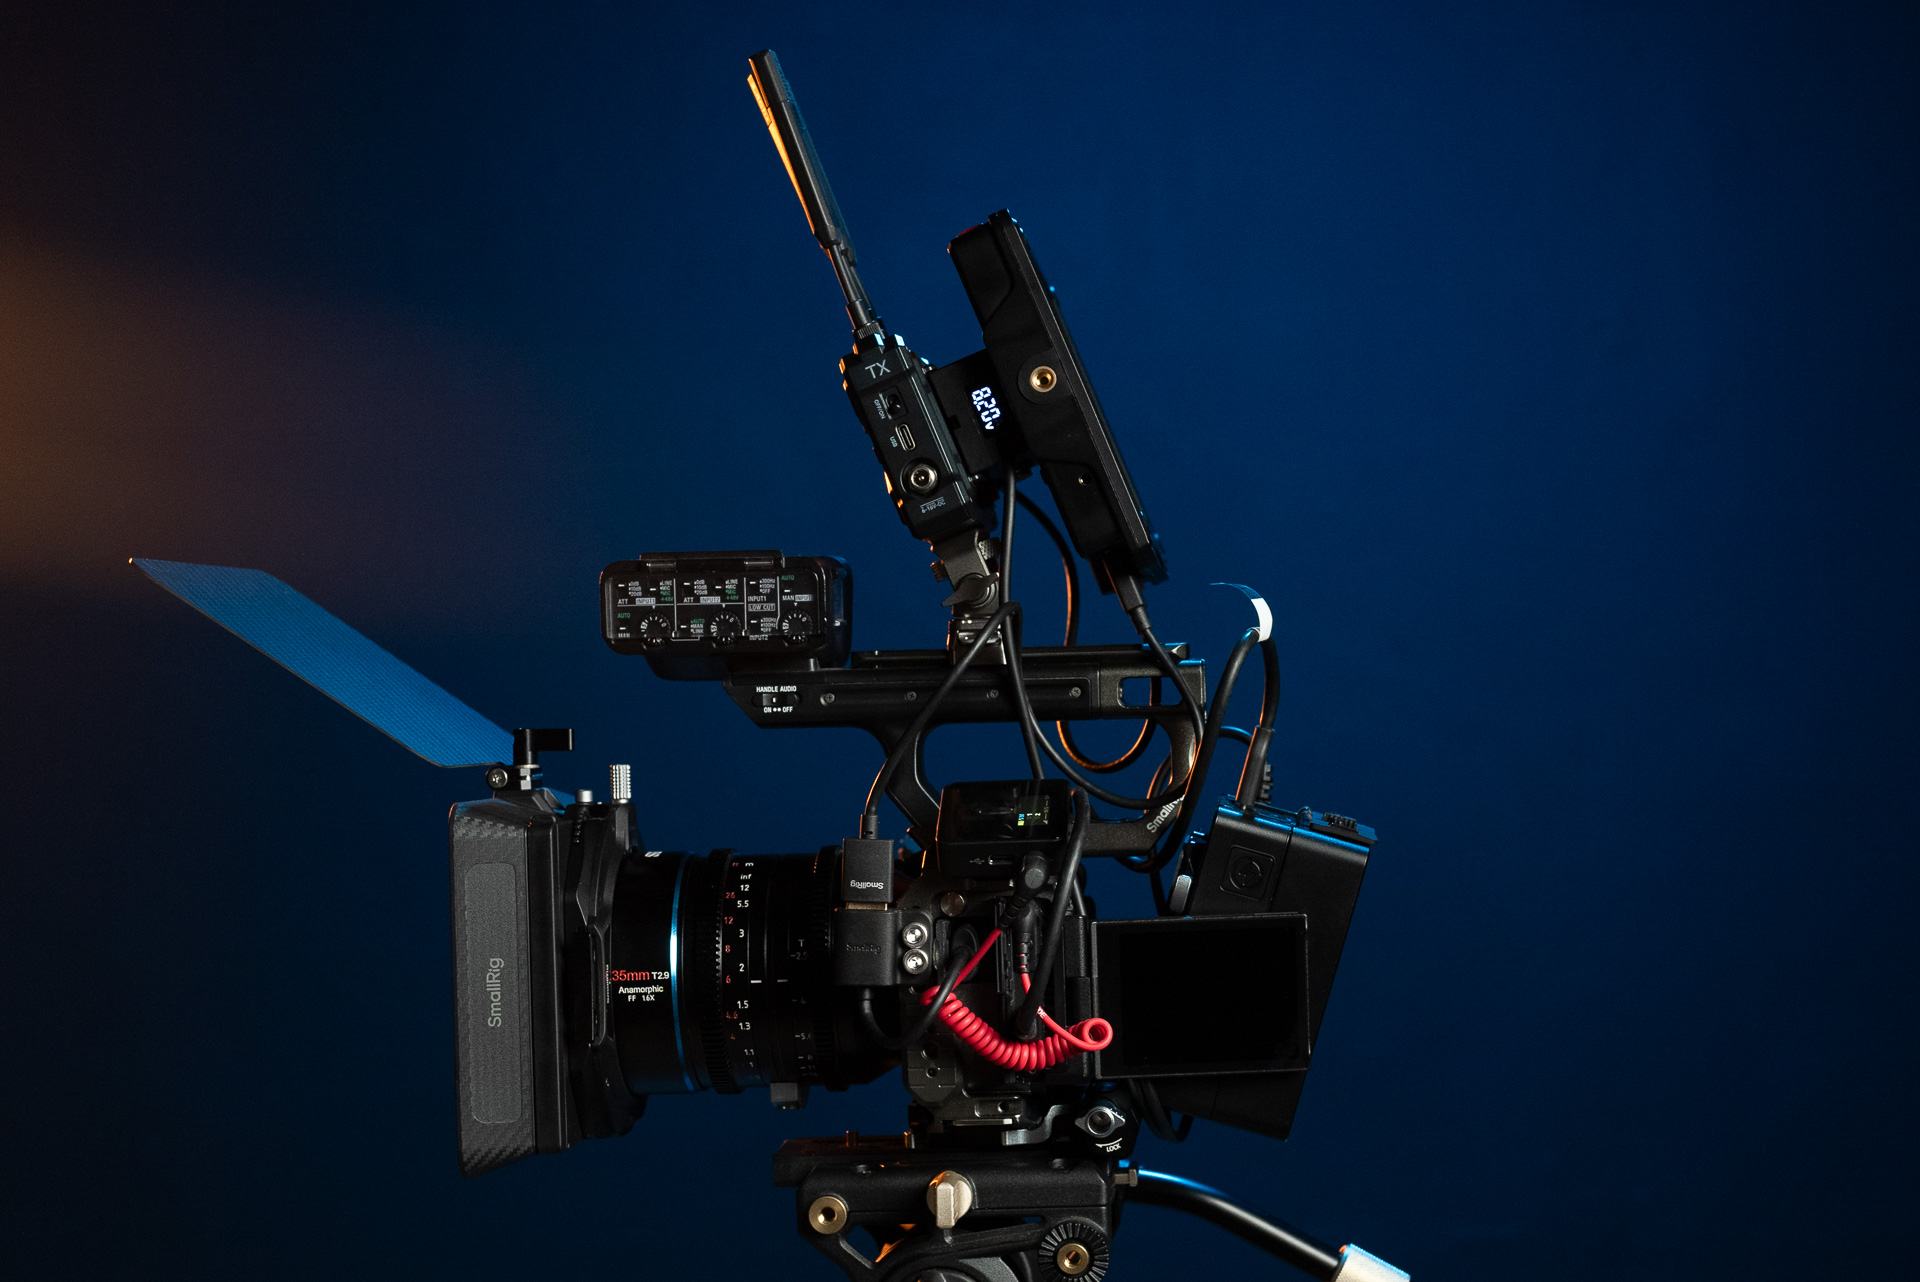
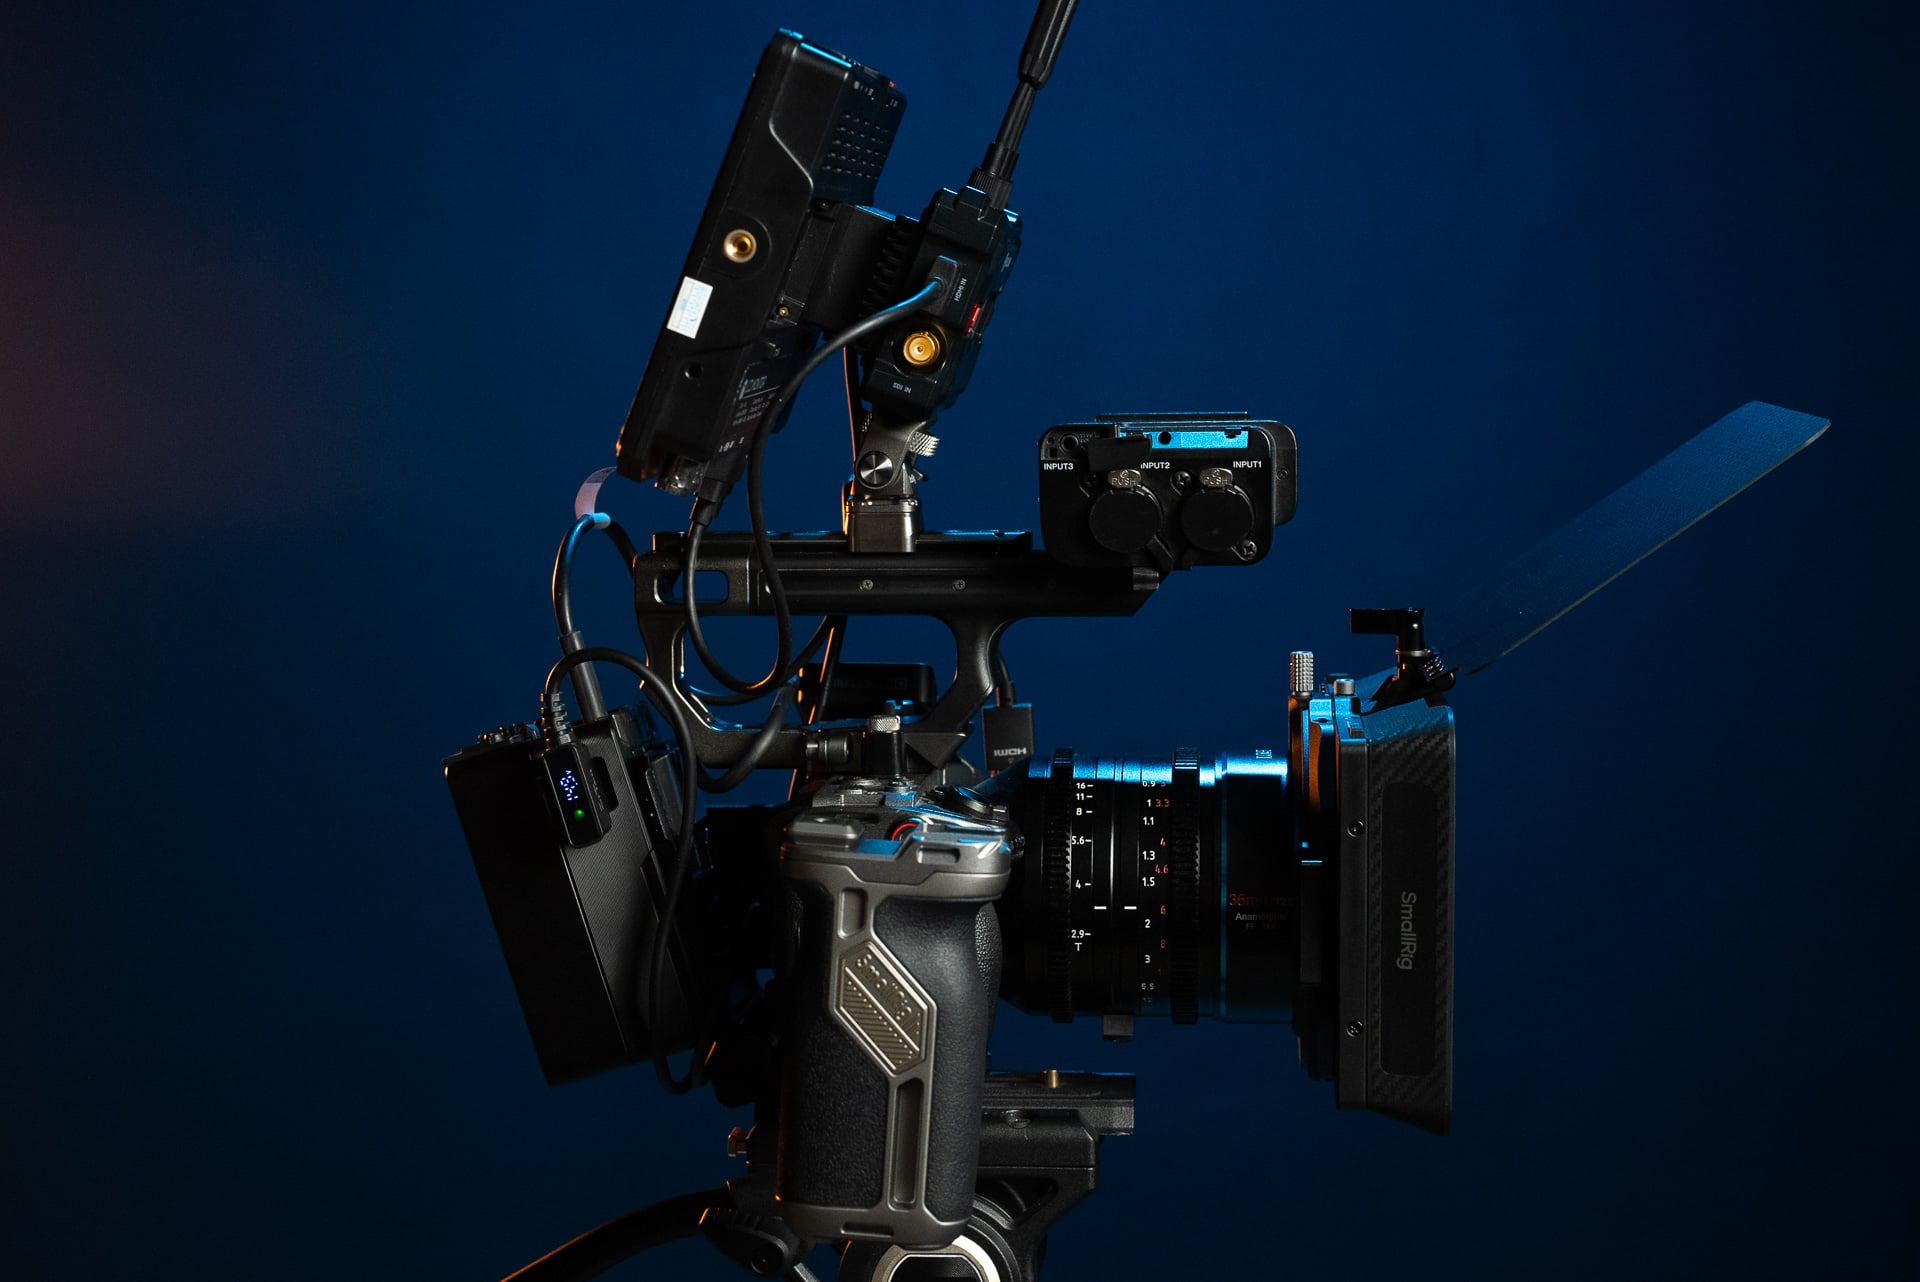
I wanted to keep the monitor and transmitter as close to the lens as I could to keep the rig balanced. For this I used the HawkLock H21 Monitor Support unit ($39.90). It fits right onto the handle with no need for extra pieces. This quick release comes tilting the wrong way, and it took a few minutes to figure out how to rotate it. But once rotated, it felt great. On the tripod I am using a seven-incher, and when hand-held, I am going with an Atomos Ninja.
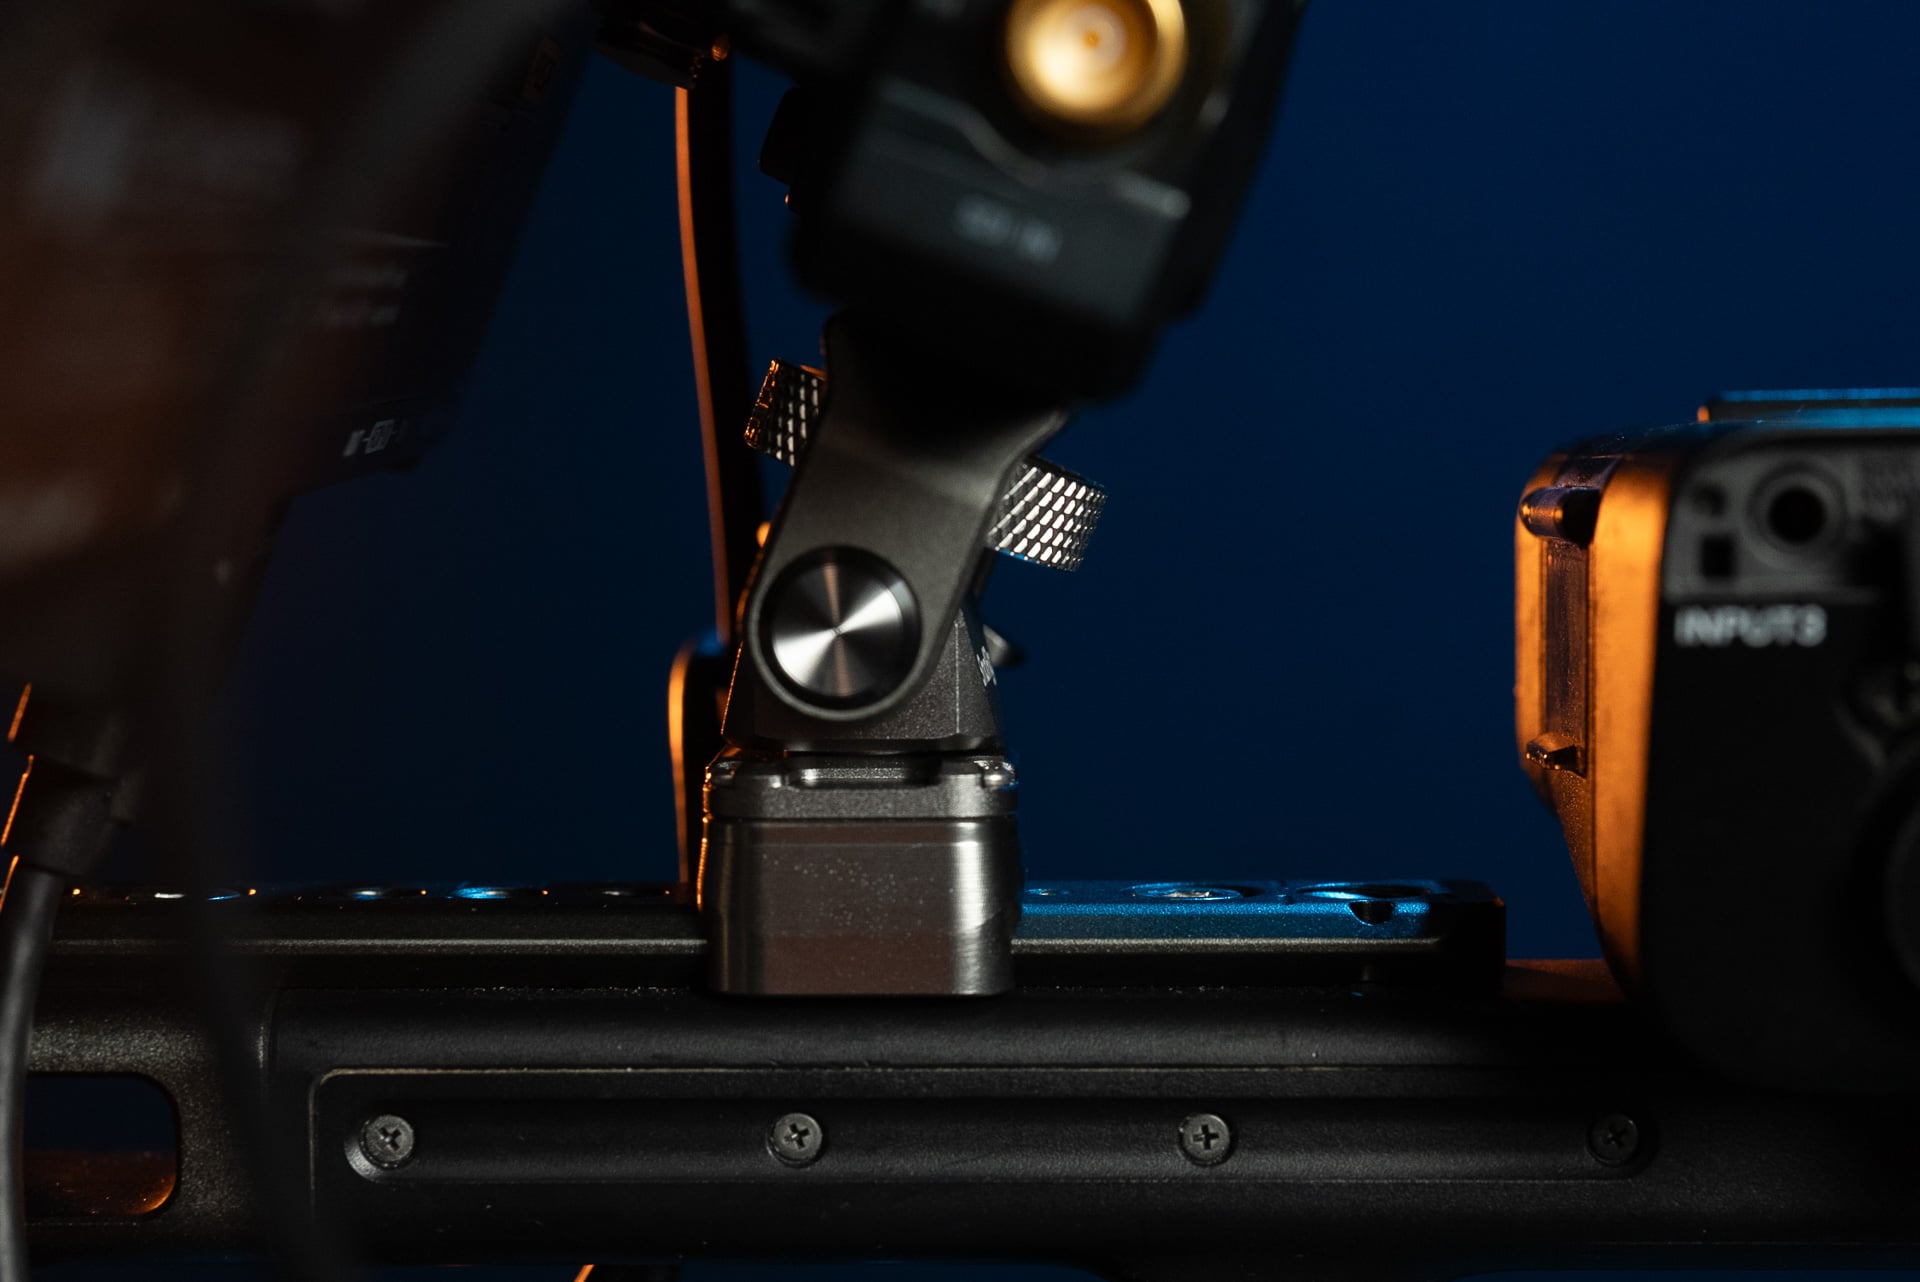
The nice thing is that both of those monitors can be powered with an NPF battery, so I only need one mounting point, and I am using the dual NPF battery to “clamp” the transmitter to the monitor.
I rarely need lens support, but the cage does have the mount to add lens support.
I am also using the SmallRig Mattebox and VND kit ($179). It is extremely convenient for outdoor use and easy to remove for indoor use.

Cable management
If you have ever built a rig, you know that cabe management is this one element that separates the good rigs from the kickass ones. And I will be honest; I don’t have this fully figured out yet. That said, there are some SmallRig accessories that make things easier. Here are my two favorites:
Ultra Slim 4K Adapter Cable (A to A) ($9.90) – this is an essential piece of gear even if you are not using a full-blown rig. What it does is connects to your cage with two screws and route the HDMI port. This means that the camera’s HDMI port never gets any pressure.
SmallRig Ultra-Slim 4K HDMI Cable ($9.90): This is a short, incredibly slim, and flexible cable that wraps easily without breaking, so you can twist it to fit around the rig.
I am not 100% done with cable management, and I will come back to revise this post once I have a complete solution.
Tripod vs hand-held
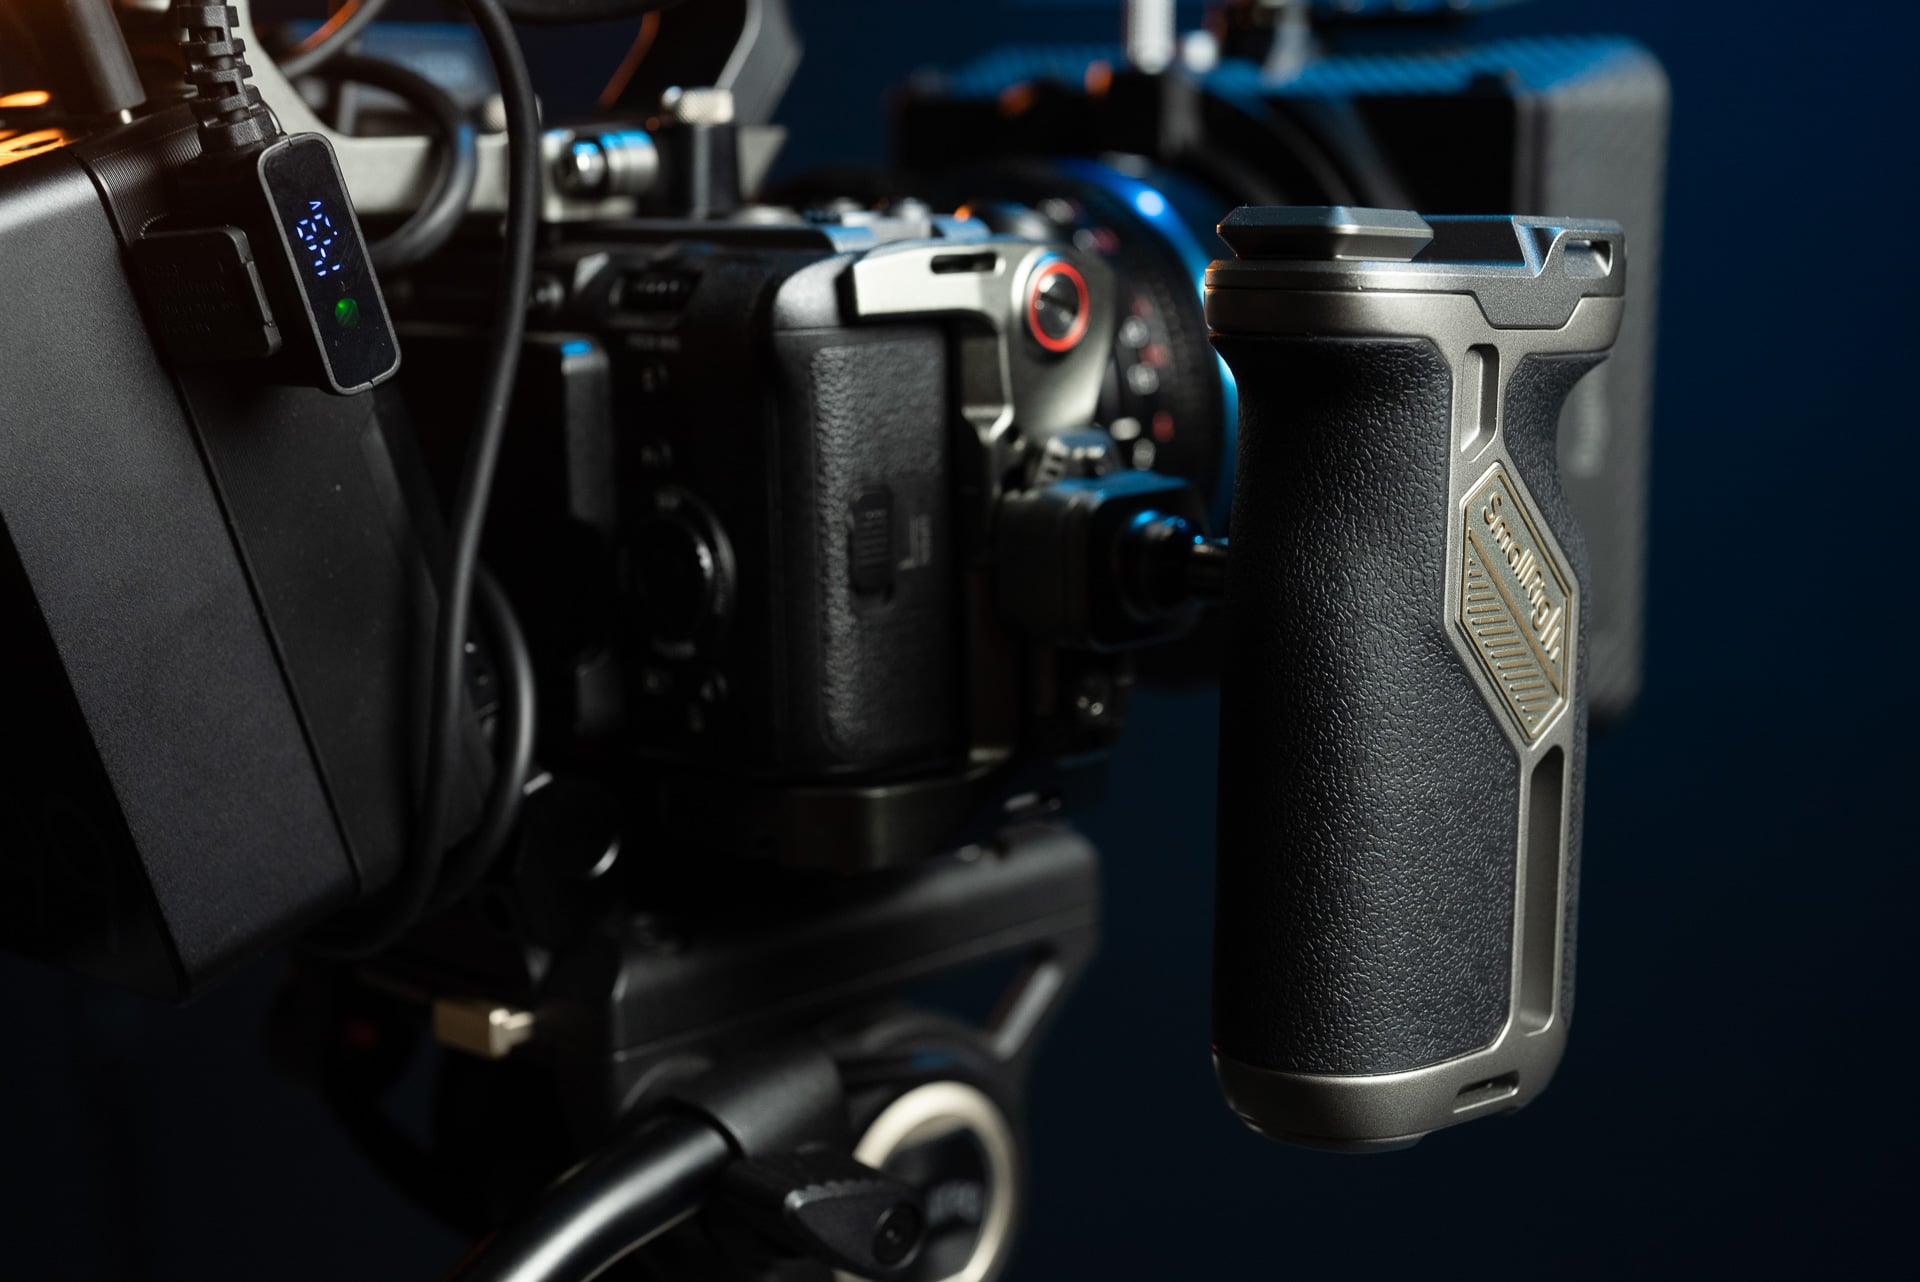
As I mentioned, 90% of the time, the camera will be on a tripod, and we have that tripod on a mini dolly so we can easily move it around. But for the occasions where it needs to go hand-held, I added a HawkLock Rotating Side Handle ($109) to help balance the rig better. My handle is set on the right, but it comes with a quick release and a quick rotating mechanism so you can easily mount it to the left as well.
Conclusion
Is this the perfect camera rig? There is no such thing :) but it gets pretty close. Power is easy to handle, the balance is great, and even the cables are not that bad. (though I am still working on this). If you want to build a similar rig, here is the full list of materials:
- HawkLock cage – $139.99
- SmallRig VB99 Pro – $249.99
- SmallRig V-Mount Battery Mounting Plate – $79
- DC barrel dummy battery $49.99
- DTAP to dual NPF mount – $36
- HawkLock H21 Monitor Support unit – $39.90
- SmallRig Mattebox and VND kit – $179
- Ultra Slim 4K Adapter Cable (A to A) – $9.90
- 2 x SmallRig Ultra-Slim 4K HDMI Cable $9.90
- HawkLock Rotating Side Handle – $109

Udi Tirosh
Udi Tirosh is an entrepreneur, photography inventor, journalist, educator, and writer based in Israel. With over 25 years of experience in the photo-video industry, Udi has built and sold several photography-related brands. Udi has a double degree in mass media communications and computer science.
Related Posts
 PSA: Don’t update yet – Sony pulls Sony FX3 and FX30 firmware updates after bootloop bug cripples cameras
 First Sony FX3 image leaks – looks a lot like an Alpha (it even has the logo)
 The Sony FX3 officially announced – It’s just an A7S III with a top handle and no EVF
 Sony’s ZV-E1 is a cut-down FX3 in a vlogging form factor
Join the Discussion
DIYP Comment Policy
Be nice, be on-topic, no personal information or flames.