


Five tips to get perfect selections and cutouts in Photoshop
Apr 26, 2019
John Aldred
John Aldred is a photographer with over 25 years of experience in the portrait and commercial worlds. He is based in Scotland and has been an early adopter – and occasional beta tester – of almost every digital imaging technology in that time. As well as his creative visual work, John uses 3D printing, electronics and programming to create his own photography and filmmaking tools and consults for a number of brands across the industry.
Share:
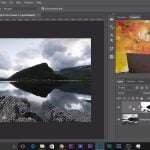
Making selections and cutting out is probably the most common use for Photoshop. It’s used on countless product shoots, not to mention compositing. And it’s something that almost all of us need to do at some point during our photography journey.
Selections can be tricky, though, especially if you’ve not used them before. And even sometimes if you have used them before, given how often Adobe seems to change how they work. But here’s Colin Smith from photoshopCAFE to show you five tricks to help get perfect selections in Photoshop.
1. Choke masks with Levels
One little known feature of Photoshop is that you can actually apply adjustments to masks. Things like curves or levels. All you need to do is highlight the layer mask and then hit the shortcut key command for the adjustment you wish to use. In this case, CTRL+L (or CMD+L on a Mac) to bring up the Levels adjustment. This allows you to select exactly where the black & white points are, as well as the middle grey point to really tweak the contrast of your mask along the edges.
2. Finding the edges
With the mask options open, you get various methods for displaying your mask. One particularly useful feature is the “Show Edge” checkbox. This allows you to just look at a very specific part of the image where it finds the edges, and the transition it uses to go from fully opaque to fully transparent. From here you can make finer selections for your edge detection to make your mask more accurate.
3. Use the old Refine Edges
The Refine Edge tool added way back in Photoshop CS3. It was sort-of-removed from Photoshop in recent versions, to much uproar. But it wasn’t really removed, it was just hidden. From the Select Menu, move your cursor down to Select and Mask, but before you click on it, hold down the shift key. Now the old Refine Edges dialogue will pop up instead of the new one.
4. Select by not making a selection
This method uses luminosity in order to make a selection. It’s easy enough to do and more effective than simply changing blending modes. We’re still blending, we’re just doing it a little differently. Double clicking on the layer brings up the Layer Style properties. In that dialogue, you can slide the “Blend If” sliders around to give you a lot more control over exactly how underlying layers show through, and give, in this example, a more realistic level of smoke and depth than you would get by simply changing the blending mode to screen.
5. Automatic cleanup using Colour Range
The Colour Range tool is a wonderful and easy way to make selections for cutting out with subjects against a fairly clean background. All you need to do is click the background and expand the range until only your subject is selected. But these selections, while looking great, aren’t perfect. If you go into the channels panel, you can see this quite clearly.
Colin again uses the Levels adjustment here to clip both the black and white areas to clean up the mask with minimal time wasted due to manually brushing areas to pure black or white. You’ll still probably need to do a little cleanup with the brush tool, but not as much as if you hadn’t used levels.
So there’s five quick and easy tricks to help you make selections.

John Aldred
John Aldred is a photographer with over 25 years of experience in the portrait and commercial worlds. He is based in Scotland and has been an early adopter – and occasional beta tester – of almost every digital imaging technology in that time. As well as his creative visual work, John uses 3D printing, electronics and programming to create his own photography and filmmaking tools and consults for a number of brands across the industry.


Join the Discussion
DIYP Comment Policy
Be nice, be on-topic, no personal information or flames.
One response to “Five tips to get perfect selections and cutouts in Photoshop”
this tips are gold thanks for sharing