


How to effectively use Warp Stabilizer to make your shaky footage rock steady
Mar 1, 2017
John Aldred
John Aldred is a photographer with over 25 years of experience in the portrait and commercial worlds. He is based in Scotland and has been an early adopter – and occasional beta tester – of almost every digital imaging technology in that time. As well as his creative visual work, John uses 3D printing, electronics and programming to create his own photography and filmmaking tools and consults for a number of brands across the industry.
Share:

Even if you’re trying to be as rock steady as possible with your footage, the camera almost inevitably moves in a way you hadn’t counted on. Sometimes you’ll just shoot it again, but there may be no opportunity for that. You might not even know there’s a problem until you’re back home reviewing the footage.
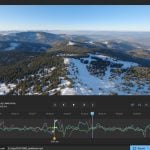
Sometimes, there’s no choice but to fix it in post. Adobe’s Warp Stabilizer that comes with After Effects and Premiere has always been something of a mixed blessing. It’s a fantastic tool that can often fail miserably. Mostly due to user error. In these two videos, we find out how to fix it.
The first is from YouTuber Justin Odisho, who provides a basic introduction to the Warp Stabilizer and how it works. Justin shows what it does by default, and how we can break out of those settings and tweak it to get what we want.
The second video comes from Story & Heart’s tutorial series on the Warp Stabilizer. This video shows a comparison of different settings used to help reduce camera shake. This is probably the most common use of Warp Stabilizer.
It’s well worth checking out the full series of tutorials on No Film School if you want to get really in depth with it. And there’s even more information about it on the Story & Heart blog.
With stabilisation systems such as motorised gimbals becoming more commonly used, the need for things like Warp Stabilizer seems to be dwindling. I find myself rarely having to use it myself any more for the same reason.
But, there are still times when gimbals aren’t practical to use. So it’s always good to know and learn the tools we have at our disposal.
[via No Film School]

John Aldred
John Aldred is a photographer with over 25 years of experience in the portrait and commercial worlds. He is based in Scotland and has been an early adopter – and occasional beta tester – of almost every digital imaging technology in that time. As well as his creative visual work, John uses 3D printing, electronics and programming to create his own photography and filmmaking tools and consults for a number of brands across the industry.


Join the Discussion
DIYP Comment Policy
Be nice, be on-topic, no personal information or flames.