


How to Resize Images in Lightroom Across All Your Devices
Nov 18, 2025
Darlene Lleno
Darlene Lleno brings a unique perspective to DIY Photography as someone who grew up surrounded by camera gear but chose words over lenses. With five years of writing experience, she specializes in photography content that’s both technically informed and genuinely passionate. Growing up with a photographer twin brother meant camera talk was everyday conversation in her household. While he mastered capturing moments, Darlene discovered she preferred being the subject and the storyteller behind the scenes. As a travel enthusiast and mother of two, she understands the importance of preserving life’s precious moments. When not exploring new destinations or writing for DIY Photography, you’ll find her reading or tending to her garden. Her approach to photography writing is refreshingly authentic, she may not be behind the camera, but she knows exactly what it takes to help others capture the shots that matter most.
Share:
Learning to resize images in Lightroom makes your workflow smoother across all platforms. Whether you’re preparing photos for social media, printing, or client delivery, controlling image dimensions saves time and maintains quality.
Lightroom doesn’t actually resize photos inside the catalog. The software uses non-destructive editing, which means your originals stay untouched. All dimension changes happen during export. This approach protects your original files while giving you control over output sizes.
Different platforms demand different image sizes. Instagram prefers 1080 pixels on the longest edge. Print labs require 300 PPI resolution files. Websites need smaller files to load quickly. Proper resizing prevents platforms from compressing your work with poor-quality algorithms.
Our free print size calculator helps you determine the perfect dimensions for any print size based on your image resolution. Websites need smaller files to load quickly. Proper resizing prevents platforms from compressing your work with poor-quality algorithms.
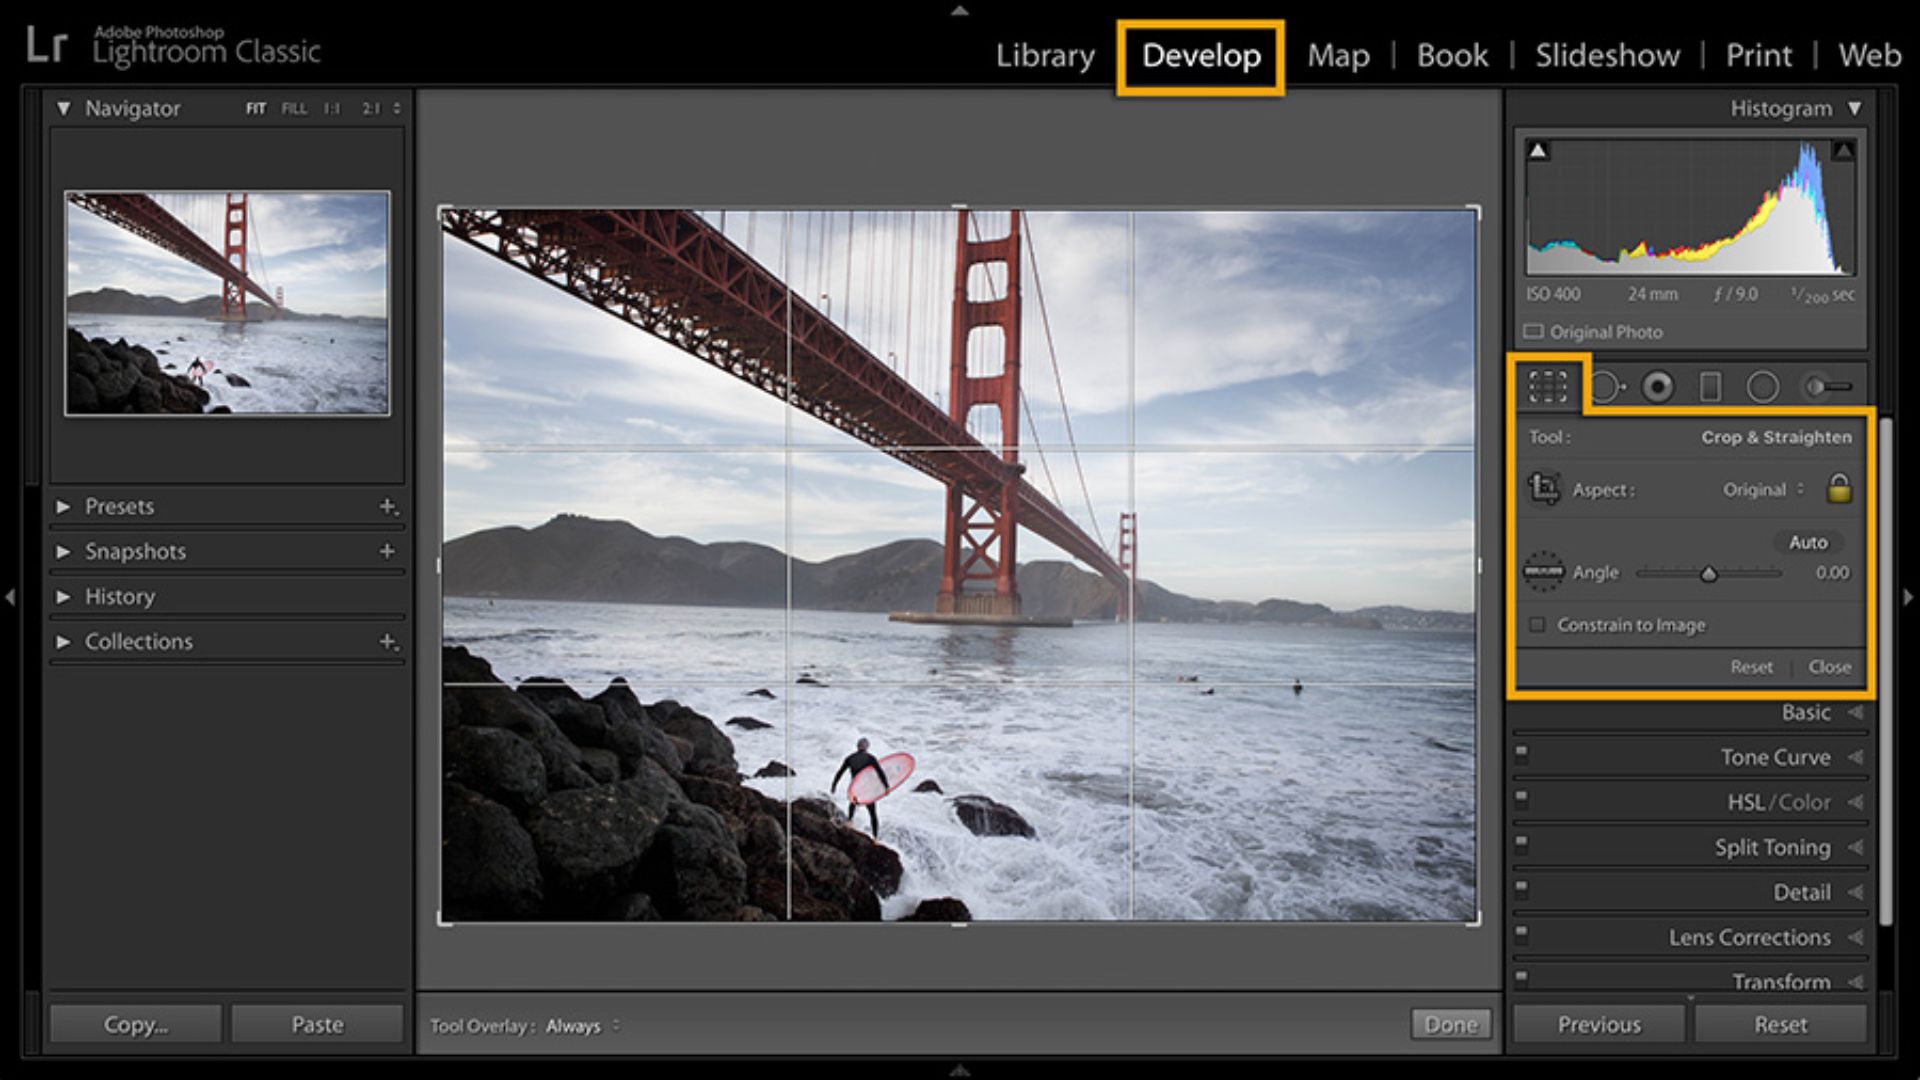
How to Resize Images in Lightroom Desktop
Desktop versions offer the most control over image dimensions. Both Lightroom Classic and the newer Lightroom desktop app share similar export workflows. The process centers on the Export dialog box.
Complete Step-by-Step Guide for Desktop
Here’s exactly how to resize images in Lightroom on your desktop computer:
Step 1: Open Lightroom and go to the Library module.
Step 2: Select the images you want to resize. Click one photo for a single export. Hold Ctrl (Windows) or Cmd (Mac) and click multiple photos for batch resizing.
Step 3: Open the Export dialog by pressing Ctrl+Shift+E (Windows) or Cmd+Shift+E (Mac). You can also click File > Export from the top menu.
Step 4: In the Export dialog box, scroll down to find the “Image Sizing” section.
Step 5: Check the box labeled “Resize to Fit” to activate dimension controls.
Step 6: Click the dropdown menu next to “Resize to Fit” and choose your preferred resizing method:
- Width & Height: Enter exact dimensions like 1920 x 1080 pixels for HD sizing
- Long Edge: Set the longest side (great for mixed orientations)
- Short Edge: Control the shortest side instead
- Megapixels: Set a maximum file size in megapixels
- Percentage: Scale by percentage of original size
Step 7: Enter your desired pixel dimensions in the width and height fields.
Step 8: Set the Resolution field to 72 PPI for web or 300 PPI for print.
Step 9: Under Output Sharpening, select “Screen” and “Standard” for web images.
Step 10: Set JPEG Quality between 80-90 for best results.
Step 11: Choose your Export Location at the top of the dialog.
Step 12: Click the “Export” button to save your resized images.
Understanding Each Resize Method
Width & Height lets you set exact pixel dimensions like 1920×1080 for HD. Lightroom maintains your aspect ratio.
Long Edge or Short Edge works well for mixed orientations. Set Long Edge to 2048 pixels, and all photos resize proportionally.
Megapixels reduces file size to a target number. Setting 5MP works great for email attachments.
Percentage scales images by fraction. Choose 50% to cut dimensions in half.
Resolution Settings Explained
Resolution only matters when you specify dimensions in inches. When working with pixels, ignore this setting. Use 72 PPI for web. Set 300 PPI for print.
Output Sharpening adds edge definition. Select “Screen” and “Standard” for web. JPEG Quality at 80-90 produces excellent results.
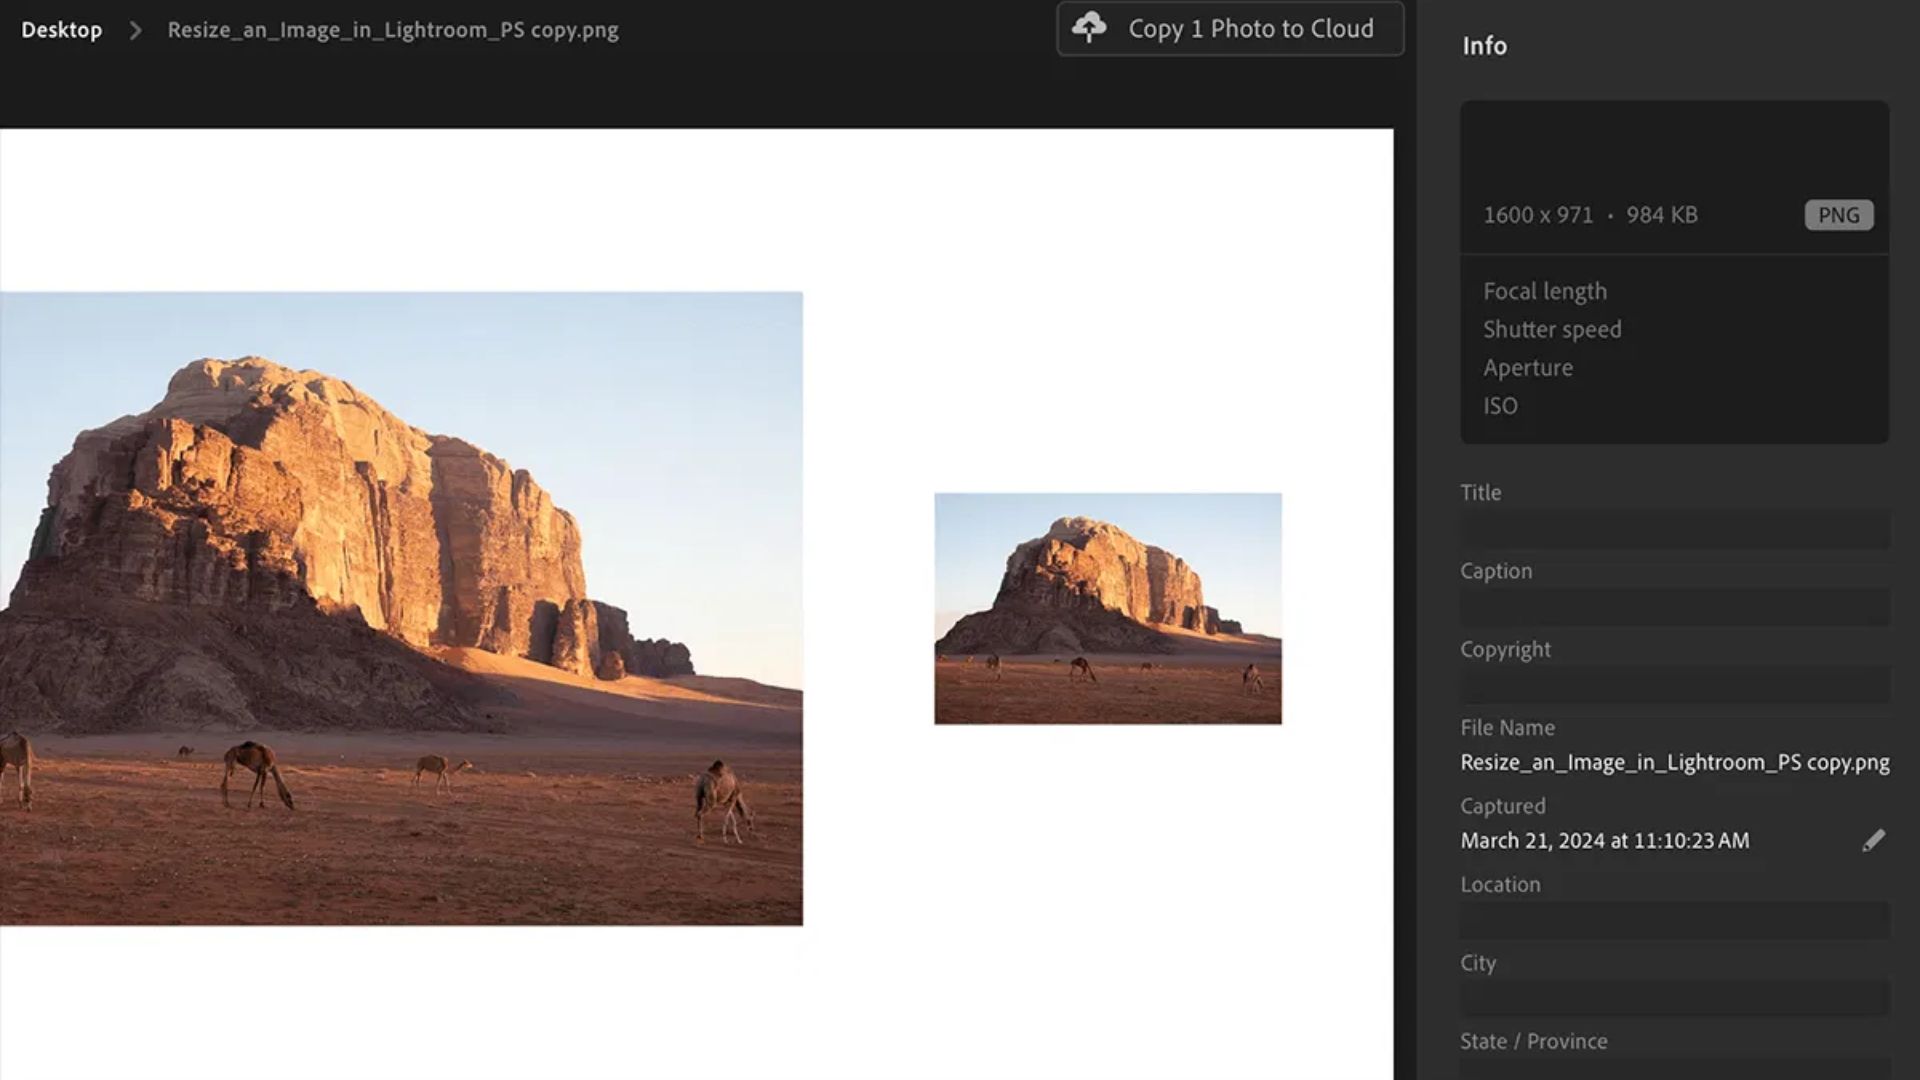
How to Resize Images in Lightroom Web
The web version mirrors desktop functionality during export. Access Lightroom through your browser at lightroom.adobe.com. Your synced photos appear in the main library view.
Complete Step-by-Step Guide for Lightroom Web
Follow these steps to resize images in Lightroom using your web browser:
Step 1: Open your web browser and go to lightroom.adobe.com.
Step 2: Sign in with your Adobe Creative Cloud account.
Step 3: Your synced photo library appears. Browse to find the image you want to resize.
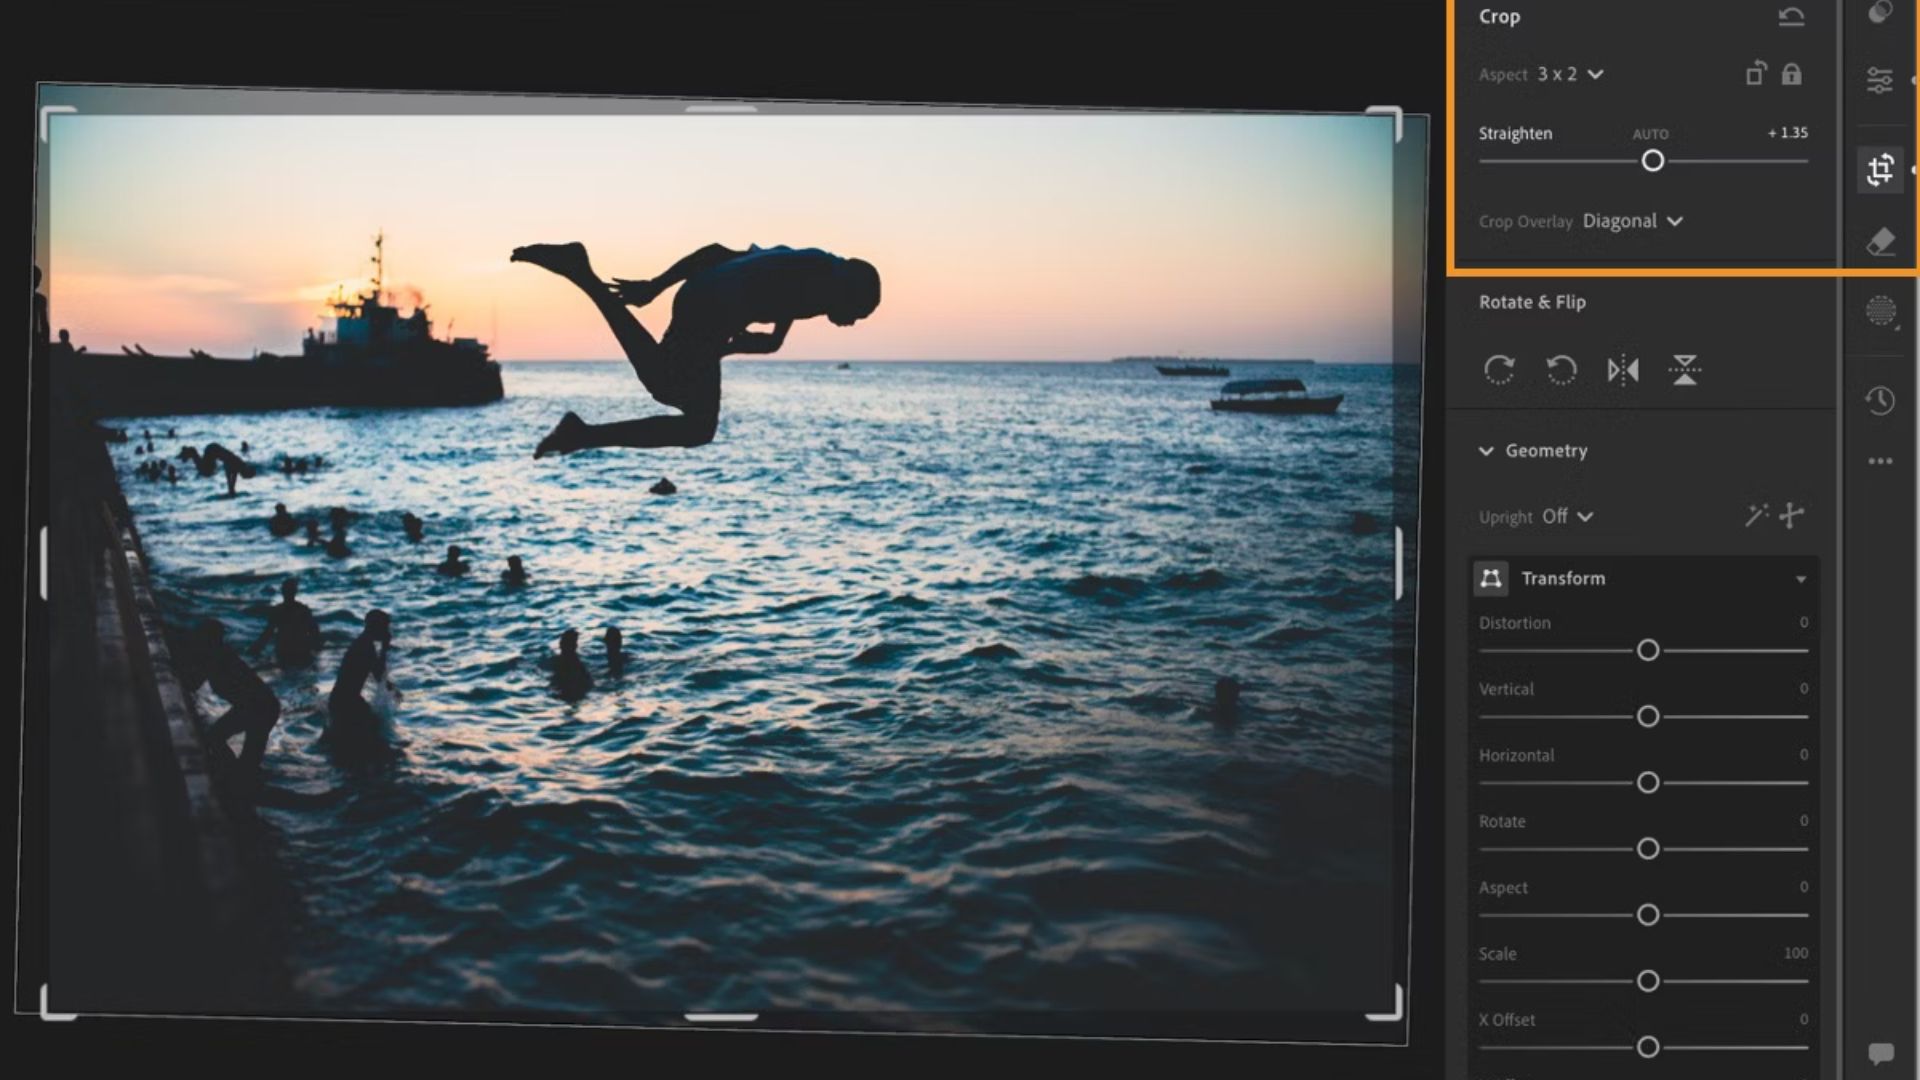
Step 4: Click on the image thumbnail to open it in detail view.
Step 5: If you need to adjust the composition first, select the Crop & Rotate tool from the right panel.
Step 6: Click the Share button at the top right of the screen.
Step 7: Select “Export” from the dropdown menu options.
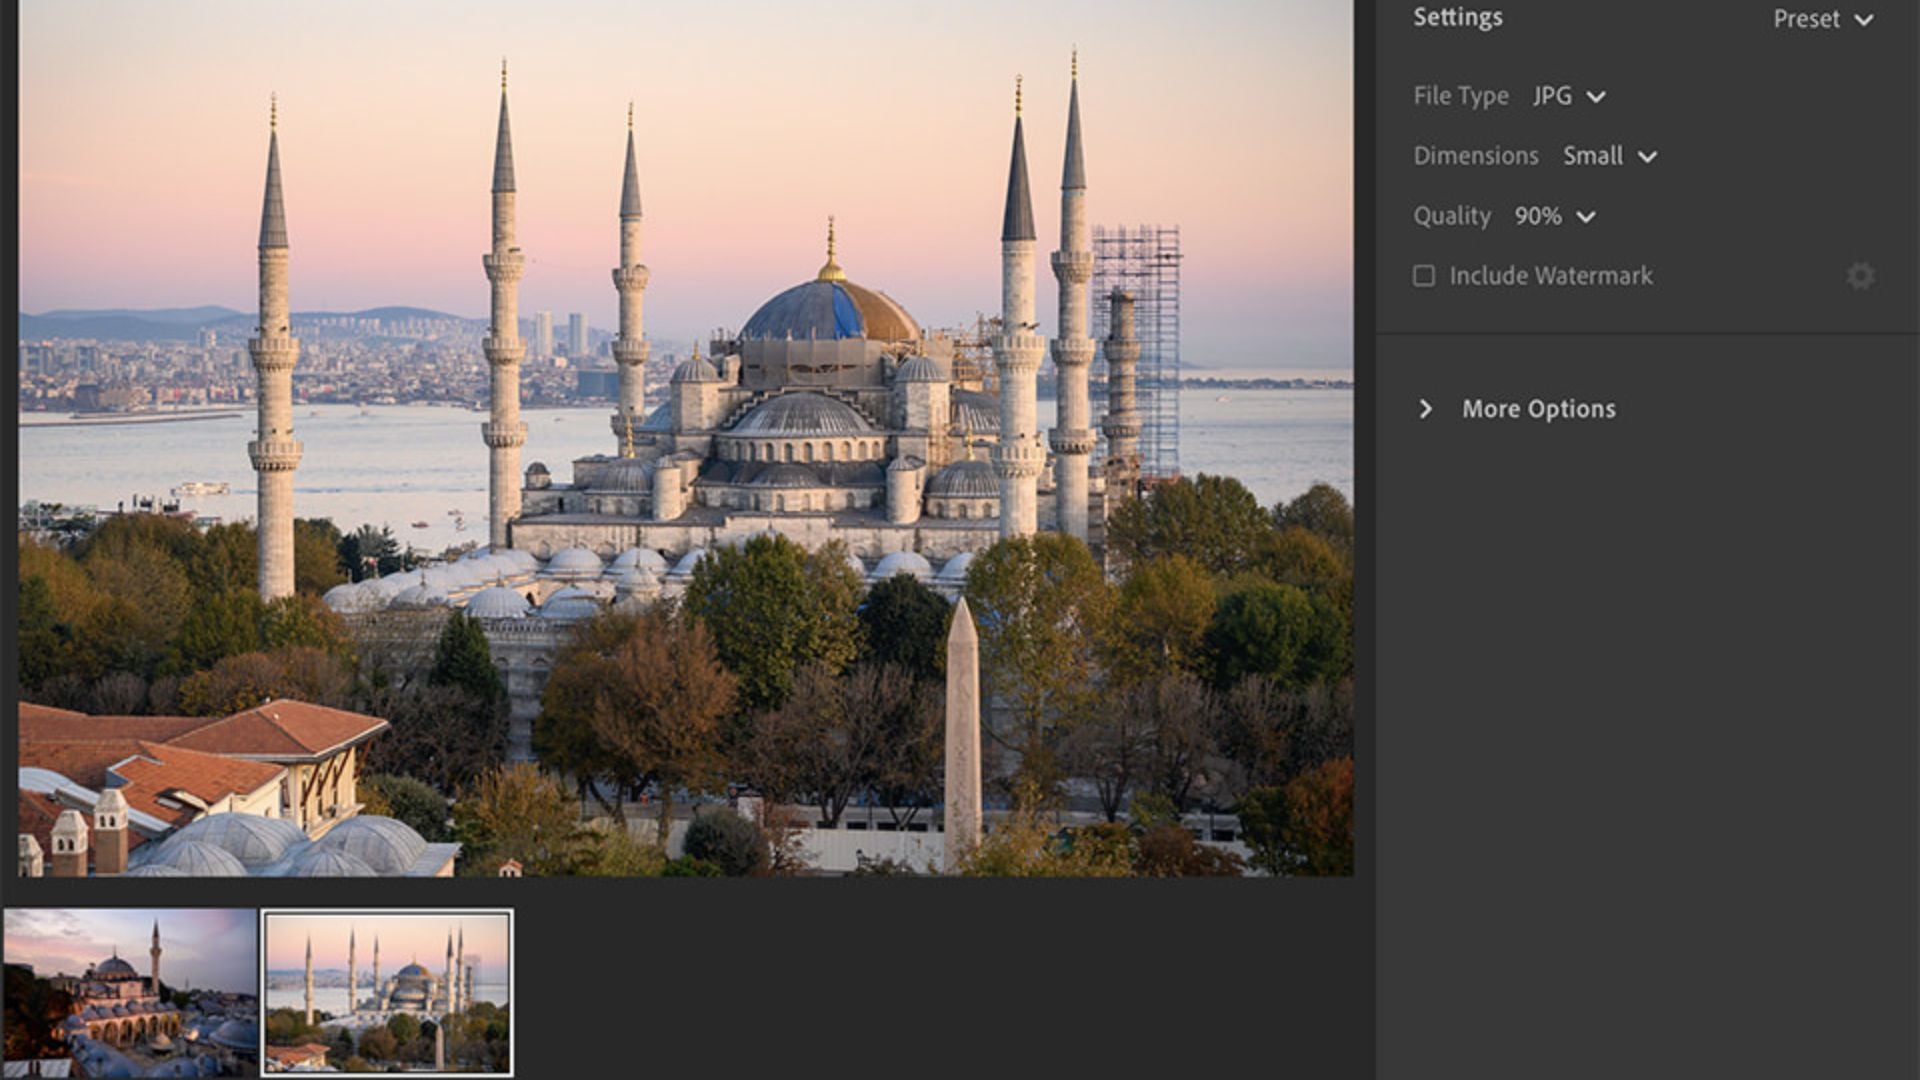
Step 8: The export settings panel opens. Find the “Long Edge” dimension setting.
Step 9: Enter your desired pixel value for the longest edge. Type 1920 for HD web size or 2048 for high-quality sharing.
Step 10: Choose your file format from the Format dropdown. Select JPEG for most purposes.
Step 11: Set the Quality slider between 60-100. Use 80-90 for balanced quality and file size.
Step 12: Select your output resolution. Choose 72 PPI for web use.
Step 13: Click the “Export” or “Download” button.
Step 14: Your browser downloads the resized image to your default download folder.
Web Lightroom offers fewer options than Classic but runs faster. The Long Edge method handles most situations. For Width & Height control, use the desktop app.
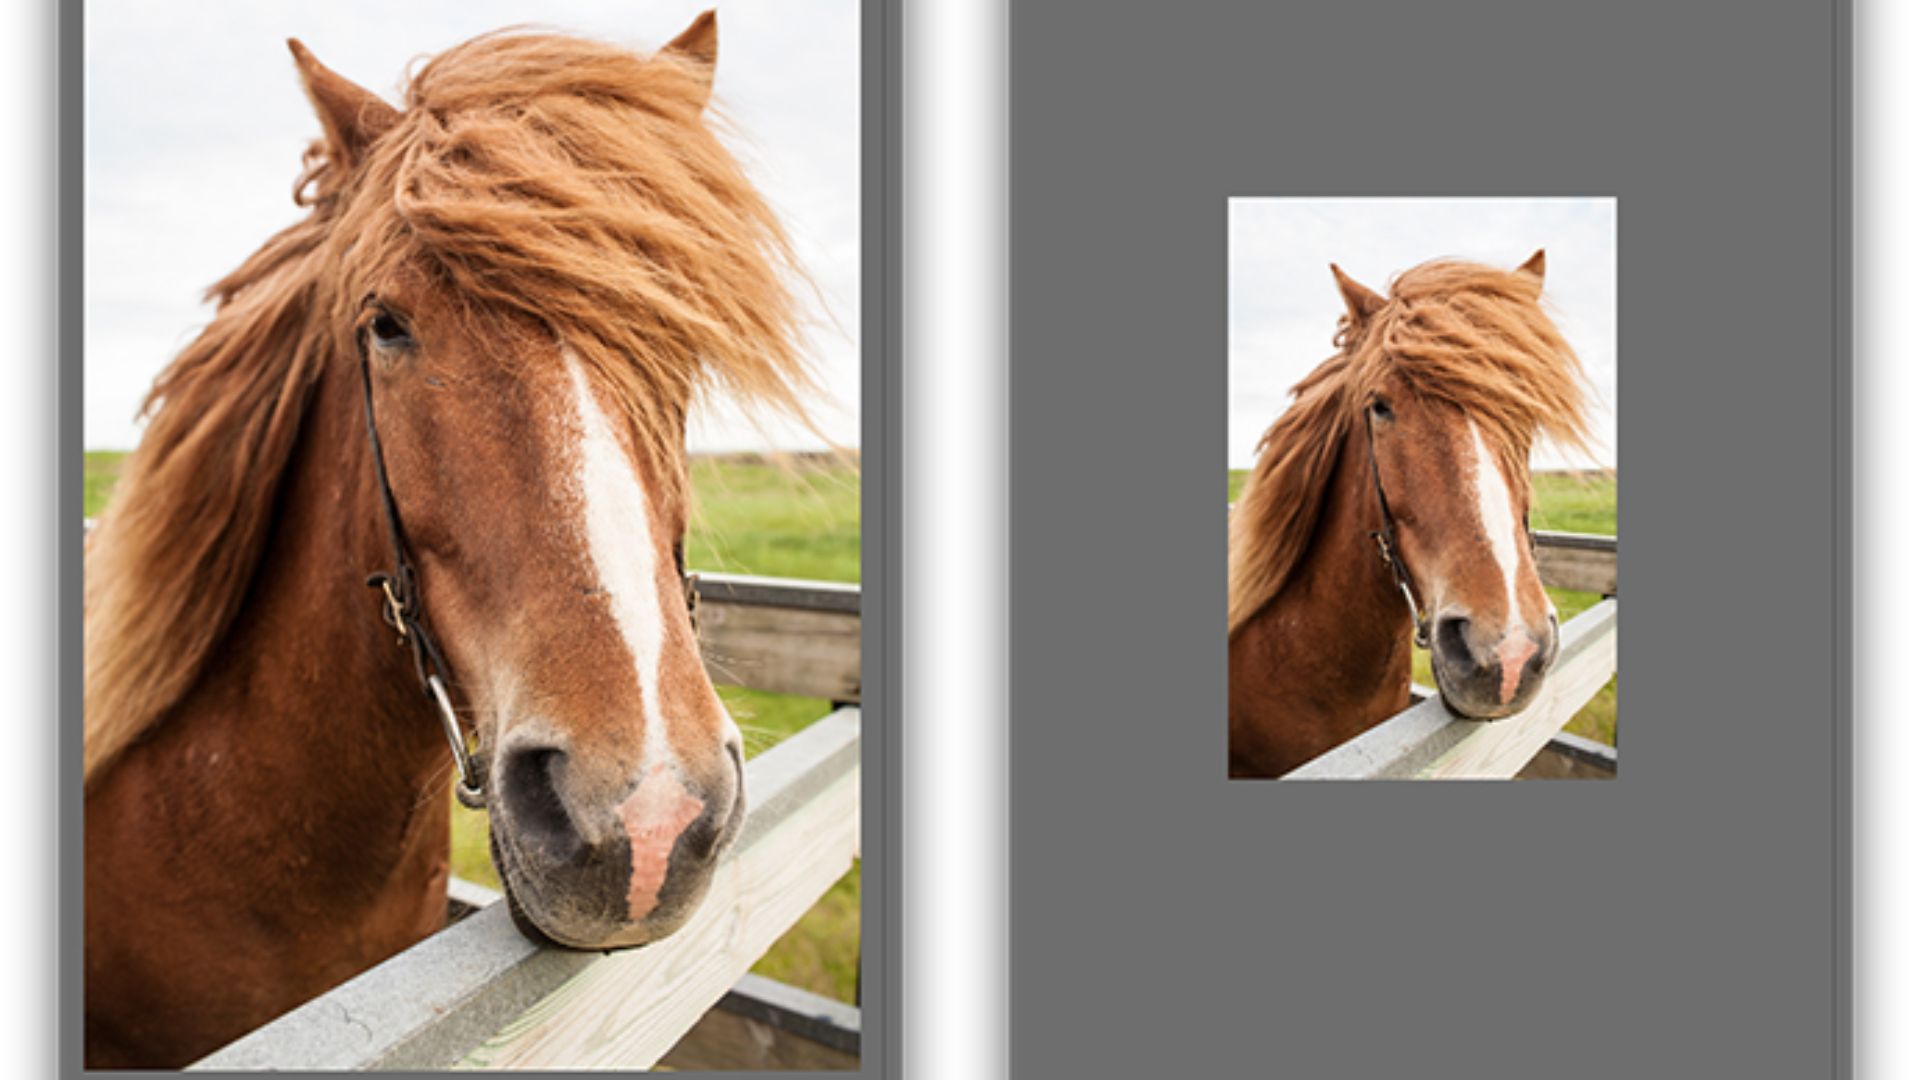
Resize Images in Lightroom Mobile
Mobile apps handle resizing differently than desktop versions. Lightroom Mobile focuses on cropping and aspect ratios rather than specific pixel dimensions. The final size gets determined when you save or share.
Complete Step-by-Step Guide for iOS
Here’s how to resize images in Lightroom Mobile on iPhone or iPad:
Step 1: Open the Lightroom Mobile app on your iOS device.
Step 2: Navigate to your photo library and tap the image you want to resize.
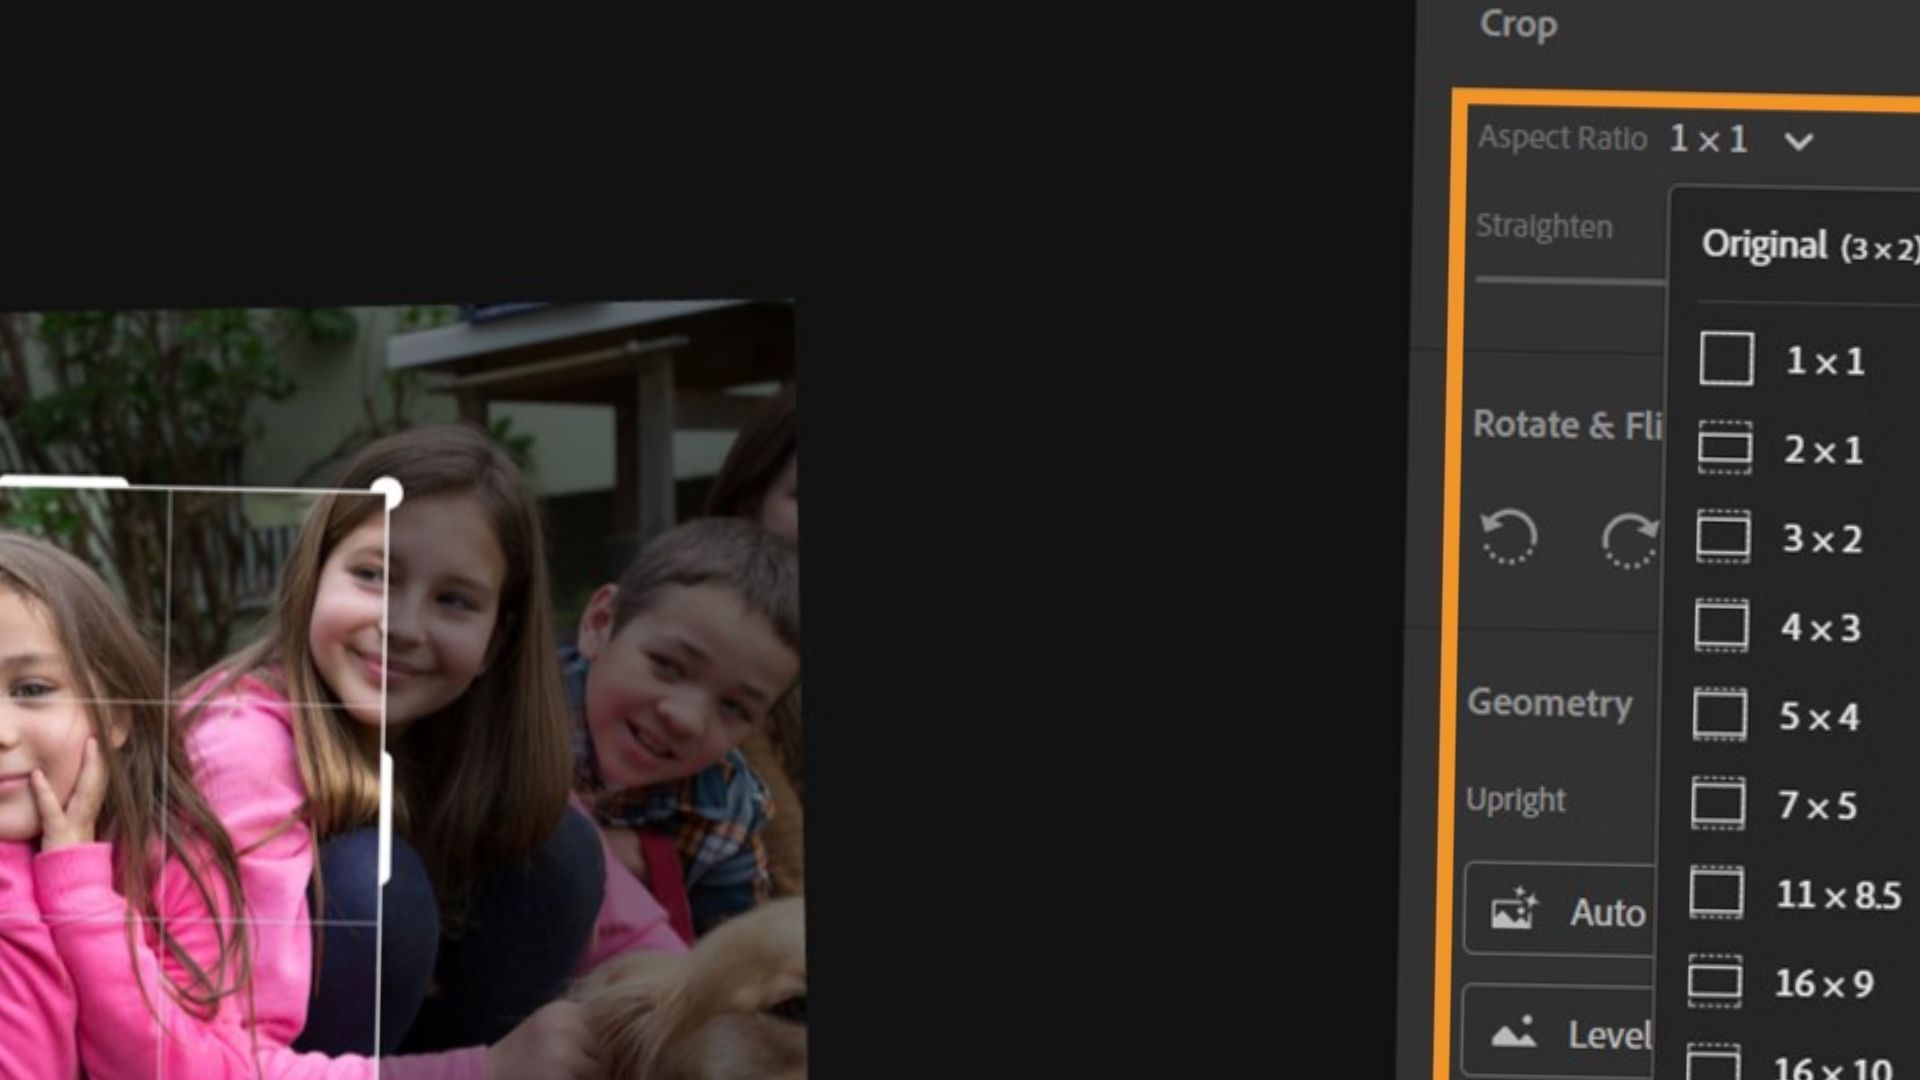
Step 3: Tap the Crop icon at the bottom of the screen (it looks like two overlapping right angles).
Step 4: Select your desired aspect ratio from the menu:
- Tap “Original” to keep the current ratio
- Select “1:1” for square crops
- Choose “4:5” for Instagram portrait posts
- Pick “16:9” for widescreen format
- Use “Custom” to drag corners freely
Step 5: Adjust the crop by dragging the edges or corners.
Step 6: Tap the checkmark icon to apply your crop.
Step 7: Tap the Share icon (box with upward arrow) at the top right.
Step 8: Select “Export As” from the share menu.
Step 9: In the Export settings, tap “File Type” and choose JPEG.
Step 10: Tap “File Type Setup” to access dimension controls.
Step 11: Under Dimensions, select “Custom” from the dropdown.
Step 12: Enter your desired long edge dimension. Type 1350 for Instagram portrait or 2700 for double resolution.
Step 13: Set Quality to High or Maximum for best results.
Step 14: Tap “Export” to save or share your resized image.
Step 15: Choose where to save (Camera Roll, Files, or share directly to apps).
Complete Step-by-Step Guide for Android
Follow these steps to resize images in Lightroom Mobile on Android devices:
Step 1: Launch Lightroom Mobile on your Android phone or tablet.
Step 2: Open your photo collection and tap the image to resize.
Step 3: Tap the Crop tool icon at the bottom toolbar.
Step 4: Choose your aspect ratio from the options menu:
- “Original” maintains current proportions
- “1:1” creates square images
- “4:5” works for vertical social media posts
- “16:9” suits widescreen displays
- “Free” lets you crop without constraints
Step 5: Drag the crop boundaries to frame your image.
Step 6: Tap the checkmark to confirm the crop.
Step 7: Tap the three-dot menu icon (⋮) or Share button at the top.
Step 8: Select “Export As” or “Share” from the menu.
Step 9: Choose JPEG as your file format.
Step 10: Tap the settings gear icon to access export options.
Step 11: Find the “Dimensions” or “Size” setting.
Step 12: Select “Largest Available” for maximum size, or choose “Custom.”
Step 13: If using Custom, enter your desired long edge pixels.
Step 14: Adjust Quality slider to 80-100 for high quality.
Step 15: Tap “Export” and choose your save location.
Mobile App Considerations
Mobile versions lack precise pixel control. For exact dimensions, sync photos to desktop Lightroom. Cloud syncing keeps edits across devices.
Quick Platform Sizing Guide
Instagram works best with 1080×1080 for squares or 1080×1350 for portrait posts. Facebook handles up to 2048 pixels wide. Web images rarely need more than 2000 pixels on the long edge. Use 72 PPI for all web exports.
For printing, labs typically want 300 PPI files. An 8×10 print needs 2400×3000 pixels. Never upscale beyond original dimensions.
Batch Resizing Multiple Photos
Lightroom processes multiple images simultaneously. This saves tremendous time when preparing large photo sets.
Step-by-Step Batch Resize Process
Step 1: Go to the Library module in Lightroom Desktop.
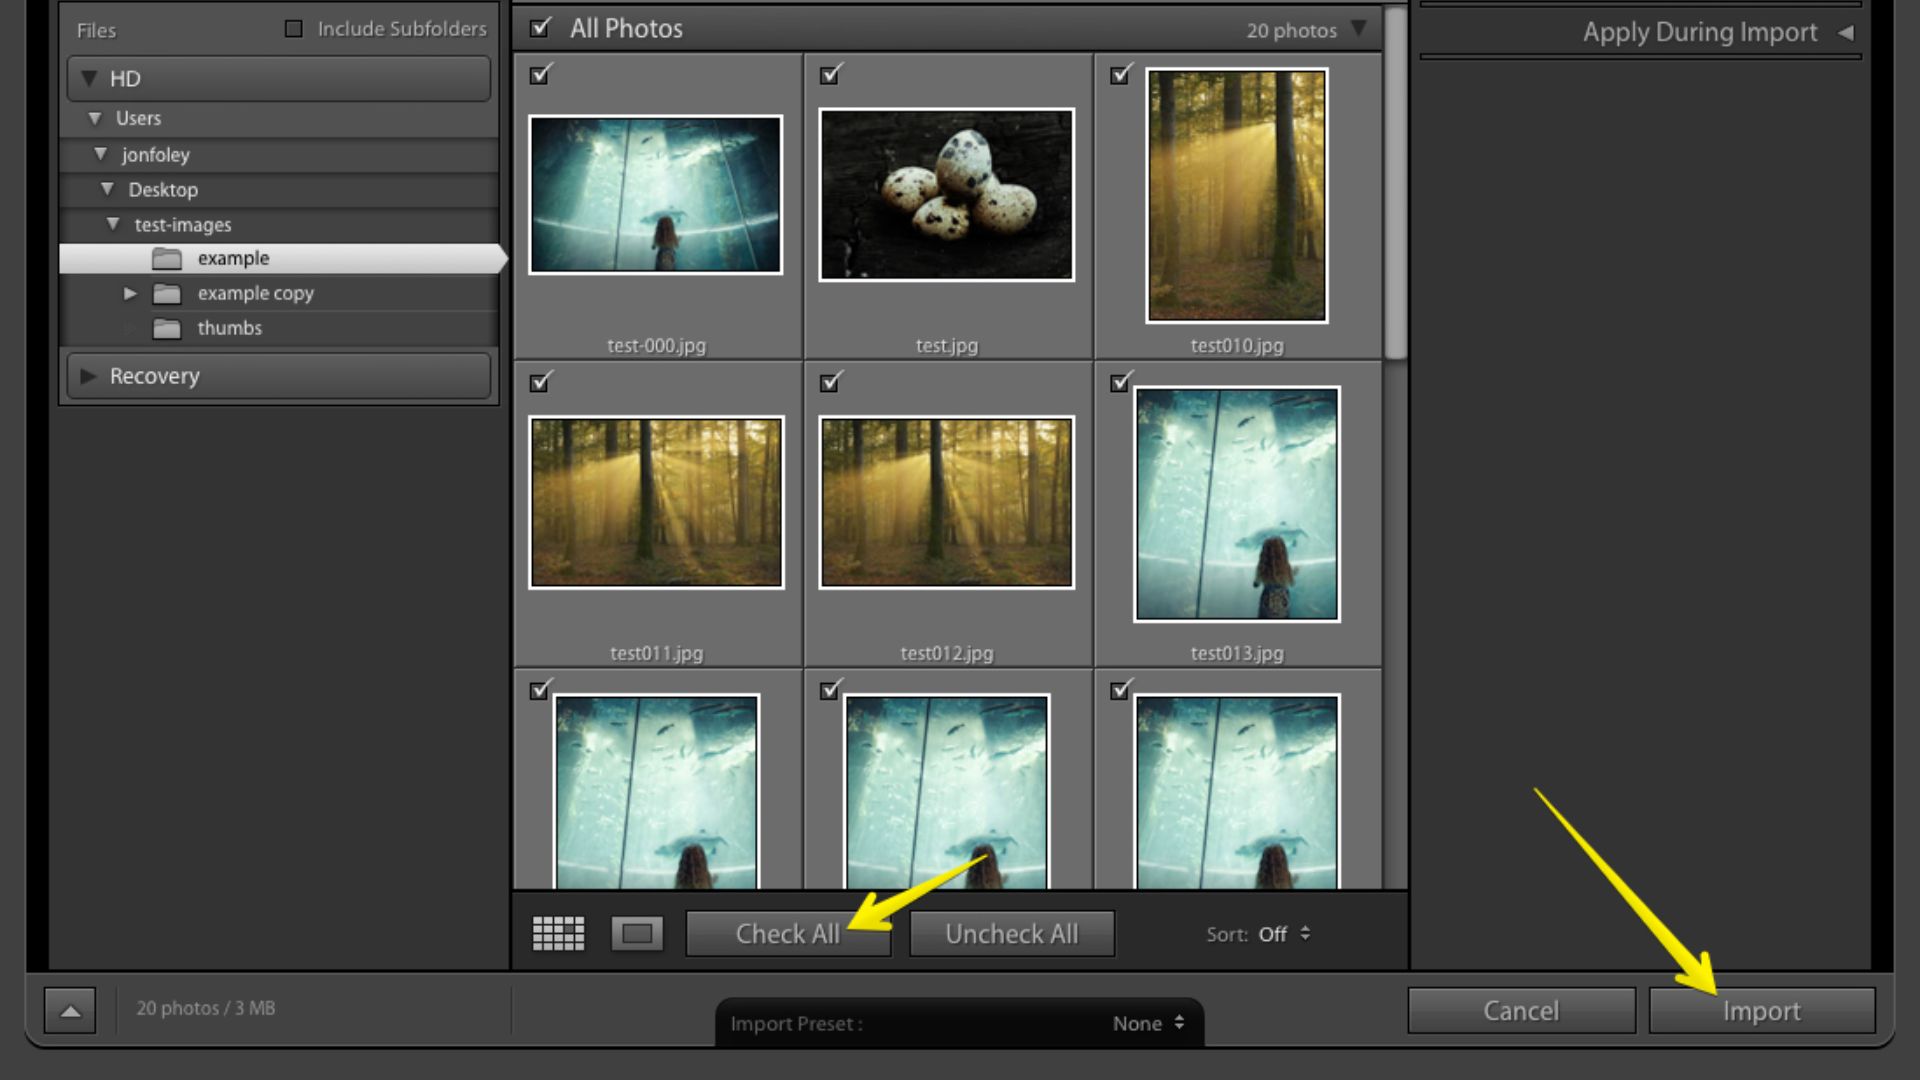
Step 2: Select multiple photos using one of these methods:
- Hold Shift and click the first and last image to select a range
- Hold Ctrl (Windows) or Cmd (Mac) and click individual photos
- Press Ctrl+A (Cmd+A on Mac) to select all visible photos
Step 3: Press Ctrl+Shift+E (Windows) or Cmd+Shift+E (Mac) to open Export.
Step 4: Configure all your resize settings once in the Image Sizing section.
Step 5: Set your desired dimensions, resolution, and quality settings.
Step 6: Click Export to process all selected images with identical settings.
Step 7: Lightroom applies the same resize parameters to every photo automatically.
Creating Export Presets for Faster Workflow
Save time by creating reusable presets for common export sizes.
Step 1: Open the Export dialog with any photo selected.
Step 2: Configure your ideal settings (dimensions, quality, sharpening, etc.).
Step 3: Look for the “Preset” panel on the left side of the Export dialog.
Step 4: Click “Add” at the bottom of the preset panel.
Step 5: Name your preset descriptively. Use names like “Instagram Square 1080” or “Web Export 1920 HD.”
Step 6: Click “Create” to save your preset.
Step 7: Your new preset appears in the left panel for future use.
Step 8: Next time, select your preset name and click Export.
These presets work across all projects. Your workflow becomes faster once presets exist.
Common Resizing Mistakes to Avoid
Don’t upscale images beyond original size. This reduces quality through interpolation. Always match your crop ratio to export dimensions to avoid distortion. Keep JPEG quality between 70-90. Don’t forget output sharpening after resizing.
Your Next Steps
Mastering how to resize images in Lightroom streamlines your photography workflow. Desktop offers maximum control through the Export dialog. Web Lightroom provides quick basic resizing. Mobile apps focus on aspect ratios with export-time settings.
Remember that Lightroom’s non-destructive editing keeps originals safe. All resizing happens during export. Build export presets for common uses. Your efficiency improves dramatically once these workflows become automatic.

Darlene Lleno
Darlene Lleno brings a unique perspective to DIY Photography as someone who grew up surrounded by camera gear but chose words over lenses. With five years of writing experience, she specializes in photography content that’s both technically informed and genuinely passionate. Growing up with a photographer twin brother meant camera talk was everyday conversation in her household. While he mastered capturing moments, Darlene discovered she preferred being the subject and the storyteller behind the scenes. As a travel enthusiast and mother of two, she understands the importance of preserving life’s precious moments. When not exploring new destinations or writing for DIY Photography, you’ll find her reading or tending to her garden. Her approach to photography writing is refreshingly authentic, she may not be behind the camera, but she knows exactly what it takes to help others capture the shots that matter most.
Related Posts
 Copying Large Video File Across Devices/Drives? This Is How To Make Sure You Don’t Goof Up
 This DIY battery adapter lets you unify your battery power system across your video devices
 How to sync Lightroom catalogs across many computers without Lightroom CC
 How to Resize Images in Canva for Any Device (PC, Mac, and Mobile)
Join the Discussion
DIYP Comment Policy
Be nice, be on-topic, no personal information or flames.