


What Lighting Setup Works Best for White Background Products?
Aug 20, 2025
Darlene Lleno
Darlene Lleno brings a unique perspective to DIY Photography as someone who grew up surrounded by camera gear but chose words over lenses. With five years of writing experience, she specializes in photography content that’s both technically informed and genuinely passionate. Growing up with a photographer twin brother meant camera talk was everyday conversation in her household. While he mastered capturing moments, Darlene discovered she preferred being the subject and the storyteller behind the scenes. As a travel enthusiast and mother of two, she understands the importance of preserving life’s precious moments. When not exploring new destinations or writing for DIY Photography, you’ll find her reading or tending to her garden. Her approach to photography writing is refreshingly authentic, she may not be behind the camera, but she knows exactly what it takes to help others capture the shots that matter most.
Share:

Getting the perfect white background for your product photos starts with the right lighting setup. You know those crisp, clean product shots you see on Amazon and other shopping sites? They’re not magic. They come from understanding how light works and positioning it correctly.
Most people think you can just stick a product in front of a white wall and call it good. That’s how you end up with gray, muddy backgrounds and products that look flat and boring. The secret is lighting your background separately from your product and making sure everything works together.
Why White Background Photography is Trickier Than You Think
White background photography isn’t about pointing lights at white paper and hoping for the best. Your camera sees light differently than your eyes do. What looks white to you might look gray to your camera.
Here’s what actually happens: you need to trick your camera into seeing the background as pure white while keeping your product perfectly exposed. This means the background needs to be much brighter than your product. We’re talking about overexposing that background on purpose.
Your camera’s light meter tries to make everything middle gray. That’s fine for regular photos, but terrible for white backgrounds. You have to outsmart your camera’s automatic systems and take control of the exposure yourself.
Building Your Lighting Setup: What You Actually Need
You don’t need to spend thousands of dollars, but you do need the right gear. Here’s what actually matters:
Continuous LED lights are perfect for beginners. You see exactly what you’re getting while you shoot. Professional LED panels like the ones from B&H Photo give you consistent results every time.
Softboxes turn harsh light into something beautiful. A 24×36 inch softbox is perfect for most products. The bigger your softbox compared to your product, the softer your shadows will be.
Get proper seamless paper, not printer paper or poster board. Superior Seamless #28 Snow is what most studios use. The paper needs to curve smoothly from the wall down to your table.
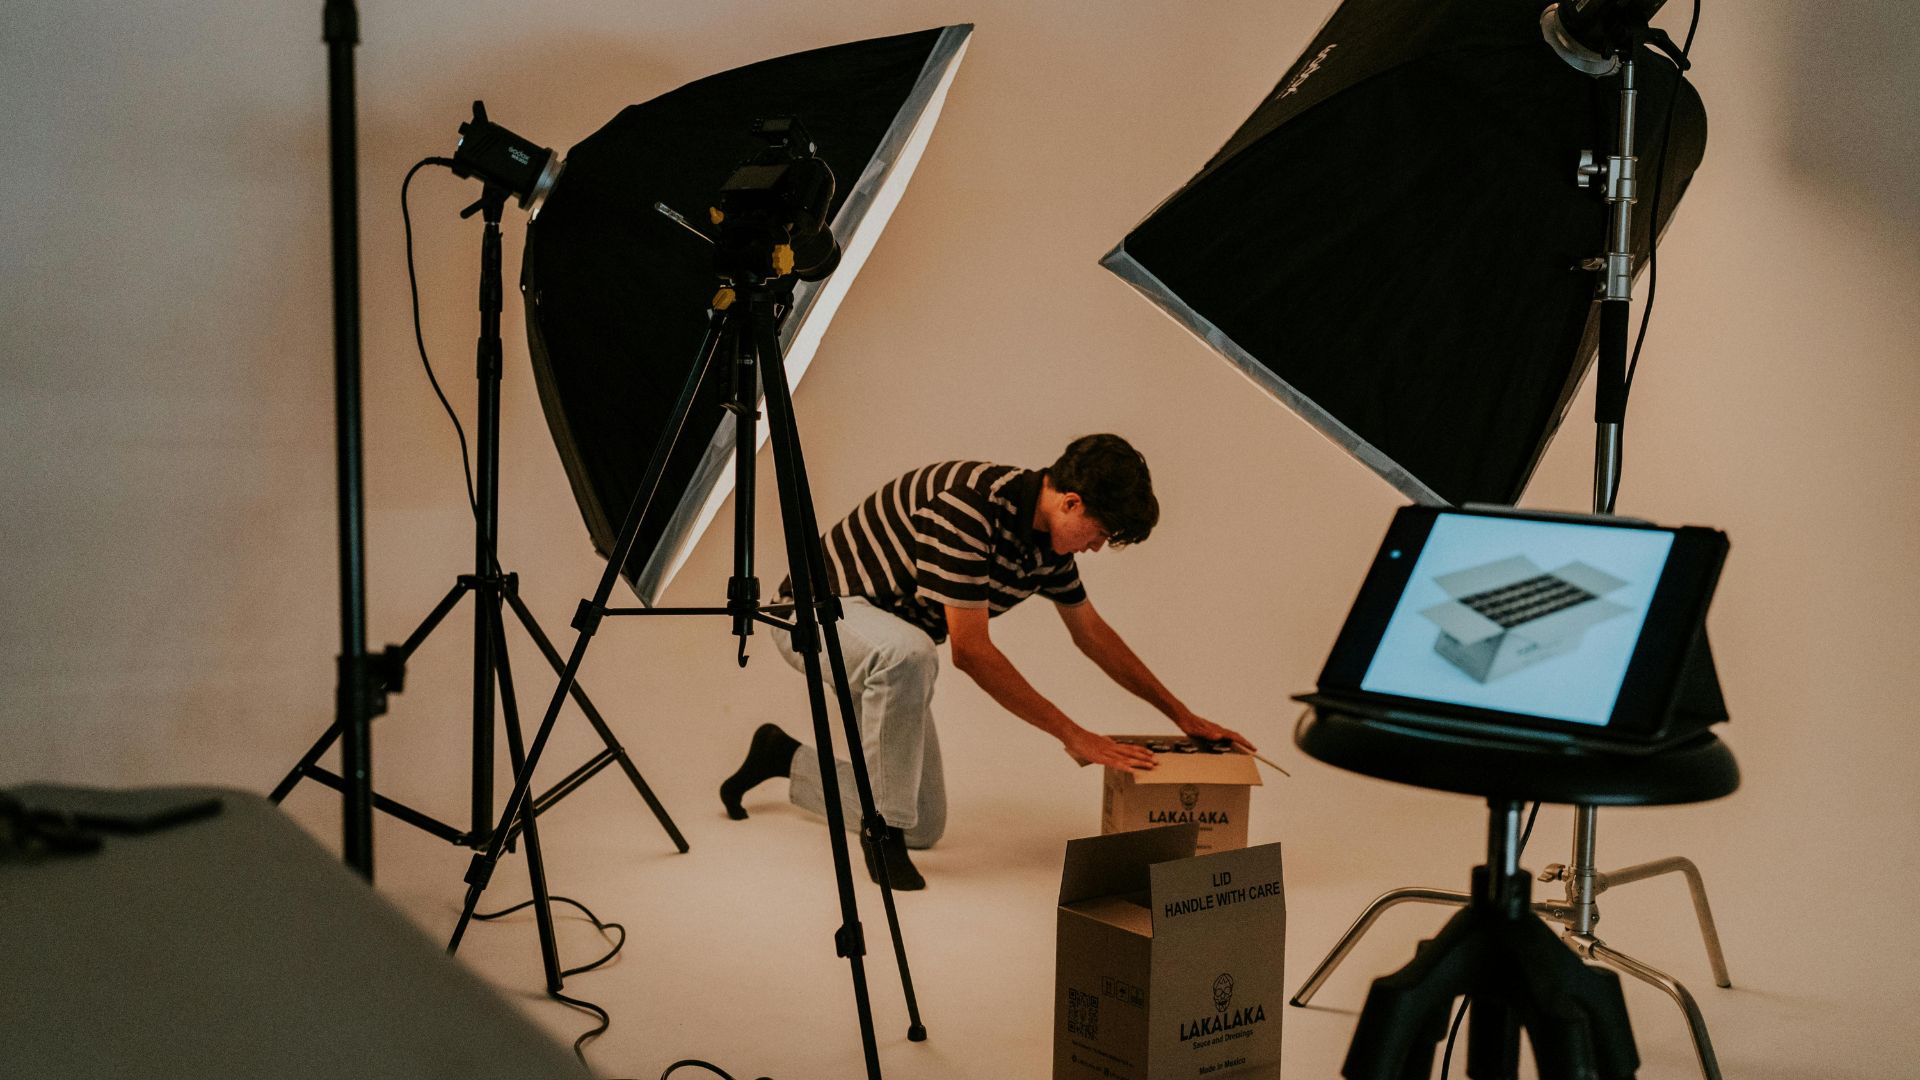
The Three Light Method That Actually Works
Professional lighting setup follows a simple pattern that works every single time. Three lights, each with a specific job.

Your Main Light
This does most of the work lighting your product. Put it at a 45-degree angle to your product, slightly above where your camera sits. This angle creates natural shadows that give your product shape and dimension.
How far away you put this light matters a lot. Closer gives you softer shadows but darker edges. Further away spreads the light more evenly but you might need to crank up the power.
Your Fill Light
This light’s job is making your shadows lighter. Put it on the opposite side from your main light, but keep it dimmer. About half the power of your main light works well.
You can use a reflector instead of a second light here. Just bounce some light from your main light back onto the shadowy side of your product.
Background Lights
Two lights pointed at your background make sure it comes out pure white. These need to be brighter than your product lights. About one to two stops brighter gets the job done.
Check your camera’s histogram while you set this up. The background should be clipping on the right side, meaning it’s blown out to pure white.
Camera Settings That Work With Your Lighting
Your lighting setup is only half the battle. Your camera settings need to work with your lights to create professional results.
Shoot in manual mode so you control everything. Start with f/8 or f/11 for good sharpness across your whole product. Keep your ISO low, usually 100 or 200. Higher ISOs add noise that makes your photos look grainy.
Set your white balance manually based on your lights. LED lights usually need daylight setting (5500K). Shoot RAW files, not JPEGs. RAW gives you way more room to fix exposure and color problems in editing.
Common Problems and Quick Fixes
When Your Background Looks Gray
This happens when your background lights aren’t bright enough compared to your product lights. The fix is simple: make your background lights brighter or move them closer to the background.
Product Shadows You Don’t Want
Dark shadows under your product can be distracting. Add more fill lighting or use reflectors to bounce light into the shadowy areas.
Budget-Friendly Ways to Get Started
You don’t need to drop thousands of dollars to get professional results. Window light makes an excellent main light source. Use white poster board or foam core as reflectors to fill shadows.
Look for entry-level continuous lighting kits with at least two lights, softboxes, and backdrop support. Expect to spend $150-300 for a decent starter setup that will actually produce good results.
Different Products Need Different Approaches
Electronics with glossy screens need large diffusion panels to create smooth reflections. Macro photography techniques work well for jewelry and tiny products. Fabric shows texture beautifully with side lighting at shallow angles.
Small products often need focus stacking to keep everything sharp, especially for three-dimensional pieces.
Perfect Your Lighting Setup Skills
Your lighting setup makes the difference between amateur and professional product photos. Start with solid basics, practice with different products, and gradually build up your skills and equipment. The investment in proper lighting pays off in better sales, happier customers, and photos you can be proud of.
Remember, great product photography isn’t about having the most expensive gear. It’s about understanding how light works and using it to make your products look their absolute best.

Darlene Lleno
Darlene Lleno brings a unique perspective to DIY Photography as someone who grew up surrounded by camera gear but chose words over lenses. With five years of writing experience, she specializes in photography content that’s both technically informed and genuinely passionate. Growing up with a photographer twin brother meant camera talk was everyday conversation in her household. While he mastered capturing moments, Darlene discovered she preferred being the subject and the storyteller behind the scenes. As a travel enthusiast and mother of two, she understands the importance of preserving life’s precious moments. When not exploring new destinations or writing for DIY Photography, you’ll find her reading or tending to her garden. Her approach to photography writing is refreshingly authentic, she may not be behind the camera, but she knows exactly what it takes to help others capture the shots that matter most.


Join the Discussion
DIYP Comment Policy
Be nice, be on-topic, no personal information or flames.
One response to “What Lighting Setup Works Best for White Background Products?”
Great article! 💡 The breakdown of lighting setups for white background products is super clear and practical. It’s always inspiring to read content that makes technical concepts easy to apply. By the way, if you’re interested in more exciting updates, check out our Beatcolor Referral Program.