


Editing a Cartoon Portrait in Photoshop (and a little Affinity Photo)
Apr 12, 2016
Share:
Following you will find a detailed guide on how to make these cartoonish portraits, but first I must share how they came to be. If you just want the tutorial, jump a paragraph or two forward.
A few weeks ago I traveled to Birmingham UK, to hang out at the Photography Show. I met up with the people from DIY Photography and they interviewed me on my work, (you can view that interview here). I spent a few days hanging around the Inspired PhotoGear stand, where we played with Light Blasters, Lollipods, RoundFlash Dish and Ring’s and I fell in love with the Cosyspeed Holster Bag, which now houses my Olympus OMD.
(I also met the awesome people from Amersham Studio’s, who will host my next UK photoshop workshop this June, together with my agency Draumlist, but I digress)
The Images
Amber Scarisbrick was the stand’s photographer and she took some amazing portraits of a lot of people. Even though the portraits where fine as they where, I wanted to pull them through Photoshop and see what I could pull off. I was going for a cartoony look, but still retain the photographic quality of the image. A blend of real and weird.
The Lighting
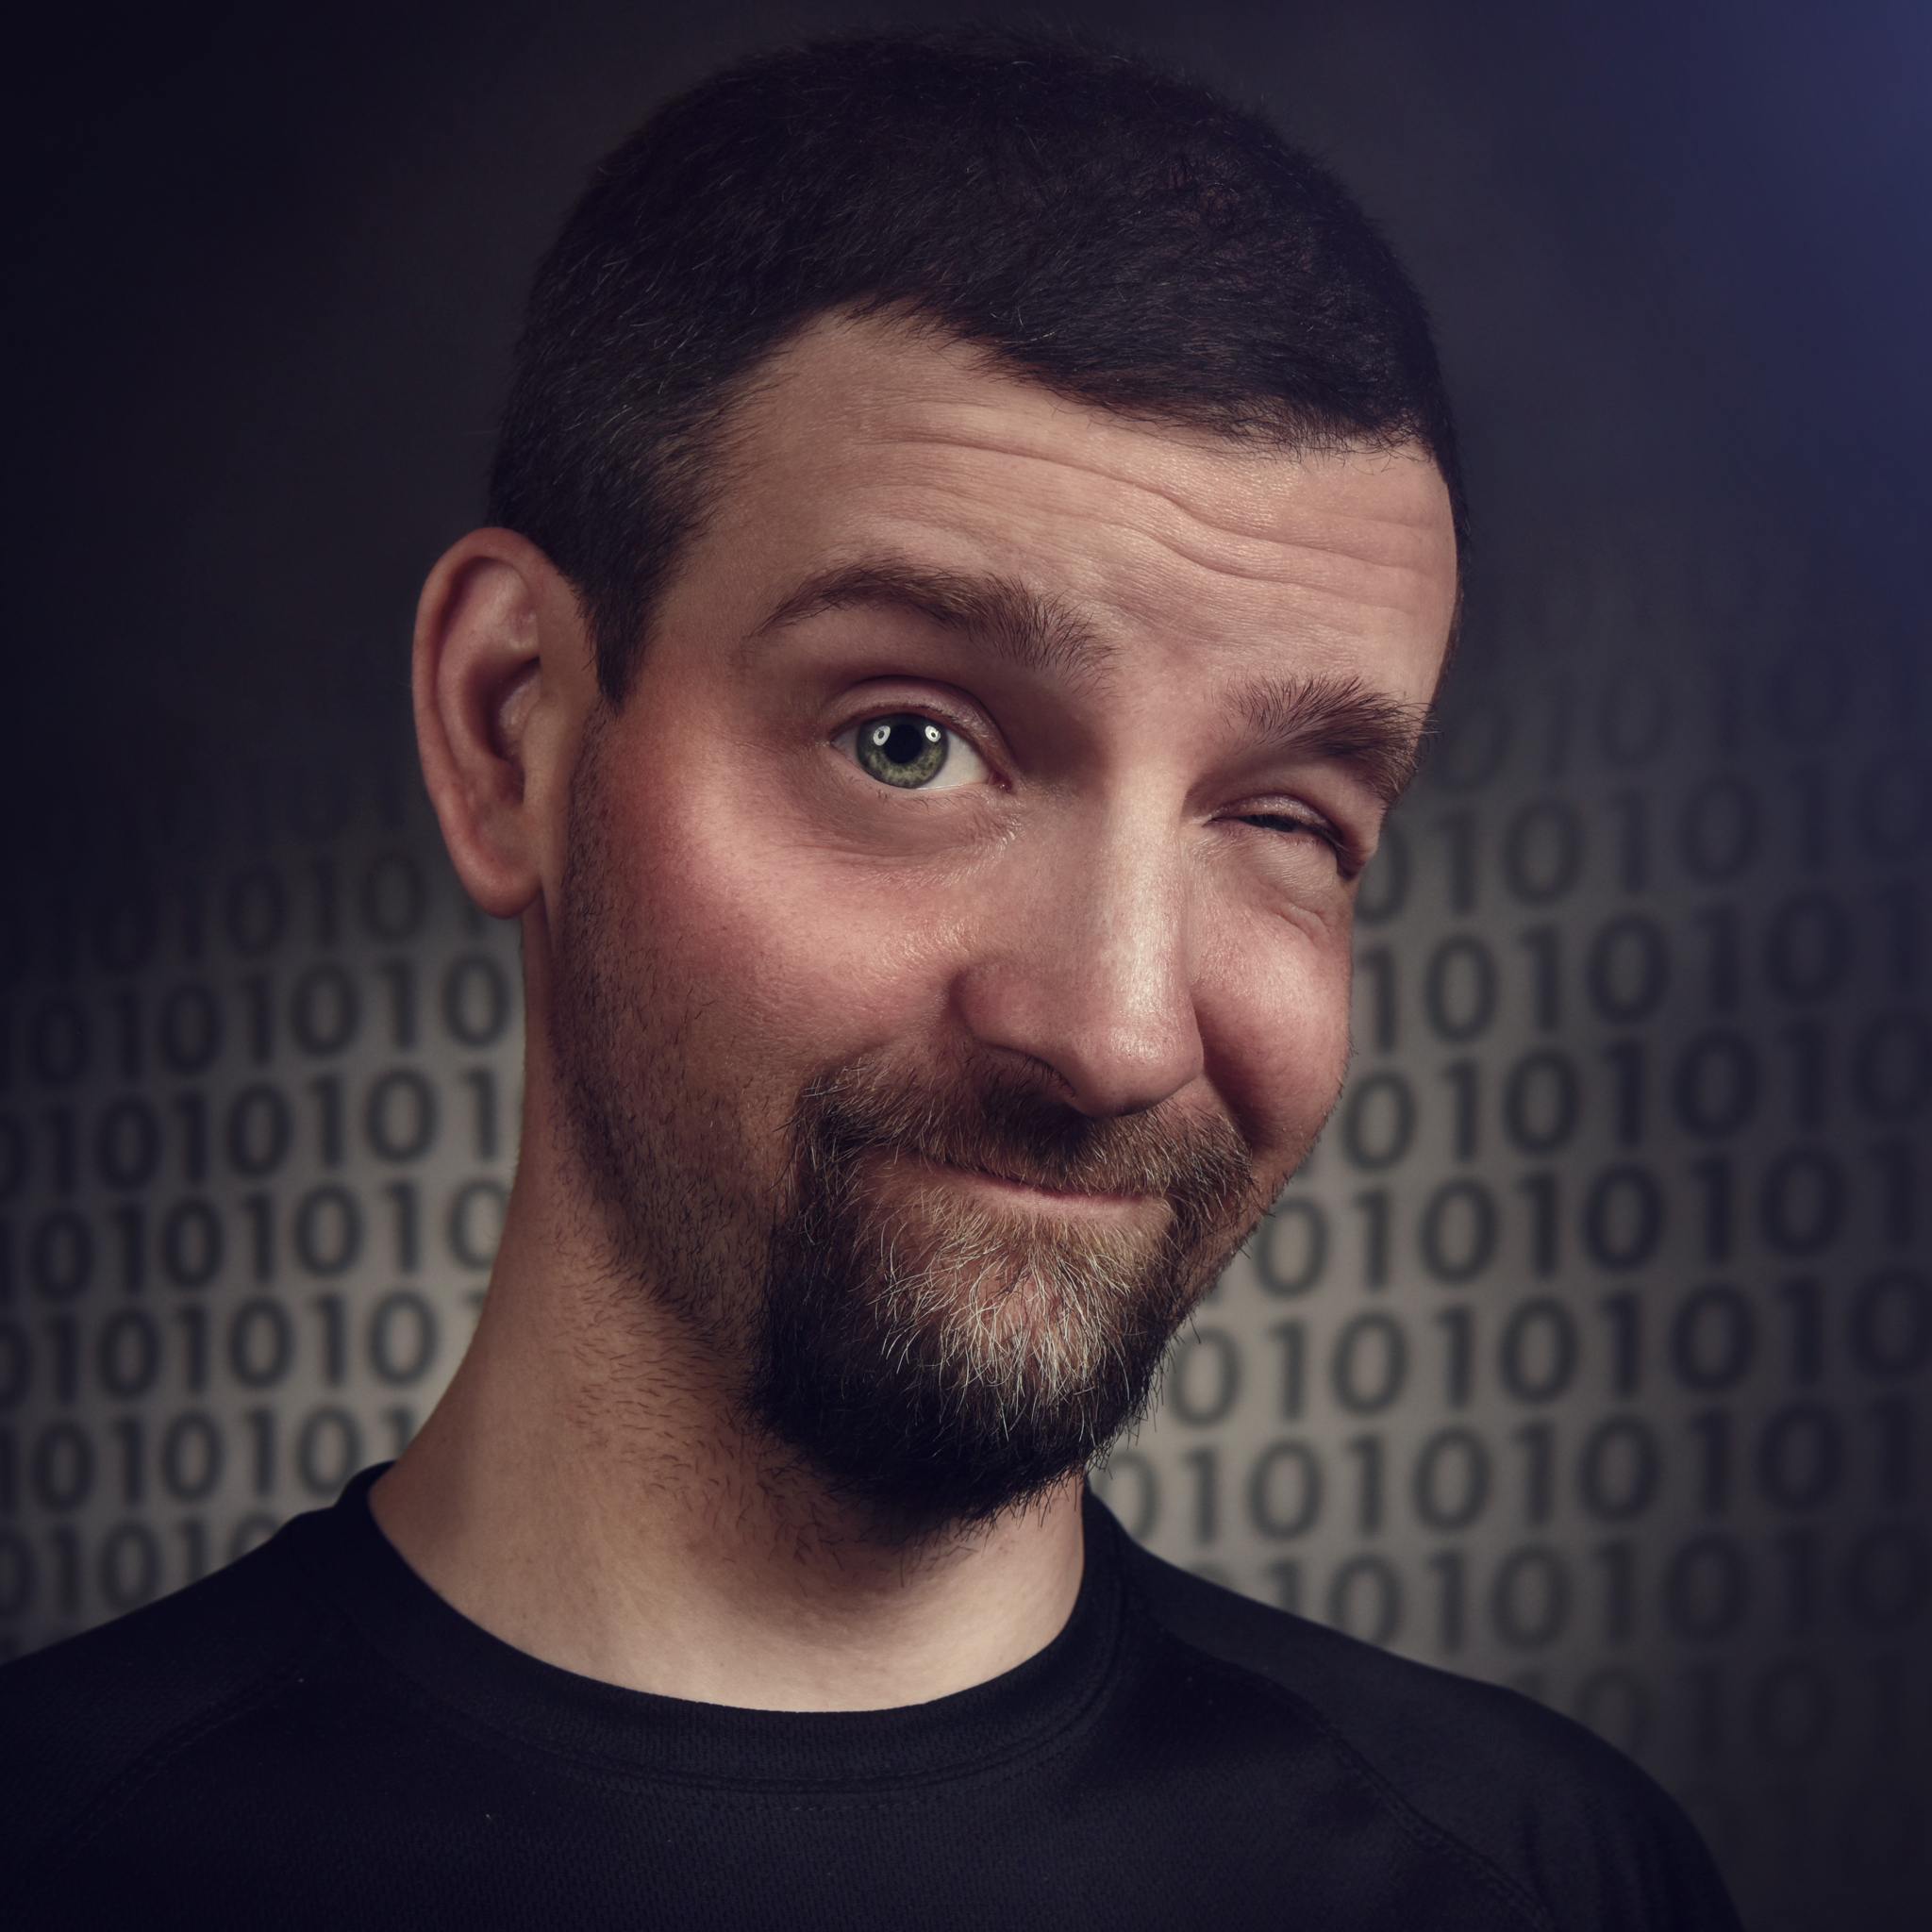
As for the lighting setup for this shot, we used a Light Blaster to project a random background onto a grey backdrop (the zero’s and one’s, YES and weird sun thing). We also positioned two speed-lights with the Roundflash Ringlights attached to them on both sides of the face. You can see the beautiful catchlights they produce in the eyes. Pretty trivial lighting.
The video below show the process I’ve written out here, where I edit this portrait of DIYP’s writer John Aldred
Next to using photoshop I also worked with Affinity Photo (more here), which has turned out to be a great photo editing app with some killer features. For the making of these images I only used their Inpainting Brush (which is pure magic) to get rid of the initial blemishes.

From there I hopped back to Photoshop and start with cleaning up the image using Dodging & Burning on a micro level (zoomed way in), getting rid of little distractions in the photo.
I am not actually using Photoshop’s Dodge and Burn brushes, but rather creating a dodge and burn layers (you can see more about that in this tutorial)

I then turn to D&B on a medium level (where I zoom out to see the full image). I get rid of medium distractions that stand out, like bumps and shadows on the skin, evening it all out even more.

Once that is done I turn to my liquifying stage. I’m a great fan of the RAWwxchange Retouching Toolkit. Not only does the kit have a D&B action (yes I could make my own, but I’m lazy sometimes), but it also has the magical Smart Liquify button.
Smart Liquify basically makes Liquifing a non destructive action. It works like a Merge Visible Layers, but it creates a Smart Object Layer on top of the rest. So if I need to go back in one of the layers and make changes I can update the Smart Object Layer (with the Update Smart Liquify button) and the changes will be updated as well. It’s magic!!

you can see how smart liquify works here, once you’ve used it, you can not go back…

From my Liquify panel I start with making the eyes bigger, I use low setting to keep the distortion under control and prevent pixel smearing. I then Liquify the face into shape, to give it the cartoony look. I try to evenly balance between realism and cartoony.
Once I’m happy with the liquifying stage, I add some texture and glare into the eyes, to make them pop more. If there’s some skin tones that need adjusting, I can use the Gradient Map Maker (also in the retouching toolkit) to even out the skin colors.

Now its time for some Dodging and Burning on a macro level, adding broad and obvious highlights and shadows to the image. This gives the image the stylised look that I’m after.
Some more curves adjustment to add some color toning and vignetting and the image is done.
Here are the other three portraits I made


Filed Under:
Tagged With:

Roderique Arisiaman
Roderique “Dracorubio” Arisiaman is a professional photographer, photoshop wizard, and artist, using photography as his canvas to create beyond reality imagery and stories. you can follow Dracorubio on his site, facebook and G+ account.
Related Posts
 Affinity Photo and Affinity Designer coming soon to Windows
 These are the five top tools and features Photoshop needs that Affinity Photo has
 This instant camera turns everything you shoot into cartoon doodles
 Affinity Photo – First Impressions: Inpainting Brush; Photoshop Plugins; Frequency Separation
Join the Discussion
DIYP Comment Policy
Be nice, be on-topic, no personal information or flames.