


This $6 Viewfinder will Enable You to Use a Camera LCD in Full Bright Sunlight
Sep 20, 2025
David Prochnow
Our resident “how-to” project editor, David Prochnow, lives on the Gulf Coast of the United States in Ocean Springs, Mississippi. He brings his expertise at making our photography projects accessible to everyone, from a lengthy stint acting as the Contributing How-To Editor with Popular Science magazine. While you don’t have to actually build each of his projects, reading about these adventures will contribute to your continued overall appreciation of do-it-yourself photography. A collection of David’s best Popular Science projects can be found in the book, “The Big Book of Hacks,” Edited by Doug Cantor.
Share:
That blasted Sun! How are you supposed to use the rear LCD of your Panasonic Lumix S9 when that bright sunlight is glaring off the screen? You’ve set the screen brightness to full strength, but to no avail…the LCD is a reflected mess. Oh, yes, there are solutions from Hoodman, but they are large, bulky, and difficult to move between your various camera setups. There’s gotta be a better way? And, there is, but you’re gonna have to go smaller to see the whole picture.
This miracle device is called the Digiviewer®. You can order the Digiviewer from FreeStyle Photo and Imaging for the irresistible price of $6. Beware, this is a sale price and there are limited numbers available.
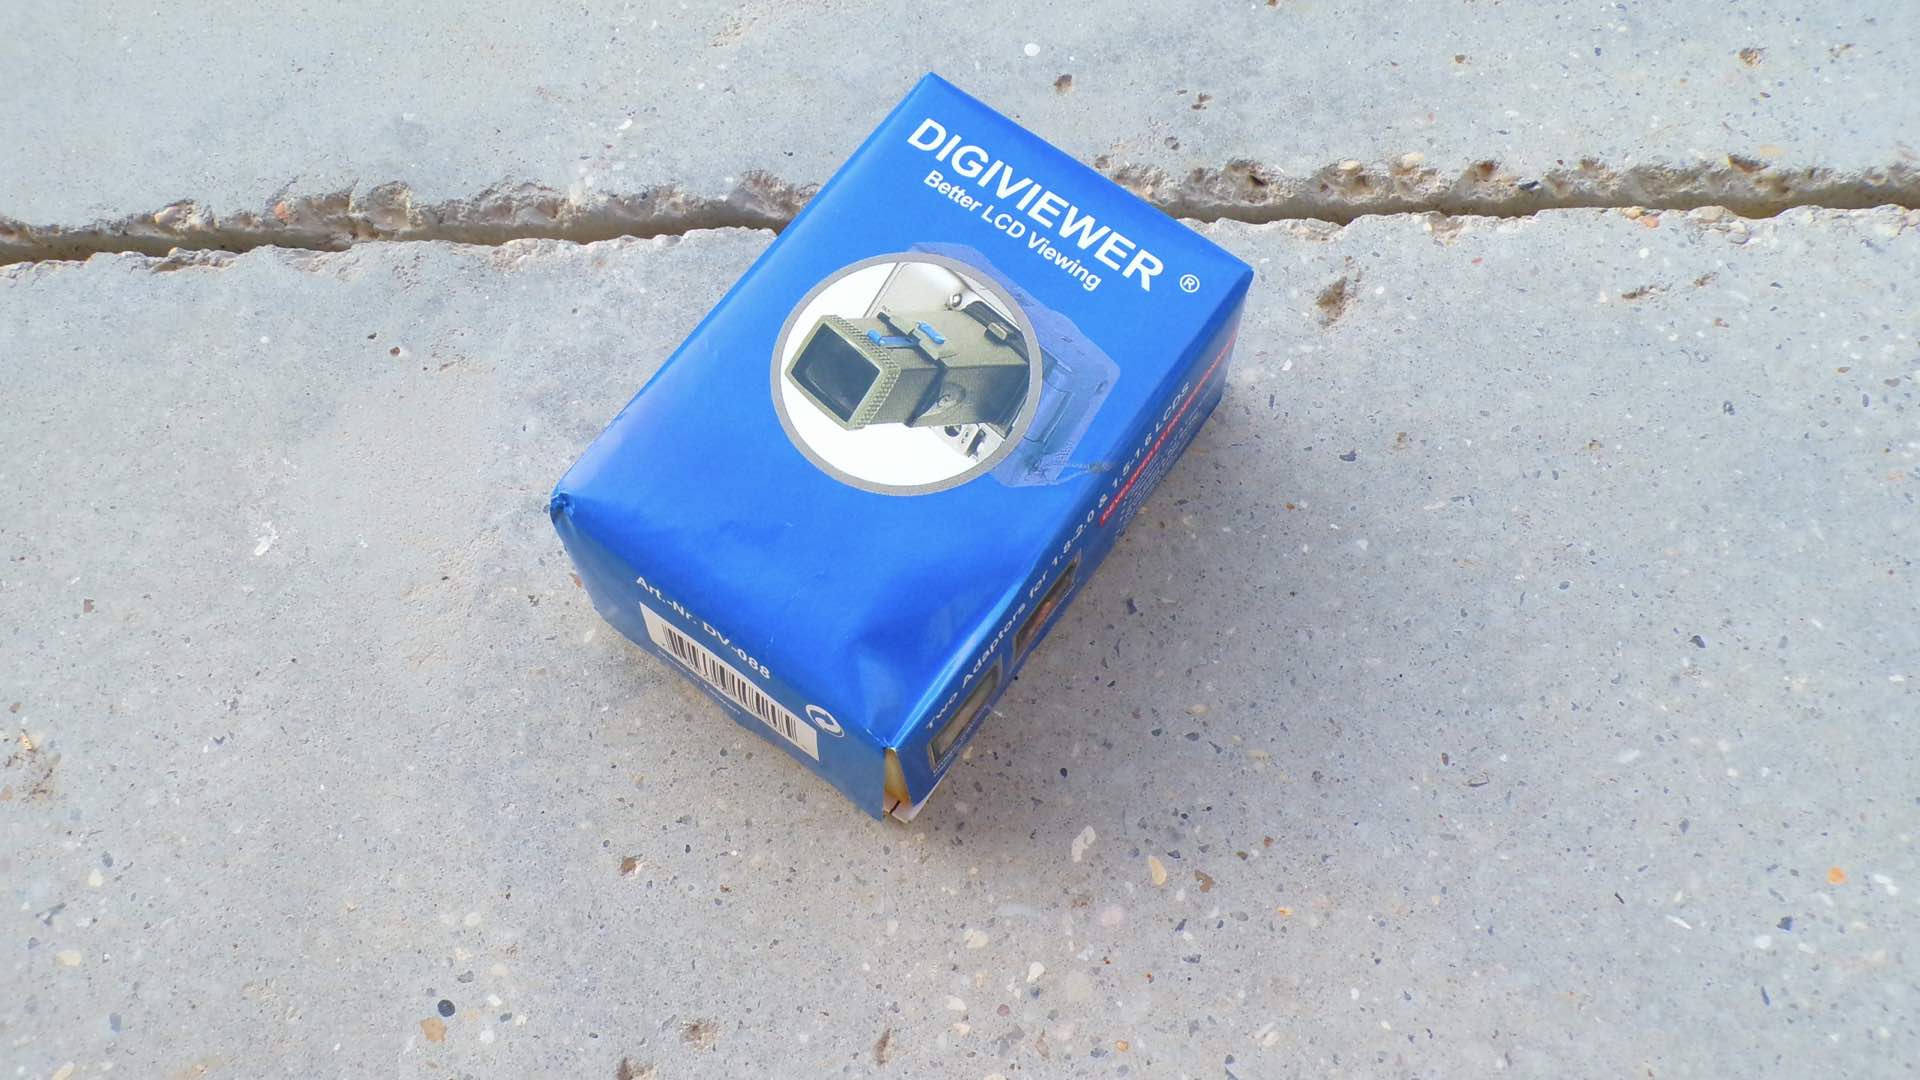
Delivery of your Digiviewer arrives in a funny little package. This humor is derived from the “better LCD viewing” subtitle and confidence-building declaration that the Digiviewer was “developed by professionals.” Whew, you wouldn’t want amateurs designing an LCD viewer, right? Furthermore, inside the package the instruction sheet informs you that the Digiviewer was designed in Germany and manufactured in Taiwan.
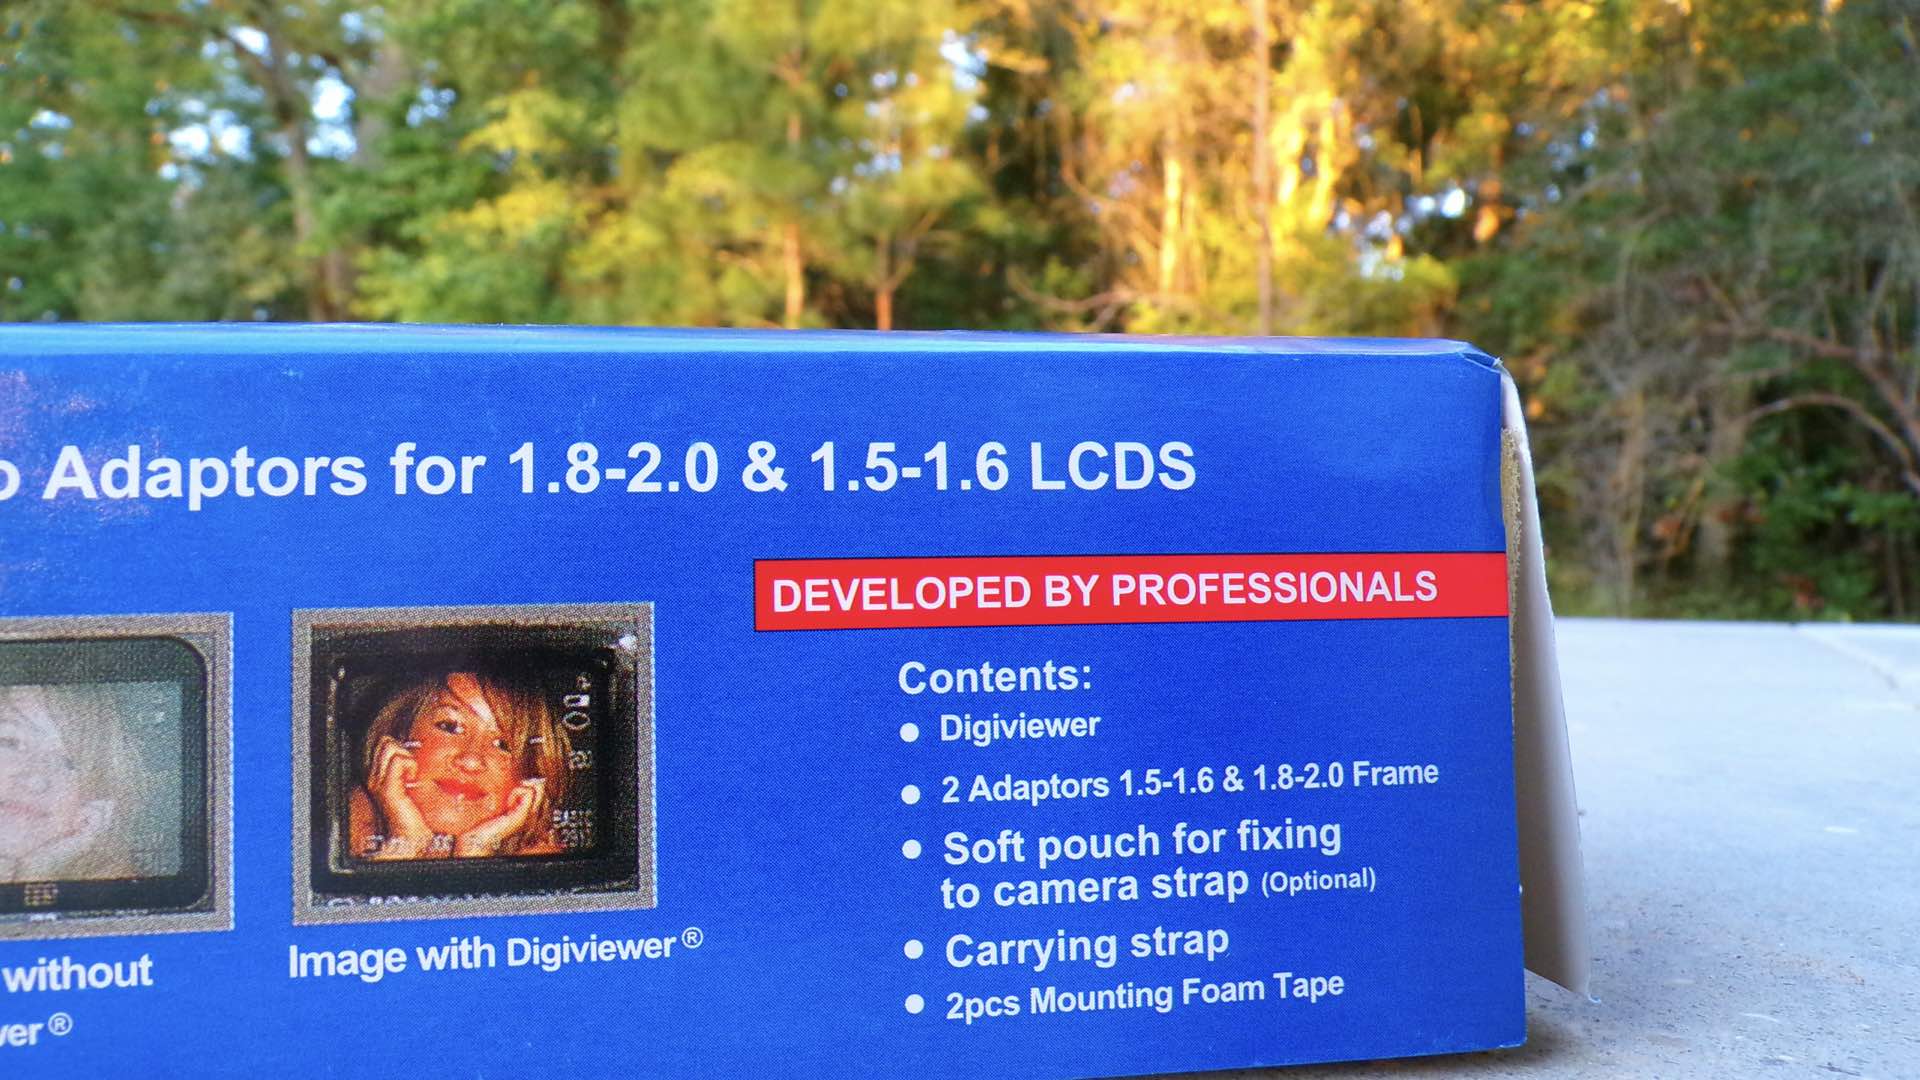
After learning about all of this remarkable background information, you might be shocked to now read that the Digiviewer is usable on LCD screens with dimensions sized from 1 1/2- to 2-inches. What the…? How can this tiny viewer work on 3-inch and larger screens? Don’t fret, the Digiviewer was originally designed to be directly “mounted” on the camera’s LCD screen. Therefore, it is sold with frames and foam mounting tape for attachment to these smaller screens. When using the Digiviewer with larger camera screens, both the frames and the mounting tape are NOT used.
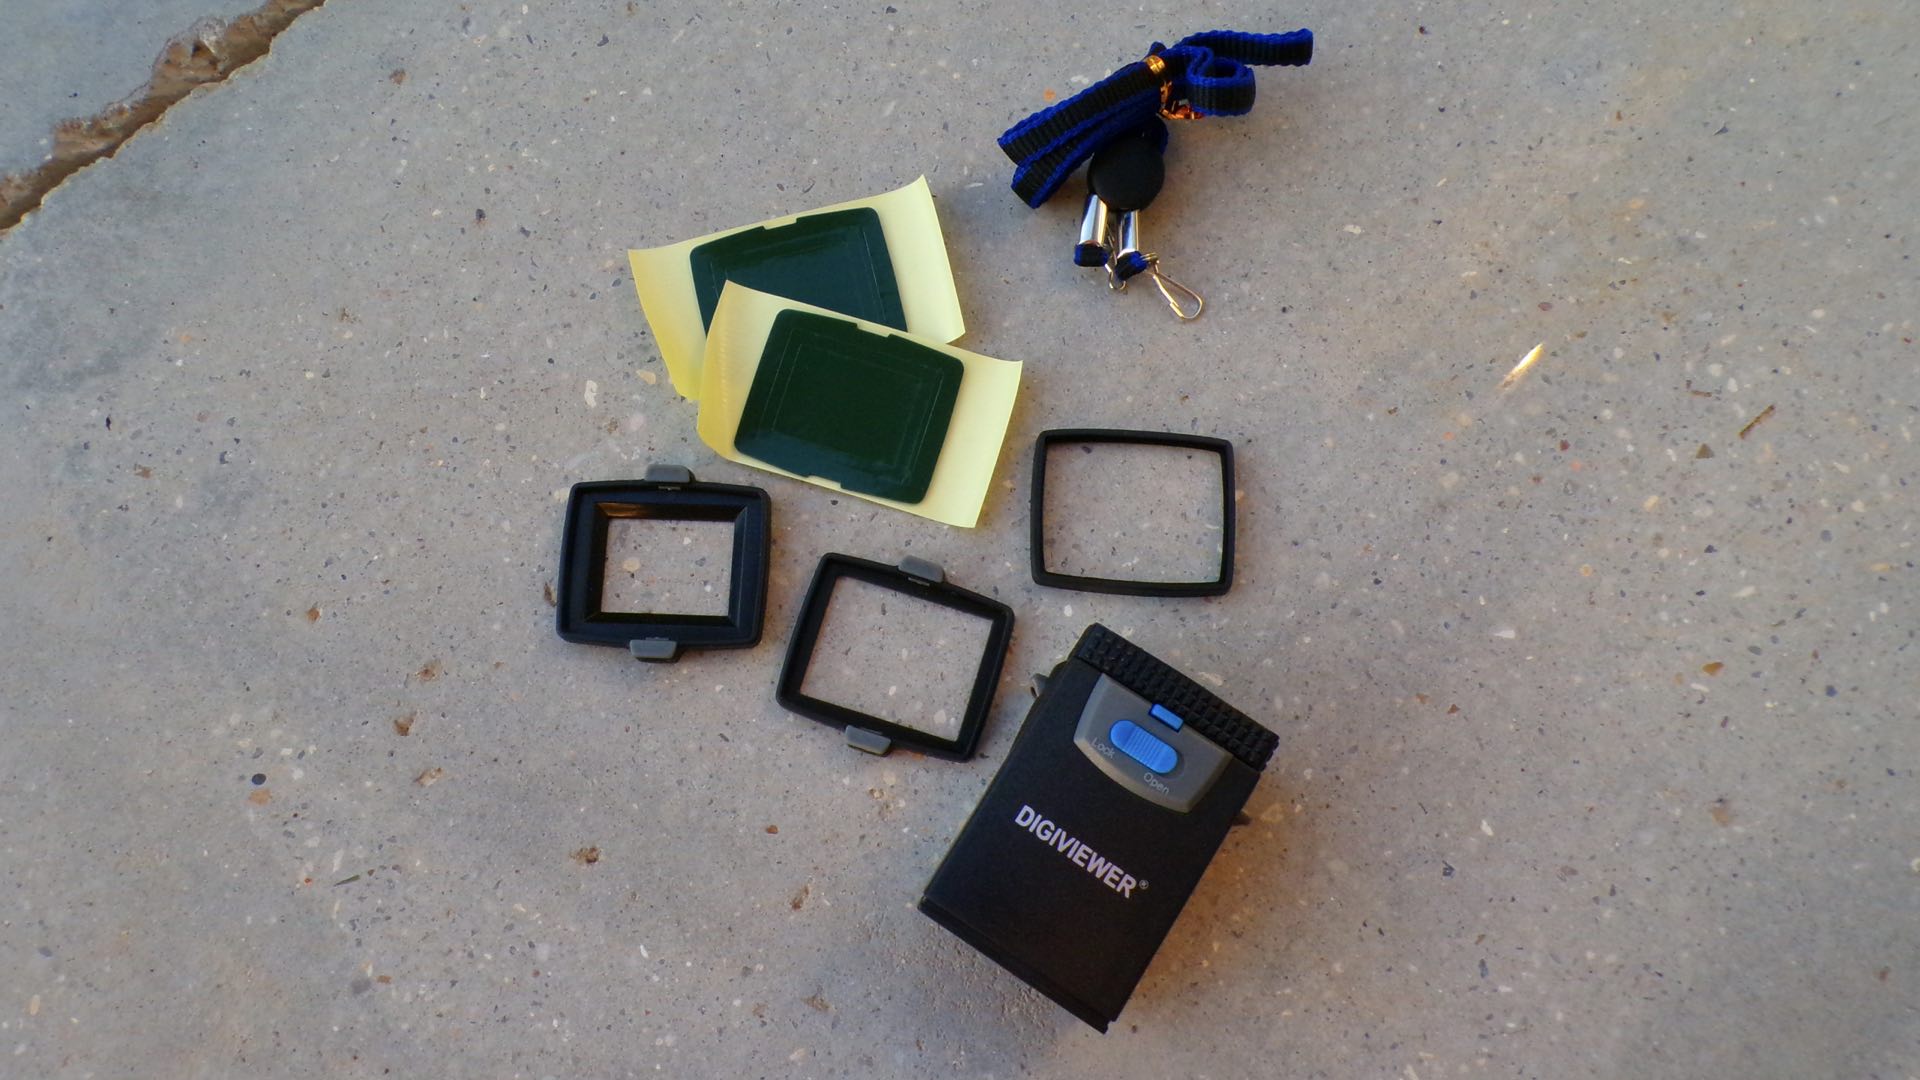
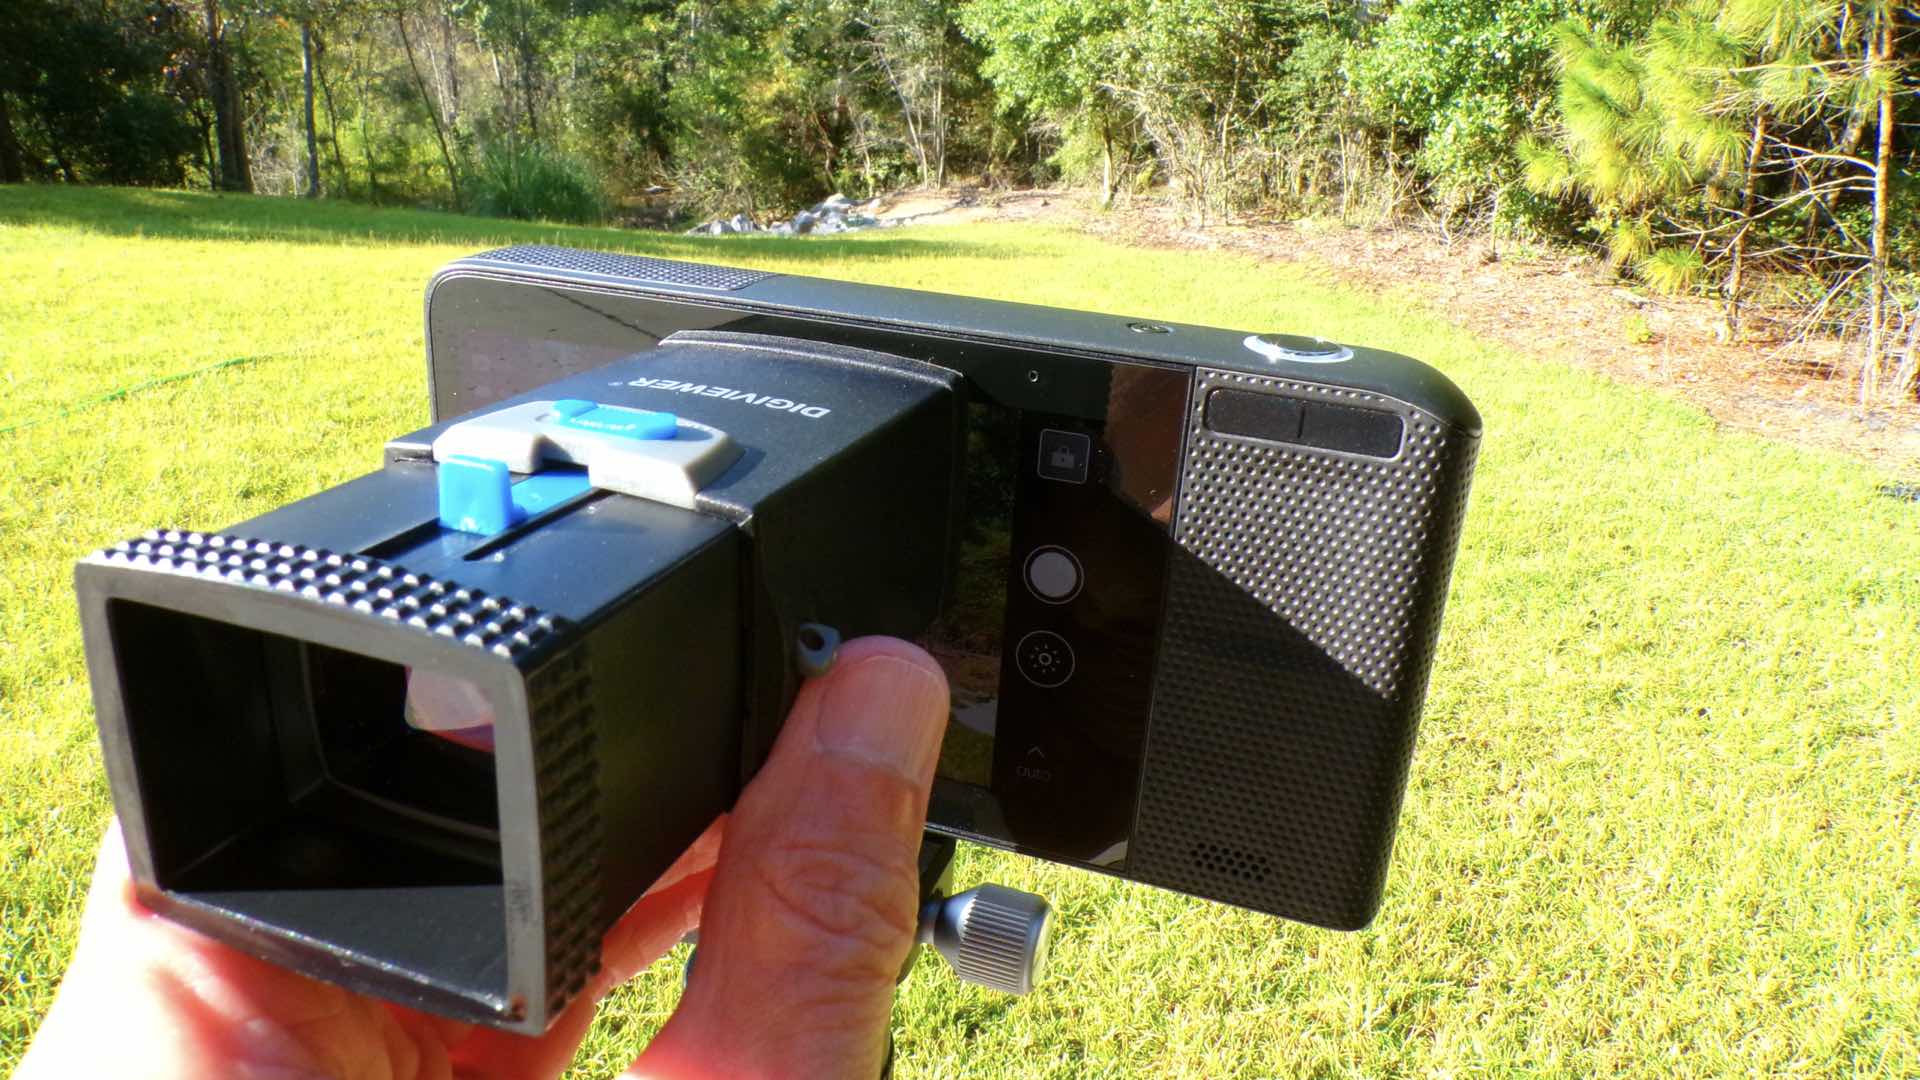
Instead, the Digiviewer is used as a handheld viewer and rested against the LCD while your other hand is holding the camera. Hey, it works great in this capacity and it gets even better when you attach the enclosed strap and let the Digiviewer dangle from your neck while not in use.
But Wait, There’s More…Much, Much More
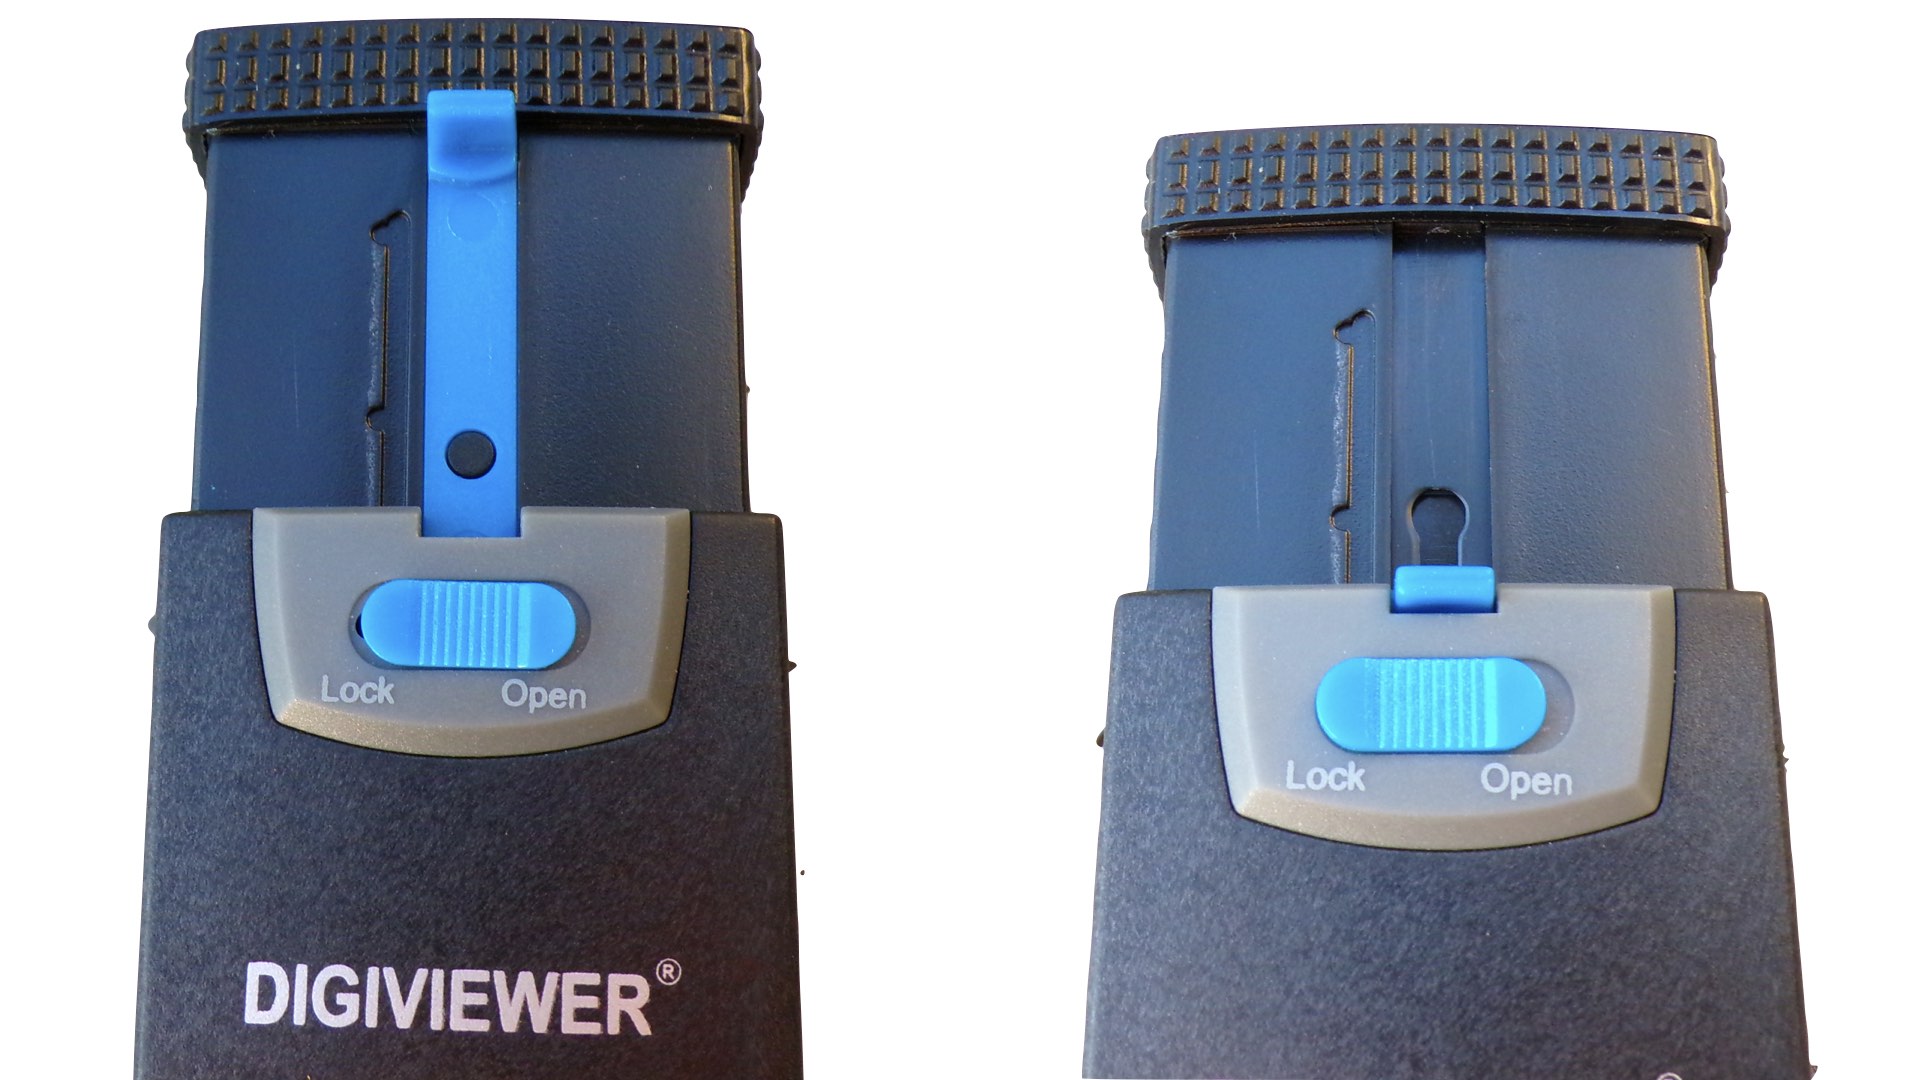
Now that could be the end of the story, but the incredible Digiviewer has couple more tricks…big tricks, up its sleeve. Remember, this device was “developed by professionals.” Looking at the top panel of the Digiviewer, there are two blue buttons. The button labeled Lock-Open is Switch A. This button is used for extending the Digiviewer chimney 1 1/2-inches more in height. Also, there is an intermediate detent for extending the chimney to a 1-inch height.
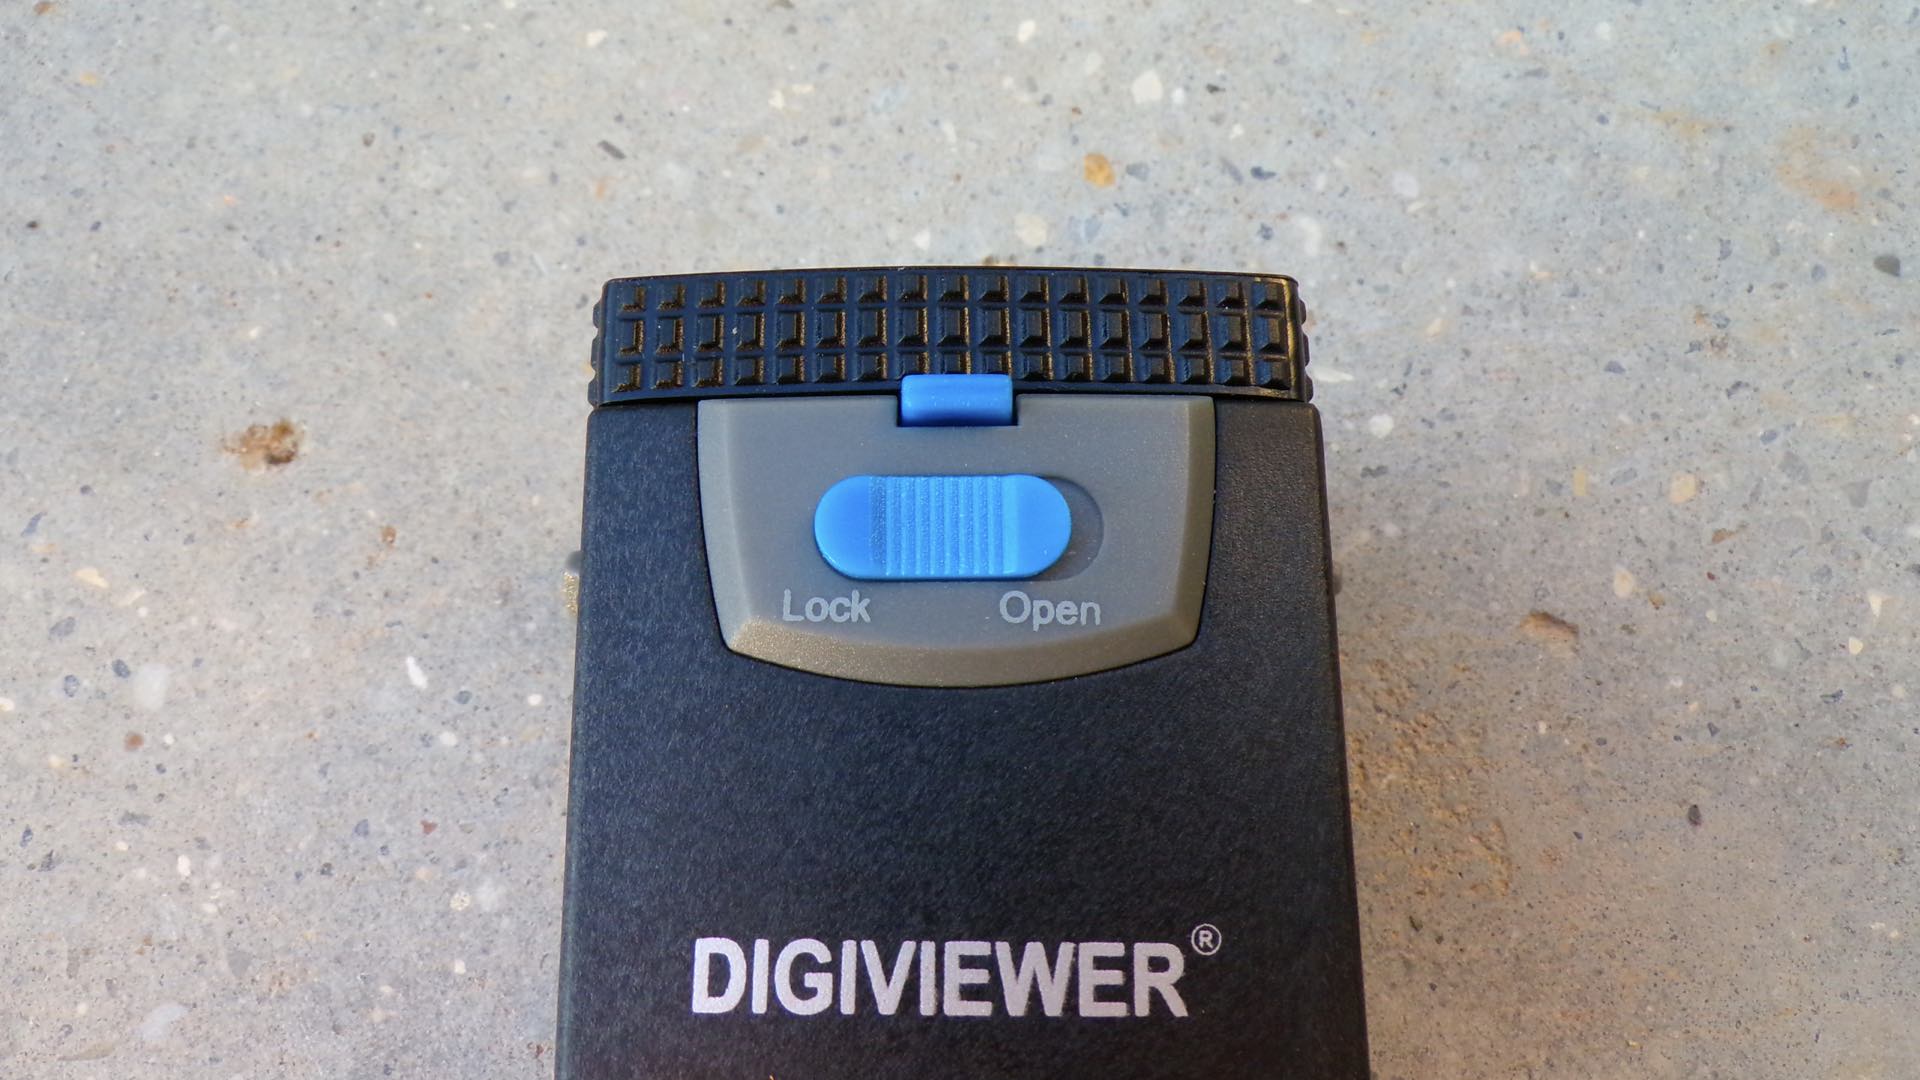
The second blue button is the Lens Controller B. Sliding this button up/down moves the internal lens further away from the Digiviewer eyepiece and closer to the LCD screen. This movement doubles for focusing the lens, as well as adding additional shading for the Digiviewer.
In real world use, this is a multi-function LCD screen viewer that can work on ANY camera in bright sunshine. The lens provides 3X magnification of the LCD screen with variable shading and focus adjustments included via the Digiviewer chimney. You’d be hard-pressed to find anything costing $6 that is as indispensable as the Digiviewer. Plus, the Digiviewer was designed by professionals. So, you can’t go wrong.
Enjoy.
Filed Under:
Tagged With:

David Prochnow
Our resident “how-to” project editor, David Prochnow, lives on the Gulf Coast of the United States in Ocean Springs, Mississippi. He brings his expertise at making our photography projects accessible to everyone, from a lengthy stint acting as the Contributing How-To Editor with Popular Science magazine. While you don’t have to actually build each of his projects, reading about these adventures will contribute to your continued overall appreciation of do-it-yourself photography. A collection of David’s best Popular Science projects can be found in the book, “The Big Book of Hacks,” Edited by Doug Cantor.
Related Posts
 Overpowering the sun; Shooting outdoor flash portraits in harsh bright sunlight
 How to use scrims and strobes outdoors in bright sunlight for amazing portraits
 The new Super Dark variable ND from Syrp lets you shoot long exposure timelapse in bright sunlight
 Why and how to shoot portraits in bright sunlight with flash using high speed sync
Join the Discussion
DIYP Comment Policy
Be nice, be on-topic, no personal information or flames.