


How To Build The Smallest Intervalometer In The World
Jul 26, 2010
Udi Tirosh
Udi Tirosh is an entrepreneur, photography inventor, journalist, educator, and writer based in Israel. With over 25 years of experience in the photo-video industry, Udi has built and sold several photography-related brands. Udi has a double degree in mass media communications and computer science.
Share:
") If you are into time lapse you must have checked the option of getting an Intervalometer. as you can see from the Canon and Nikon links an Intervalometer is not cheap. Not really expensive either, but definitely not cheap. So As usual I ask: what can you DIY about it?
If you are into time lapse you must have checked the option of getting an Intervalometer. as you can see from the Canon and Nikon links an Intervalometer is not cheap. Not really expensive either, but definitely not cheap. So As usual I ask: what can you DIY about it?
Some cameras already have the time lapse feature built in, and Canon photographers can turn to CHDK for adding a time lapse feature. But there is a third, cooler version if you are into electronics (which I know lots of site readers are not afraid of).
Achim Sack – a super electronics engineer – has a project for building an intervalometer the size of a finger nail. It needs no power and learns the interval between shots as you go. If you are into embedded programming, this is a project for you, if not, “move along nothing to see…” [Image credit: tonyVC]
There are three parts for this project: making a PCB, Soldering the PCB and loading the PIC (a small, cheap, stupid CPU) with software. In Achim’s case he is using a microchip PIC called PIC10F222. It is ridiculously cheap @ about 60 cents.
Creating the PCB
The PCB schematics are available for personal use here along with a PCB making tutorial. If you have never created a PCB in college you are in for a treat.

Downloading the Software to the PIC
You download a software to a PIC using a kit called PicKit3. This process is called burning. There are instructions for this on the Kit’s quick start manual but I am including it here just in case. (the software is available under CC here)
- Install MPLAB IDE
- Connect the PicKit3 to the computer
- Start MPLAB, select Programmer > Select programmer > PicKit3
- Open the *.asm file with my code
- Go Configure > Select Device and select PIC10F222 as device
- Project > Quickbuild
- Connect the target to the PicKit3
- Select Programmer > Settings > Power and check “Power target circuit …”
- Programmer > Program
Soldering
Did I mention iron jet pilot hands are needed for this project? There is a great soldering tut on make, however, this one’s definitely not for beginners.

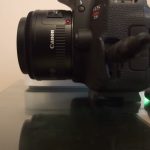
Then you mount it on the stereo jack (it’s that itsy bitsy dot on the left).

Shooting
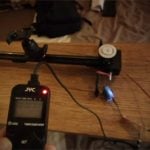
Here is the nice thing. The little prong goes in the 3.5 jack of your camera. It “drains ” power from your battery (so little you won’t even feel it) and is ready to go. It will “remember” the time between your first two shots and will keep photographing in this interval until you half press the focus button.
The movie below is made from 2300 still image, took 4 hours to take and was going on until the battery drained.
Link Recap
- Intervalometer scheme, idea, software and PCB plans: On Achim’s site
- PCB making tut: On Achim’s site
- PIC10F222: here
- PicKit3: here

Udi Tirosh
Udi Tirosh is an entrepreneur, photography inventor, journalist, educator, and writer based in Israel. With over 25 years of experience in the photo-video industry, Udi has built and sold several photography-related brands. Udi has a double degree in mass media communications and computer science.
Related Posts
 LIM Intervalometer Fits In A Liquorice Drops Box and Takes Time Lapse Movies
 How To Convert A Time-lapse Intervalometer To A Slider Controller
 Put Your Old Calculator To Work As An Intervalometer With This Super Easy DIY Hack
 This DIY 3D printed “Micro Jib” is the world’s smallest camera crane and lives on your desktop
Join the Discussion
DIYP Comment Policy
Be nice, be on-topic, no personal information or flames.