

















El Bokeh Wall!
Dec 4, 2013
Laya Gerlock
Laya Gerlock is a Portrait and Product photographer based in the Philippines. His passion is teaching and sharing his knowledge in Photograpy and has been doing this for 6 years.
Share:
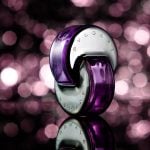
I started my first 365 project in flickr with a 365 Days Bokeh Project. After awhile playing with Christmas lights with bokeh, I tried thinking of a new bokeh background.
I tried using plastic bottles and different reflective materials for the background until I ended up with using a very simple material found in the kitchen which gave such an amazing result. Aluminum foil.
I have seen many people also using this technique but I just wanted to share how I do mine. I call it “The El Bokeh Wall”

What You Need
- Aluminum Foil
- Prime Lens(For best bokeh result)
- Lights (Continuos or Flash)
How To
Step 1: Get as many aluminum foil you will need for covering the background

Step 2: Crumple the foil together and make a ball

Step 3: Lay the foil flat again without removing the crumples – the crumples will provide the specular highlights which in turn create the magnificent bokeh.

Step 4: Stick the foil to the background

Final Setup


- Being a a “Strobist” I normally shoot this at ISO 200, 1/160, f1.4 (using a 50mm 1.4 lens – which gives a great bokeh).
- Depending on the distance and the speedlight I use, normally the power of my flash will be around 1/32-1/64 on my subject.
- Then I will have my background light on the floor pointing at the “El Bokeh Wall” @ around 1/16 -1/8 power.
- Lastly, I put gels on my background flash to change the color of the El Bokeh Wall.
Plain and Simple


See more from DIYPhotography.net on Google
Add DIYPhotography.net as a trusted source. This makes
our stories more likely to appear in your Google Search results.
 Add as a preferred source on Google

Laya Gerlock
Laya Gerlock is a Portrait and Product photographer based in the Philippines. His passion is teaching and sharing his knowledge in Photograpy and has been doing this for 6 years.


Join the Discussion
DIYP Comment Policy
Be nice, be on-topic, no personal information or flames.
27 responses to “El Bokeh Wall!”
great tip and execution!
thank you! :)
How did you get EVE to float in the last picture?
Probably some fishing wire that was cloned out afterwards in photoshop
Eve came with a stand, that I just photoshopped out :)
Great article! Simple and effective method, the best solutions often comes in simple packages
Great idea! I’ll have to try this
yes, very cool! thanks!
You killed Cardbo!
This is brilliant, I experimented today and I am thrilled with the results. Thanks for the great tip!
feel free to share the results here
Great idea! Thanks!
Focal length of the prime(s) you used?
Thanks for writing this article, I hope you do not mind but I used your technique here.
http://www.flickr.com/photos/p1ay/11827499093/
Excellent source of inspiration. Thank you!
Gave it a shot myself with a bit of a twist.
http://threesixtyfivefiftytwo.tumblr.com/post/77548164472/i-dont-generally-do-much-shooting-indoors-with
Amazing! Had a go! https://www.flickr.com/photos/s_w_photgraphy/14446779063/sizes/l
https://www.flickr.com/photos/127008260@N07/15251763169/
thanks for the tutorial! this is my image using the above techniques:)
https://www.flickr.com/photos/127008260@N07/15251763169/
this is my image using the above aluminium foil techniques! thanks for the tutorial :)
what’s the meaning of “EL”?
It means the same as “the” but than in spanish. Just read it like “the bokehwall” ?
Fantastic technique, great idea, thanks!
I tried it out:
Superb Technique, I got some awesome results
http://yourshot.nationalgeographic.com/photos/6600018/
What are you using for the table surface?
Brilliant, just brilliant!
Is there anyone who used this with portraits?
that’s ingenious. will definitely use that. Keep up the good work :)
Feel free to visit our website https://www.edealo.com