


How to Use a Circular Polarizing Filter Like a Champ!
Jun 9, 2016
John Aldred
John Aldred is a photographer with over 25 years of experience in the portrait and commercial worlds. He is based in Scotland and has been an early adopter – and occasional beta tester – of almost every digital imaging technology in that time. As well as his creative visual work, John uses 3D printing, electronics and programming to create his own photography and filmmaking tools and consults for a number of brands across the industry.
Share:

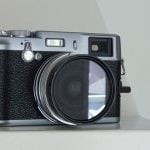
Circular polarizing (CPL) filters are one of the most useful tools a landscape photographer can have in their toolkit. In this video from landscape and nature photographer Joshua Cripps, you’re going to find out why.
Of course, they’re not limited to just landscapes. Polarizers can also help to cut through reflections and glare on glass and other reflective surfaces. Therefore, they can also be great for street, automotive and even portrait photography.
As mentioned in the video, they’re not all that useful if you’re using ultra wide angle lenses, because the field of view is too great. It will cover angles that receive no benefit, but not every landscape needs to be shot ultra-wide.
What Does a Polarizing Filter Do?
When used well, though, they can have a dramatic effect on skies and reflections (on water and other). They can also help to cut through haze.
[Related Reading: Reflecting on Some Polarizing Filter Pranks]
Depending on the scene before you, this darkening of the sky and removal of specular highlights can truly enhance your image. It effectively lowers the dynamic range of your scene to prevent your sky from blowing out. At the same time, you’ll preserve the shadow detail in your shots.
A circular polarizer may not be something you’ll want to use often. It’s certainly not something you’d want to use for everything, either. But they are extremely useful when you need them, and there’s no way to realistically reproduce the results they can achieve in post. Although, you can recreate some effects up to a point.
There is a great variety of quality out there when it comes to CPL filters. You generally don’t want to go with one that’s too cheap. This is because a cheap CPL will mess with your image quality. Personally, I use B+W Kaesemann CPL filters, but there are some good inexpensive ones out there, like the Hoya Pro1 Digital.
[Related Reading: Two lesser known polarizing filter effects]
Do you use a CPL filter often? Which one do you prefer? Let us know in the comments.
Polarizing Filter FAQ
What does a polarizing filter do?
A polarizing filter (specifically a circular polarizer or CPL) reduces reflections and glare from non-metallic surfaces like water, glass, and wet foliage. It also enhances color saturation and contrast, especially in skies, making blues deeper and clouds more defined. This helps lower the dynamic range of a scene and creates more balanced, vivid images—effects that are difficult to replicate in post-processing.
When not to use a polarizing filter?
Avoid using a polarizing filter with ultra wide-angle lenses, as it can create uneven polarization, leading to dark patches in the sky. CPL filters also reduce the amount of light reaching your sensor – usually by 1–2 stops – so they’re not ideal in low-light situations. Additionally, they can interfere with LCD screens or windows if not aligned properly, making them less effective in some scenarios.
Can you use a CPL with wide-angle lenses?
Technically, you can use a CPL with wide-angle lenses, but with caution. The wide field of view often causes uneven polarization across the sky, resulting in unnatural dark and light areas. To minimize this, rotate the filter carefully and avoid using it when the sun is at a 90° angle to your lens. For best results, try using it with standard or telephoto lenses instead.

John Aldred
John Aldred is a photographer with over 25 years of experience in the portrait and commercial worlds. He is based in Scotland and has been an early adopter – and occasional beta tester – of almost every digital imaging technology in that time. As well as his creative visual work, John uses 3D printing, electronics and programming to create his own photography and filmmaking tools and consults for a number of brands across the industry.


Join the Discussion
DIYP Comment Policy
Be nice, be on-topic, no personal information or flames.
3 responses to “How to Use a Circular Polarizing Filter Like a Champ!”
Rainbows are 100% polorized light, you can tune them out with a polorizer if you don’t want them in your picture. More likely, you can darken the scene by a stop or more (depending on the ambient light polarization) while keeping the rainbows as bright as before!
I almost always use a warming polarizer and keep one on every lens I have.
Even better is the studio workflow of cross-polarization – talk about polarizing like a champ. You can make tinfoil go black when lit correctly.