


Camp Snap 2: Faster, On-Camera Filters, but Keeping Screen-Free Experience
Jun 3, 2026
Dunja Đuđić
Dunja Djudjic is a multi-talented artist based in Novi Sad, Serbia. With 15 years of experience as a photographer, she specializes in capturing the beauty of nature, travel, concerts, and fine art. In addition to her photography, Dunja also expresses her creativity through writing, embroidery, and jewelry making.
Share:
Camp Snap built a following by doing the opposite of every other camera. No screen, app, or endless settings to fiddle with. Just point, shoot, and see what you get later. My fellow millennials and older folks probably remember how we did this with point-and-shoot film cameras.
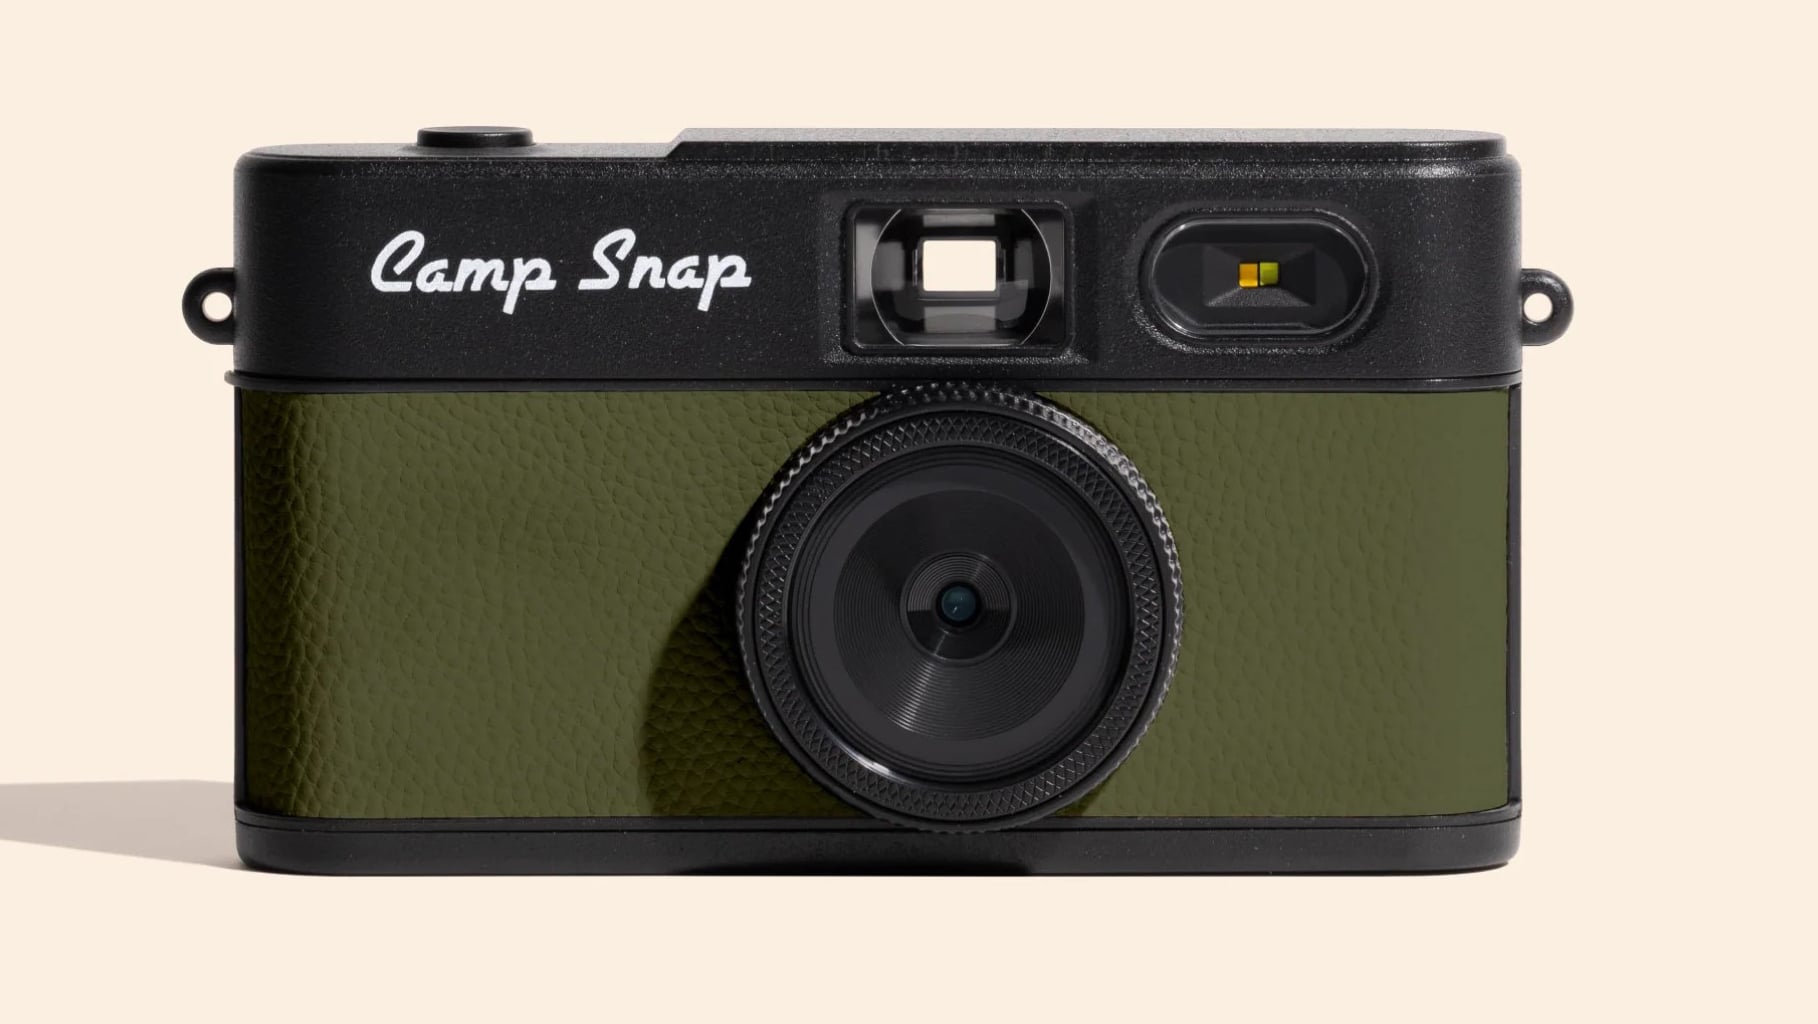
And now, Camp Snap 2 keeps that philosophy completely intact with some fixes from the first version. The result: a better camera for kids, camps, and anyone who wants a low-distraction shooting experience… Or just needs a hint of nostalgia.
[Related Reading: Camp Snap Fever: Can a Screen-Less Camera Really Go Pro?]
The headline addition is six built-in swappable filters – Standard, Vintage 1, 2, and 3; Analog, and Black & White. Instead of applying them in an app or the camera itself, you toggle them directly on the camera with a physical button on the back. You can even build custom filters at filters.campsnapphoto.com, which is a positive surprise for a camera this simple.
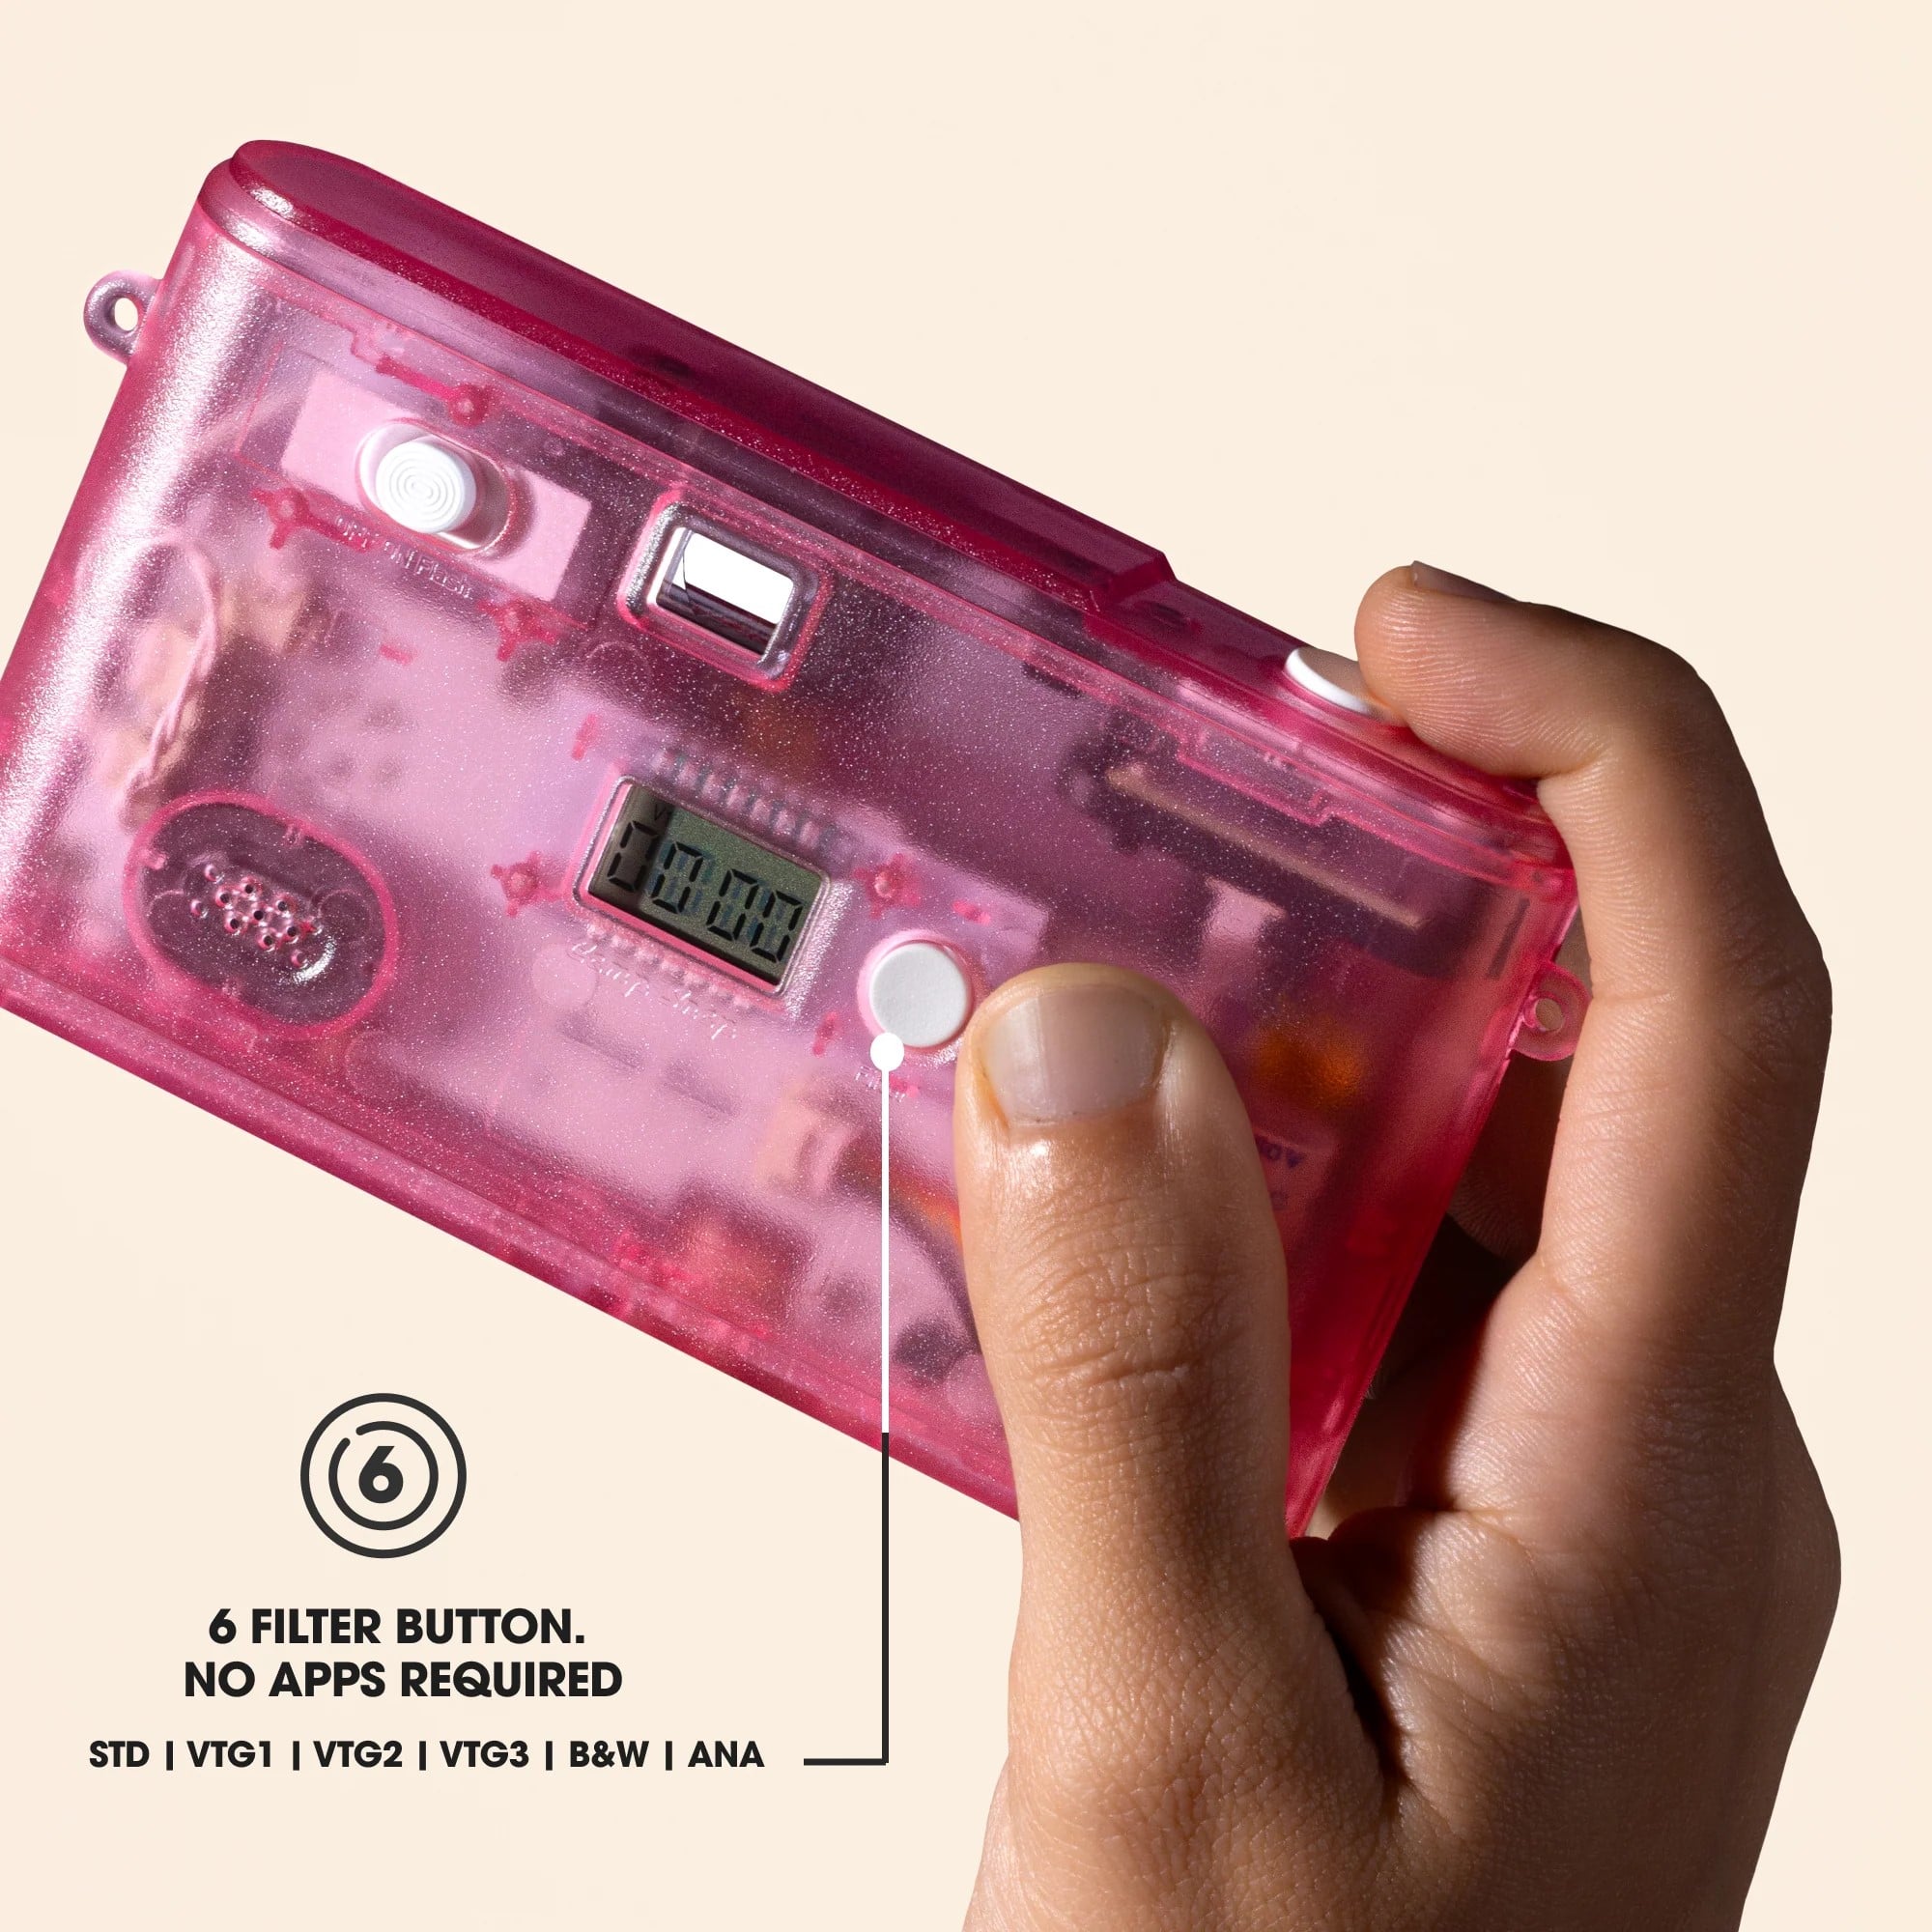
The Camp Lock system is clearly the most thoughtful improvement for the youngest users. The filter button ships locked out of the box and requires a ten-second hold to unlock, so younger photographers can’t accidentally cycle through settings mid-session. The memory card door gets a physical screw lock too, protecting date and time settings from curious little hands. Parents can remove the screw once they’re comfortable and switch to the new pull-tab door design for easier access going forward.
[Related Reading: Batman v Superman; PC v Mac; Digital v Film: the Age Old Conflict Finally Resolved]
On the hardware side, the QuickDraw sleep-and-wake system means you never have to power the camera on or wait for a boot sequence. Press the shutter, it wakes, and you can shoot. Combined with the near-instant shutter response, this removes those moments that frustrate kids and adults equally: missing the shot because the camera was off or because the shutter lagged.
As before, there’s still no screen of any kind. It can be frustrating if you’re used to screens (and who isn’t), but this is exactly what gives it its charm. After all, buyers of the Camp Snap camera know what they’re signing up for. The 30.5mm filter thread allows the addition of third-party screw-on optics, from macro to diffusion to star filters, if you want to experiment beyond the built-in looks.
The camera body is also a bit slimmer than the previous model (15% slimmer, to be exact). It uses USB-C charging and direct transfer to iOS, Android, Mac, or PC, and comes with a pre-installed MicroSD card ready for roughly 2,000 photos. You get about 500 photos per charge, so bring a battery pack for long shooting days.
[Related Reading: How to Teach Your Kids Photography]
Camp Snap 2 Specs
| 8MP sensor |
| 6 built-in swappable filters |
| Camp Lock™ |
| QuickDraw by Camp Snap™ |
| Near-instant shutter response |
| 15% slimmer and pocketable |
| Lockable memory door |
| 30.5mm filter thread |
| Standard tripod mount |
| Strap lugs |
| USB-C charging and transfer |
| MicroSD pre-installed |
| Create your own filters |
Pricing And Availability
Camp Snap 2 is available now at introductory launch pricing of $69.95 for a limited time. You can get it in nine colors, including four versions with transparent plastic. Just in case you thought it couldn’t get any more nostalgic.

Dunja Đuđić
Dunja Djudjic is a multi-talented artist based in Novi Sad, Serbia. With 15 years of experience as a photographer, she specializes in capturing the beauty of nature, travel, concerts, and fine art. In addition to her photography, Dunja also expresses her creativity through writing, embroidery, and jewelry making.


Join the Discussion
DIYP Comment Policy
Be nice, be on-topic, no personal information or flames.